© Ferno / 234-1929-06 / July 2021
4
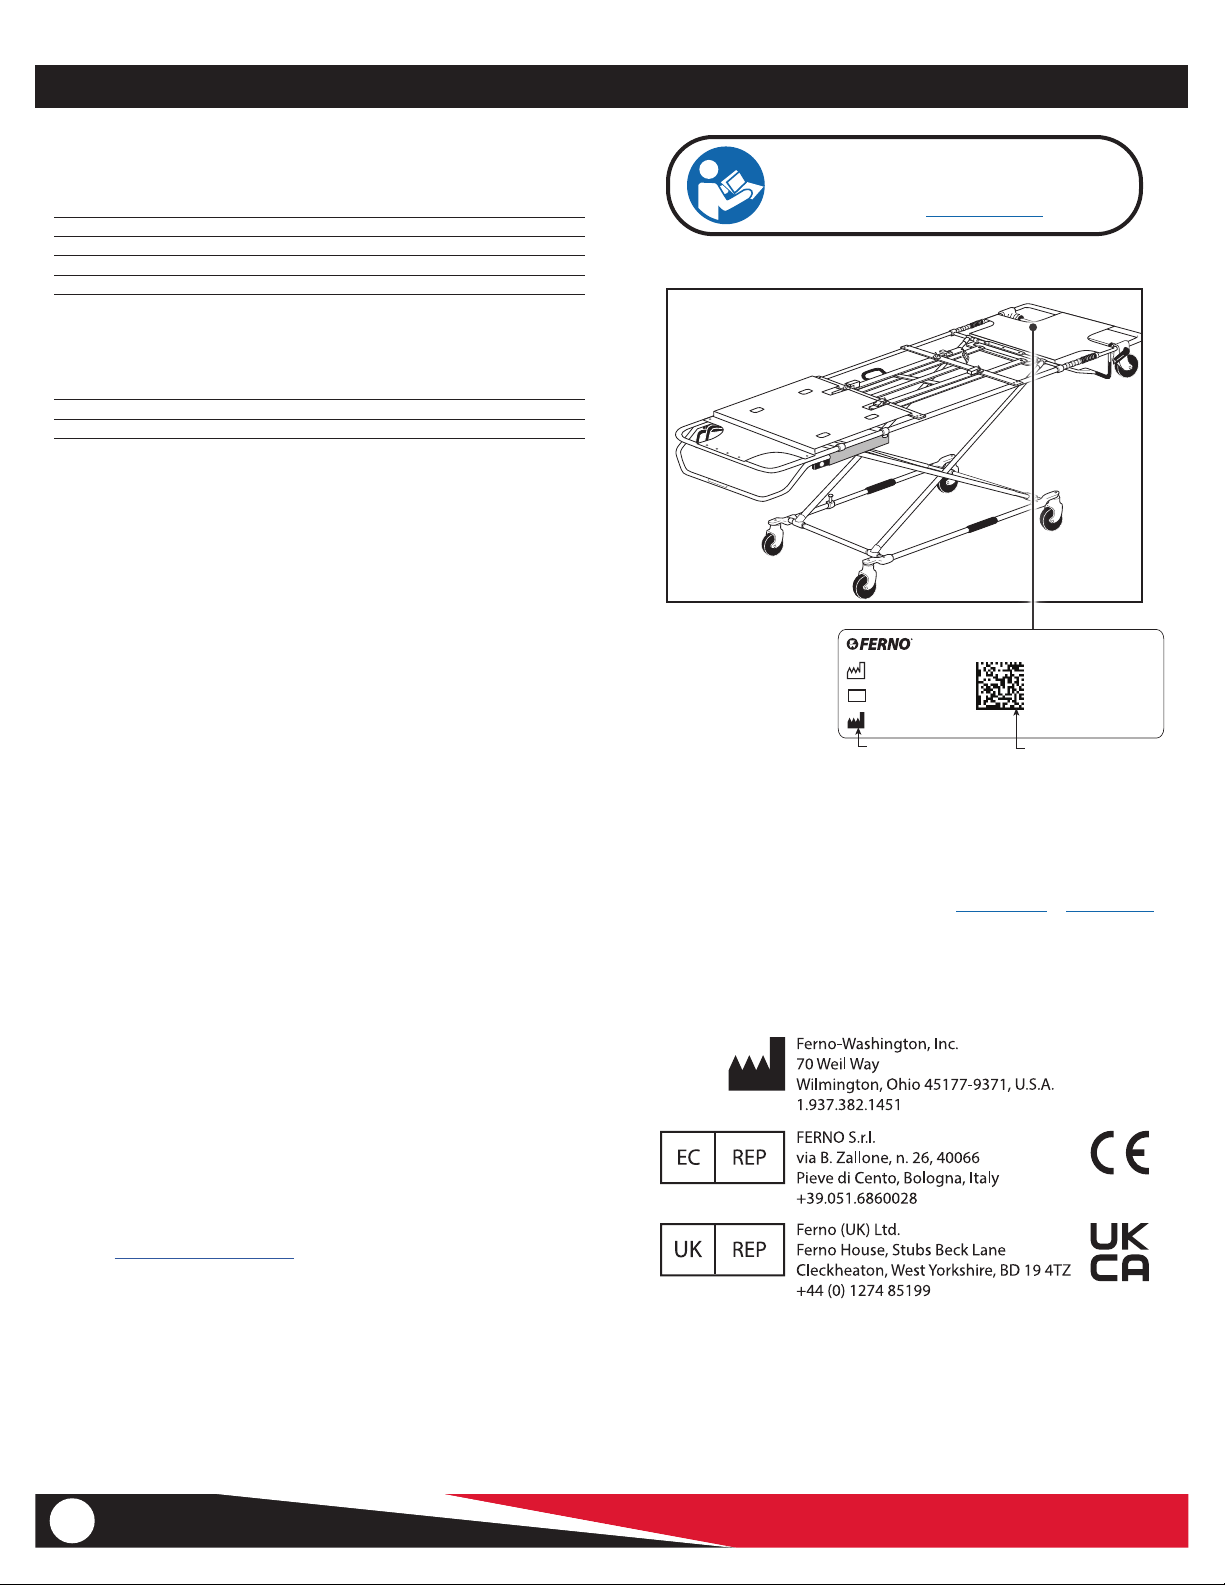
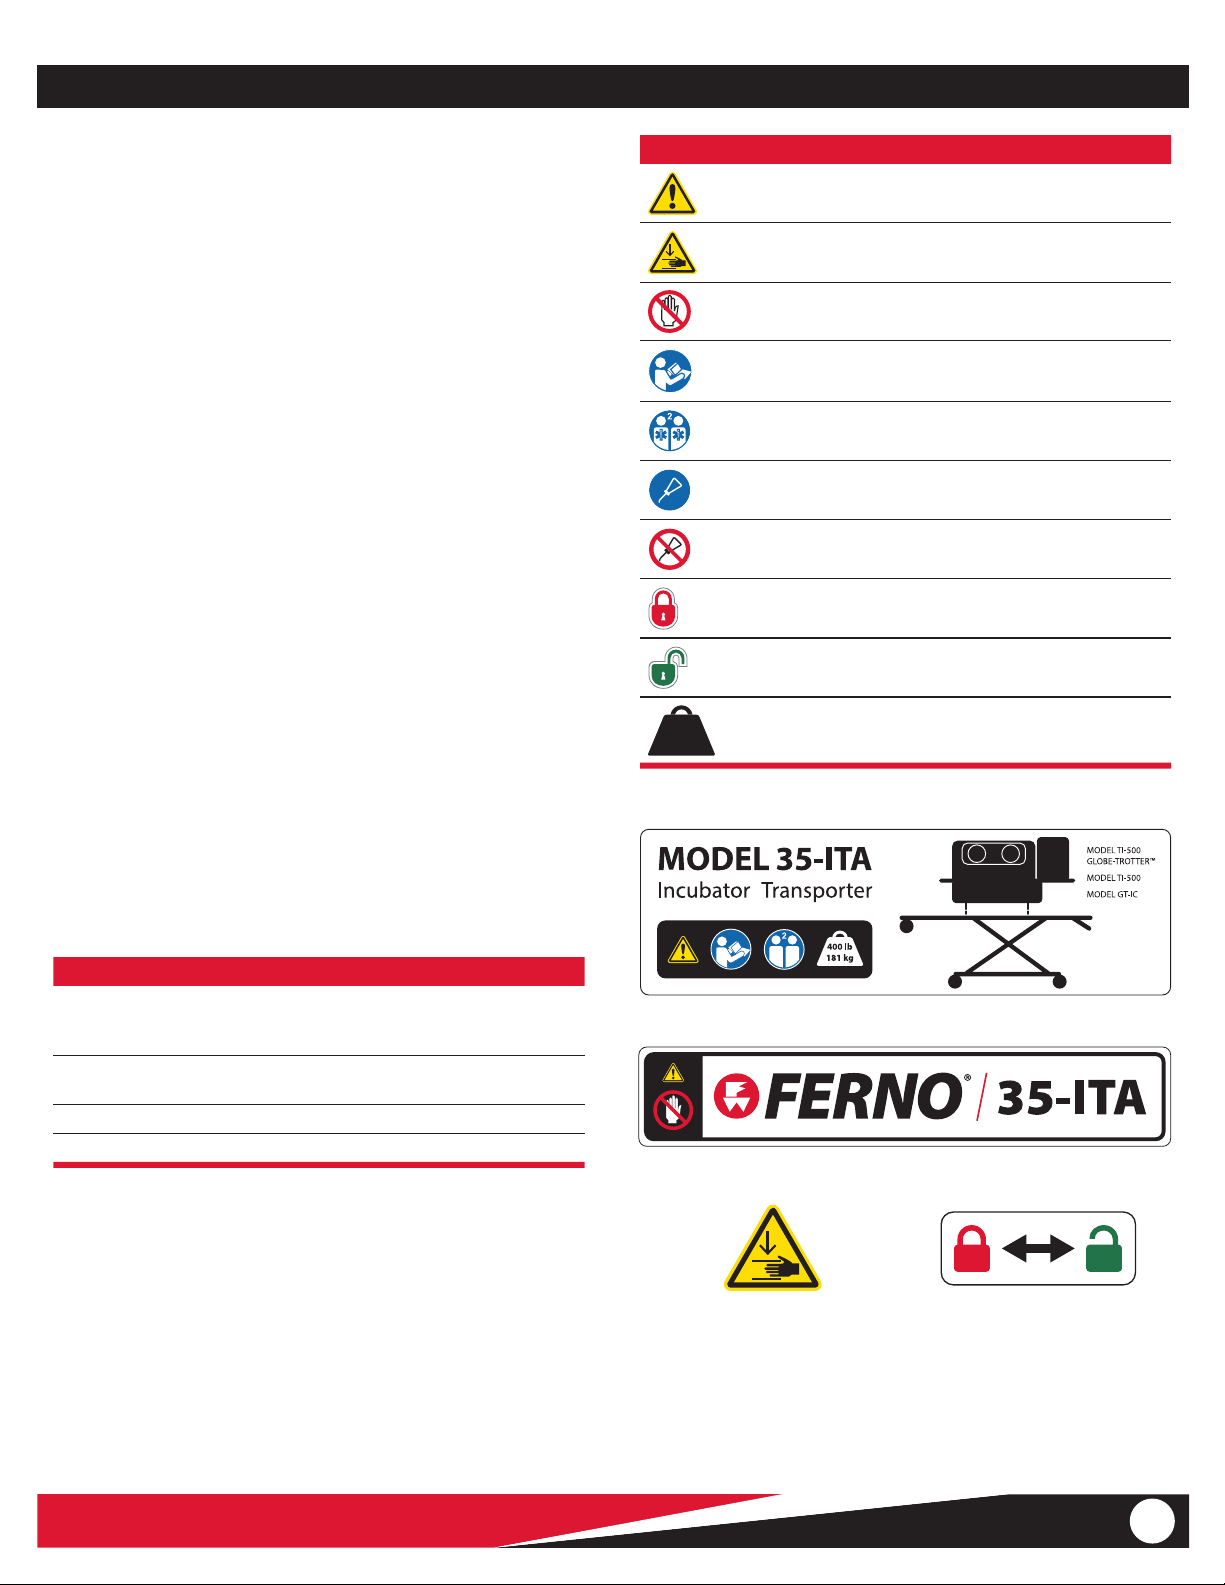
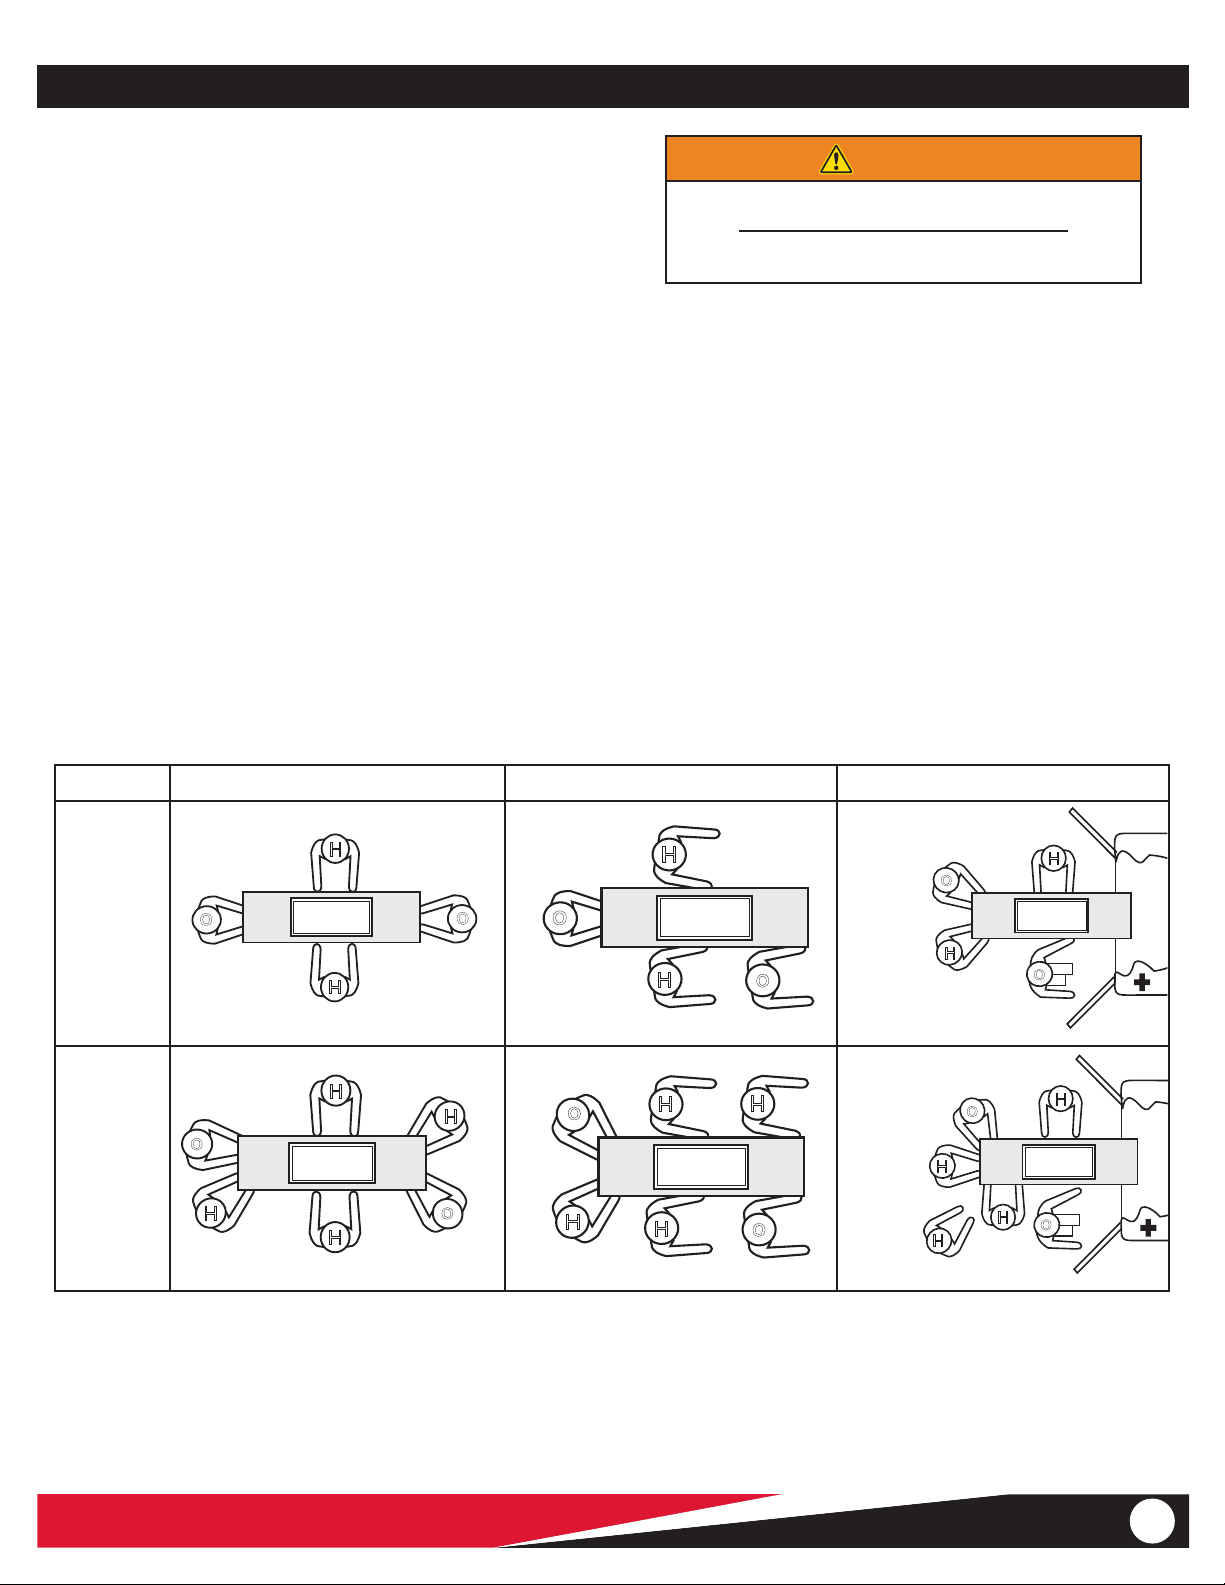
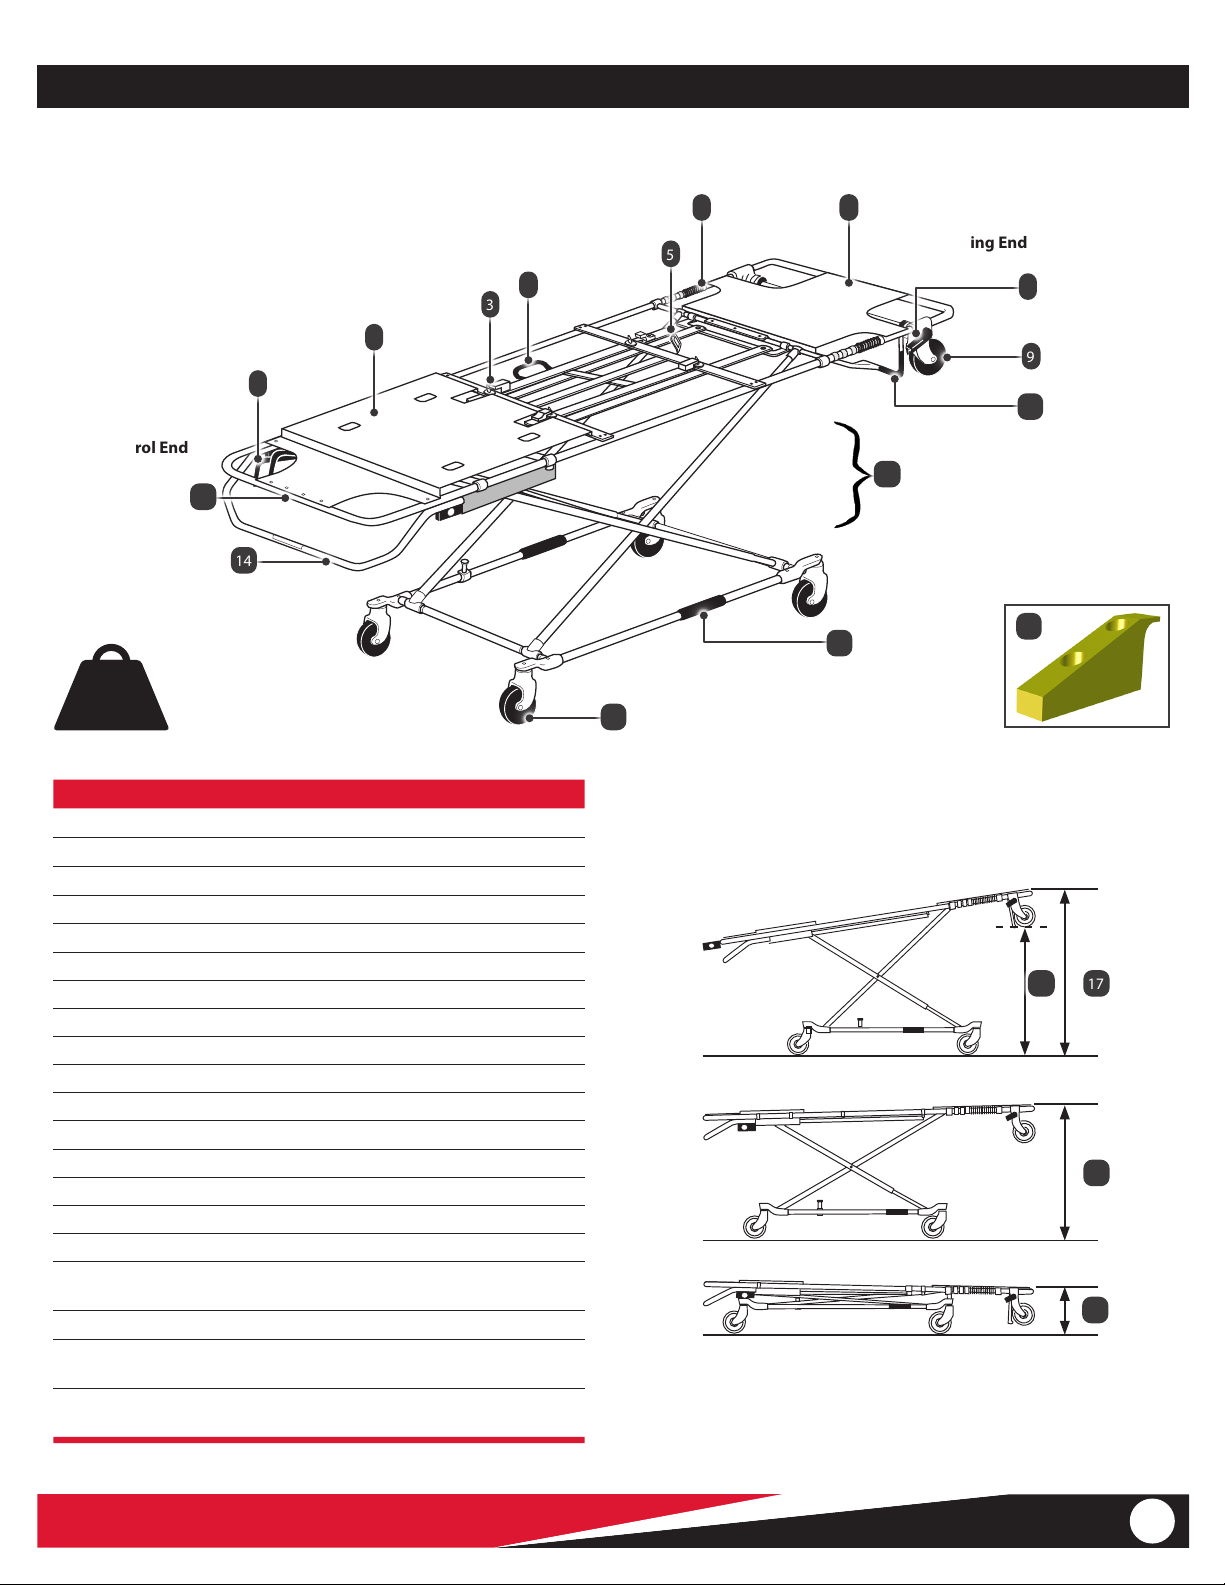
Model 35-ITA Incubator Transporter
1 SAFETY INFORMATION
1.1 Warning
Warning safety alerts indicate a potentially hazardous situation that, if
not avoided, could result in injury or death.
1.3 Bloodborne Disease Notice
To reduce the risk of exposure to blood or other potentially infectious
materials when using the transporter, follow the disinfecting and
cleaning instructions in this manual.
1.4 Fastening System Compatibility
Combining dierent manufacturers’ products such as a Ferno cot/
transport system with a non-Ferno fastening system can increase the
user’s risk of injury and damage.
Ferno-Washington, Inc. products are designed for use only with Ferno-
manufactured fastening systems. Use of a Ferno transport system with
a non-Ferno fastening system is misuse of the Ferno product. The user
assumes responsibility for the outcome of known, intentional misuse.
WARNING
Untrained operators can cause injury or be injured.
Permit only trained personnel to operate the transporter.
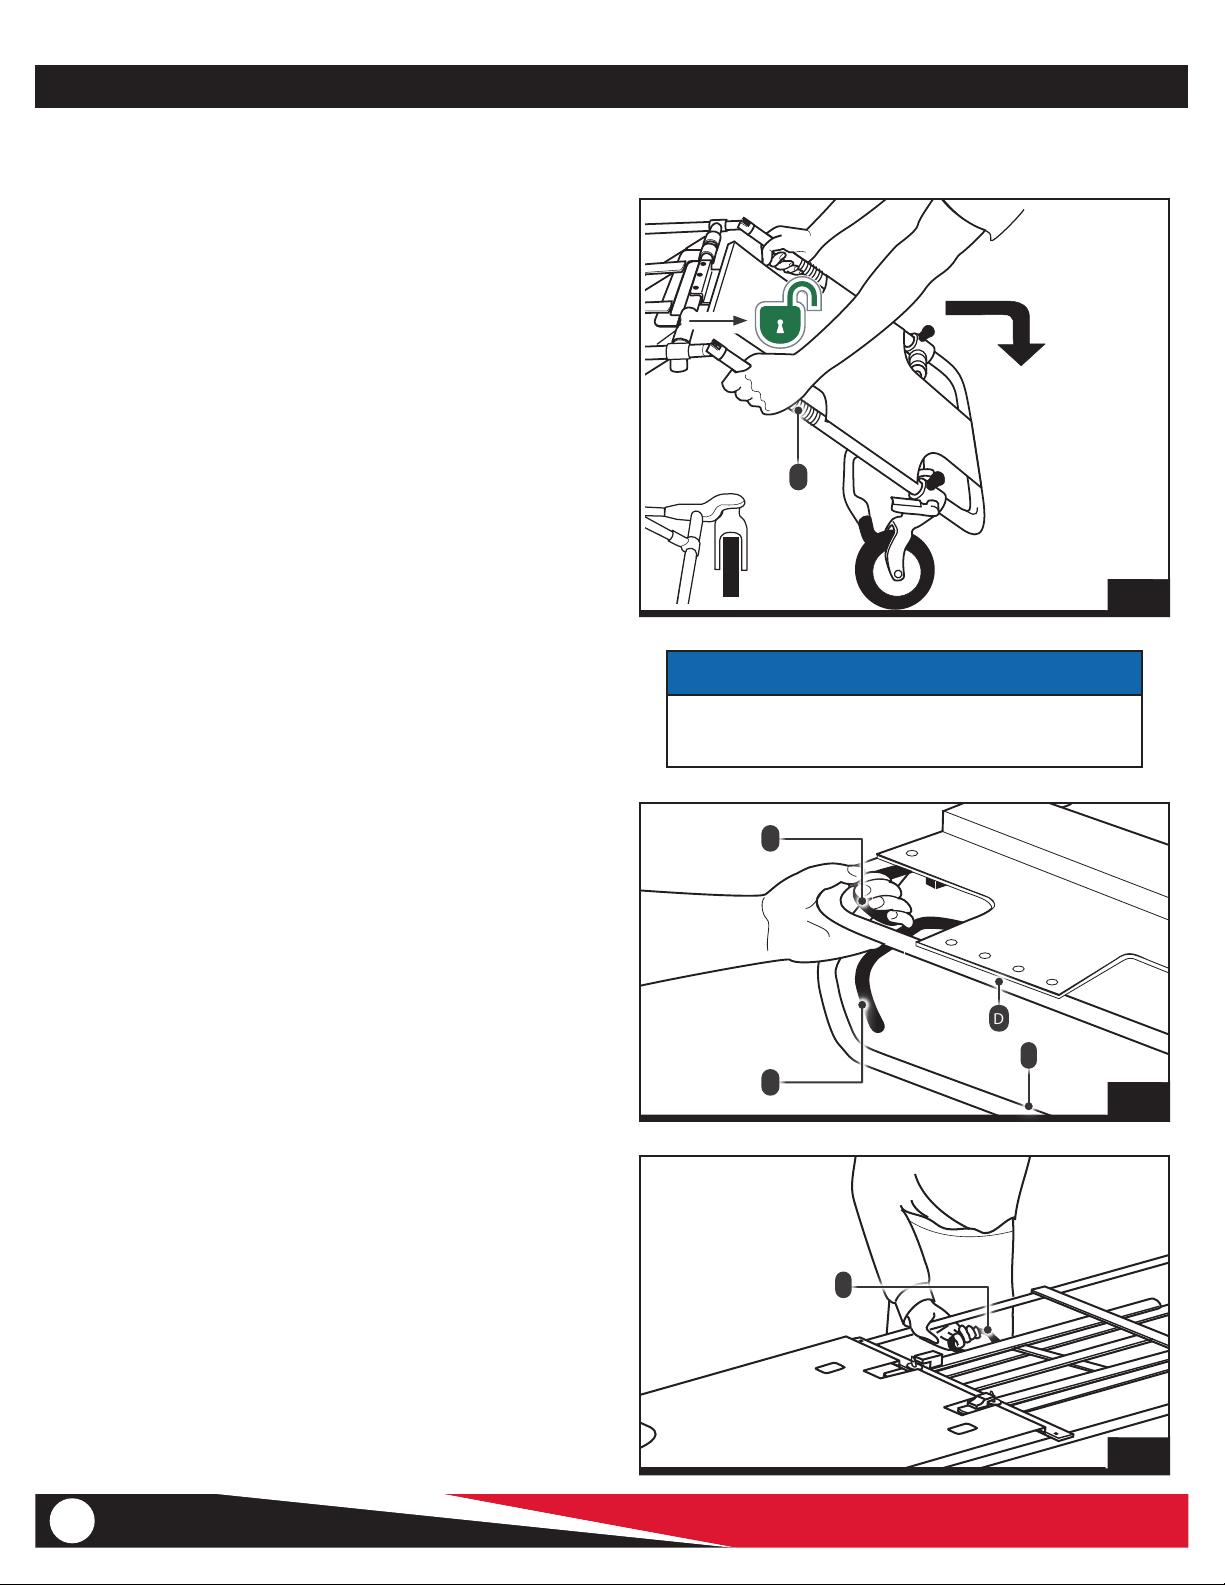
An unlocked undercarriage can cause injury. Make sure
the undercarriage is locked before releasing the safety
bar from the safety hook.
Helpers can cause injury. Maintain control of the transporter,
work the control handles, and direct all helpers.
Helpers can be injured. Show helpers where to grasp the
transporter to avoid pinch points.
Improper use can cause injury and damage. Use the
transporter only as described in this manual.
Equipment improperly placed on the panels can cause
injury. Consult a bio-med technician, the controlling EMS,
or Ferno for direction on equipment placement.
Failure to use the safety hook can cause injury. Install and
use the safety hook as described in this manual.
Improper operation can cause injury. Operate the
transporter only as described in this manual.
An unattended patient can be injured. Stay with the
patient at all times.
An unrestrained patient can be injured. Follow the
incubator manufacturer’s instructions for restraining an
infant during transport.
Rolling the transporter in a loading position can cause it
to tip. Use a rolling position when rolling the transporter.
Rolling the transporter sideways or in the loading position
can cause it to tip and injure the patient or operators. Roll
the transporter only in a level (Rolling) position and with
the loading end or control end rst.
An unlisted incubator can cause injury. Only use
compatible incubators listed in this manual or on the
transporter.
Failure to properly secure the incubator to the transporter
can cause injury. Securely attach the incubator to the
transporter before moving the transporter.
Improper maintenance can cause injury and damage.
Maintain the transporter as described in this manual.
1.2 Notice
Notices emphasize important, but not hazard-related information.
Failure to follow Notices could result in product or property damage.
NOTICE
WARNING
Attaching improper items on the transporter can cause
injury and damage. Use only Ferno-approved items on
the transporter.
Improper installation can cause injury. Install the safety
hook so the safety bar catches the hook during every
loading and unloading sequence.
Modifying the transporter can cause injury and damage.
Use the transporter only as designed by Ferno.
Improper parts or service can cause injury. Use only
Ferno-approved parts and service.