KIRTON Duo Mini Operation manual

Duo Mini
User Instructions
Contents
2
Introduction to the Duo Mini chair
3 Duo Mini Chair
3 Guidelines for Best Practice
3 Questions and Concerns
4 The User Instructions
General Operation of the Duo:
4 What is Tilt-in-Space?
4 Operating the Tilt-in-Space and Elevating
Legrest
5 Back Height Adjustment
5 Back Support Adjustment
6 Footboard Height Adjustment
6 Footboard Angle Adjustment
6 Back Angle Adjustment
6 Seat Height Adjustment
7 Seat Length Adjustment
7 Removing the Seat Module
7 Seat Width Adjustment
8 Arm Height
8 Headrest Angle Adjustment
8 Headrest Split-Wing Adjustment
9 Positional Headrest Adjustment
9 Lateral Supports
9 Removable Arms
10 Pommel
10 Leg-Laterals
10 Lap-Belt and Pelvic Positioner
11 Potential Risks, Cautions and Warnings
11 Care and Maintenance
11 Service and Maintenance Indicator
12 General Care
12 Helpline
Duo Mini User Information
June 2017
IMPORTANT NOTICE
•
On receipt of the chair the battery must be
fully charged before use via the handset.
•
It is recommended that the battery is
charged for at least 8 hours.
•
DO NOT let the battery completely
discharge as this will render it unable to
fully recharge again. If the battery is left to
completely discharge it will have to be
replaced and this is not covered under
warranty.
•
It is recommended that the battery is
charged regularly overnight to prevent
complete discharge.
•
The chair may be used and operated whilst
it is being charged.
•
WARNING – If the chair is moved whilst
plugged into the wall socket, damage may
occur to the charger.

Page 2
Introduction to the Duo Mini
chair
What is the Duo Mini?
The purpose of the Duo Mini seating
system is to provide the ultimate in
positioning and postural management for
young children who are unable to maintain
their body posture and require extra
support.
The Duo is the third generation in Kirton’s
multi-positioning seating range following on
from the original Persona and Solo chairs.
Whilst the original chairs provided
significant manual adjustment and
positioning opportunities, the Duo provides
equivalent adjustment and positioning with
the added value of electrically/battery
operated Tilt-in-Space and legrest
elevation.
Designed to easily adjust the tilt-in-space
positioning and elevate the legrest as well
as providing a pressure management
seating solution, the Duo Mini is multi-
adjustable in all its dimensions for each
individual user.
Why is there a need for this type of
chair?
The ability of a seated person to function
efficiently and perform activities depends on
their ability to adopt the appropriate
posture. All activity is posture dependent.
If a person cannot move or has problems
adjusting their posture, it may be necessary
to use seating to try to provide externally
what is limited internally.
The Duo helps fulfil the need to maintain an
individual’s seated posture yet
re-orientate and redistribute pressure. This
is achieved by using the tilt-in-space and
back angle recline features that are key to
the Duo’s functionality.
Who should consider using the Duo
Mini?
Designed for young children with or at risk
of developing an unconventional body
shape or for those with postural related
problems, the Duo can be used within a
variety of different environments including
domestic homes, special schools, hospital
and respite care environments.

Duo Mini Chair
Options
Different seat widths:
•
200, 250, 300 or 350mm
Available as either Ramped or Flat seat
modules
Pressure Relieving Seat Options
•
Intelli-Gel® Seat Module
•
Transflo Gel Seat Module
•
Reflexion™ Foam Seat Module
Back Style Options
•
Cushioned Waterfall Backrest
Accessories
•
Lateral supports
•
Leg-Laterals
•
Pommel
•
Extra waterfall cushion for back
heights over 490mm
•
Flat seat board
•
Ankle Huggers
•
Tray with straps
•
Pelvic Positioners
•
Lap-Belt
Page 3
Guidelines for Best Practice
To ensure good practice when considering
purchasing a Duo Mini and effective use
post purchase we advise that the following
guidelines are considered:
1. Seek advice and input from a qualified
therapist/professional and/or Kirton
representative/distributor at the initial
prescription of the chair.
2. If unsure when ordering the chair and
any accessories contact either the
therapist involved or your Kirton
representative or distributor or our
Customer Services Team on
Freephone 0800 212709 or
+44 (0) 1440 705352 to discuss
further.
3. Following delivery of the Duo Mini
chair, it is necessary for it to be
configured and adjusted for the user.
This can either be carried out by a
therapist or individual trained in the
set-up and configuration of the Duo
Mini chair or the regional Kirton
representative, where possible.
4. It is recommended that during the
initial set-up of the chair other staff
members that will be supervising the
user(s) should be trained in adjusting
the chair to ensure the chair is
adjusted safely and correct positioning
is maintained for the benefit of the
user. This is of particular importance
where the chair is to be used by
several different users who will all
require different configurations of the
chair to varying degrees.
5. Users of the Duo Mini should be
supervised and checked regularly to
ensure their most appropriate position
is maintained in the chair.
Questions and Concerns
Should you experience any difficulties or
have any concerns regarding the initial
purchase or subsequently adjusting the
Duo chair or have any concerns regarding
its use or operation then immediately
contact either your Kirton representative,
distributor or our Customer Services Team
on Freephone 0800 212709 or
+44 (0) 1440 705352, they will be delighted
to help you.

Page 4
The User Instructions
The purpose of the following user
instructions is to provide a guide on how to
utilise, adjust and maintain the Duo Mini
chair.
The instructions should be read by all those
involved with the supervision of the user
and/or the care of the chair before
configuration and use.
The Duo Mini must be set-up or configured
specifically for each individual using the
chair.
The necessary steps for configuration are
detailed in this document to ensure correct
positioning and to make postural
adjustments to the chair to ensure safe and
comfortable use.
Please retain these instructions with the
Care and Maintenance card enclosed for
future reference.
What is Tilt-in-Space?
Tilt-in-space is a unique pivoting system
that provides a reclined, resting position
whilst maintaining posture and pelvic
stability.
Weight is distributed over a larger contact
surface area, reducing the shearing forces
on the skin, making it a simple yet effective
way to combat the build up of pressure.
Key to the Duo Mini is the ability to effect
the tilt-in-space without over exertion by the
carer or indeed the user through the use of
a battery powered motor.
Operating the Tilt-in-Space and
Elevating Legrest
The Duo Mini enables either the carer or
the user, where appropriate, to adjust the
Tilt-in-Space facility and/or the elevating
legrest by the simple touch of a button.
Electric Hand Controller Buttons
Legrest
Elevation
Legrest
Lowering
Lowering
Tilt-in-Space
Reclining
Tilt-in-Space

Page 5
Back Height Adju
stment
The correct postural position for the user is for
the top of the chair back to be the same height
as the top of the user’s ear.
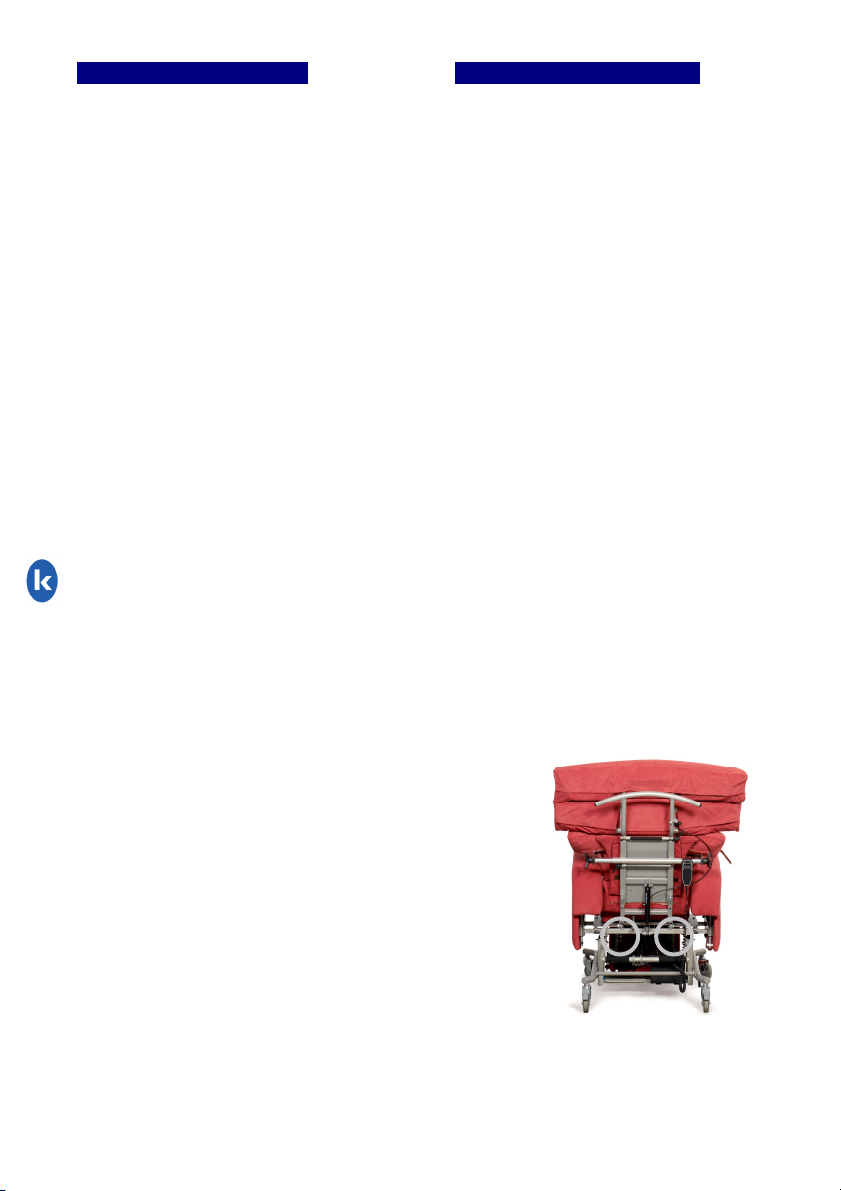
To increase the back height of the chair:
•
Detach the loose cover back panel at the
rear of the chair by unfastening the Velcro
both at the top and bottom of the cover.
•
Secondly, loosen the material backboard
cover (it folds underneath the backboard for
storage on lower back heights) so that the
extra material hangs loose revealing an
extra Velcro strip.
•
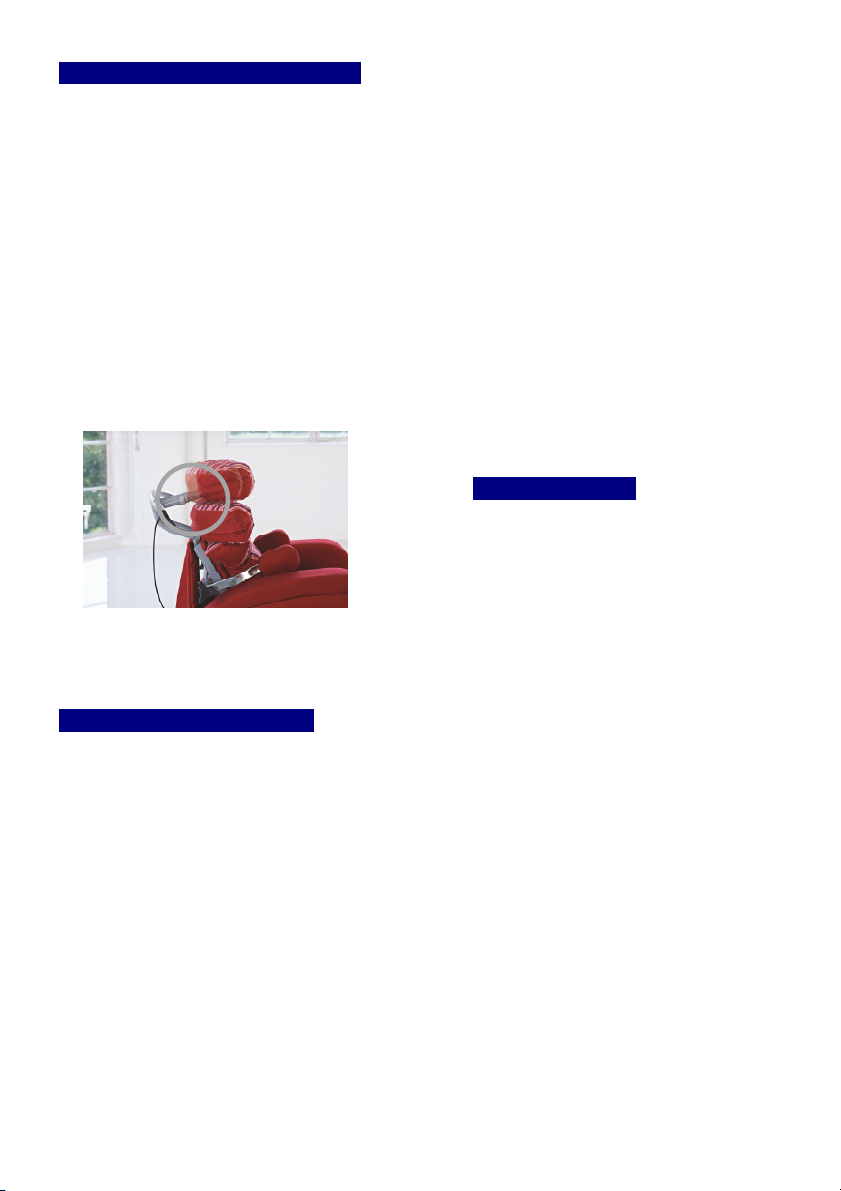
To adjust the back height, use the spring
pull “snaps” located on the metal back
frame. When retracted and turned 90°the
snaps will stay out whilst the correct position
is selected. Slide the upper part of the back
up or down until the height required is
achieved and allow both pins to snap back
into the required holes.
•
Ensure both “snaps” are located correctly
before use.
•
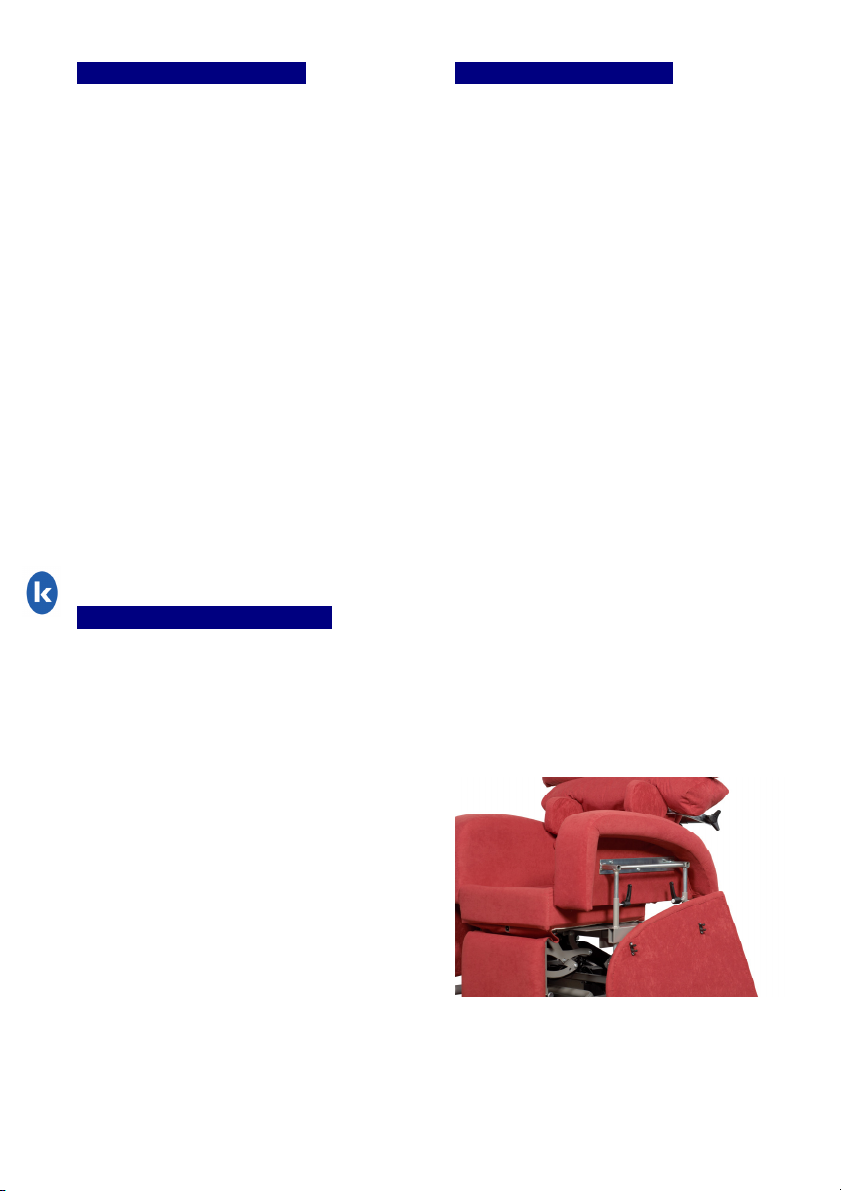
For Duo Mini’s with a back height over
625mm an extra waterfall cushion is
required to fill the increased back height
space. Always check that there is enough
cushioning when the back of the Duo Mini is
reclined as this can reveal a gap on the
higher back heights. Use the extra waterfall
cushion to fill this gap.
•
The extra waterfall cushion should be fixed
to the Velcro on the backboard cover. The
remaining backboard cover should then be
folded up behind the backboard for
neatness.
•
The waterfall cushions have been designed
to condense and mould to the user as the
dimensions of the chair are reduced or
increased to fit altered chair dimensions.
Where necessary the extra waterfall
cushion should be inserted.
Back Support Adjustment
The user may require more or less waterfall
cushioned support dependent on the
individual’s needs and the back height
required. For those that require a back height
greater than 490mm an extra waterfall cushion
can be added (see back height adjustment).
The cushioning of the waterfall pillows can be
increased or decreased according to user
need.
•
To decrease padding:
Simply unzip the cushions at the back; slit
the fabric bag carefully and remove the
amount of Dacron padding necessary.
Take care not to trap any of the fibres in the
zipper.
•
To increase padding:
If more Dacron is required to provide firmer
cushioning and support, unzip the cushions
at the back and add more Dacron preferably
behind the bagged Dacron so as to avoid
trapping any loose fibres in the zipper.
Extra Dacron can be obtained from Kirton.
Please contact your Kirton representative or
distributor or our Customer Services Team on
Freephone 0800 212709 or
+44 (0) 1440 705352 to discuss further.

Page 6
Footboard Height Adjustment
It is important to try and support the whole
foot from the heel to the toes with the thighs
evenly distributed on the seat cushion to
ensure the least possible pressure directly
behind the knee.
•
The complete footboard assembly slides
up and down the front tubes. It is easily
adjusted by using spring pull “snaps”.
When retracted and turned 90°the snaps
will stay out whilst the correct position is
selected.
•
To find the “snaps” on the footrest, tilt the
footboard upwards and pull out both pins.
•
Slide the footboard up or down as
required and allow the pins to click back
into the required hole.
Footboard Angle Adjustment
The angle of the footboard can be adjusted
to three different settings; - 15°, 0°, 25°
from the horizontal.
•
Using the spring pull “snap” adjusters
located at the sides of the footboard, pull
out and turn so that they stay out. Adjust
the footboard to select the angle
required, then turn the pins so that they
“snap” into the appropriate holes.
•
The footboard can also “flip up” towards
the legrest by pulling out and turning the
snaps on either side so that they stay out
and simply pushing the footboard
towards the legrest. This is particularly
useful for those individuals who would
like their feet on the floor or have some
mobility when exiting the chair.
Back Angle Adjustment
The angle of the back is adjustable in
relation to the seat in order to ensure
comfort and facilitate correct positioning.
To alter the angle, squeeze the “brake-
style” handle on the right hand side of the
push handle at the back of the chair. This
activates the positioning mechanism and
enables the back to recline.
Release the lever when the desired angle is
achieved.
To bring the chair back to an upright
position, squeeze the “brake-style” handle
on the right hand side of the push handle
at the back of the chair and guide the chair
to the desired position.
Seat Height Adjustment
The seat height of the chair can be either
raised or lowered according to the needs of
the user.
On the right hand side of the chair is a
retractable handle that facilitates the chair
movement.
To raise the chair:
•
Turn the handle clockwise.
To lower the chair:
•
Turn the handle anti-clockwise.

Page 7
Seat
Length Adjustment
To ensure that the correct seat length is
achieved for each user a clearance of 25mm
or one inch between the front of the seat
cushion and the calf is desirable when the
user is firmly against the back of the seat.
•
To adjust, locate at the rear of the seat
module at the back of the chair frame a
silver-spring adjuster. Lifting the spring will
enable the seat module to be moved
forwards or backwards according to the
user’s needs.
•
The seat module may be stiff to adjust but
by moving to the front of the chair and
positioning one hand at the back of the seat
module and the other at the front the correct
seat length should be achieved.
•
Check that the silver-spring adjuster is
securely in place and the seat module is not
movable.
•
Sit the user in the chair and check the
dimensions.
Removing the Seat Module
To remove the seat module completely for
either replacement or cleaning the following
steps should be taken.
•
Locate at the front of the chair two screws
that should be removed completely using a
Phillips screwdriver.
•
When replacing the seat module do not
forget to replace the screws at the front of
the seat and ensure that the silver-spring
clip is locked in place.
Seat Width Adjustment
The seat width depends on the user’s hip
width and will vary according to the level of
pelvic support required. If substantial support
is needed, the chair arms should fit firmly
against the user. Both arms should be at the
same distance from the seat cushion, to obtain
a central position for the user.
•
To adjust the arms in and out, remove the
side arm panel by pulling it away from the
chair. It is fitted with plastic clips for easy
removal and fitting.
•
Locate the spring loaded popper at the rear
of the under arm and loosen the butterfly
knob.
•
Pull the spring-loaded popper out and pull
the whole arm assembly either in or out to
the required width. Keep the gap between
each arm and the seat the same.
•
Ensure that the spring-loaded popper is
securely in place and re-tighten the butterfly
knob.
•
Repeat on the opposite arm
•
Replace the side arm panel by locating the
plastic clips on the metal frame of the chair
and pressing until it fixes to the frame.

Arm Height
The user’s elbow should rest comfortably
on the armrest, high enough to provide
support without having shoulders raised or
hunched.
•
To adjust the arm height, remove the
side arm panel by pulling it away from the
chair. It is fitted with plastic clips for easy
removal and fitting.
•
Loosen the front and back spring-loaded
levers. Rotate anti-clockwise until loose.
•
Raise or lower the arm to the required
setting.
•
Secure both the front and back levers.
•
Do not take the arm above 200mm from
the top of the seat module as the arm
panel will not fit back onto the side of the
arm.
Arm height adjustment
Split-wing headrest adjustment
Page 8
Headrest Angle Adjustment
The headrest tilts backwards or forwards,
supporting the user’s head as required.
•
Using the small spring-loaded lever on
the left hand side of the back frame,
release the locking mechanism by turning
the lever anti-clockwise.
•
Move the headrest to the desired position
and turn the lever clockwise to lock. The
lever is ratcheted and will rotate freely
when pulled out.
•
To avoid damaging the ratchet
mechanism, push the lever in when
loosening or tightening the locking
mechanism.
Advice: Try not to restrict the angle of
vision too much when adjusting the
headrest and wing positions whilst ensuring
user comfort – keep it within range for
watching television and conversation when
the head is against the headrest.
Headrest Split-Wing Adjustment
The split-wings provide lateral support to
the user’s head and shoulders. They can be
angled in or out for a more central position
and should be adjusted to provide support
to the user in the centre of the chair.
The articulating joints in the split-wing
headrest are an integral part of the back of
the Duo.
By bending both wings on each side of the
headrest, the headrest can be set in its
desired position.
It may require some effort to manoeuvre the
wings. The wing movement has been made
tight to ensure that it will not move when
you are sitting in the chair in a relaxed
position.
To tighten the wings:
Use an Alun Key and a 13mm adjustable
spanner (not supplied).
•
Pull the wing back so that it lies flat.
•
Loosen the cover to expose the friction
joint.
•
Tighten by using the Alun Key at the top
of the joint and the 13mm adjustable
spanner to secure the bolt, at the bottom.
•
Refit the cover and adjust to suit.

Positional Headre
st Adjustment
The top section of the headrest is designed
to adjust forward and backward to facilitate
precise positioning of the head to support
the user. It is adjusted in the following way:
•
Remove the two grey clips that hold the
top section of the headrest in place.
•
Slide the metalwork forwards until it
reaches the desired position.
•
Replace the two grey clips, ensuring they
lock into corresponding holes in the
framework to lock the headrest in place.
Positional Headrest Adjustment
Lateral Supports (optional)
•
The Duo can be fitted with two lateral
supports that operate independently but
are adjusted in the same way.
•
Both lateral supports can be completely
removed.
•
To detach or attach the lateral supports,
loosen the “triangular” handle and adjust
to preference.
•
The two supports can be moved
horizontally across the bar (wider or
narrower) or vertically to suit the individual
in the chair. They are marked to ensure
that they are positioned evenly to provide
balanced support where appropriate.
Page 9
•
To move vertically, loosen the black
spring-loaded levers on each lateral
support at the rear of the chair. Rotate
anti-clockwise until loose.
•
Raise or lower the lateral support to the
required setting and secure the levers.
•
To move horizontally, loosen the
“triangular” handle and adjust to
preference. When appropriate positioning
has been found then the “triangular”
handles should be tightened to provide
stable and secure support.
Removable Arms
•
Arms are detachable for easy side
transfer and sling positioning if a hoist is
used.
•
Remove the side arm panel by pulling it
away from the chair. It is fitted with
plastic clips for easy removal and fitting.
•
Locate and loosen the butterfly knob at
the rear of the under arm and the spring-
loaded popper at the front.
•
Pull the spring-loaded popper down and
pull the whole arm assembly either in or
out to the required width. Keep the gap
between each arm and the seat the
same.
•
Pull arm away from chair.
•
Ensure that the spring-loaded popper is
securely in place and re-tighten.
•
To ensure user safety, never remove
both arms at the same time and never sit
on the arms or put undue pressure at the
front.

Lap
-
Belt and Pelvic Positioner
Lap-Belt
•
To use the Lap-Belt effectively, undo the
buckle joining the two halves of the strap
by depressing the button on the central
console and place the straps over the
arms or to the side of the seat before
transferring the user into the chair.
•
When the user is seated, bring the two
sides of the buckle together and fasten.
•
Adjust the strap by pulling on the plastic
loop to give firm control but take care not
to restrict user movement.
•
NOTE: Please refer to Lap-Belt User
Instructions enclosed for further
information.
Pelvic Positioner
•
Lay the positioner out flat.
•
Place the positioner in the seat of the
chair with the buckles pointing towards
the chair front and the levers on the
buckles facing down.
•
Feed the lengths of the straps through the
D-Rings on either side of the seat
cushion.
•
Place the ends of the straps over the
arms of the chair before transferring the
user into the chair.
•
Sit the user into the chair with their pelvis
firmly back in the seat and their buttocks
on the back edge of the harness.
•
Bring the straps over the users thigh and
through the buckles on each end of the
harness.
•
Pull the straps tight and fasten down the
levers on the buckles. The fit should be
snug – not too tight and not too loose.
Page 10
Pommel (optional)
The pommel simply slides on and off from
the front of the seat module.
•
To remove, firmly take hold of the
pommel metal work and pull. The
pommel will slide out of the seat module.
•
To fix the pommel in place, take the
metal bar of the pommel and align with
the fixing point at the front of the seat
module in the centre. Simply push the
pommel in place.
Leg-Laterals (optional)
The Leg-Laterals are one complete unit that
slides onto the legrest assembly.
The footboard must be removed before
attempting to fix the Leg-Laterals to the
legrest assembly.
•
To remove the footboard assembly
retract the spring pull “snaps”. Slide the
footboard down and off the legrest
assembly.
•
Pull out the “snaps” on the Leg-Lateral
unit. Align the unit with the legrest
assembly and slide the Leg-Lateral unit
up the legrest to the desired position.
Ensure the zips of the lateral pads are on
the underside of the Leg-Lateral Unit to
guarantee it has been put on the correct
way.
•
Locate the pins into the correct
positioning holes and click the “snaps”
into a firm fixing.

•
The user is at risk if the Lap-Belt is not
properly specified and adjusted to their
particular requirements.
•
Users should be regularly checked and
continuously supervised when using the
Lap-Belt to mitigate the user moving or
sliding into an inappropriate position.
•
Thrusts, spasms and strong movements,
for example as well as partial loosening of
the Lap-Belt could cause injury to the
user.
•
Care should be taken not to over tighten
the Lap-Belt in order to reduce the risk of
harm to the user.
Care and Maintenance
For recommended care, cleaning and
maintenance, please refer to the care
and maintenance guidelines enclosed
with your chair and the care label fixed
to the chair.
Service and Maintenance Indicator
A service and maintenance indicator is
located on the push handle of the chair.
This indicator will flash after 11 months of
use to advise that the chair should be
serviced.
Annual servicing of the chair will extend the
warranty of the chair to 5 years if
maintained from new and increase the
chair’s lifespan.
The annual maintenance service is
chargeable. Additional components and
parts will be quoted and charged
separately, if required.
Should you require any further information
or costs please do not hesitate to contact
our Customer Service Team on Freephone
0800 212709
Page 11
Potential Risks, Cautions &
Warnings
•
The user is at risk if the Duo Mini is not
properly configured to their particular
physique and requirements.
•
It is recommended that the tilt-in-space is
changed at regular intervals to reduce
the risk of pressure sores.
•
When tilting a user who has their feet on
the floor or footboard without elevating
the legrest, exercise care to avoid
pressure build up behind the user’s
knees.
•
The footboard must never be stood on
when transferring into or out of the chair.
It will not support the user’s full weight
and may cause the chair to tip.
•
Never sit on the elevating legrest or push
the chair around by it as this may
damage the mechanism and may cause
the chair to tip.
•
To ensure user safety never remove
both arms at the same time.
•
Never sit on the arms or put them under
undue pressure.
•
When adjusting the headrest angle or the
arms, push the lever in when tightening
or loosening the locking mechanism to
avoid damaging the ratchet mechanism.
•
Users should be regularly checked and
supervised when sitting or lying in the
chair to mitigate the user moving or
sliding into an inappropriate position.
•
Care should be taken when adjusting the
chair not to trap fingers or clothing in the
framework.

Page 12
General Care
•
Wipe down framework with soapy water
and a soft cloth.
•
Check castors regularly for build up of
fluff and dirt particles.
•
Cleaning with scouring pads is not
advised.
Helpline
Should you have any concerns either pre or
post purchase of the chair contact
our Customer Services Team on
Freephone 0800 212709 or from outside
the UK +44 (0) 1440 705352 to discuss
further. Alternatively, if you purchased your
chair from a Kirton distributor in the first
instance please contact your point of
reference there.
If your call concerns a specific seating
product or item of furniture please have
ready your sales order number before you
telephone. This can be located on the base
of each chair and helps us identify your
details and deal with your enquiry
efficiently.
23 Rookwood Way
Haverhill
Suffolk
CB9 8PB
England
Telephone: +44 (0)1440 705352
Fax: +44 (0)1440 706521
Freephone: 0800 212709
www.kirton-healthcare.co.uk
Table of contents
Other KIRTON Wheelchair manuals
Popular Wheelchair manuals by other brands

Pride
Pride Jazzy 1113ATS Specifications

Trac About
Trac About IRV2000 owner's manual

Sunrise Medical
Sunrise Medical Quickie Freestyle M11 User instruction manual & warranty

Invacare
Invacare R2 jr. Specification sheet

Pressalit Care
Pressalit Care PLUS R7124 Mounting instruction

Invacare
Invacare I-Fit 9781E user manual