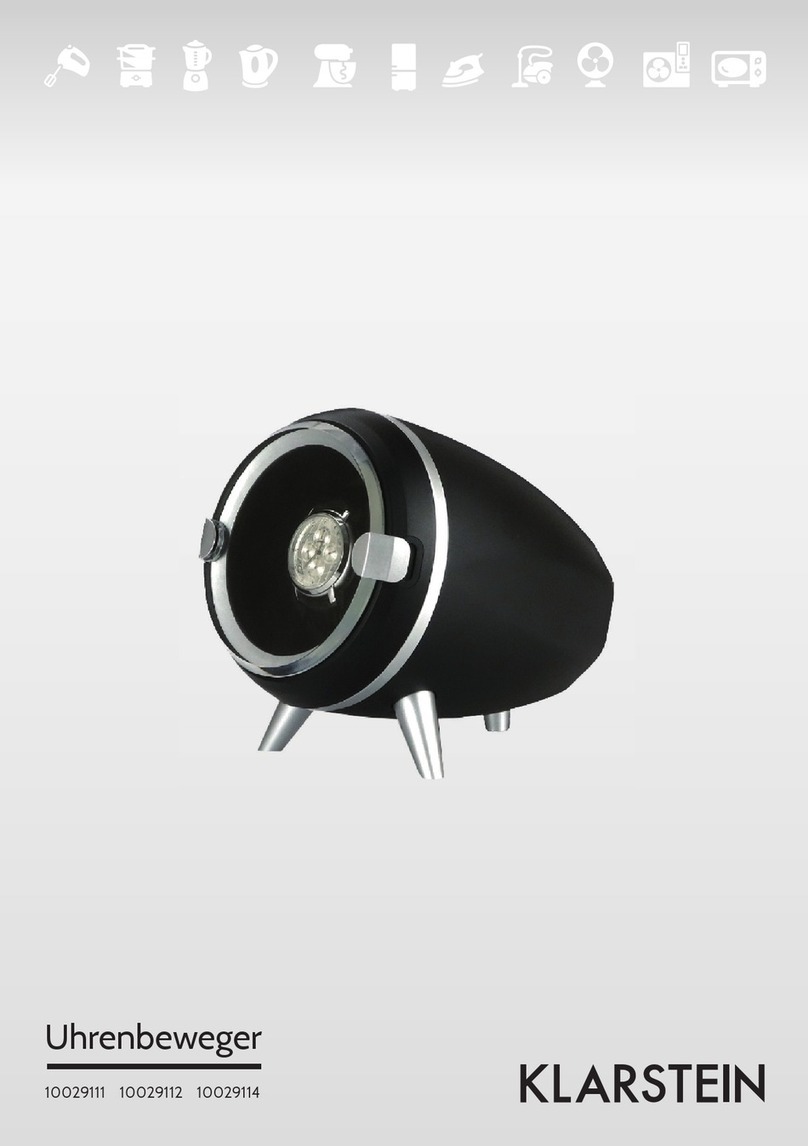
Klarstein 10029402 User manual

10029402 10029479
Klingenthal
Uhrenbeweger
Watch Winder
Cuerda del reloj
Remontoir à montres
Carica orologio


3
DE
Sehr geehrter Kunde,
wir gratulieren Ihnen zum Erwerb Ihres Gerätes. Lesen Sie
die folgenden Hinweise sorgfältig durch und befolgen Sie
diese, um möglichen Schäden vorzubeugen. Für Schäden,
die durch Missachtung der Hinweise und unsachgemäßen
Gebrauch entstehen, übernehmen wir keine Haftung. Scannen
Sie den folgenden QR-Code, um Zugriff auf die aktuellste
Bedienungsanleitung und weitere Informationen rund um das
Produkt zu erhalten.
INHALTSVERZEICHNIS
Sicherheitshinweise4
Schalter4
Inbetriebnahme4
Bedienung5
Tastenfunktionen6
Hinweise zur Entsorgung8
Hersteller8
TECHNISCHE DATEN
Artikelnummer 10029402, 10029479
Stromversorgung
Netzteil (4 V, 1.2 mAh, mitgeliefert) oder
3x 1.5 V Batterien (nicht im Lieferumfang
enthalten)
Maße (B x H x T) 31,5 x 55 x 33 cm
Gewicht 7,7 kg
Kabellänge 160 cm
Lieferumfang Gerät, Netzteil, Bedienungsanleitung
English 9
Español 15
Français 21
Italiano 27

4
DE
SICHERHEITSHINWEISE
• Kinder ab 8 Jahren, psychisch, sensorisch und körperlich eingeschränkte Menschen
dürfen das Gerät nur benutzen, wenn sie vorher von einer für sie verantwortlichen
Aufsichtsperson ausführlich mit den Funktionen und den Sicherheitsvorkehrungen
vertraut gemacht wurden und die damit verbundenen Risiken verstehen.
• Verwenden Sie den mit Ihrem Uhrenbeweger mitgelieferten Adapter oder einen
ähnlichen Adapter mit exakt gleicher Ausgangsspannung.
• Drehen Sie den Uhrenbeweger nicht manuell. Dadurch wird der Uhrenbeweger
beschädigt und Ihre Garantie erlischt.
• Vermeiden Sie es, den Uhrenbeweger direkter Sonne, Wasser oder anderer
Feuchtigkeit und extremen Temperaturen auszusetzen, die zu Schäden führen
können.
SCHALTER
Schalter auf der Rückseite
Netzanschluss für den Adapter
Ein/Aus-Schalter für die LED-Leuchten
INBETRIEBNAHME
Batterien einlegen
Entfernen Sie die Batterieabdeckung an der Unterseite des Geräts und befestigen Sie
drei 1.5 V Batterien im Batteriefach. Befestigen Sie die Batterieabdeckung wieder.

5
DE
BEDIENUNG
Bedienfeld und Anzeigen
Hinweis: Bevor Sie die folgende Anleitung durchgehen, versichern Sie sich, dass der
Bildschirm ausgeschaltet ist.
Bildschirm einschalten
Wenn Sie das Gerät erstmalig oder erneut einschalten geht der Bildschirm in den
Standby-Modus und die 6 Tasten erscheinen, die Hintergrundbeleuchtung ist aber
ausgeschaltet.
CW = Im Uhrzeigersinn
CCW = Gegen den Uhrzeigersinn
CCW + CW = Wechselnd
Bildschirmsperre
Umdrehungen pro Tag
Erhöhen
Verringern
Nummer des Rotors
Richtung Ein/Aus

6
DE
TASTENFUNKTIONEN
Power-Taste
Mit dieser Taste können Sie den Bilschirm einschalten und ausschalten.
Nach dem Einschalten leuchtet die weiße Hintergrundbeleuchtung auf dem
Bildschirm auf, sie zeigt die aktuellen Arbeitsstände und Daten an.
Rotations-Taste
Mit dieser Taste stellen Sie den die Rotationsrichtung ein.
Rotor-Taste
Mit dieser Taste können sie den gewünschten Rotor auswählen, für den
Sie Einstellungen vornehmen wollen. Es können maximal alle 6 Rotoren
gleichzeitig laufen.

7
DE
Umdrehungs-Taste
Mit dieser Taste stellen Sie die Umdrehungen pro Tag (0-2200) ein. Wenn
Sie auf die Taste drücken, blinkt die Umdrehungszahl.
Diese Taste erhöht die Umdrehungszahl um 1 pro Tastendruck. Halten Sie
die Taste gedrückt, um die Umdrehungszahl schneller anzupassen.
Diese Taste verringert die Umdrehungszahl um 1 pro Tastendruck. Halten
Sie die Taste gedrückt, um die Umdrehungszahl schneller anzupassen.
Bildschirmsperre
Die Bildschirmsperre verhindert, dass andere Personen Ihre Einstellungen aus Versehen
verstellen, solange Sie nicht anwesend sind.
Bildschirm sperren und entsperren:
Halten Sie beide Tasten 2-3 Sekunden lang gedrückt. Das
Symbol für die Bildschirmsperre erscheint. Bildschirm wird in
einen Sperr-Zustand versetzt und reagiert nicht mehr, wenn Sie
eine der Tasten drücken.
Um den Bildschirm wieder zu entsperren, halten Sie beide
Tasten abermals 2-3 Sekunden lang gedrückt, bis das Symbol
für die Bildschirmsperre verschwindet.
Wichtige Hinweise zur Bedienung
(1) Zustände der LED-Leuchten: Die beiden LED-Leuchten oben im Gehäuse gehen
an, wenn Sie den kleinen Netzschalter auf der Rückseite der Box einschalten, und
das Licht geht aus, wenn Sie den Schalter ausschalten. Im Allgemeinen sind die
Leuchten blau. Wenn die Batterien fast leer sind, werden die beiden Leuchten rot.
Wechseln Sie die Batterien in diesem Fall umgehend.
(2) Wenn alle 6 Rotoren unter Batteriebetrieb laufen, ist es besser, die LED-Leuchten
nicht eingeschaltet zu lassen, da sonst die Batterieleistung schnell verbraucht wird.
8
DE
HINWEISE ZUR ENTSORGUNG
Bendet sich die linke Abbildung (durchgestrichene Mülltonne
auf Rädern) auf dem Produkt, gilt die Europäische Richtlinie
2012/19/EU. Diese Produkte dürfen nicht mit dem normalen
Hausmüll entsorgt werden. Informieren Sie sich über die
örtlichen Regelungen zur getrennten Sammlung elektrischer
und elektronischer Gerätschaften. Richten Sie sich nach
den örtlichen Regelungen und entsorgen Sie Altgeräte nicht
über den Hausmüll. Durch die regelkonforme Entsorgung
der Altgeräte werden Umwelt und die Gesundheit Ihrer
Mitmenschen vor möglichen negativen Konsequenzen
geschützt. Materialrecycling hilft, den Verbrauch von
Rohstoffen zu verringern.
Das Produkt enthält Batterien, die der Europäischen Richtlinie
2006/66/EG unterliegen und nicht mit dem normalen
Hausmüll entsorgt werden dürfen. Bitte informieren Sie sich
über die örtlichen Bestimmungen zur gesonderten Entsorgung
von Batterien. Durch regelkonforme Entsorgung schützen
Sie die Umwelt und die Gesundheit Ihrer Mitmenschen vor
negativen Konsequenzen.
HERSTELLER
Chal-Tec GmbH, Wallstraße 16, 10179 Berlin, Deutschland.

9
EN
Dear Customer,
Congratulations on purchasing this device. Please read the
following instructions carefully and follow them to prevent
possible damages. We assume no liability for damage caused
by disregard of the instructions and improper use. Scan the QR
code to get access to the latest user manual and more product
information.
CONTENT
Safety Instructions10
Switches10
Commissioning10
Operation11
Key Functions12
Hints on Disposal14
Producer14
TECHNICAL DATA
Order number 10029402, 10029479
Power supply
Power supply unit (4 V, 1.2 mAh,
supplied) or 3x 1.5 V batteries (not
included)
Dimensions (W x H x D) 31,5 x 55 x 33 cm
Weight 7,7 kg
Cable length 160 cm
Scope of delivery Device, power supply unit, operating
instructions

10
EN
SAFETY INSTRUCTIONS
• Children from the age of 8 years and persons with mental, sensory and physical
impairments may only use the device if they have been thoroughly familiarized with
the functions and safety precautions by a responsible supervisor and understand the
associated risks.
• Use the adapter supplied with your watch winder or a similar adapter with exactly
the same output voltage.
• Do not turn the watch winder manually. This will damage the watch winder and
void your warranty.
• Avoid exposing the watch winder to direct sunlight, water or other moisture and
extreme temperatures that may cause damage.
SWITCHES
Switches on the rear
Mains connection for the adapter
On/Off switch for the LED lights
COMMISSIONING
Inserting batteries
Remove the battery cover at the bottom of the unit and attach three 1.5 V batteries in the
battery compartment. Replace the battery cover.

11
EN
OPERATION
Control panel and displays
Note: Before you go through the following instructions, make sure that the screen is
turned off.
Turning the Screen On
When you turn on the unit for the rst time or again, the screen goes into standby mode
and the 6 buttons appear, but the backlight is off.
CW = Clockwise
CCW = Counter-Clockwise
CCW + CW = Alternate
Lock
Turns per day
Increase
Decrease
Number of rotor
Direction On/Off

12
EN
KEY FUNCTIONS
Power button
Use this button to turn the screen on and off.
After switching on, the white backlight on the screen lights up, showing the
current work status and data.
Direction button
Use this button to set the direction of rotation.
Rotor button
With this button you can select the desired rotor for which you want to
make settings. A maximum of all 6 rotors can run simultaneously.

13
EN
Turns per day button
Use this button to set the turns per day (0-2200). When you press the
button, the number of revolutions ashes.
This key increases the number of turns by 1 per keystroke. Keep the key
pressed to adjust the number of revolutions faster.
This key decreases the number of turns by 1 per keystroke. Press and hold
the key to adjust the number of revolutions faster.
Screen Lock
The screen lock prevents other people from accidentally changing your settings while
you are not present.
Lock and unlock the screen:
Press and hold both buttons for 2-3 seconds. The screen lock
symbol appears. Screen is put into a locked state and will not
respond when you press any of the buttons.
To unlock the screen, press and hold both buttons again for
2-3 seconds until the screen lock icon disappears.
Important operation instructions
(1) States of the LED lights: The two LED lights at the top of the cabinet turn on when you
turn on the small power switch on the back of the box, and the light goes off when
you turn the switch off. In general, the lights are blue. When the batteries are almost
empty, the two lights turn red. In this case, change the batteries immediately.
(2) If all 6 rotors are running on battery power, it is better not to leave the LED lights on,
otherwise the battery power will be quickly used up.

14
EN
HINTS ON DISPOSAL
According to the European waste regulation 2012/19/EU this
symbol on the product or on its packaging indicates that this
product may not be treated as household waste. Instead it should
be taken to the appropriate collection point for the recycling of
electrical and electronic equipment. By ensuring this product is
disposed of correctly, you will help prevent potential negative
consequences for the environment and human health, which
could otherwise be caused by inappropriate waste handling of
this product. For more detailed information about recycling of
this product, please contact your local council or your household
waste disposal service.
Your product contains batteries covered by the European
Directive. 2006/66/EC, which cannot be disposed of with
normal household waste. Please check local rules on separate
collection of batteries. The correct disposal of batteries helps
prevent potentially negative consequences on the environment
and human health.
PRODUCER
Chal-Tec GmbH, Wallstraße 16, 10179 Berlin, Germany.

15
ES
Estimado cliente,
Le felicitamos por la adquisición de este producto. Lea
atentamente las siguientes instrucciones y sígalas para evitar
posibles daños. No asumimos ninguna responsabilidad por los
daños causados por el incumplimiento de las instrucciones y el
uso inadecuado. Escanee el siguiente código QR para obtener
acceso a la última guía del usuario y más información sobre el
producto:
ÍNDICE
Instrucciones de seguridad 16
Interruptores16
Puesta en marcha16
Funcionamiento 17
Funciones de las teclas 18
Retirada del aparato20
Fabricante20
DATOS TÉCNICOS
Número de artículo 10029402, 10029479
Fuente de alimentación
Fuente de alimentación (4 V, 1,2 mAh,
suministrada) o 3 pilas de 1,5 V (no
incluidas)
Dimensiones (Anchura x Altura x
Profundidad) 31,5 x 55 x 33 cm
Peso 7,7 kg
La longitud del cable 160 cm
Alcance de la entrega Aparato, fuente de alimentación,
instrucciones de uso

16
ES
INSTRUCCIONES DE SEGURIDAD
• Los niños a partir de 8 años y las personas con limitaciones sensoriales, físicas
y mentales deben utilizar el aparato solo bajo la vigilancia de un adulto que se
haga responsable y que conozca las funciones y las instrucciones de seguridad y
conozca los riesgos.
• Use solo la unidad de corriente incluida.
• No gire la cuerda de manera manual, ya que podría estropearla
• No coloque la cuerda del reloj directamente bajo la dirección del sol y no la
exponga a agua, humedad o temperaturas extremas para no dañar la caja.
INTERRUPTORES
Interruptor en la parte trasera
Conexión de red para el adaptador
Interruptor de encendido y apagado para las luces LED
PUESTA EN MARCHA
Insertar las baterías
Retire la tapa de la batería en la parte inferior de la unidad y coloque tres baterías de
1,5 V en el compartimento de la batería. Vuelva a colocar la tapa de la batería.

17
ES
FUNCIONAMIENTO
Panel de control y pantallas
Nota: Antes de seguir estas instrucciones, asegúrese de que la pantalla esté
apagada.
Encendiendo la pantalla
Al encender la unidad por primera vez o de nuevo, la pantalla pasa al modo de espera
y aparecen los 6 botones, pero la luz de fondo está apagada.
CW = En el sentido de
las agujas del reloj
CCW = En el sentido contrario
a las agujas del reloj
CCW + CW = Alternando
Bloqueo de pantalla
Revoluciones por día
Aumentar
Disminuir
El número del rotor
Dirección On/Off

18
ES
FUNCIONES DE LAS TECLAS
Tecla de encendido
Use este tecla para encender y apagar la pantalla.
Después de encenderse, se enciende la luz blanca de la pantalla,
mostrando el estado actual de trabajo y los datos.
Tecla de rotación
Utilice este tecla para ajustar la dirección de rotación.
Tecla del rotor
Con este tecla se puede seleccionar el rotor deseado para hacer los
ajustes. Un máximo de los 6 rotores pueden funcionar simultáneamente.

19
ES
Tecla de rotación
Utilice este tecla para ajustar las revoluciones por día (0-2200). Cuando
presionas la tecla, el número de revoluciones parpadea.
Esta tecla aumenta el número de revoluciones en 1 por cada pulsación.
Mantén la tecla pulsada para ajustar el número de revoluciones más
rápido.
Esta tecla disminuye el número de revoluciones en 1 por cada pulsación.
Mantenga pulsada la tecla para ajustar el número de revoluciones más
rápido.
Bloqueo de pantalla
El bloqueo de la pantalla evita que otras personas cambien accidentalmente sus ajustes
mientras usted no está presente.
Bloquea y desbloquea la pantalla:
Mantenga ambos teclas presionados durante 2-3 segundos.
Aparece el símbolo de bloqueo de la pantalla. La pantalla
está congurada en un estado de bloqueo y no responderá
cuando presione cualquiera de los botones.
Para desbloquear la pantalla, mantenga pulsados ambos
teclas de nuevo durante 2-3 segundos hasta que el icono de
bloqueo de la pantalla desaparezca.
Notas importantes sobre el funcionamiento
(1) Estados de las luces LED: Las dos luces LED de la parte superior de la caja se
encienden cuando se enciende el interruptor pequeño de la parte posterior de la
caja, y la luz se apaga cuando se apaga el interruptor. En general, las luces son
azules. Cuando las baterías están casi agotadas, las dos luces se vuelven rojas.
Entonces, cambie las pilas inmediatamente.
(2) Si los 6 rotores funcionan con energía de la batería, es mejor no dejar las luces
LED encendidas, de lo contrario la energía de la batería se agotará rápidamente.

20
ES
RETIRADA DEL APARATO
Si el aparato lleva adherida la ilustración de la izquierda (el
contenedor de basura tachado) entonces rige la normativa
europea, directiva 2012/19/UE. Este producto no debe
arrojarse a un contenedor de basura común. Infórmese sobre
las leyes territoriales que regulan la recogida separada
de aparatos eléctricos y electrónicos. Respete las leyes
territoriales y no arroje aparatos viejos al cubo de la basura
doméstica. Una retirada de aparatos conforme a las leyes,
contribuye a proteger el medio ambiente y a las personas a
su alrededor frente a posibles consecuencias perjudiciales
para la salud. El reciclaje ayuda a reducir el consumo de
materias primas.
Este producto contiene pilas que según la Normativa europea
2006/66/CE no deben ser arrojadas al cubo de la basura
común. Infórmese sobre la legislación de su país que regula
la retirada y eliminación de las pilas y baterías. La retirada
y eliminación de pilas conforme a la ley, protege el medio
ambiente y a las personas frente a posibles riesgos para la
salud.
FABRICANTE
Chal-Tec GmbH, Wallstraße 16, 10179 Berlín, Alemania.
Other manuals for 10029402
2
This manual suits for next models
1
Table of contents
Languages:
Other Klarstein Display Case manuals
Popular Display Case manuals by other brands

Arneg
Arneg Mini Ankara Twin 4P Series Direction for Installation and Use

HAMOKI
HAMOKI iMT-100L Operation instructions

saro
saro LISETTE 100 operating instructions

Ideal AKE
Ideal AKE AKV Series operating manual

BKI
BKI Hot Food Display Cabinets CHS/1N operating instructions

Hoshizaki
Hoshizaki KN-150D-L parts list