9
8User Manual
Setup
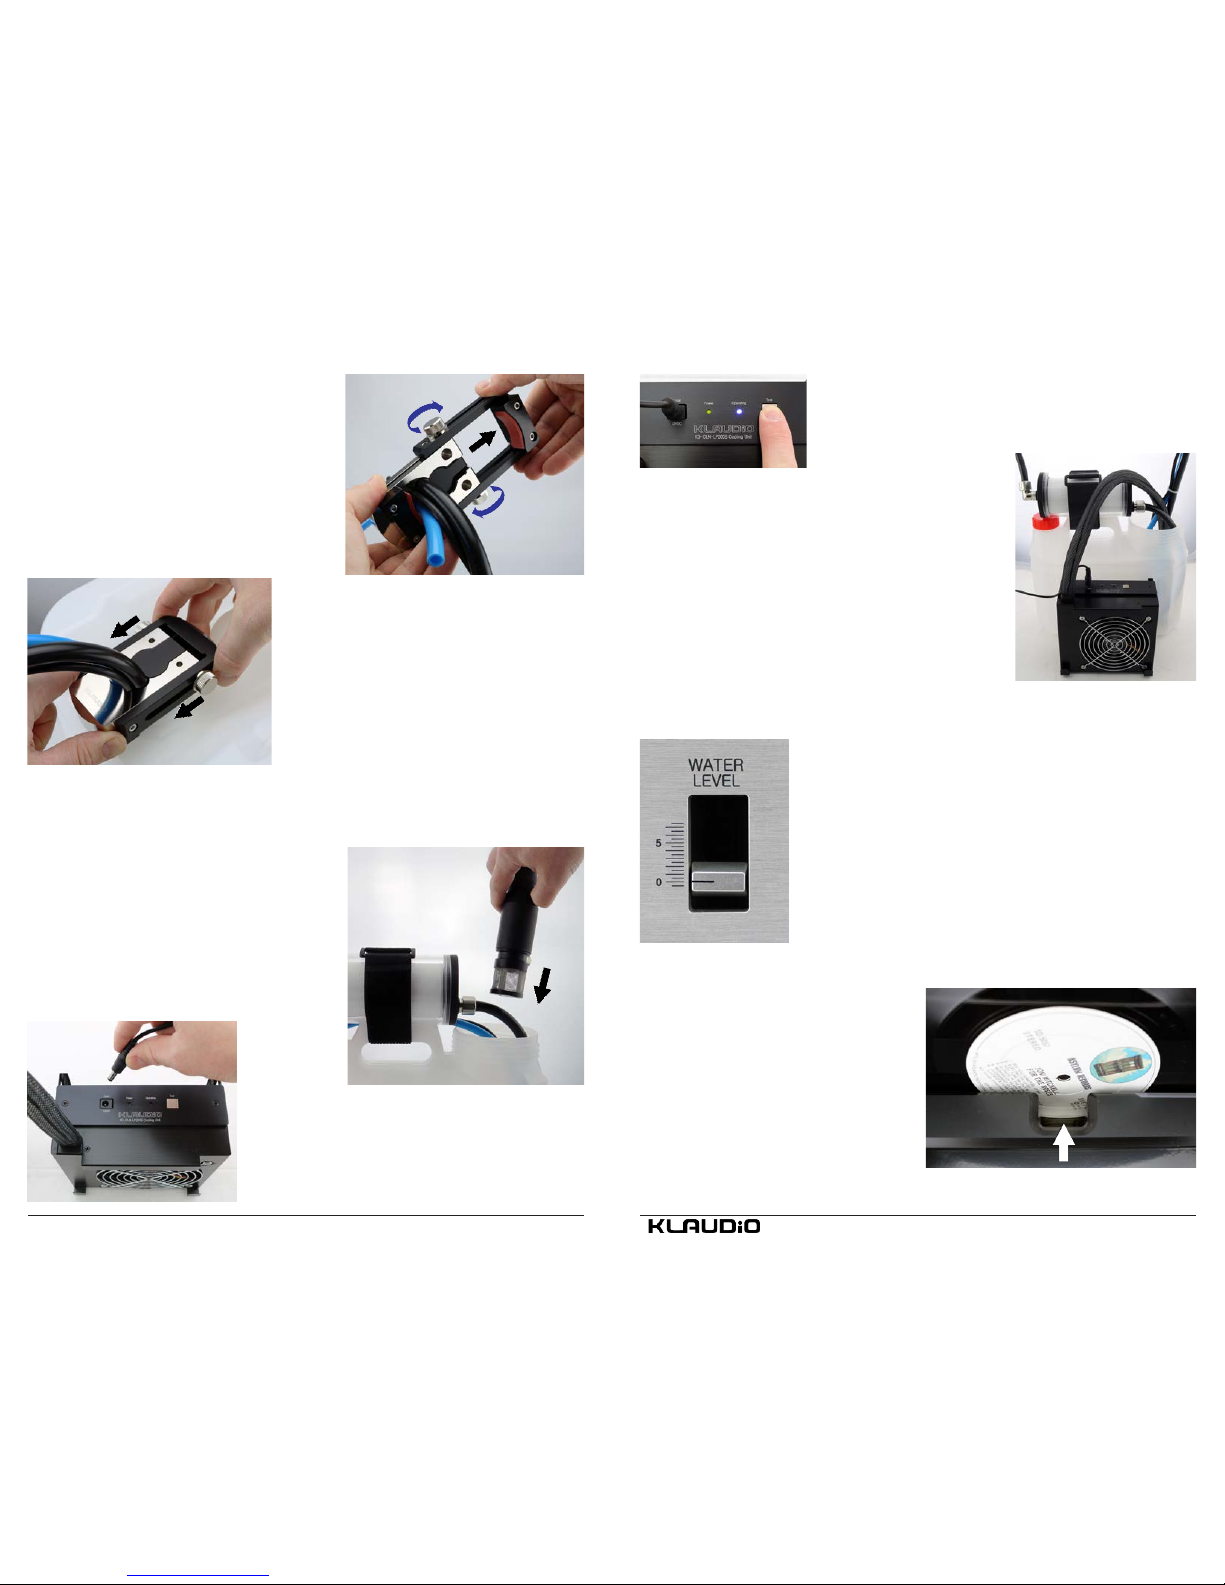
Alternative Reservoirs
When using alternative reservoirs, a bracket
is included to prevent the tubing and pump
power lines from sliding into the reservoir.
Route both tubes and pump wire through
the reservoir bracket. Each end above the
bracket will be connected to the LP cleaner.
Drain
Tubing
Pump Power
Supply
Tubing
Alternative containers can be used as the reservoir. The container’s opening should
be wide enough to accommodate the tubing and pumps. 3.75-inches (95mm) is
recommended.
Drop the pump and connected lines into the
water container.
The blue drain tubing should be shortened to
remain above water level inside the container.
Keep the drain tubing as straight and short
as possible, and descending with no elevated
sections.
Drain
Tubing
Drop the blue drain tubing from the cleaner into
the reservoir. Keep the drain tubing as straight and
short as possible, and descending with no elevated
sections.
Furthermore, the blue drain tubing must remain
above water level inside the container. It is recom-
mended to trim the tubing as needed, then to zip-tie
it to the black supply tubing to prevent sliding.
Connect the remaining black
tubing from the cleaner to the
outlet (elbow tting) of the lter.
Fasten the lter to the reservoir’s
handle with the included velcro
strap. The filter’s inlet should
face the reservoir opening.
Place the pump into the reservoir.
Connect the pump’s power cable to
the “Water Control” plug on the rear
of the LP cleaner.
Connect the smaller blue drain tubing
to the compression fitting labeled
“Out”.
Connect the unused black tubing to
the compression tting labeled “In”.
To Cleaner
Velcro Strap
The pump will rest at the bottom of the contain-
er. Allow enough slack in the power wire and
supply tubing to achieve this.
The end of the blue drain tubing must remain
above water level to speed circulation. (There-
fore, the container can not be completely lled.)
The drain tubing should allow rapid water re-
turn. It should not be excessively long or loop
upwards.
Supply
Tubing
Drain
Tubing
Power
Wire
Pump