P/N 1.00060 Revision A
4
SECTION 2
BASIC TROUBLESHOOTING DURING WARRANTY PERIOD
No pendant display. Check that the wall outlet has power.
Check power switch-on.
Pendant displays “Err”. Turn power off, wait 5 seconds, and turn power back on.
Pendant adjustments inoperative, but
display is on.
Check all connections at the P.C. Board.
Unit will not start, or it starts then stops. Check pendant settings.
Check belts.
Cannot change pendant settings. Refer to User’s Manual regarding locking feature.
NOTE: If the above solutions do not work or for other problems not listed, call KLC Services, Inc.
Any actions taken other than those listed above will void the Warranty.
SECTION 3
TROUBLESHOOTING OUT OF WARRANTY PERIOD
No pendant display. Check that the wall outlet has power.
Check power switch-on.
Use a multi-meter to check voltage before and after switch:
- If no voltage before switch, replace transformer. (See voltage chart Pg27)
- If voltage before but not after switch, replace switch.
- If voltage after switch, check all P.C. Board and pendant connections.
- If still no display, replace pendant.
- If still no display, replace P.C. Board. (Note: If this solves the problem, test the
original pendant; it may be okay.)
Pendant
adjustments
inoperative, but
display is on.
Check to see if the settings are locked.
- If locked, a dot will appear in the lower right hand corner of the display. To
remove lock, press both the ‘UP’ and ‘DOWN’ arrows at the same time.
Check all connections at the P.C. Board.
Replace pendant.
- If still no display, replace P.C. Board. (Note: If this solves the problem, test the
original pendant; it may be okay.)
Unit will not start, or
it starts then stops.
Check pendant settings. Ensure settings are greater than 10°apart.
Check belts. Ensure that no oil has gotten onto the belts.
- If oil is present, remove all belts and wipe the clean both the belts and
pulleys with alcohol to remove oil. Allow the components to dry thoroughly
before installing belts.
Remove the belts and turn each of the pulleys by hand.
- If any of the pulleys do not turn freely, this could be the cause of the issue.
- If the Large Pulley does not turn freely, inspect the thigh adjustment knobs for
alignment, the condition of the leadscrew and nut, and the amount of slack/play in the
driveline. Also inspect the tightness of the screw at the knee joint.
- If the Dual Pulley/Transfer Pulley does not turn freely, replace pulley.
- If the motor pulley does not turn freely, replace motor.
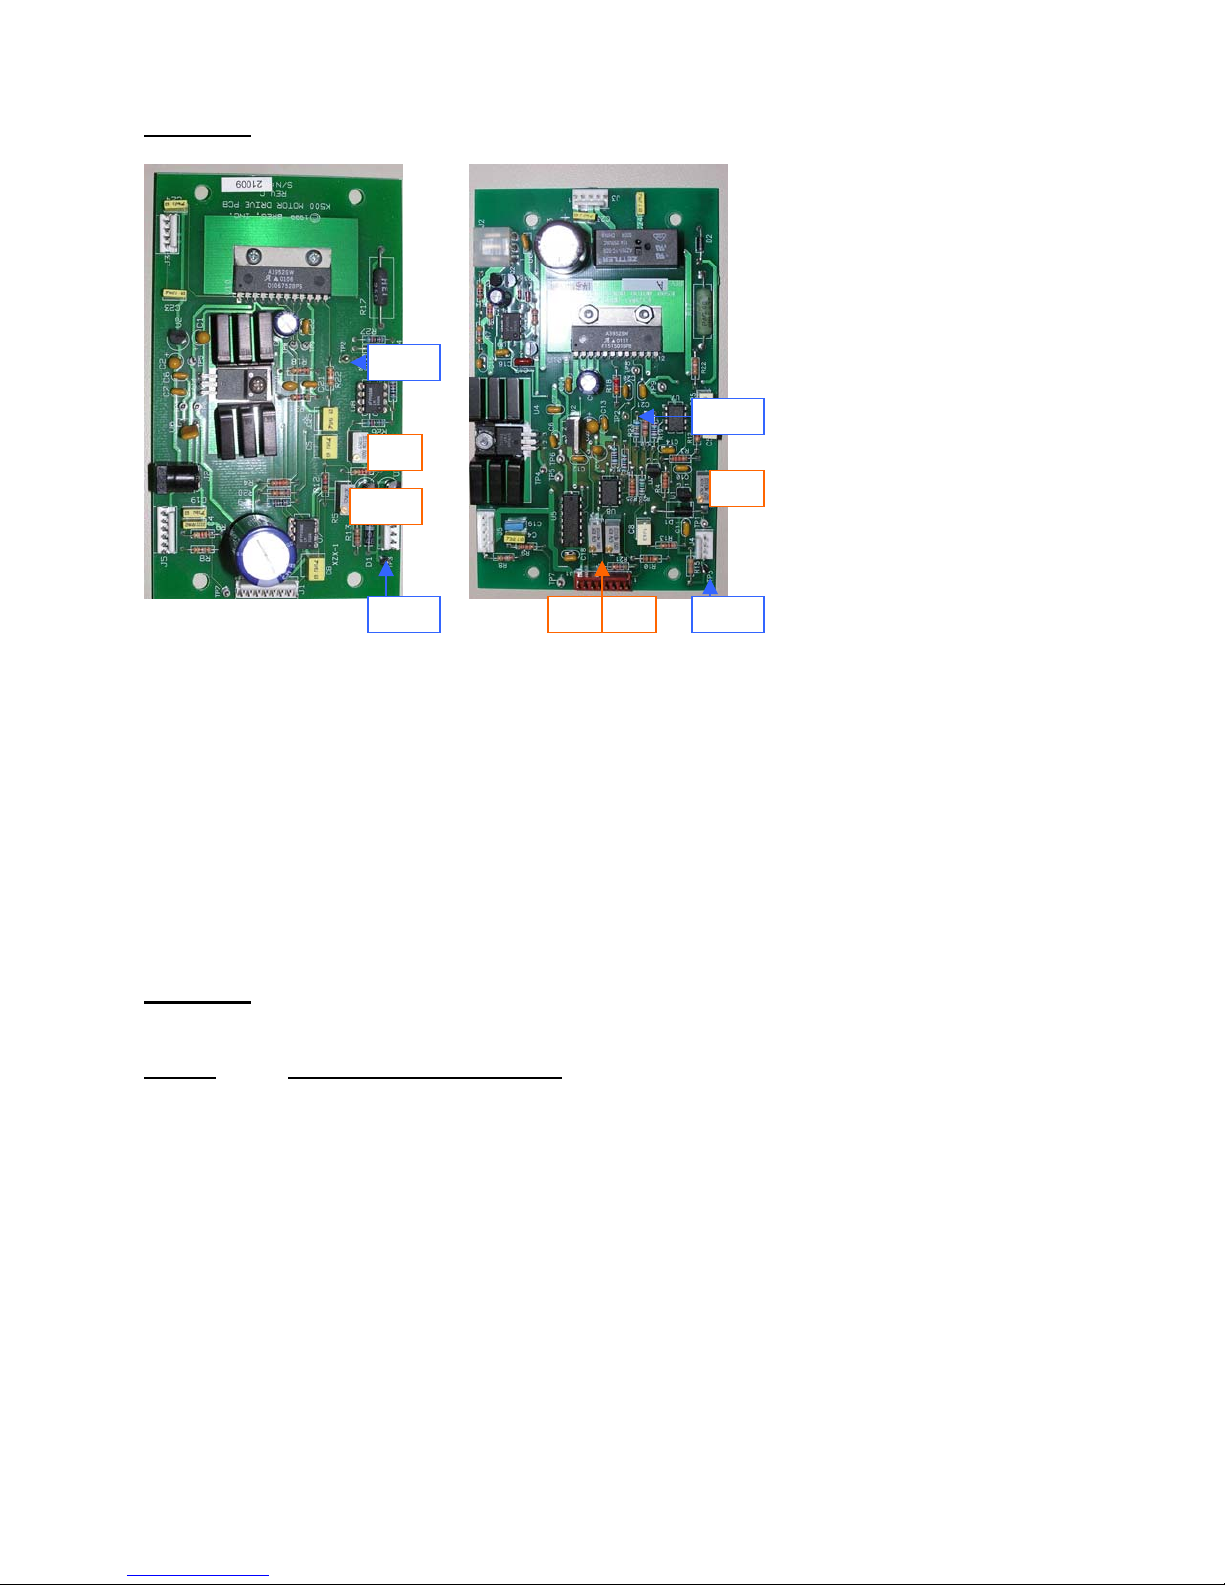
Remove the Motor Connector from J3 on the Motor PCB. Using a knife blade carefully push
the red and black wires deeper into the connector. Reattach connector and turn on power.
Use a multi-meter to test voltage at motor after pressing the Start/Stop button. (See voltage
chart Pg27)
- If there is voltage to the motor, but the motor is not running, replace motor.
- If there is no voltage to the motor, replace P.C. Board.
- If still no voltage to the motor, replace the pendant. (Note: If this solves the
problem, test the original P.C. Board, it may be okay.)
Cannot change
pendant settings.
Check to see if settings are locked. If locked, a dot will appear in the lower right hand corner of
the display. To remove lock, press both the ‘UP’ and ‘DOWN’ arrows at the same time.
- If unlocking does not work, replace pendant.
- If this still does not work, replace the P.C. Board (Note: If this solves the
problem, test the original pendant; it may be okay.)
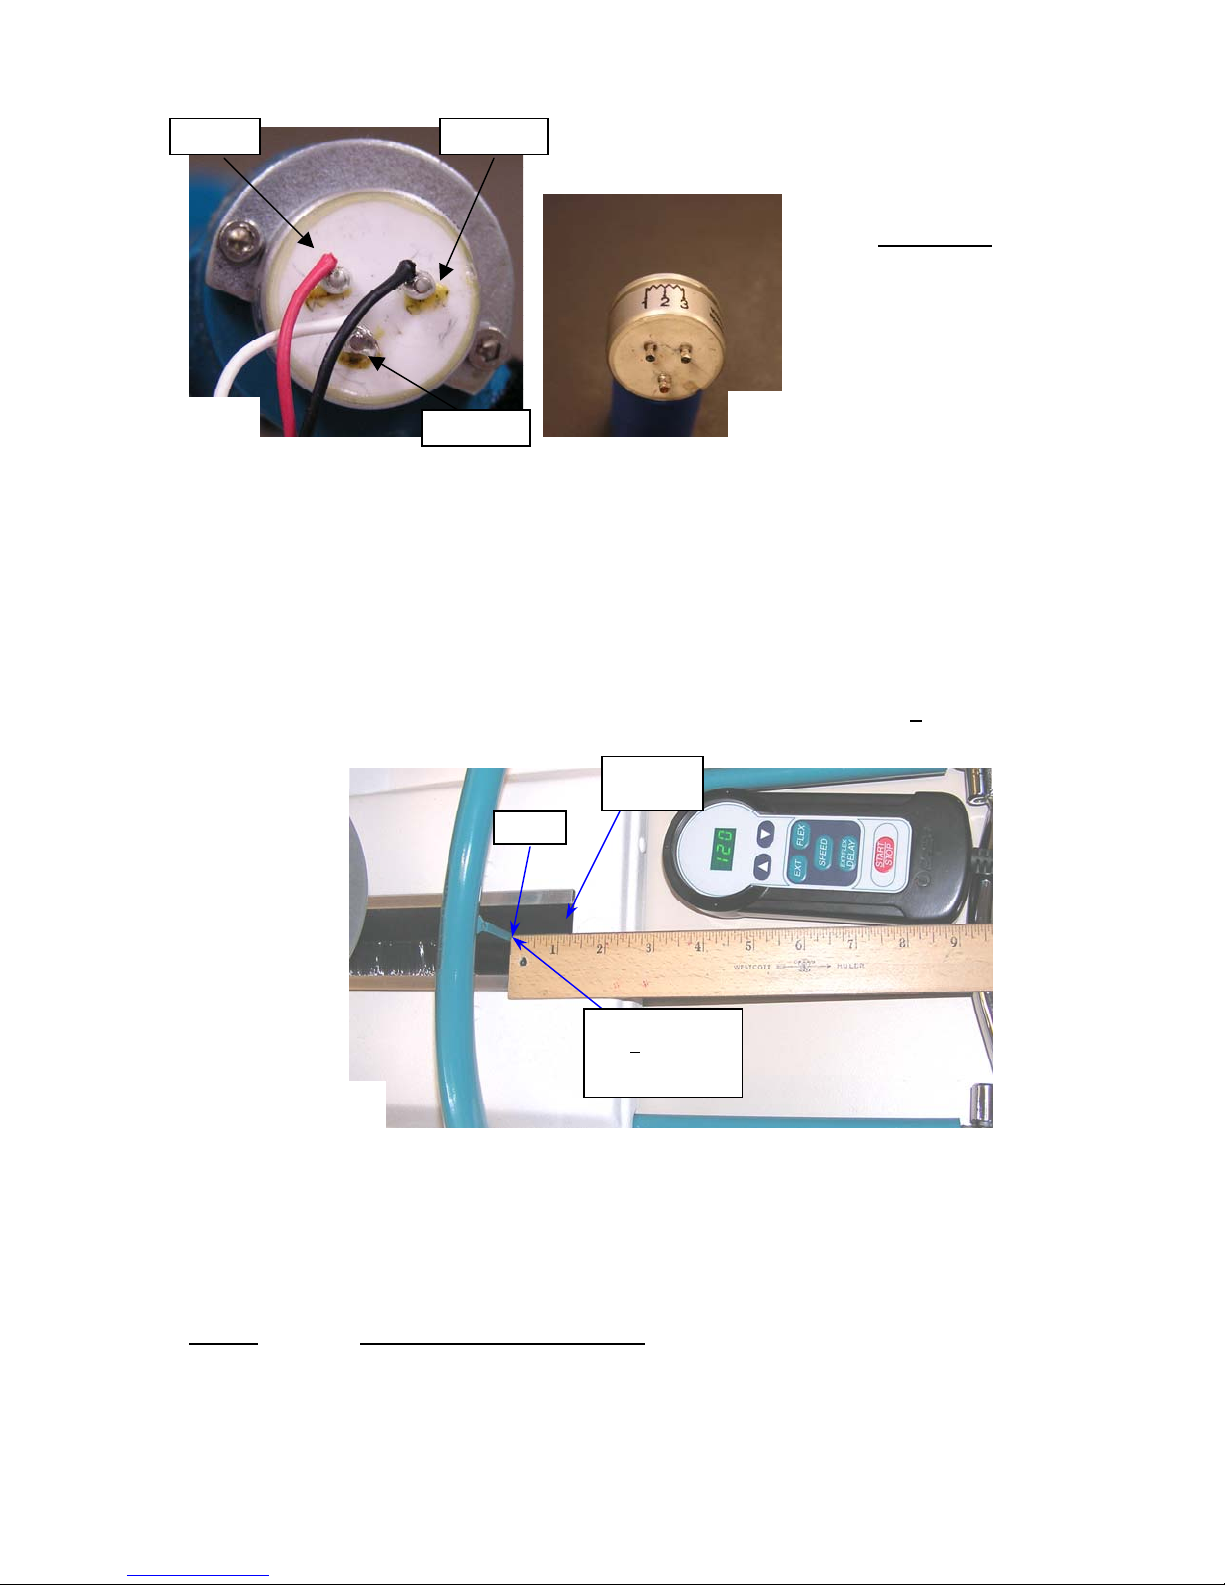
Angle does not
appear to read
correctly on
pendant.
Start unit. Set extension limit to 0°. Stop unit when 0°is displayed on the pendant. Visually
check to see that the Leg Carriage is perfectly straight.
- If the carriage is not aligned properly, calibrate the range of motion as
dictated in Section 7.1 of this manual.
Loud grinding
screeching sounds
present when in
Inspect the position of the encoder wheel within the optical sensor.
- If it is contacting the sensor, reposition the encoder wheel.
Inspect the area just below the rear of the motor for debris.