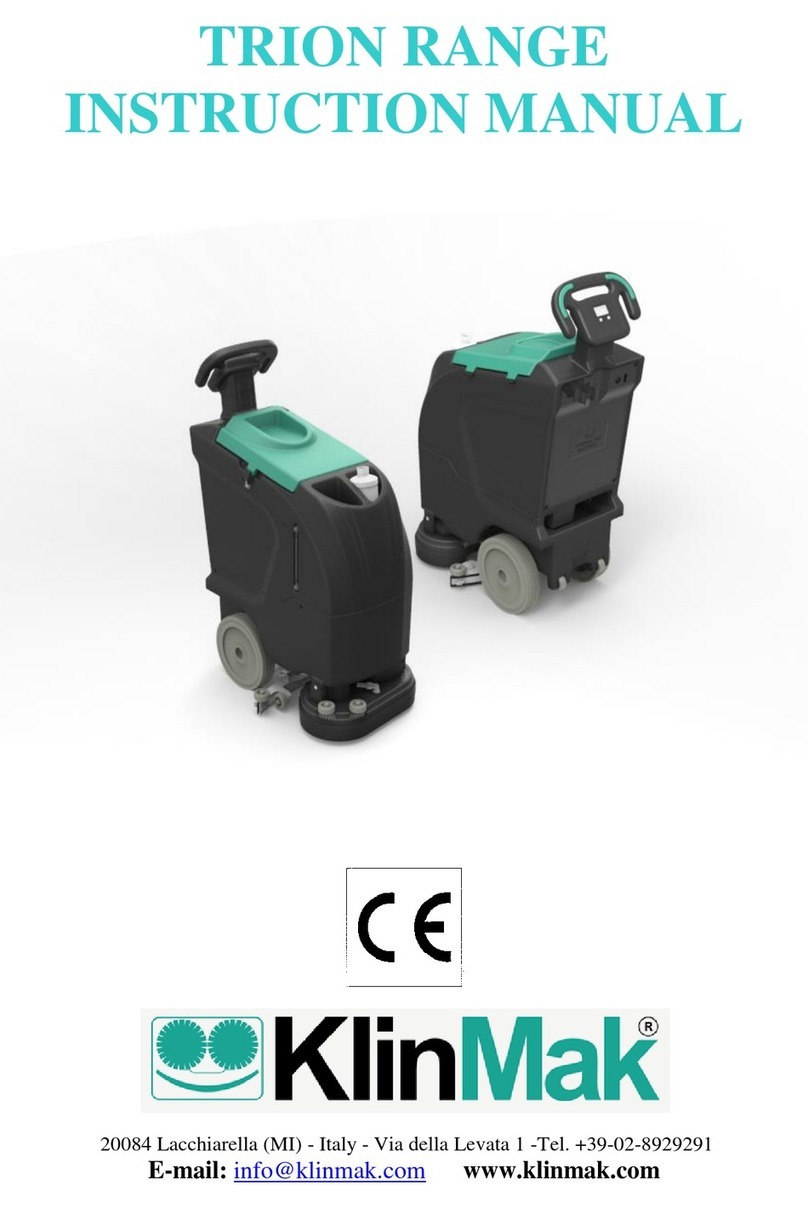
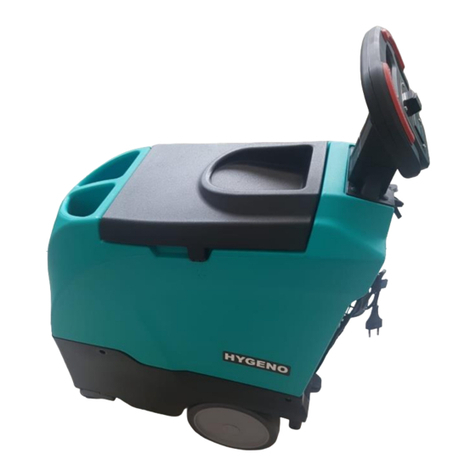
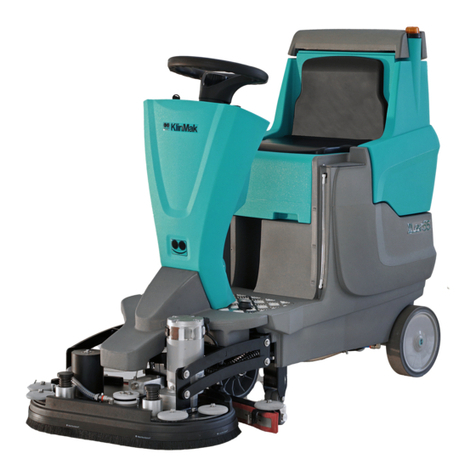
KlinMak MINI 1240 User manual

MINI 1240
UK INSTRUCTION MANUAL 2

2
MINI 1240
INSTRUCTION MANUAL
•Description: Walk-behind scrubber dryer for use in commercial/industrial premises
•Model: MINI 1240
•Manual revision: 00
In order to obtain the best results, it is recommended to use original consumables
The brands or registered trademarks mentioned in this manual belong to their respective owners.

MINI 1240 Owner's Manual
Translation of the original instructions
Revisione 0.0 3
UK
TABLE OF CONTENTS
1. MACHINE DESCRIPTION 6
1.1. Control panel description 8
2. TECHNICAL SPECIFICATIONS 9
2.1. Functional units 10
3. SAFETY FEATURES 11
3.1. Declaration of absence of harmful substances 13
3.2. Safety devices for fixed closing guards 13
3.3. Safety devices for movable guards 13
4. CE NAMEPLATE POSITION 13
5. MACHINE TRANSPORT AND LIFTING 13
6. INTENDED USE OF THE MACHINE (Washing and drying phase) 14
7. INTENDED USE OF THE MACHINE
(Machine being moved without washing or drying) 14
8. REASONABLY FORESEEABLE MISUSE OF THE MACHINE 14
9. KIT SUPPLIED 15
10. INSTALLATION 15
10.1. Preliminary operations 15
11. MACHINE PREPARATION AND COMMISSIONING 16
11.1. Machine start-up 16
11.2. Machine filling 16
12. MACHINE USE 17
12.1. Floor washing and drying 17
12.2. Start of washing and drying 17
12.3. Double washing and single drying 17
12.4. Emptying and cleaning the recovery tank 18
12.5. Emptying and cleaning the solution tank 18

MINI 1240 Owner's Manual
Translation of the original instructions
Revision 0.0 4
UK
13. CONTROL STATION 19
13.1 CONTROL STATION 19
13.1.1 Key switch 0/1 19
13.1.2 Brush rotation activation switch 19
13.1.3 Suction activation switch 19
13.1.4 Water dispensing switch 19
13.1.5 Battery Charge Status Indicator 19
13.1.6 Counter 19
13.2 CHECKS 20
13.2.1 Neutrik connector socket for battery charging 20
13.3 Batteries 20
13.4 Charging the batteries 21
13.5 Replacing the brushes 22
13.6 Squeegee fitting 22
13.7 Adjusting the Squeegee 22
13.8 Replacing the squeegee drying blades 23
13.9 Cleaning the clean water filter 23
13.10 Maintenance Schedule 24
13.11 Summary for good machine maintenance 24
13.12 Troubleshooting 25
14. SOUND EMISSIONS 26
15. WIRING DIAGRAM 26
16. DECLARATION OF CONFORMITY 27

MINI 1240 Owner's Manual
Translation of the original instructions
Revisione 0.0 5
UK
INTRODUCTION
Dear Customer,
Thank you for choosing to purchase the new MINI 1240 walk-behind floor scrubber-dryer whose
features described in this manual will surely will meet all your needs.
MINI 1240 has been entirely designed and built completely in line with the Machinery Directive
2006/42/EC (implemented with Italian Legislative Decree 17/10), the Low Voltage Directive
2014/35/EC, Electromagnetic Compatibility 2014/30/EC, with top quality materials and a particular
commitment to reduce the risk of accidents as much as possible.
We have therefore drawn up this manual in order to provide you with adequate instructions for correct
use and maintenance that are essential for operator safety, for correct machine operation and its long
life.
Therefore, carefully read the entire manual and strictly follow the instructions provided; for safety
reasons, do not carry out any type of maintenance or operation not specifically mentioned.
The following symbols are used for the purposes outlined in the following
descriptions:
WARNING - Hazardous or unsafe practices that can result in serious
personal injury or even death.
CAUTION - Hazardous or unsafe practices that may result in minor
personal injury or damage to the machine or surrounding objects.
Used to identify actions to be taken for safe machine operation.
Before using the machine for the first time, read these original
instructions, follow them and keep them for future use or in case of
resale of the machine.
WARNING
CAUTION
FOR SAFETY:

MINI 1240 Owner's Manual
Translation of the original instructions
Revisione 0.0 6
UK
1. MACHINE DESCRIPTION
MINI 1240 is a walk-behind battery-powered Scrubber-Drying machine for washing and drying hard floors
intended for commercial use.
The main systems of the machine are as follows:
▪The cleaning solution tank and its circuit,
▪The washing brushes disc
▪The dirty water recovery tank and its circuit
▪The electrical system and its control panel.
The cleaning solution tank's job is to store the water (with solution diluted also manually), supplying it to the
washing system.
The relevant system includes the tank, the filter, the delivery valve and the controls.
The tank contains the cleaning solution (water and detergent) supplied to the washing system when needed. The
filter protects the solenoid valve from impurities in the water. The solenoid valve controls the supply of the
cleaning solution to the washing system. The valve automatically prevents the flow of the cleaning solution. The
activation of the function is activated directly from the control panel (On/Off).
Water flow is regulated by the ball valve located on the rear of the machine.
The disc washing device includes two counter-rotating disc brushes, and the electric motor that rotates 2 brushes.
The liquid suction turbine is independent and activated by the control panel. The brushes wash the floor while the
motor and the pair of gears, solidly attached to the brushes, actuate their motion. The side band, in bristles,
allows the cleaning solution to remain in the work area of the brushes.
The squeegee (or wiper) is the water collection device. It can be lifted manually: lifting it from the ground towards
the machine underside, it attaches to the underside by 2 magnets that secure it in place.
The collection device (wiper or squeegee) is designed to suction the dirty water sending it to the recovery tank.
The recovery system includes: the squeegee, the vacuum turbine, the filter, the recovery tank and the controls.
The wiper collects the dirty cleaning solution from the floor as the machine moves forward. The vacuum turbine
provides the vacuum required to suck the dirty cleaning solution from the floor and send it to the recovery tank.
The recovery tank stores the dirty cleaning solution.
The maximum level of the recovery water is controlled by a level sensor connected to the control unit and acting
on the motor; the turbine and the brushes stop working as soon as the collection water reaches the maximum
level.
MINI 1240 Owner's Manual
Translation of the original instructions
Revision 0.0 7
UK
1
1
2
3
4
The control devices are designed to control the various machine settings.
They include:
1. Start-up commands
2. Display
3. Solenoid valve button
4. Brush button
5. Suction button
6. Emergency pushbutton
6
5

MINI 1240 Owner's Manual
Translation of the original instructions
Revisione 0.0 8
UK
1. Control panel description
1. Start-up commands
Press either the right or left red button on the handle to start the machine.
CAUTION: when the machine is switched on, the red lever must NOT be pressed, otherwise the RELEASE RED
LEVER alarm will appear
2. Display
When the machine is switched on using the key selector located on the emergency mushroom-shaped button, the
total hours of work carried out and the total square metres washed/average hourly total square metres washed
(optional) are displayed.
Press the button (brushes and suction) and activate the machine using handles (1) to display the battery charge
level (bars) and the square metres washed (optional) when switched on.
ADAPTIVE: during use, the word ADAPTIVE may flash on the display accompanied by a reduction in the brush
motor revolutions. This function has been designed to protect the machine from extremely heavy duty or incorrect
applications, for example the use of a soft brush on a non-slip floor or running over drainage gratings. As soon as
the brush motor consumption returns within the defined parameters, the function will automatically disable.
FULL: during use, the word FULL may flash on the display. This indicates that the recovery tank is almost full. When
it the word stops flashing and becomes steady, the suction motor is deactivated. Empty the recovery tank and press
the suction button (5) to reset the machine.
3. Solenoid valve solution button
Press to activate or deactivate the dispensing of the solution –the appropriate icon appears on the display.
Holding down the button lets you freely drain the water from the solution tank into the appropriate manhole or
floor drain.
4. Brush button
E1: Lower brush speed rotation (ECO)
E2: Maximum power rotation
5. Suction button
You can select 3 modes:
E1: Rotation at lower rpm (recommended on hard/drainage free floors)
E2: Medium power rotation (recommended on most floors with drainage)
E3: Maximum power rotation (recommended on structured floors or with wide drainage lines)
6. Start Key –Emergency pushbutton
The machine is activated by akey selector on the emergency button. At the end of the work session, engage the
emergency and lock by removing the key.

MINI 1240 Owner's Manual
Translation of the original instructions
Revision 0.0 9
UK
2. TECHNICAL SPECIFICATIONS
Description Note MINI 1240
Voltage
54.6 Volt
Solution/recovery
tank capacity 12 / 14 L
Expected hourly coverage
1600 sqm/h
Length
750 mm
Width with squeegee
490 mm
Height
Open handle 1100 mm
Protection rating
IP X3
Warranty
12 months or 500 hours
Washing
Working width
2 Brushes 406mm / 2x8"
Motor power
250 W
Brush speed
ECO / max 220 / 275 rpm
Weight on brushes
25 kg
Solution flow rate
Adjustable 0-2 l/min
Suction
Motor power
200 W
Squeege width
490 mm
Sound pressure level
For the operator 66.7 dB(A)
Exhaust air filtration
Hepa 13
Packaging
Packaging dimensions
750x530x820 mm
Unladen / packed weight
34 / 45 kg
Battery and charger
Capacity
Li-ion 54.6V/7 .8Ah
Expected runtime
Max 2 hours
Battery charger
UL certified 54.6V - 3A
Charge time
2 hours

MINI 1240 Owner's Manual
Translation of the original instructions
Revisione 0.0 10
UK
2.1 Functional units
LIST OF UNITS
1. Control panel
2. Solution tank
3. Recovery tank
4. Recovery tank lid
5. Recovery tank drain hose
6. Brush head
7. Squeege
8. Vacuum motor (turbine)
9. Battery compartment
10. Turbine exhaust air filter
11. Brush rotation motor
12. Water loading inlet
Rear view
Control panel
Charger connection and
power button
General description
Steering handle
Recovery drain hose
Brush start levers
Lithium battery
Hour meter, remaining
runtime, energy
consumption
Brush button
Solution ON/OFF
Display
Control panel
Turbine button

MINI 1240 Owner's Manual
Translation of the original instructions
Revision 0.0 11
UK
3. SAFETY FEATURES
In view of the safety standards of the consolidated text of the Machinery Directive 2006/42/EC (implemented with
Italian Legislative Decree 17/10), the Low Voltage Directive 2014/35/EC, Electromagnetic Compatibility
2014/30/EC.
•To reduce the risk of fire, electric shock or personal injury, comply with the instructions below
•Only use the machine indoors. Do not use the machine outdoors and do not expose it to rain.
•Only use the machine following the instructions described in this manual.
•Only use the components and accessories recommended by the manufacturer.
•If the machine is not working properly, or has been dropped, damaged, left outdoors, or dropped into water,
send it to an authorised service centre.
•Do not use the machine if one of the openings is obstructed. Keep the openings free of debris that may reduce
air flow.
•The machine is not designed for collecting hazardous dust or powders.
•If operated in the vicinity of flammable materials or vapours, the machine may cause fires.
•Do not operate the machine near flammable liquids, powders or vapours.
•The machine is designed for commercial use, for example for use in supermarkets, hotels, schools, hospitals,
factories, warehouses, therefore for more complex applications than simple domestic cleaning operations.
•Only personnel trained and instructed how to use the machine correctly can operate the machine.
•Maintenance and repair operations must only be carried out by qualified personnel.
•If foam or liquids leak from the machine, turn it off immediately.
•Disconnect the battery before carrying out cleaning or maintenance operations. (engaging the emergency
completely disconnects the connections, including the battery).
Dirty water inlet
from squeegee
Tank view
Lid closing hinge
Lid with gasket
Water loading
inlet
WARNING

MINI 1240 Owner's Manual
Translation of the original instructions
Revisione 0.0 12
UK
•Before transferring the machine to a waste collection centre, the battery must be removed and disposed of
correctly.
•Check that all warning labels are legible and correctly applied to the machine.
•During operation, pay the utmost attention to other people, especially children.
•Before using the machine, make sure that all the covers/lids and doors are in the positions specified in the
instructions.
•When the machine is left unattended, take all necessary measures to prevent any unintentional movement of
the machine.
•The machine must only be operated by trained and authorised personnel.
•When the machine is left unattended, engage the emergency, turn the locking key and remove it.
•Use only chemicals recommended by the manufacturer.
•The machine is designed to be used with the brushes specified by the manufacturer. The use of other types of
brushes may compromise the safety of the machine.
•Lithium - Ion batteries follow specific reference standards –Correct use according to the manufacturer's manual
is recommended
•Do not operate the machine near sparks or naked flames.
•Keep batteries away from sparks or naked flames.
•Do not smoke near batteries.
•Disconnect the batteries before carrying out any type of work on the machine. (engage or release the
emergency)
•All work on the machine must be carried out exclusively by qualified personnel. Always wear protective clothing
and goggles when working on or near batteries.
•Do not wash the scrubber dryer with pressure washers and electrical parts with water
•Report any damage or malfunction of the machine immediately.
•Do not use the machine if it is not in perfect working condition. Please read the information carefully.
•Identify all machine safety devices.
•Ensure adequate training of the personnel in charge of operating the machine.
•DO NOT OPERATE THE MACHINE IN THE FOLLOWING CASES:
•You have not been trained and authorised.
•The Operating Guide has not been read.
•You are in an area at risk of fire or explosion.
•You are in an area where there is a risk of falling objects.
•DURING MAINTENANCE OPERATIONS:
•Avoid moving parts. Do not wear loose clothing, such as jackets, shirts or in general, necklaces or hanging
objects
•Clothing with wide sleeves when using the machine.
•Use original spare parts.
FOR SAFETY:
WARNING
WARNING
WARNING

MINI 1240 Owner's Manual
Translation of the original instructions
Revision 0.0 13
UK
3.1 Declaration of absence of harmful substances
We declare that our products, used during machine assembly, are manufactured with materials that comply with
the limits established by the current regulations on safeguarding health and protecting the environment and do not
contain substances classified as SVHC (Substance of Very High Concern) in accordance with EC Regulation
1907/2006 (REACH, Registration, Evaluation, Authorisation and Restriction of Chemical substances).
Although the aforementioned substances are not used in the processing cycles of the raw materials and our
products, their presence in the order of ppm (parts per million) cannot be excluded, due to micro-pollution of raw
materials.
3.2 Safety devices for fixed closing guards
Fixed closing guards are considered to be components that protect certain areas that contain moving parts or live
equipment.
The brush plate is equipped with a closing protection, formed by the protective casing in plastic material.
Do not remove the fixed closing guards. In case of maintenance, make sure that they are refitted, before turning on
the machine and starting work
3.3 Safety devices for movable guards
There is a movable guard to protect the brush plate.
The battery compartment is located on the rear side, in front of the operator. To access it, remove the 4 locking
screws on the back and disconnect the wiring.
The customer must contact the authorised dealer for all maintenance and repair needs.
4. CE NAMEPLATE POSITION
The technical data plate, bearing the CE marking, is affixed to the Steering handle tube; it is adhesive and must not
be removed for any reason.
5. MACHINE TRANSPORT and LIFTING
The machine is equipped with 2 main wheels when running; to transfer you must use tilt the machine backwards
using the rear support.
Transporting and any lifting must take place with the machine on a pallet.
It is recommended to empty the recovery and the solution tanks before tilting or handling the machine.
WARNING

MINI 1240 Owner's Manual
Translation of the original instructions
Revisione 0.0 14
UK
6. INTENDED USE OF THE MACHINE (Washing and drying phase)
MINI 1240 is a walk-behind battery-powered Scrubber-Drying machine for washing and drying hard floors
intended for commercial use.
The machine applies a cleaning solution from its tank to the floor; a tube brings it to the brush plate, with
manually adjustable flow rate with lever selector; it scrubs the floor by means of the combined action of two
counter-rotating brushes and then sucks the dirty water into the recovery tank.
It is also possible to spray the floor with water, using only the brushes for scrubbing and cleaning, but without
drying.
When the floor is already wet, you can turn off the supply of the solution and carry out additional steps to
completely clean and dry the floor.
The MINI 1240 machine is not intended to carry out any other operations
Any other operation is therefore to be considered misuse.
7. INTENDED USE OF THE MACHINE (machine being moved without washing or drying)
MINI can be moved without the brush plate having to be lowered and the brushes in contact with the floor, nor
with the drying turbine on. This can happen when moving from one room to another, at the end of the cleaning
phase or for other reasons. Simply use the rear support (1) positioned on the back of the machine for easy
movement.
8. REASONABLY FORESEEABLE MISUSE OF THE MACHINE
The machine is not intended for outdoor use.
Do not wash and vacuum corrosive, flammable, explosive liquids even if diluted.
It is absolutely forbidden to use the machine in environments with risk of explosion where there are gases,
vapours, liquids and flammable and explosive dusts.
Do not wash floors with water above 50°C;
Do not use diesel/petrol or corrosive detergents for washing floors;
1
WARNING
FOR SAFETY:

MINI 1240 Owner's Manual
Translation of the original instructions
Revision 0.0 15
UK
The machine is designed to work on flat surfaces and gentle slopes.
The maximum slope allowed, which can be driven uphill both during the work phase and during the transfer
phase, is 2%.
Use the machine in reverse to go down a slope.
Going down the slope in the normal working direction can lead to dangerous slipping or long breaking distance
due to surface conditions (wet, uneven or material with low friction); this is even more evident and risky if
moving the machine with the brush plate lifted from the floor.
9. SUPPLIED KIT
Besides this instruction manual and the battery charger, no other equipment is supplied.
10. INSTALLATION
Preliminary operations
The machine is shipped fully assembled and packed on a pallet
You must use a suitable ramp to move the machine from the pallet to the ground. Do not push the machine off the
pallet without a suitable ramp.
Alternatively, it can be lifted and put on the floor by at least 2 people at the same time, using the tank part as
gripping point (rigid part).
Before use perform the following operations:
1. Carry out a preliminary inspection to identify any problems that could cause malfunctions or breakdowns.
Visually check that there is no external damage, leaks and that the wheels are not damaged.
4. Check that the drain hose, the relative cap, the pipe coming from the squeegee are installed correctly.
5. Check the condition of the battery and recharge it if necessary.
In the event of damage, anomalies or defects, do not use the machine and contact your Dealer.
WARNING

MINI 1240 Owner's Manual
Translation of the original instructions
Revisione 0.0 16
UK
11. MACHINE PREPARATION AND COMMISSIONING
11.1 Machine start-up
NOTE: Carry out a preliminary inspection before operating the machine.
Before starting the machine, make sure that the emergency on the back of the machine is not pressed.
Before leaving the machine unattended or performing any maintenance, make sure it is on a flat surface and turn
off the machine.
1. The solution tank can be filled up to the maximum filling capacity (12 litres), paying attention to the level
shown on the gauge located on the side of the tank, under the water loading inlet.
2. It is advisable to fill the solution tank, pouring the filling water into the appropriate housing, equipped with a
blue filter (dirt filter)
Leave enough space for the detergent.
The water temperature must not exceed 50°C, so as to avoid damaging the tank.
Measure the amount of chemical in the solution tank after filling with water. Before adding non-liquid chemicals
to the solution tank, it is necessary to dissolve them completely.
11.2 Filling the machine
FOR SAFETY:
FOR SAFETY:

MINI 1240 Owner's Manual
Translation of the original instructions
Revision 0.0 17
UK
12. USE OF THE MACHINE
12.1 Floor washing and drying
Plan the washing and drying route in advance. The longest route is that which follows the perimeter of the area
to be treated. The ideal route is that with the fewest turns, stops or lifting and lowering of the brush plate (for
manoeuvring).
Sweep the area to be cleaned well for best results. Remove large debris, ropes, straps and cables to prevent
them from coming into contact with the brushes or squeegee.
12.2 Start of washing and drying
When using the machine with people around, pay close attention to
unexpected movements. Pay extra attention with children nearby.
•Turn the start key
•Press the brush start switch on the control panel. The brush motor is ready to start in ECO mode. The brushes
will only start to turn when the operator presses the red lever (1) behind the control handle.
•Press the suction button. The suction motor operates only when the operator presses the red lever (1) located
behind the control handle.
•Select the solution flow rate
NOTE: The rotation of the brushes and the flow of the solution automatically stops when the operator removes
their hands from the handle. When the activation buttons are pressed again, the brush movement and flow
resume automatically.
12.3 Double washing and single drying
Particularly dirty floors may not be clean enough passing only once. In such cases you will need to pass twice with
the brushes.
For double washing, first pass with the squeegee lifted, manually lifting it and locking it with magnets.
In this way the solution is in contact with the floor while the brushes work on removing the dirt. Allow a
reasonable amount of time for the solution to remain in contact with the floor. The time between the first and
second passing with the machine depends on the amount of dirt and the type of chemical used.
Passing a second time with the squeegee and brushes lowered and the activated solution will help to further
remove the layer of dirt. Adding further solution will help remove stubborn dirt.
1

MINI 1240 Owner's Manual
Translation of the original instructions
Revisione 0.0 18
UK
12.4 Emptying and cleaning the recovery tank
1. Place the machine near a drainage system on the floor drain. The drain hose (1) is located to the rear area of
the machine.
2. Remove the drain hose from the hook. Open the cap and lower the drain hose in the direction of the
drainage system on the floor. Remove the cap from the drain hose slowly.
3. Open the tank top lid.
4. Wash the recovery tank with clean water. Wash until clean water comes out of the drain hose. Do not use
water above 50°C, as it may damage the tank.
5. Reposition the cap and drain hose.
6. If the machine is to be left unused for a long period, do not close the recovery tank top lid and the drain hose
cap, so as to allow air to circulate inside it.
12.5 Emptying and cleaning the solution tank
1. Place the machine near a drainage system on the floor. Activate the emptying button, located on the control
panel (it activates by holding down the water supply button for 5 seconds). In this way, the water will come out in
the centre of the brush plate. Alternatively, you can unscrew the water filter.
2. Wash the tank with clean water and feed the clean water into the system, until the tank capacity is reached.
Do not use water above 50°Cto clean the tank as this may get damaged.
NOTE: Never leave the solution inside the tank as the detergent tends to precipitate and create deposits that can
clog the ducts, filter and solenoid valve.
1

MINI 1240 Owner's Manual
Translation of the original instructions
Revision 0.0 19
UK
1
1
2
3
4
13. CONTROL STATION
13.1 CONTROL STATION
1. Start-up commands
2. Display
3. Solenoid valve solution button
4. Brush button
5. Suction button
6. Start Key –Emergency pushbutton
5
13.1.1 Key switch (6)
There is a key on the emergency mushroom-shaped button to be disconnected after activating the emergency for
the machine lock.
13.1.2 Brush rotation activation button (4)
This switch controls the rotation of the brushes. To start the rotation, press the button and press the rear red lever
to activate the rotation. Select the desired speed (E1 –low rotation; E2 –high rotation)
13.1.3 Suction activation button (5)
This button controls the activation of the suction. To start it, press the button and press the rear red lever. When
the red lever is released, the motor will go at maximum power for a few seconds.
13.1.4 Solution dispensing on/off switch (3)
Allows the desired water dispensing onto the brush plate
Hold down the button for 5 seconds to discharge all the solution tank water onto the brush plate. This allows the
solution tank to be fully emptied (to be performed in a special drain). If the operator forgets to stop this command,
it will automatically stop after 10 minutes.
13.1.5 Battery charge status indicator (2)
The LED display indicates battery charge level.
Charge the batteries making sure you have used the machine for at least 60 minutes since the last charge, to avoid
damaging the charging cycles. Pay attention to the battery charging operation, as explained in the relevant paragraph.
13.1.6 Counter (2)
The display indicates the machine operating hours since control unit activation when the scrubber-dryer was being built.
The counter activates at the start of the brush rotation and deactivates when the brushes stop. Therefore, only the
actual working hours of the machine are counted.
6
FOR SAFETY:

MINI 1240 Owner's Manual
Translation of the original instructions
Revisione 0.0 20
UK
13.2 CHECKS
We recommend cleaning the squeegee after each work cycle: remove it from the connection by unscrewing the
locking knobs, unhook the pipe and clean under running water.
Cleaning the water filter: it is positioned at the rear. Close the valve, unscrew the cap and clean the internal
mesh. Reassemble everything after cleaning.
13.2.1 Battery charger connector socket
It is placed directly on the steering column of the handle
13.3 BATTERIES
The batteries provide the power to operate the machine. In order to ensure that the batteries always perform at
their best, it is necessary to carry out some maintenance operations regularly.
The lithium-ion battery used is sealed and presents no hazards of any kind if used in accordance with the
requirements indicated in the technical specifications.
The material contained in this battery may represent a hazard only if the integrity of the battery itself is
compromised or if it has been mechanically, thermally or electrically tampered with.
Caution: Do not open or disassemble the battery, do not expose it to naked flames. Do not short-circuit,
puncture, burn, break, overload, over-discharge or expose the battery to temperatures above those indicated. In
such cases there is a risk of explosion, fire or the release of unpleasant odours and fumes.
Table of contents
Other KlinMak Scrubber manuals