LIMPIEZA Y MANTENIMIENTO
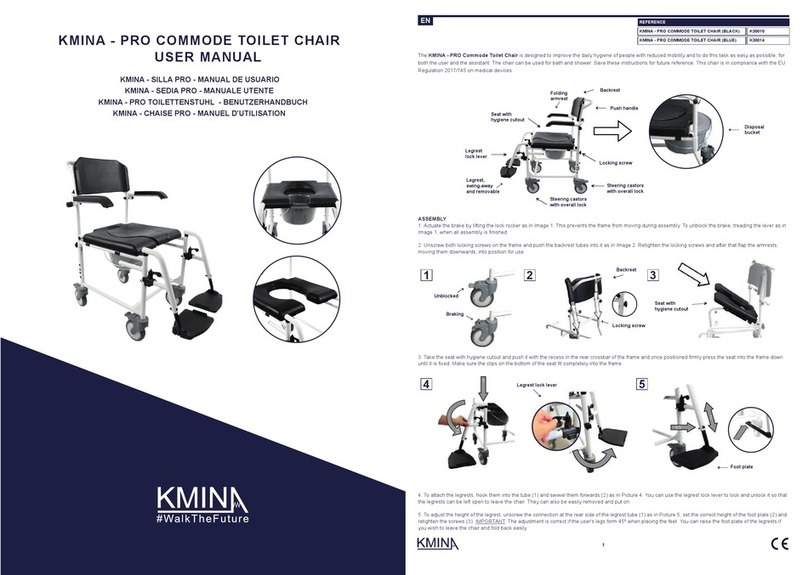
■ Limpiar regularmente a mano con un paño húmedo. No utilizar productos abrasivos para su limpieza ni enjuagar con agua.
■ Desinfecte el producto limpiando todas las superficies accesibles con desinfectante (después de desmontarlo, si es posible).
Todos los productos de limpieza empleados deben ser eficaces, compatibles entre sí y proteger los materiales que van a limpiar.
■ Si la estructura va a utilizarse por varias personas, debe desinfectarse en cada uso.
■ Para desinfección en medios hospitalarios, atenerse a las instrucciones de un especialista en higiene.
GARANTÍA
KMINA garantiza que este dispositivo está libre de defectos. La garantía permanecerá vigente durante 3 años desde la fecha
de compra original del consumidor. La garantía no se extiende a piezas expuestas a un desgaste natural que requieran un
reemplazo periódico. Esta garantía no cubre:
- Piezas de repuesto suministradas por cualquiera que no sea KMINA o el distribuidor autorizado.
- Cualquier fallo de la unidad durante el período de garantía que no sea causado por un defecto del material o la mano de obra
o si el fallo es causado por un mal uso.
- KMINA no es responsable de daños accidentales o daños a la propiedad.
MATERIALIEN
Gestell, Armlehnen und Endkappen: ABS-Kunststoff.
Beine und Griffe: rostfreier Stahl.
Griffe: Gummi.
WARNUNGEN
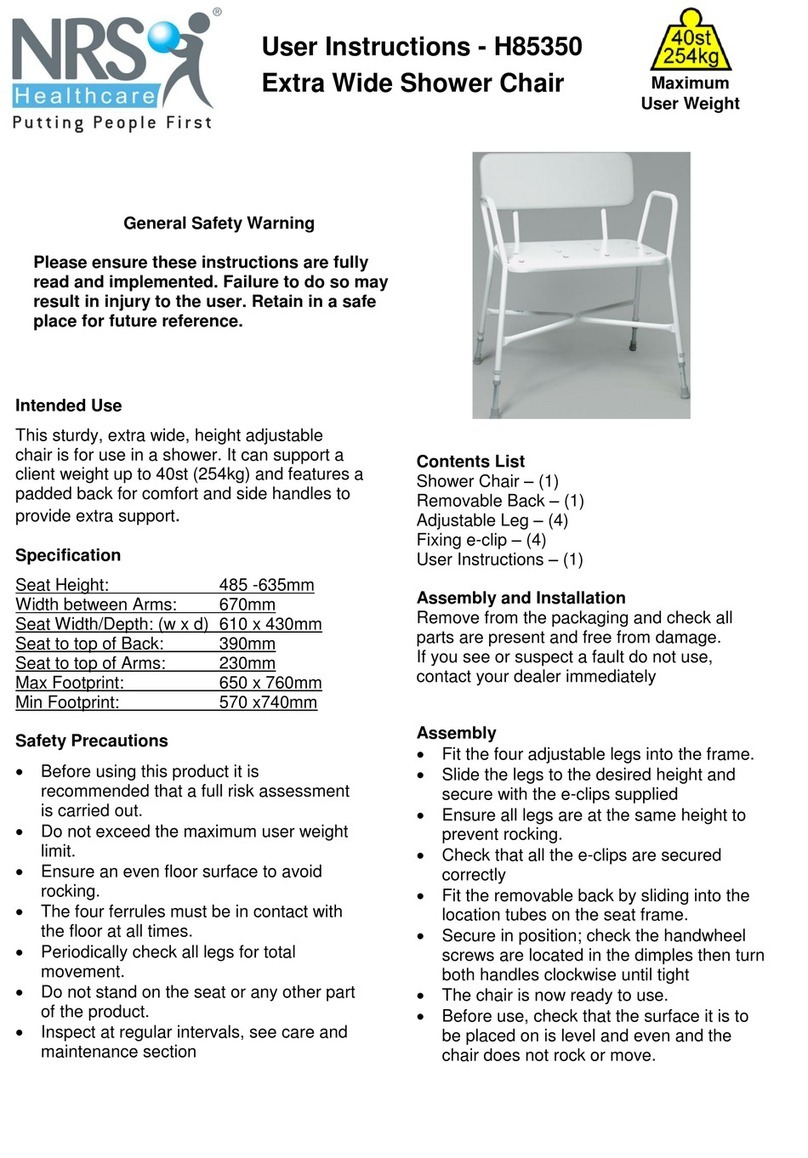
■ Lesen Sie die Anleitung vor dem Einbau sorgfältig durch.
■ Benutzer mit eingeschränkten körperlichen Fähigkeiten müssen bei der Benutzung des Geräts beaufsichtigt oder
unterstützt werden.
■ Überschreiten Sie nicht das maximale Gewicht des Geräts, das 150 kg beträgt.
■ Die Griffe sind als Stütze zum Stehen und/oder Sitzen gedacht, wobei beide Griffe gleichzeitig verwendet werden.
Belasten Sie nicht nur einen der Griffe mit Ihrem gesamten Körpergewicht.
■ Stellen Sie sich nicht auf dieses Produkt. Es handelt sich nicht um eine Kletterhilfe.
■ Belasten Sie nicht 100 % Ihres Körpergewichts auf nur einer Armlehne, sondern nur die Hälfte Ihres Körpergewichts auf
jeder Armlehne. Wenn die Armlehne überlastet wird, kann sie brechen.
■ Prüfen Sie vor der Benutzung, ob alle Teile richtig zusammengesetzt und verschraubt sind.
■ Von Wärmequellen fernhalten.
■ Jeder schwerwiegende Zwischenfall mit dem Produkt ist dem Hersteller und der zuständigen Behörde des Mitgliedstaats,
in dem der Anwender und der Patient ansässig sind, zu melden.
REINIGUNG UND WARTUNG
■ Regelmäßig von Hand mit einem feuchten Tuch reinigen. Verwenden Sie keine scheuernden Reinigungsmittel und
spülen Sie nicht mit Wasser nach.
■ Desinfizieren Sie das Produkt, indem Sie alle zugänglichen Oberflächen mit einem Desinfektionsmittel abwischen
(möglichst nach der Demontage). Alle verwendeten Reinigungsmittel müssen wirksam sein, sich untereinander vertragen
und die zu reinigenden Materialien schützen.
■ Wenn die Struktur von mehreren Personen benutzt wird, muss sie bei jeder Benutzung desinfiziert werden.
■ Für die Desinfektion in Krankenhausumgebungen befolgen Sie die Anweisungen eines Hygienespezialisten.
GARANTIE
KMINA garantiert, dass dieses Gerät frei von Mängeln ist. Die Garantie gilt für 3 Jahre ab dem Datum des ursprünglichen
Kaufs durch den Verbraucher. Die Garantie erstreckt sich nicht auf Teile, die einem natürlichen Verschleiß unterliegen und
regelmäßig ersetzt werden müssen. Diese Garantie gilt nicht für:
- Ersatzteile, die nicht von KMINA oder einem Vertragshändler geliefert wurden.
- Jeder Ausfall des Geräts während der Garantiezeit, der nicht auf einen Material- oder Verarbeitungsfehler zurückzuführen
ist, oder wenn der Ausfall durch unsachgemäßen Gebrauch verursacht wurde.
- KMINA haftet nicht für zufällige Schäden oder Schäden am Eigentum.
9
K30022
DE
KMINA PRO - TOILETTENGESTELL
REFERENZEN
MATÉRIAUX
Cadre, accoudoirs et embouts : plastique ABS.
Pieds et poignées : acier inoxydable.
Poignées : caoutchouc.
AVERTISSEMENTS
■ Lisez attentivement les instructions avant l'installation.
■ Les utilisateurs aux capacités physiques limitées doivent être surveillés ou assistés lors de l'utilisation de l'appareil.
■ Ne pas dépasser le poids maximal supporté par l'appareil, qui est de 150 kg.
K30022
FR
KMINA PRO - CADDRE DES TOILETTES
REFÉRÉNCE
■ Les poignées sont destinées à être utilisées comme support pour se tenir debout et/ou s'asseoir, en utilisant les deux
poignées en même temps. Ne mettez pas tout le poids de votre corps sur une seule des poignées.
■ Ne vous tenez pas debout sur ce produit. Il ne s'agit pas d'une aide à l'escalade.
■ Ne mettez pas 100% de votre poids sur un seul accoudoir, utilisez seulement la moitié de votre poids corporel sur chaque
accoudoir. Si l'accoudoir est surchargé, il peut se briser.
■ Vérifier que tous les composants sont correctement assemblés et vissés avant utilisation.
■ Tenir à l'écart des sources de chaleur.
■ Tout incident grave impliquant le produit doit être signalé au fabricant et à l'autorité compétente de l'État membre où sont
établis l'utilisateur et le patient.
NETTOYAGE ET ENTRETIEN
■ Nettoyez régulièrement à la main avec un chiffon humide. N'utilisez pas de produits de nettoyage abrasifs et ne rincez
pas à l'eau.
■ Désinfectez le produit en essuyant toutes les surfaces accessibles avec un désinfectant (après le démontage, si
possible). Tous les produits de nettoyage utilisés doivent être efficaces, compatibles entre eux et protéger les matériaux à
nettoyer.
■ Si la structure doit être utilisée par plusieurs personnes, elle doit être désinfectée à chaque utilisation.
■ Pour la désinfection en milieu hospitalier, suivez les instructions d'un spécialiste de l'hygiène.
GARANTIE
KMINA garantit que cet appareil est exempt de défauts. La garantie est valable pendant 3 ans à compter de la date d'achat
initial par le consommateur. La garantie ne s'étend pas aux pièces exposées à l'usure naturelle qui nécessitent un
remplacement périodique. Cette garantie ne couvre pas :
- Les pièces de rechange fournies par toute personne autre que KMINA ou le concessionnaire agréé.
- Toute défaillance de l'appareil pendant la période de garantie qui n'est pas causée par un défaut de matériau ou de
fabrication ou si la défaillance est causée par une mauvaise utilisation.
- KMINA n'est pas responsable des dommages accidentels ou des dommages matériels.


