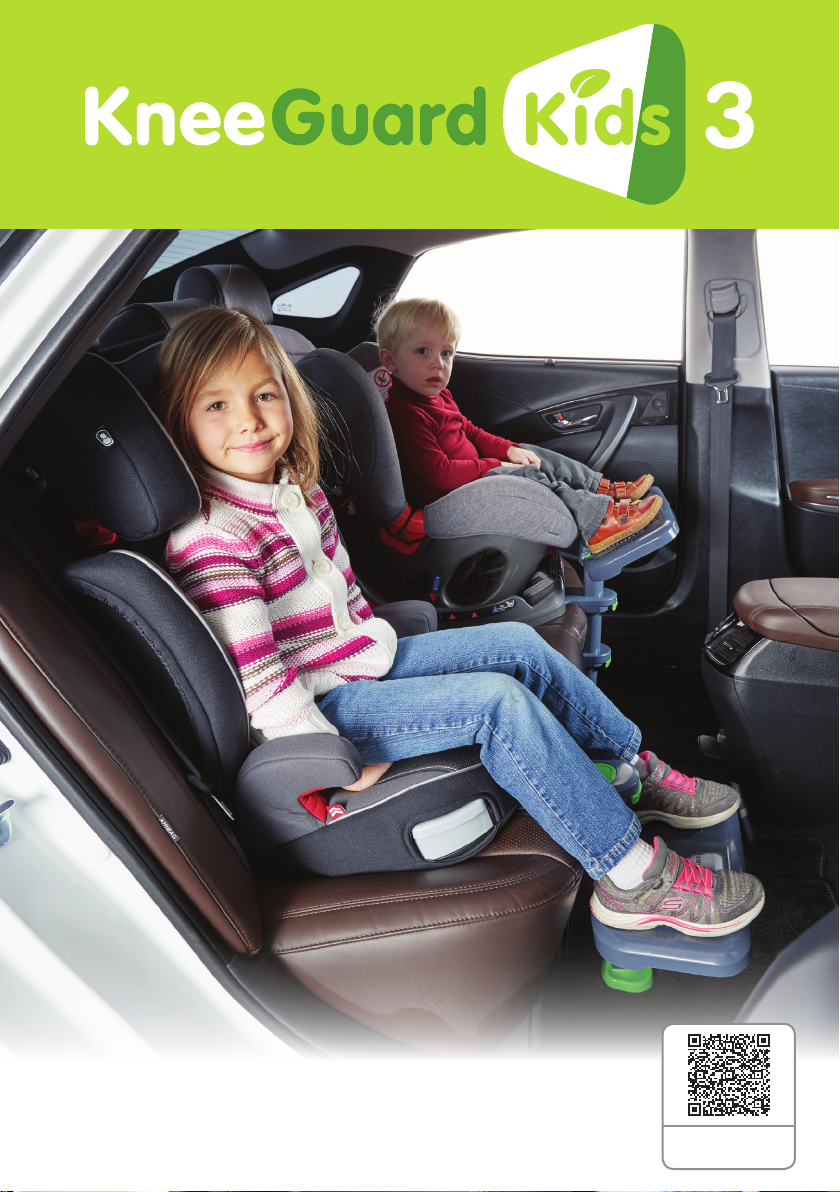
EN
Installing method
Cars with ISOFIX (install with ISOFIX Hooks)
Cars without ISOFIX (install with Clips)
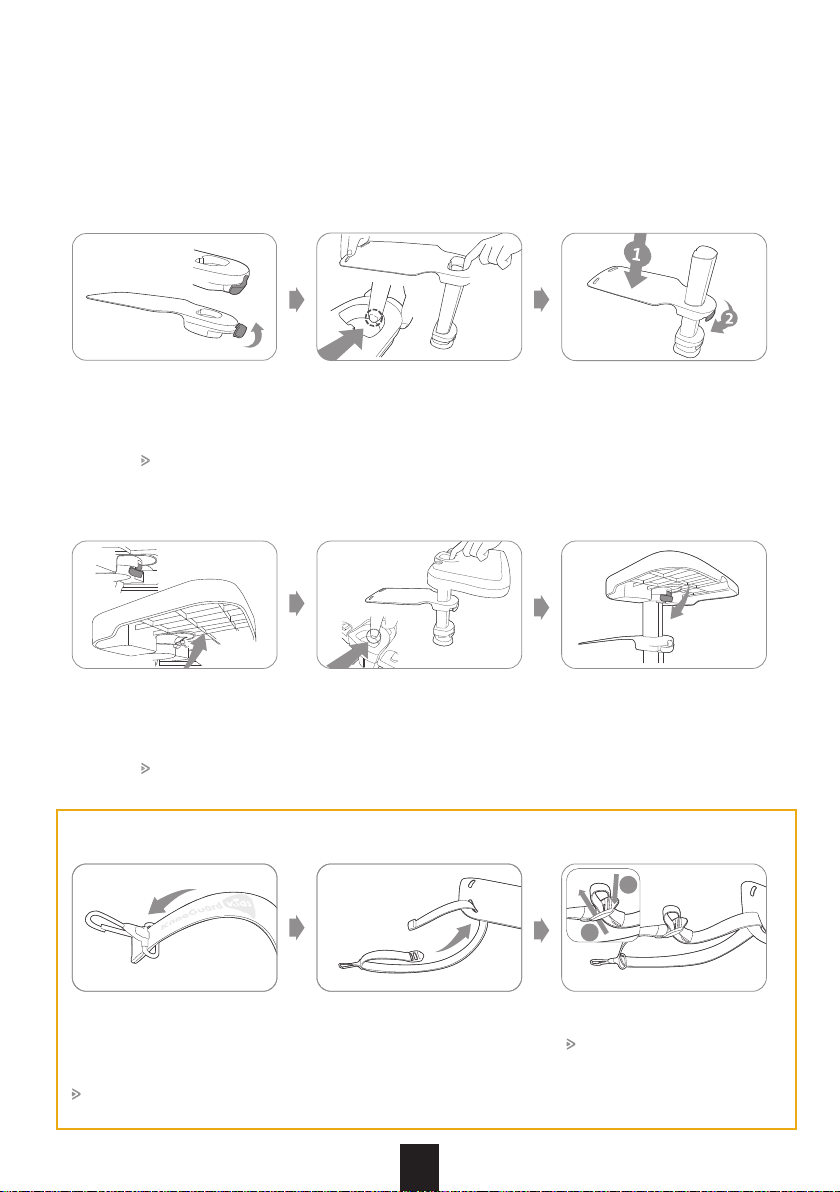
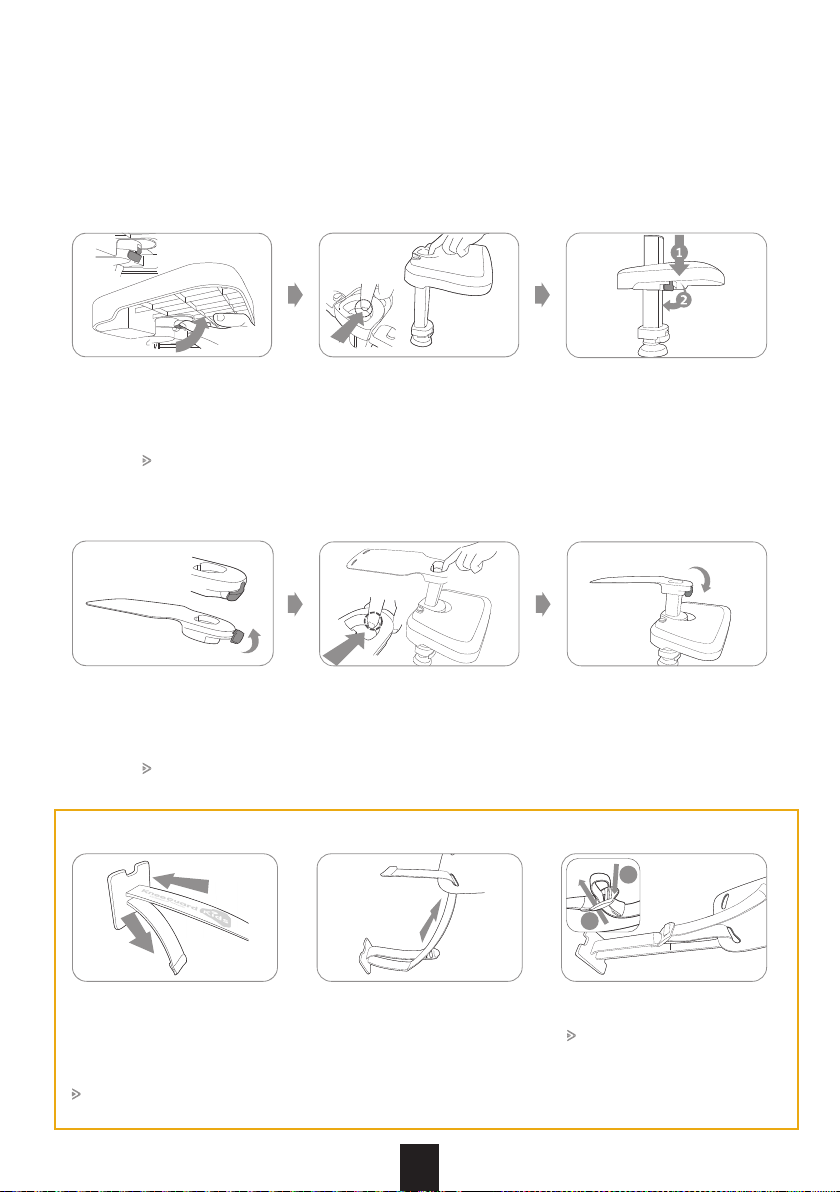
Hang the ISOFIX Hooks from
top to bottom on the ISOFIX
LATCH.
Insert your hand in the gap
(seat bight) between the cush-
ion and the back of the vehicle
seat to check if there is enough
room for the Installing Clips.
( Safety rst, make sure your
hand is safe.)
Place the Height Control Bar
close to the vehicle seat and
then fasten the Belts.
( If the Height Control Bar is
not rmly contacted to the ve-
hicle seat, the Foot Plate may
shake.)
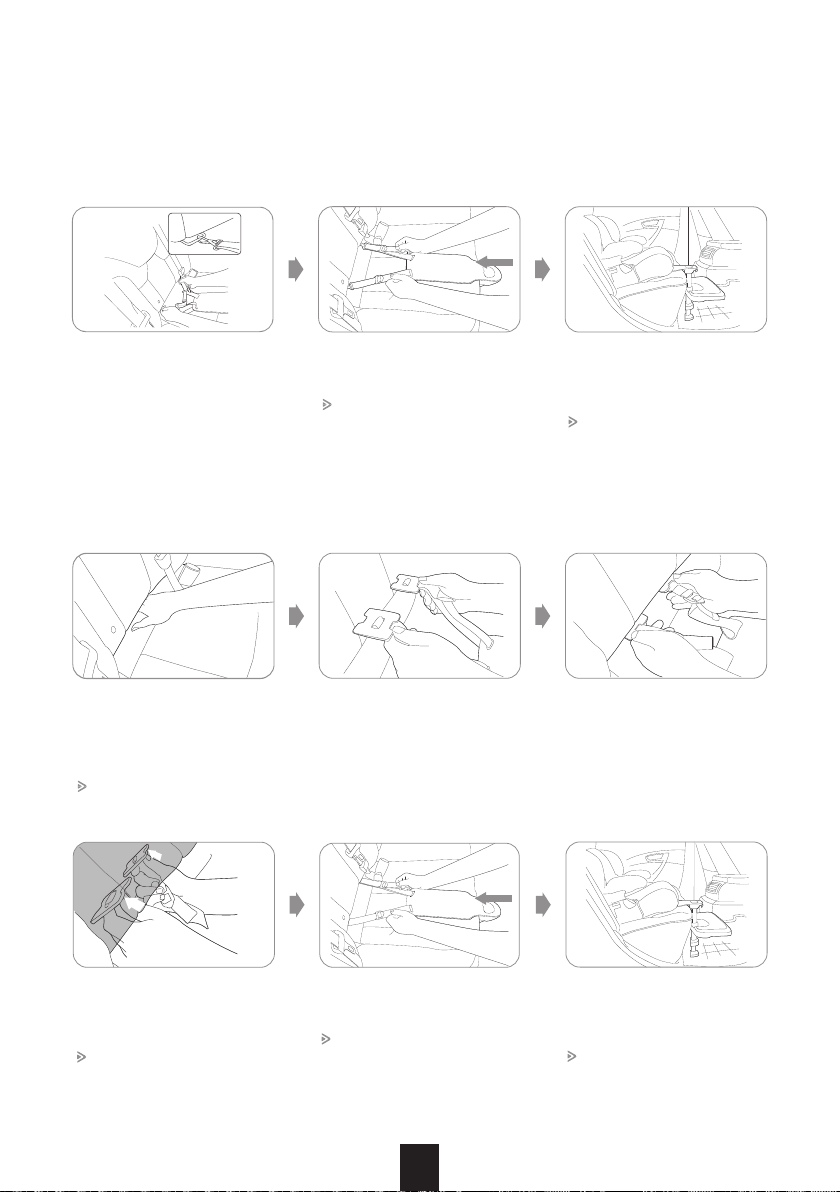
Hold the Installing Clips hori-
zontally facing upside.
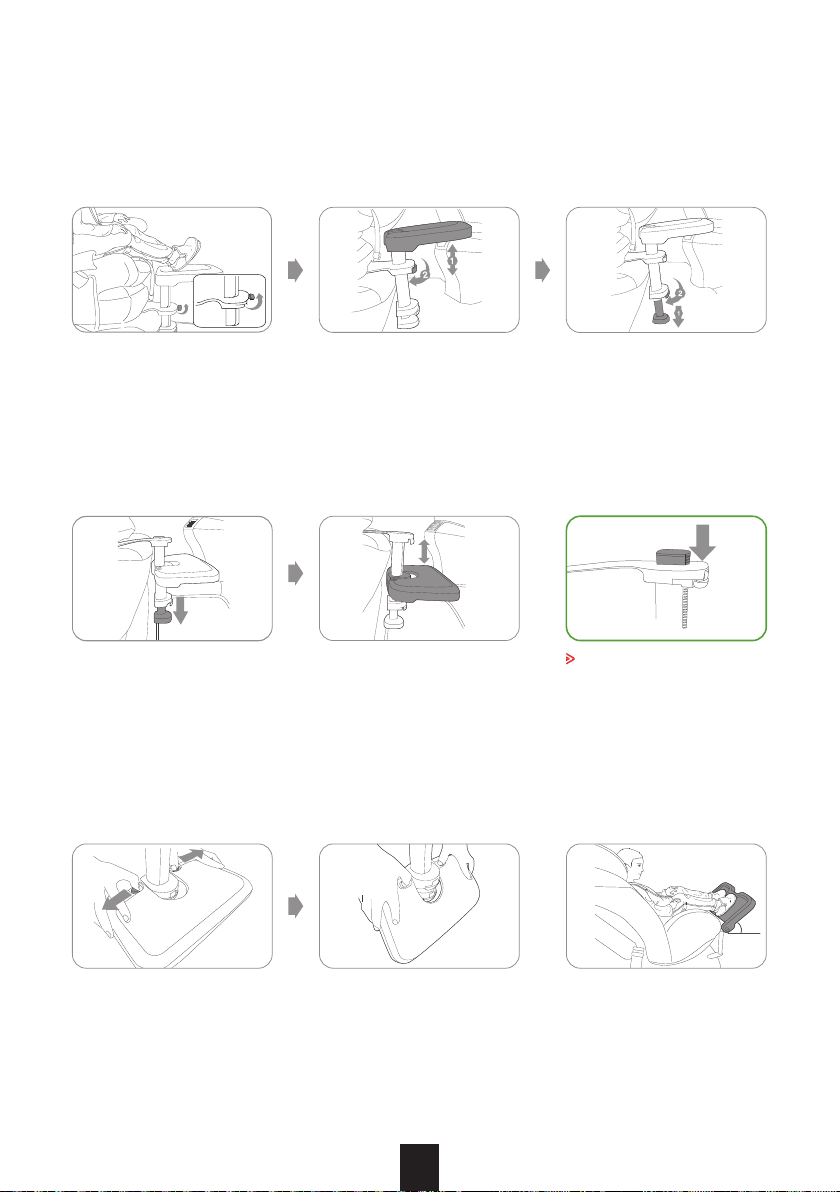
After install the car seat on the
Installing Plate, adjust height of
the Foot Plate and the Load Leg
for the comfort level of your kid.
( Please refer to page 15 for
a detailed height adjustment
method)
Insert the Installing Clips into
the gap as shown while keeping
its face downward.
Push the Installing Clips hori-
zontally all the way and then
push and stand the Clips ver-
tically.
( If you cannot stand the Clips
vertically, push the Installing
Clips further downward.)
Place the Height Control Bar
close to the vehicle seat and
then fasten the Belts.
( If the Height Control Bar is not
rmly contacted to the vehicle
seat, the Foot Plate may shake.)
After install the car seat on the
Installing Plate, adjust height of
the Foot Plate and the Load Leg
for the comfort level of your kid.
(Please refer to page 15 for
a detailed height adjustment
method.)
14
as close
as possible
as close
as possible