Kobian CyperPix E585D User manual

Preface
Congratulations on your purchase of this advanced digital
cam-era and MP3 player. Ensure that you read this manual
carefully and keep it in a safe place for future reference.
About this manual
Every effort has been made to ensure that the contents of
this manual are correct and up to date.However, no guarantee
is made regarding the accuracy of the contents, and the manufac-
turer reserves the right to make changes without notice.
Copyright
© Copyright 2005.
All rights reserved. No part of this publication may be
repro-duced, transmitted, transcribed, stored in a retrieval
system or translated into any language or computer language,
in anyform or by any means, electronic, mechanical, magnetic,
opti-cal, chemical, manual or otherwise, without the prior
writtenpermission of the manufacturer.
i
Preface

Safety
‧Do not attempt to recharge non-rechargeable batteries.
‧When using AA type batteries in this product, ensure that
they are inserted correctly. Inserting the batteries upside
down can cause damage to the product and possibly start
a fire.
‧Do not use or store the product in dusty, dirty, or sandy
areas, as its components may be damaged.
‧Do not store the product in hot areas. High temperatures
can shorten the life of electronic devices, damage batteries
and warp or melt certain plastics.
‧Do not store the product in cold areas. When the product
warms up to its normal temperature, moisture can form
inside, which may damage the electronic circuits.
‧Do not attempt to open the casing.
‧Do not drop or knock the product. Rough handing may
damage the internal components.
‧Do not use harsh chemicals, cleaning solvents or strong
detergents to clean the product. Wipe the product with a
soft cloth slightly dampened.
‧If the product or any of its accessories are not working
properly, take them to your nearest qualified service cen-
ter. The personnel there will assist you, and if necessary,
arrange for the product to be repaired.
i i
Preface

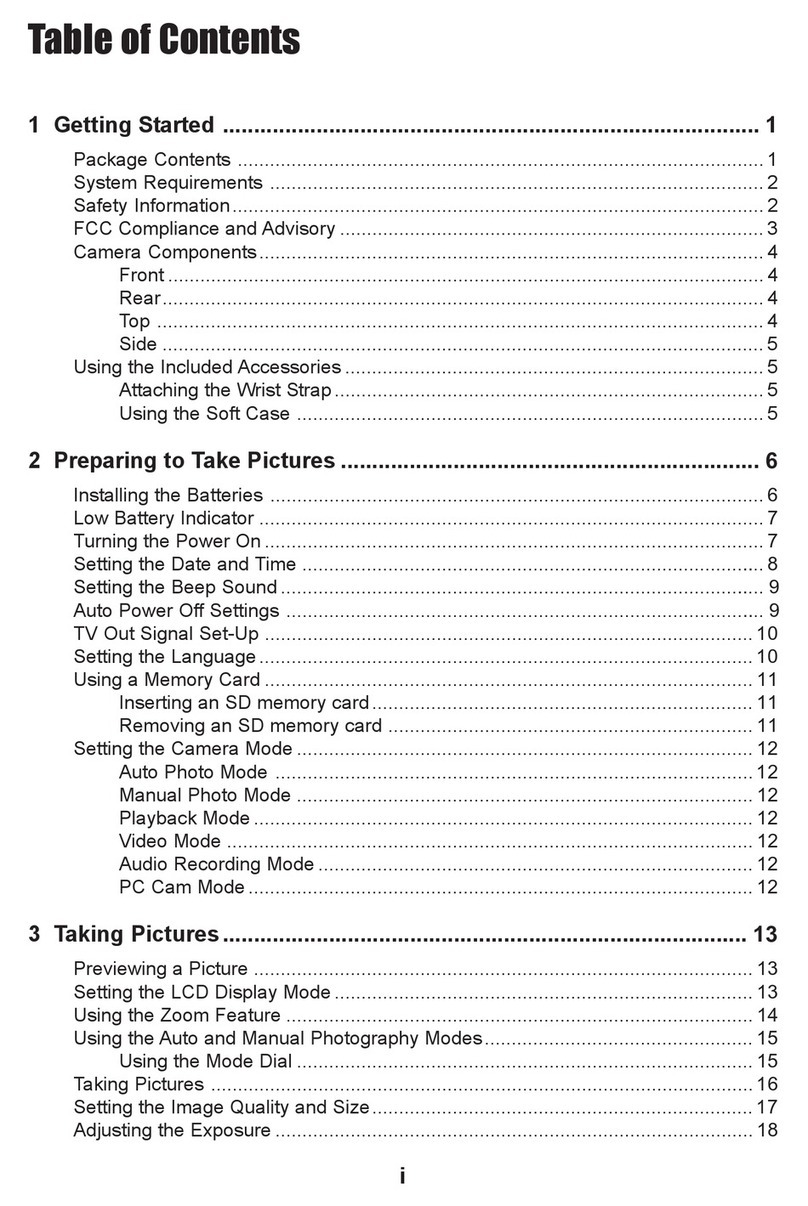
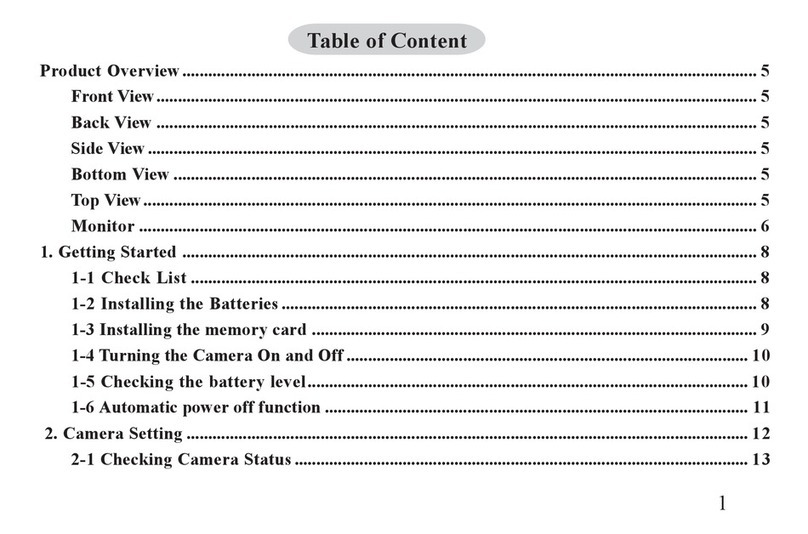
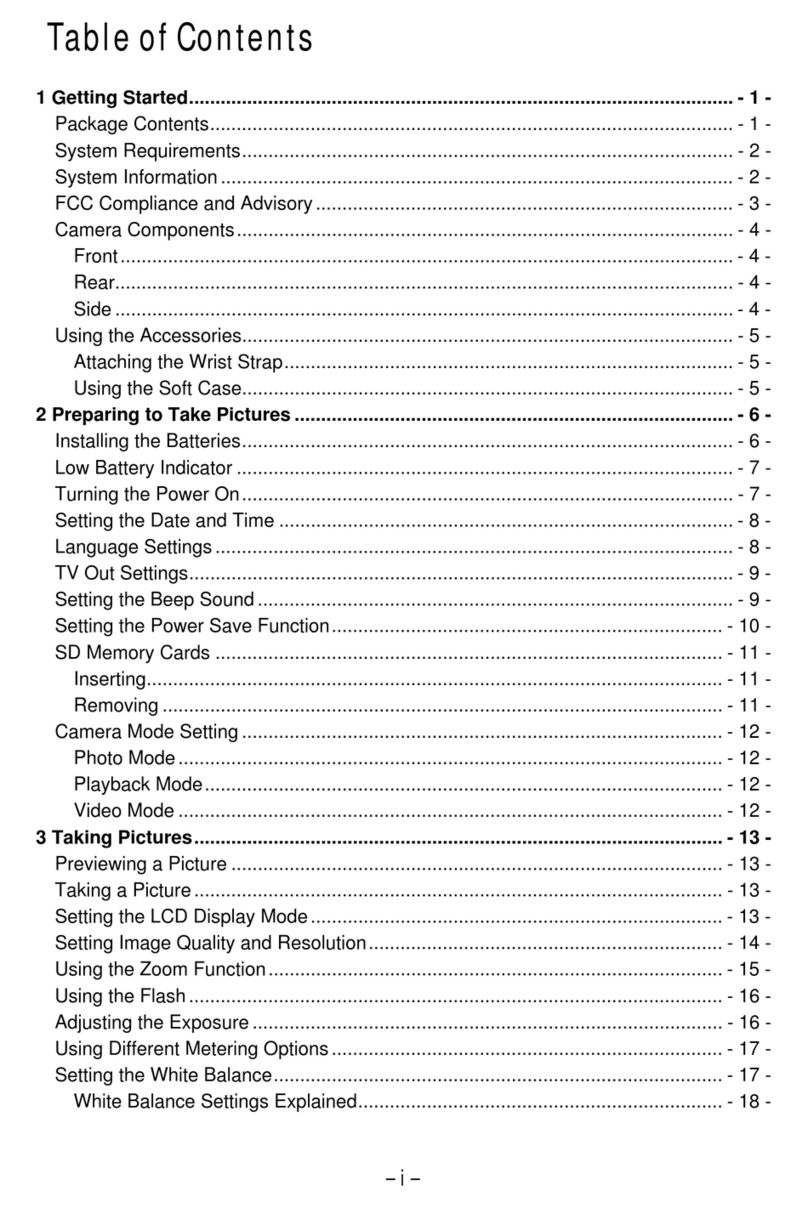
Table of contents
Preface
About this manual ............................................................i
Copyright ..........................................................................i
Safety ............................................................................ii
Introducing the camera
System requirements .........................................................1
Features .............................................................................1
Unpacking .........................................................................2
About the camera ..............................................................3
Front view .....................................................................3
Back view ......................................................................4
Top view ........................................................................4
Getting started
Inserting the battery ............................................................5
Inserting an SD card ............................................................6
Turning on for the first time ..............................................7
Before you start .................................................................8
Setting the date and time ...............................................8
Setting the date type ......................................................9
Setting the beep function .............................................10
Setting the language .....................................................11
Changing modes ..........................................................12
Taking your first still picture .......................................13
Shooting your first video .............................................13
Connecting ...................................................................14
Connecting to a TV ......................................................14
iii

Connecting to a computer ...............................................15
Connecting the earphones ...............................................15
Using the camera
Using the camera buttons ...............................................16
Using the camera LCD display ......................................18
Changing the LCD display..........................................18
About the LEDs ..............................................................19
Photo mode .....................................................................20
Photo mode icons ........................................................20
Setting the flash ...........................................................22
Using the macro function ............................................23
Using the zoom function .............................................24
Capture mode and self timer function .........................24
Video and voice recorder mode .......................................25
Video mode icons ........................................................26
Using the zoom function ..............................................27
Using the macro function .............................................27
Playback mode .................................................................28
Playback mode icons ...................................................28
Viewing pictures and videos ........................................29
Playing voice files ........................................................30
Displaying file information ..........................................30
Using thumbnail mode .................................................31
Viewing a slide show ...................................................31
MP3 mode ........................................................................32
MP3 mode icons ..........................................................32
Playing MP3s ...............................................................33
USB mode ........................................................................34
Connecting to a PC ......................................................34
iv
Connecting to a printer ............................................34
Connecting to a TV ......................................................34
Using the setup menus
Picture menu ................................................................35
Camera mode ...........................................................35
Image size ................................................................36
Scene ........................................................................36
Color ........................................................................37
Quality .....................................................................37
White balance ..........................................................38
Focus selection ........................................................38
Exposure adjustment (EV) ......................................39
ISO adjustment ........................................................39
Metering ..................................................................40
Date stamp ...............................................................41
Video menu ..................................................................41
Video and voice recorder mode ...............................41
Video quality ...........................................................42
Playback menu ............................................................42
Delete ......................................................................42
Protect .....................................................................43
Slide show delay .....................................................44
Copy to card ...........................................................44
DPOF .....................................................................44
Setup menu ................................................................45
Date and time .........................................................45
Date type ................................................................45
Number reset ..........................................................45
v

Beep ......................................................................46
Language ..............................................................46
Power saving ........................................................46
Default ..................................................................46
Format ...................................................................47
USB mode .............................................................47
TV .........................................................................47
Installing the software and drivers
Drivers ......................................................................49
Presto! Video Works 6 ..............................................50
Presto! Mr. Photo 3 ...................................................55
Appendix
Specifications .............................................................58
vi

1. Introducing the camera
Read this section to learn about the features and functions
of the camera. This chapter also covers system requirements,
package contents, and front and rear views.
1.1 System requirements
The camera requires a host PC with the following specifica-
tions:
‧Windows® XP, 2000, ME, 98SE operating system
‧Intel® Pentium 166 MHz CPU or better
‧At least 32 MB of RAM
‧Standard USB 1.1 port or better
‧4 x speed CD-ROM drive or better
‧At least 10 MB of available disk space
Note: A USB 1.1 port will enable you to transfer files to and
from your host PC, but transfer speeds will be much
faster with a USB 2.0 port.
1.2 Features
The camera is packed full of features and functions including:
‧Digital still camera (5.1 megapixels)
‧Digital camcorder
‧Mass storage device
‧MP3 player
‧Voice recorder
Additionally, the camera also features 3X optical zoom, 4X
digi-tal zoom, and a direct print function.
1
System requirements

1.3 Unpacking
All the following items should be present in the camera
pack-age. If any item is missing or appears damaged,
contact your dealer immediately.
2
Unpackingee
Digital camera Earphones
Wrist strap Camera pouch
Alkaline USB/TV-out
AAbatteriesx2 cable

1.4 About the camera
Refer to the following diagrams to familiarize yourself with
thebuttons and controls of the camera.
1.4.1 Front view
3
CD-ROM (driver and User’s manual
a
pp
lication software
)
About the camera

1.4.2 Back view
Note: Refer to “About the LEDs” on 3.3 for
informa-tion on the camera’s LEDs.
1.4.3 Top view
4
About the camera

2. Getting started
Read this section to learn how to start using the camera.
This section covers only basic functions. See later chapters
for details about advanced functions.
2.1 Inserting the battery
The camera can use either standard AA alkaline batteries
or a CR-V3 3V lithium battery.
Note: Install the battery exactly as described here. Ensure
that the polarity of the batteries is correct. Installing
the batteries incorrectly could cause damage to the
camera and possibly start a fire.
1. Open the battery door.
2. Insert the battery as shown.
5
Inserting the battery

3. Close the battery door.
Note: The pictures here show a CR V3 type lithium
battery. The camera can also use 2 AA alkaline type
batteries. Ensure that the batteries are inserted the right
way. Batteries inserted upside down can damage the
product and cause a fire.
2.2 Inserting an SD card
An SD/MMC card can be installed in the camera to provide
additional storage space for still images, videos, MP3, or
other files.
To install an SD card:
1. Open the battery door.
6
Inserting an SD card

2. Insert an SD card as shown.
Make sure the gold contacts are facing up as shown.
3. Close the battery door.
2.3 Turning on for the first time
Press and hold the power button to turn it on.
7
Turning on for the first time

2.4 Before you start
Before you use your camera there are some basic settings
to configure.
2.4.1 Setting the date and time
To set the date and time:
1. Turn the camera on as described in “Turning on for the
first time” on 2.3 .
2. Press the menu button to
display the menu screen.
3. Use the joystick to select the
tools menu.
4. Use the joystick to highlight
the date and time option.
Press the joystick when the
option is highlighted.
8
Before you star
t

5. Move the joystick left and right to move between fields
and move joystick up and down to alter values in the
selected field.
6. Press the joystick button to save the new setting.
7. Press the menu button to leave the menu.
2.4.2 Setting the date type
To set the date type:
1. Turn the camera on as described in “Turning on for the
first time” on 2.3.
2. Press the menu button to
display the menu screen.
3. Use the joystick to select
the tools menu.
9
Before you start

4. Use the joystick to highlight
thedatetypeoption.
5. Use the joystick to select the date type, YMD, MDY, DMY.
6. Press the menu button to leave the menu and save the set-
ting.
2.4.3 Setting the beep function
To set the beep function:
1. Turn the camera on as described in “Turning on for the
first time” on 2.3.
2. Press the menu button to
display the menu screen.
3. Use the joystick to select the
tools menu.
10
Before you star
t

4. Use the joystick to highlight
thebeepoption.Pressthe
joystick when the option is
highlighted.
5. Press the menu button to
leave the menu and save
the setting.
2.4.4 Setting the language
To set the language:
1. Turn the camera on as described in “Turning on for the
first time” on 2.3.
2. Press the menu button to
display the menu screen.
3. Use the joystick (left/right)
to select the tools menu.
11
Before you start

4.Usethejoystick(up/down)
to select the Language
option.
5. Use the joystick (left/right) to select the language option,
English, Français, Deutsch, Español, Italiano,繁中,簡中,
日本語,Русский, □□□.
2.5 Changing modes
The camera can operate in three modes, photo mode, video
mode, and playback mode. Use the mode switch to change
the mode.
12
Changing modes

2.6 Taking your first still picture
Before taking your first still picture, ensure you have read
“Before you start” on 2.4.
To take a still picture.
1. Turn the camera on and make sure it is in photo mode.
2. Use the viewfinder or LCD screen to frame the picture.
3. Press the shutter button to capture the picture.
The picture will automatically be saved with a unique
file name.
2.7 Shooting your first video
Before shooting your first video, ensure you have read
“Before you start” on 2.4.
To shoot a video:
1. Turn on the camera and make sure it is in video mode.
2. Use the viewfinder or LCD screen to frame your video.
3. Press the shutter button to begin recording.
4. Press the shutter button again to stop recording.
The video will automatically be saved with a unique
file name.
13
Taking your first still picture

2.8 Connecting
Read this section to learn how to learn how to connect the
cam- era to a host computer and to a TV. Also learn how to
connect the earphones for listening to MP3 audio files.
2.8.1 Connecting to a TV
Connect the camera to a TV as shown.
See “TV” on 4.4.10 for more details about display-
ing images on a TV screen.
14
Connecting
Table of contents
Other Kobian Digital Camera manuals

Kobian
Kobian CyperPix E460M User manual

Kobian
Kobian CyperPix E350V User manual

Kobian
Kobian CyperPix E660P User manual

Kobian
Kobian CyperPix E450V User manual

Kobian
Kobian CyperPix S551V User manual

Kobian
Kobian CyperPix E560M User manual

Kobian
Kobian CyperPix S555V User manual

Kobian
Kobian CyperPix E685P User manual

Kobian
Kobian CyperPix E550V User manual

Kobian
Kobian CyperPix S550V User manual