manuals.online logo
Brands
  1. Home
  2. •
  3. Brands
  4. •
  5. Kogan
  6. •
  7. Air Conditioner
  8. •
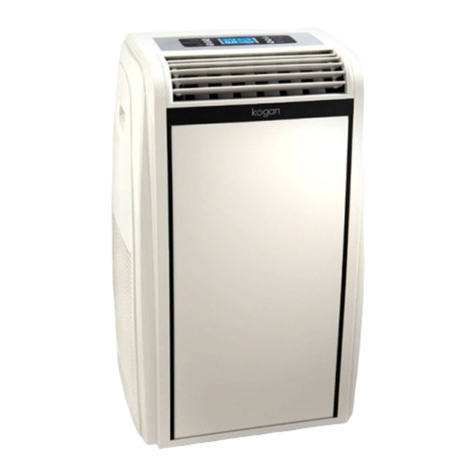
  9. Kogan KGN User manual

Kogan KGN User manual

Other Kogan Air Conditioner manuals

Kogan SMARTERHOME KAWFPAC09YA User manual

Kogan

Kogan SMARTERHOME KAWFPAC09YA User manual

Kogan SMARTERHOME KASHSAC80TA User manual

Kogan

Kogan SMARTERHOME KASHSAC80TA User manual

Kogan KAACH12PORA User manual

Kogan

Kogan KAACH12PORA User manual

Kogan SMARTERHOME KAWFPAC12YA User manual

Kogan

Kogan SMARTERHOME KAWFPAC12YA User manual

Kogan KAMINIACOA User manual

Kogan

Kogan KAMINIACOA User manual

Kogan KGNPAC34VAA User manual

Kogan

Kogan KGNPAC34VAA User manual

Kogan SMARTERHOME KAWFSAC26UA User manual

Kogan

Kogan SMARTERHOME KAWFSAC26UA User manual

Kogan SMARTERHOME KAWFPAC16YA User manual

Kogan

Kogan SMARTERHOME KAWFPAC16YA User manual

Kogan SMARTERHOME KAWFSAC26UA User manual

Kogan

Kogan SMARTERHOME KAWFSAC26UA User manual

Kogan KAACH12PORB User manual

Kogan

Kogan KAACH12PORB User manual

Kogan KHACSPLT26A User manual

Kogan

Kogan KHACSPLT26A User manual

Kogan SMARTERHOME KAPRA14WFGA User manual

Kogan

Kogan SMARTERHOME KAPRA14WFGA User manual

Kogan KAPORAIRCON User manual

Kogan

Kogan KAPORAIRCON User manual

Kogan KAPORAIR16MA User manual

Kogan

Kogan KAPORAIR16MA User manual

Kogan KGNPACH34VA User manual

Kogan

Kogan KGNPACH34VA User manual

Kogan KAPORAIR16MA User manual

Kogan

Kogan KAPORAIR16MA User manual

Kogan KASSDCEACLA User manual

Kogan

Kogan KASSDCEACLA User manual

Kogan SMARTERHOME KAWFSAC52UA User manual

Kogan

Kogan SMARTERHOME KAWFSAC52UA User manual

Kogan KAHCWDAC16A User manual

Kogan

Kogan KAHCWDAC16A User manual

Kogan KAVWAC26YA User manual

Kogan

Kogan KAVWAC26YA User manual

Kogan SMARTERHOME KASHSAC35UA User manual

Kogan

Kogan SMARTERHOME KASHSAC35UA User manual

Kogan KAPORAIR10GA User manual

Kogan

Kogan KAPORAIR10GA User manual

Kogan Kaporair14A User manual

Kogan

Kogan Kaporair14A User manual

Kogan KAMINILEDACA User manual

Kogan

Kogan KAMINILEDACA User manual

Popular Air Conditioner manuals by other brands

Fujitsu ASYG 09 LLCA installation manual

Fujitsu

Fujitsu ASYG 09 LLCA installation manual

York HVHC 07-12DS Installation & owner's manual

York

York HVHC 07-12DS Installation & owner's manual

Carrier Fan Coil 42B Installation, operation and maintenance manual

Carrier

Carrier Fan Coil 42B Installation, operation and maintenance manual

intensity IDUFCI60KC-3 installation manual

intensity

intensity IDUFCI60KC-3 installation manual

Frigidaire FAC064K7A2 Factory parts catalog

Frigidaire

Frigidaire FAC064K7A2 Factory parts catalog

Sanyo KS2432 instruction manual

Sanyo

Sanyo KS2432 instruction manual

LG MultiV Series installation manual

LG

LG MultiV Series installation manual

CLIMAVENETA a-CHD U-2T 606+2209 OPERATING AND INSTALLATION Manual

CLIMAVENETA

CLIMAVENETA a-CHD U-2T 606+2209 OPERATING AND INSTALLATION Manual

Midea EWK06CW5 user manual

Midea

Midea EWK06CW5 user manual

Pioneer FAB Series installation manual

Pioneer

Pioneer FAB Series installation manual

SPT WA-1511S user manual

SPT

SPT WA-1511S user manual

Mitsubishi Electric Mr.Slim MSZ-A24NA operating instructions

Mitsubishi Electric

Mitsubishi Electric Mr.Slim MSZ-A24NA operating instructions

Mitsubishi Electric PUHZ-RP50VHA4 Service manual

Mitsubishi Electric

Mitsubishi Electric PUHZ-RP50VHA4 Service manual

Panasonic CS-S18HKQ Service manual

Panasonic

Panasonic CS-S18HKQ Service manual

Panasonic CS-E15NKE3 operating instructions

Panasonic

Panasonic CS-E15NKE3 operating instructions

Gree GWH18TC-K3DNA1B/I Service manual

Gree

Gree GWH18TC-K3DNA1B/I Service manual

Friedrich ZoneAire Compact P08SA owner's manual

Friedrich

Friedrich ZoneAire Compact P08SA owner's manual

Daikin R32 Split Series installation manual

Daikin

Daikin R32 Split Series installation manual

manuals.online logo
manuals.online logoBrands
  • About & Mission
  • Contact us
  • Privacy Policy
  • Terms and Conditions

Copyright 2025 Manuals.Online. All Rights Reserved.

!
!
!
!
KGN
!
!
!
USER!MANUAL!
!
!
!!
1
3
4
6
9
12
13
14
15
16
14
Important Safeguards
CONTENT
Description
Preparing For Use
Description Of The Control Panel
Description Of The Remote Control
Self-diagnosis
Tips For Correct Use
Cleaning
Start - End Of Season Operations
Troubleshooting
Technical Specifications
6
9
Operating From The Control Panel
Correct use
10
Using The Remote Control Unit
IMPORTANT SAFEGUARDS
Use this appliance only as described in this instruction manual. As with all electrical equip-
ment, whilst the instructions aim to cover as many eventualities as possible, caution and
common sense should be applied when operating and installing this appliance.
This appliance is designed for home air conditioning and must not be used for other pur-
poses
It is dangerous to modify or alter the characteristics of the appliance in any way.
The appliance must be installed in conformity with national legislation regulating electrical
equipment and installations.
If the appliance requires repair, contact a Service Centre authorised by the manufacturer
only. Repairs carried out by unauthorised personnel may be dangerous.
This appliance must be used exclusively by adults.
Never allow the appliance to be used by people (including children) with psychological,
physical or sensory impairments or with insufficient experience and knowledge, unless clo-
sely supervised and instructed by someone responsible for their safety. Young children
should be supervised to ensure that they do not play with the appliance.
The appliance must be connected to an efficient earth system. Have your electrical circuit
checked by a qualified electrician.
Do not use extension cables.
Before cleaning or maintenance, always unplug the appliance from the mains socket.
Never unplug the appliance by pulling on the power cable.
Do not install the appliance in rooms containing gas, oil or sulphur. Do not install near sour-
ces of heat
Keep the appliance at least 50 cm away from flammable substances (alcohol etc) or pres-
surised containers (eg aerosol cans).
Do not rest heavy or hot objects on top of the appliance.
Clean the air filter at least once a week.
Avoid using heating appliances near the air conditioner.
Always transport the appliance upright or resting on one side. Before moving the applian-
ce, empty the internal circuit completely of water. After moving the appliance, wait at least
1 hour before starting it.
When putting the appliance away, do not cover with plastic bags.
The materials used for packaging can be recycled. You are therefore recommended to dis-
pose of them in special differentiated waste collection containers.
At the end of its working life, consign the appliance to a specialist collection centre.
If the power cable is damaged, it must be replaced by the manufacturer or an authorised
technical service centre in order to avoid all risk.
1
2
Important information for correct disposal of the product in accordance with EC Directive
2002/96/EC.
At the end of its working life, the product must not be disposed of as urban waste. It
must be taken to a special local authority differentiated waste collection centre or
to a dealer providing this service. Disposing of a household appliance separately
avoids possible negative consequences for the environment and health deriving
from inappropriate disposal and enables the constituent materials to be recove-
red to obtain significant savings in energy and resources.As a reminder of the
need to dispose of household appliances separately, the product is marked with
a crossed-out wheeled dustbin.
ELECTRICAL CONNECTIONS
Before plugging the appliance into the mains socket, check that:
the mains power supply corresponds to the value indicated on the rating plate on the back
of the appliance;
the power socket and electrical circuit are adequate for the appliance.
the mains socket matches the plug. If this is not the case, have the plug replaced;
the mains socket is adequately earthed. Failure to follow these important safety instructions
absolves the manufacturer of all liability.
3
DESCRIPTION
1
Air outlet grille
2
Control panel
3
Castors
4
Handles
5
Remote control receiver
6
Filter
7
Intake grille
8
Air exhaust hose housing
9
Condensate drain
10
11
Flange Cap
12
Air exhaust hose
13
Window outlet
14
Suckers
15
Castor locks
16
Remote control
5
RESET
ON/OF F
MODE
POWE RFUL
SWIN G
SLEE PTIME R
FAN
COOL
DRY
FAN
SMART
HEAT
FAN
SPEED
AIR
SWING
TIME R
℃
AUTO
QUIET
OFF
hr
DELAY
POWERFUL
ON
hr
DELAY
Power cable
17
17
Window bracket
PREPARING FOR USE
The instructions below will enable you to prepare your air condi-
tioner for operation as efficiently as possible.
Before use, make sure the air intake and outlet grilles are unob-
structed.
AIR-CONDITIONING WITHOUT INSTALLATION
Just a few simple steps and your comfort is ensured with your
appliance:
Fit the air exhaust hose in the housing at the back of the
appliance (fig. 1).
Fit the window outlet to the end of the hose.
Place the air conditioner near a window or French window.
Adjust the length of the hose to reach the window.
Make sure the air exhaust hose is unobstructed.
Open the window or French window slightly and position the
outlet (fig. 2).
If you have a double window, use the sucker provided to hold
the two parts of the window together (fig. 4).
1
2
4
sill,extend the bracket fully within the window frame fix the
If you have a sash window,place the bracket on the window
bracket.Insert the window outlet of the exhaust hose into the
bracket by using the pin, then lower the window onto the
Slot, then connect the hose to the air conditioner(fig.3).
Keep the air hose as short and free of curves as possible to
avoid bottlenecks.
4
3
5
AIR-CONDITIONING WITH INSTALLATION
If required, your appliance can also be installed semi-perma-
nently (Fig. 5).
Proceed as follows:
Drill in an outside wall or in the window pane a 134 mm dia.
hole respecting the heights shown in fig.6.
30 cm
30 cm
5
8
5
134
7
9
in the window pane
in the wooden kickboard
of a French window
in the wall: you are
recommended to insula-
te the section of wall
using suitable insulation.
Fit the flange accessory provided in the hole
following the
indications in figs. 7, 8 and 9.
Fit the hose in the housing at the back of the appliance (fig.
1).
Fit the end of the hose to the flange as shown in fig. 6. When
the hose is not fitted, the hole can be closed with the flange
cap.
Keep the air hose as short and free of curves as possible to avoid
bottlenecks.
When installing the air conditioner semi-permanently, you
should leave a door slightly open (as little as 1 cm) to gua-
rantee correct ventilation.
6
6
DESCRIPTION OF THE CONTROL PANEL
OPERATING FROM THE CONTROL PANEL
The control panel enables you to manage all the main functions
of the appliance, but to fully exploit its potential, you must use the
remote control unit.
TURNING THE APPLIANCE ON
Plug into the mains socket.
Two lines appear on the display indicating that the appliance
is in standby.
Press the button until the appliance comes on. The last
function active when it was turned off will appear.
Never turn the air conditioner off by unplugging from the mains. Always press the
button , then wait for a few minutes before unplugging. This allows the appliance
to perform a cycle of checks to verify operation.
1
68
9
25
34
7
11
10
12
13
14
15
16
16
1 Cool symbol
2 Dry symbol
3 Fan s ymbol
4 SMART s ymbol
5 POWERFUL symbol
6 Temperature i ndicator
7 Timer s ymbol
8 Alarm s ymbol
9 Sleep symbol
10 AUTO FAN indicator
11 Speed indicator
12 MODE button (selects the modes)
13 POWERFUL button
14 FAN button
15 ON/OFF button
16 Increase ( ) and decrease ( ) tempera-
ture button
10
COOL
MODE
Ideal for hot muggy weather when you need to air conditioning
and dehumidify the room.
To set this mode correctly:
Press the MODE
button a number of times until the COOL symbol
appears.
Select the target temperature by pressing the or button
until the corresponding value is displayed.
Select the required fan speed by pressing the FAN button.
Four speeds are available:
Maximum speed:
to achieve the target tempe-
rature as rapidly as possible
Medium speed:
reduces noise levels but still
maintains a good level of comfort
Low speed:
for silent operation
AUTO FAN:
the appliance automatically selects
the most suitable fan speed in relation to the
temperature set on the digital display.
The most suitable temperature for the room during the summer
varies from 24℃ to 27℃. You are recommended, however, not to set
a temperature much below the outdoor temperature.
DRY MODE
Ideal to reduce room humidity (spring and autumn, damp rooms,
rainy periods, etc).
In dry mode, the appliance should be prepared in the same way
as for cool mode, with the air exhaust hose attached to enable
the moisture to be discharged outside.
To set this mode correctly:
Press the MODE button a number of times until the DRY sy-
mbol appears.
In this mode, fan speed is selected automatically by the applian-
ce and can not be set manually.
7
11
12
FAN MODE
When using the appliance in this mode, the air hose does not
need to be attached.
To set this mode correctly:
Press the
MODE button a number of times until the FAN sy-
mbol appears.
Select the required fan speed by pressing the FAN button.
Three speeds are available:
Maximum speed: for maximum fan power
Medium speed: reduces noise levels but still
maintains a good level of comfort
Low speed: for silent operation
In this mode, AUTO speed cannot be selected.
SMART MODE
The appliance chooses automatically whether to operate in air
conditioning, fan mode.
In this mode, fan speed can be set manually.
To set this mode:
Press the MODE button a number of times until the SMART
symbol appears.
POWERFUL FUNCTION
Ideal for the summer to cool rooms rapidly.
Activate by simply pressing the button.POWERFUL
The appliance operates in cool mode at maximum fan
While this function is active, you needn't to set the speed.
8
Temperature and fan speed manually.
13
14
15