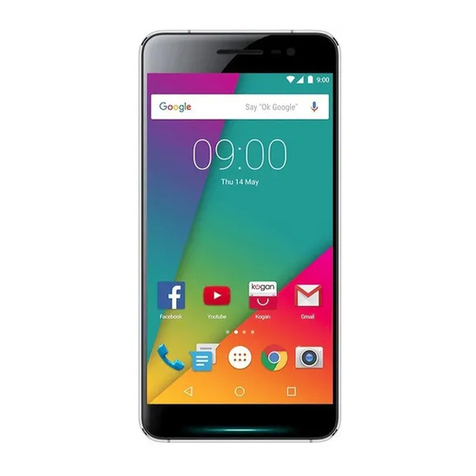
Kogan KHPHN05ANDA User manual

<,W,EϬϱE
USER MANUAL

GETTING STARTED
To get started with the Agora handset, please take both the phone and the
battery out of the box. On the rear of the phone you will find a plastic backing
cover with a small indentation at the top lefthand side.
Please remove this cover by lifting the cover away from the phone, which will
expose the Micro D card slot, the dual IM card slots and the battery recess.
Please insert your IM card (or IM cards) and Micro D card as required,
then place the battery into the battery recess.
Please replace the rear cover and press firmly around the outside of the rear
case until all of the clips have snapped into place and the rear is firmly in
position. Plug the charger in to the handset via the charger port in the bottom
of the handset. Please allow the phone to charge for 6 – 8 hours on the initial
charge.
1

GETTING STARTED
Once the phone has charged, please turn the handset on by holding down the
Power On/Off button on the top righthand side of the handset. This button
can also be used to turn the handset off during use by holding it down for 5
seconds.
On initial startup, you will be shown some basic usage hints on how to make
the most of your handset.
On the lefthand side of the handset you will find the volume control button.
Pressing the top of this button will turn the volume up, while pressing the
bottom of this button will turn the volume down. Once the volume has been
set to 0, the phone goes into vibrate only mode.
2

Introduction to the phone keys
Menu button: Click this button in an application to display the suitable
settings/options menu, where the user can choose the corresponding sub-
menu functions;
Home button: Click on this to minimize the current application, moving it to the
background and you will then be taken to the main interface; Note that using
this key will not really exit the application, the application will continue to run in
the background;
Back button: Click to fall back to previous step of the operation of the
interface;
Introduction to widgets
1, Add widgets to the main screen: in the widgets interface, long press a
widget to add it to the main screen
2, Move position of widgets: in the main interface, long press a widget, sliding
the widget can change the position of the widget in the main screen
3. Delete widgets: in the main interface, long press a widget, and the top of
the main screen will display “REMOVE”. lide the widget to the “REMOVE”
box and if the widget is released while highlighted red, the widget will be
deleted.
3

Information and Functions
Contacts are sorted alphabetically, with names starting with numbers
appearing first, then following through from A through to Z.
How to make a phone ca
To make a phone call, select the PHONE widget and select the method of
calling you would like to use. Along the top of the screen will be three modes.
1 – PHONE : This option will bring up the number pad so you can dial a
number directly.
2 – CALL LOG : This option will bring up the list of previously made and
received phone calls that you can select directly to contact.
3 – CONTACT : This option will bring up the list of every contact you have on
your list. You can then select the person/company that you would like to call.
4

How to se ect which SIM to use for outgoing ca s
When you are using our dual IM functionality, you will want to differentiate
between the two IMs as to which account you want to make your outgoing
calls from.
When you type in the phone number or select your contact to call, a menu will
pop-up just prior to dialing, showing the two different IM card accounts to
choose between. elect your desired account and the call will be made from
that number.
As a basic rule of thumb, the IM card in slot 1 will be the first option, and the
the IM card in slot 2 will be the second option.
How to receive a phone ca
When receiving a phone call, the ringtone will sound (or the handset will just
vibrate if in silent mode). An icon showing a vibrating handset will appear on
the screen (1).
If you press your finger onto the handset, you will be given options to reject
(RED HAND ET) the call, or answer (GREEN HAND ET) the call. To make
your selection, simply drag the ringing phone to the coresponding icon.
1- Vibrating Handset 2 – Reject/Accept icons
Above these two options is also an icon of a messagebox (not shown in
image). If you drag the icon up to the messagebox, you can select a text
message that can be sent to the caller if you are unable to speak at the time.
5
How to send an MMS
elect your contact from the contacts app, which is listed as PEOPLE.
elect the green “Messaging” icon from their contact information.
When in the message click the icon in the top righthand corner.
Then select the desired file format that you wish to send;
Changing the SMS tone
Go into ME AGING application and click the menu button. elect the
" ettings" function - elect " elect Ringtone" function;
6

View sender information
Go into ME AGING application and select the message you wish to view.
Click the icon, and then click the large section, where
you can then view sender information
Forward a message
Go into the ME AGING application and select the message you wish to
forward, then long press the message itself to display the message options.
From this menu, select the “Forward” function.
7

View message information detai s
Go into the ME AGING application, then select the message. Long press
the message itself to display the message options.
From this menu, select the “View Details” function.
De ete a message
Go into the ME AGING application, then select the message you wish to
delete. Long press the message itself to display the message options.
From this menu, select the “Delete” function.
8

Contact Features
Contacts will be sorted in the contacts list firstly by numbers in the name, then
followed by English characters in alphabetical order.
Favorites
The contacts that you most frequently interact with will be added to the
favourites section of the phone.
This will enable you to access them quicker.
9

Contact Search
In the CONTACT interface, click on the button.
tart typing any part of the contacts name and all names that don't include
matching letters will disappear.
Ca History Features
One by one to delete call records
Press the PHONE widget to enter the call log interface, the click the menu
button to bring up the options. elect the delete function, then choose the
delete call records by clicking the button
10

Contact information stored call records
Enter the call log screen, then select the ave call log. elect "Add to
Contacts" function, or directly into the call log entry by clicking the
button and selecting "Add to Contacts".
Copy/Paste Functiona ity
When typing or editing in the text input field - long press the text and and drag
the blue pointers to highlight desired text. The shortcuts will appear at the top
of the screen for “select all”, “cut”, “copy” and if text is already in the clipboard,
“paste”.
11

E-mai Features
Configuring mail account
elect the EMAIL application. Enter your e-mail address and password
If the system automatically recognizes the mailbox information, it will
automatically configure; if the system does not recognize the mailbox
information, it will require you to supply IMAP mailbox, or POP3, enter the
appropriate configuration information.
Gmail example:
Delete email account
elect EMAIL application - Click on the menu button - select settings function
– select account - select the "Remove Account" function
12

Email check frequency setting
elect EMAIL application - Click on the menu button - select setting function –
select account - select Inbox check frequency function
Desktop Features
Interface into the program group. elect the application you wish to have a
widget for by long pressing the icon. The application will be placed as a
widget to the desktop;
13

Wa papers
Long press the desktop background, and the wallpaper options will appear.
elect "Wallpapers" feature
Creating Fo ders
In the desktop space, sliding an application widget over another application
widget will create a ringed application group, which can be pressed to open
the new folder.
14

Change the fo der name
Open the folder on the desktop, then click the Input box which is named
“Unnamed Folder”. The keyboard will appear and you can type in your
desired folder name.
Add a contact to your desktop
In the widgets space, long press the contacts widget. elect the contact you
require and they will appear as a widget on the desktop
15

Add URL to the desktop
In the widgets space, long press the Bookmark widget, then choose a preset
bookmark that you have created in the internet browser. This will enable you
to access your favourite websites from the front screen of your handset.
Add a p ay ist to your desktop
In the widgets space, long press the Music playlist widget. elect a playlist
that you have previously created, which will allow you to listen to your
favourite music collections from the front screen of your handset.
De ete the contents of the desktop
elect the desktop content, then Long press the icon you wish to remove.
Drag the icon into the REMOVE section at the top of the screen, where it will
turn red. Releasing the icon at this point will remove the widget.
16

B uetooth Function
elect " ettings", then toggle "Bluetooth" function to ON.
Tap the Bluetooth icon to see list of available devices.
Wifi Features
elect " ettings", then toggle "Wi-Fi" function to ON.
Tap the Wi-Fi icon to see list of available devices.
elect "Add NETWORK " and select the desired access APN.
17

F ight mode Function
elect " ettings", then select “More" under the Wireless & Networks ection.
Tap the checkbox next to "Flight Mode".
An alternate method to turn on the airplane mode, press the phone "Off"
button, then select the "Flight Mode " function in shut-down menu.
18

Pattern Un ock
elect " ettings", then select "security" from below.
elect the " creen lock" and set your desired pattern.
Restore to factory defau t
elect " ettings", then select "Backup & Reset"
elect "Factory data reset".
NOTE: This will erase all data on the handset.
19
Table of contents
Other Kogan Cell Phone manuals

Kogan
Kogan Agora Lite User manual

Kogan
Kogan KAPHNHDQCXA User manual

Kogan
Kogan KAPHN4G6PA User manual

Kogan
Kogan Agora 6 User manual

Kogan
Kogan AGORA GO KAPH4AGMA User manual

Kogan
Kogan Agora 6 User manual

Kogan
Kogan Agora 6Plus User manual

Kogan
Kogan Aurora 6Plus User manual

Kogan
Kogan Agora 4G Pro KHPHN4GOCA User manual

Kogan
Kogan KHPHN4GQCA User manual