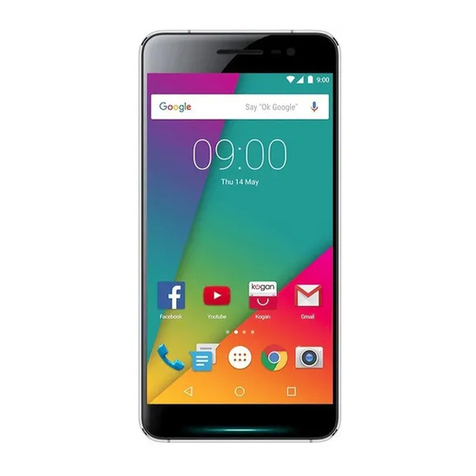
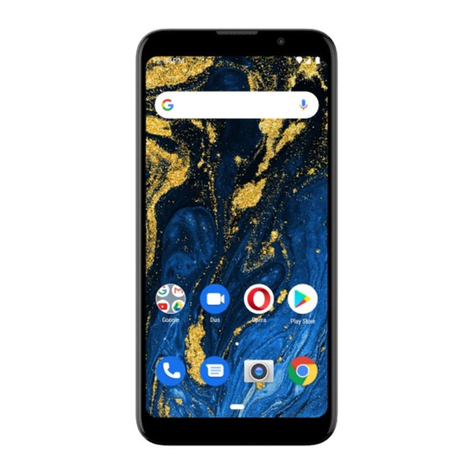
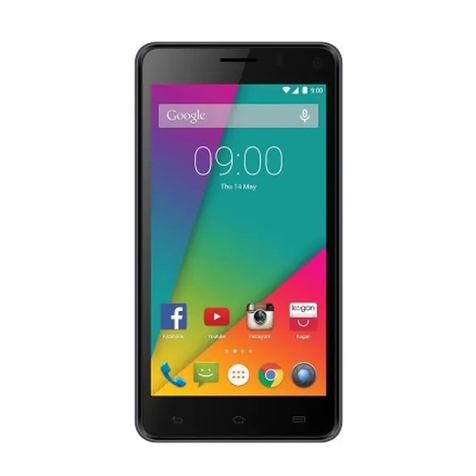
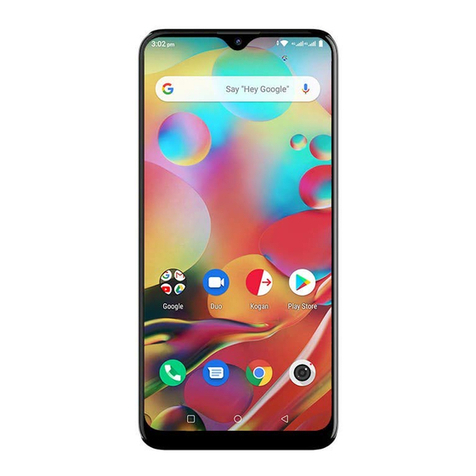
Kogan KAPHNHDQCXA User manual

.$3+1+'4&;$
USER MANUAL

GETTING STARTED
INSERT SIM CARD
The phone is a dual SIM mobile phone, allowing you to use the handset for two networks and/or
mobile phone accounts.
To insert the SIM card(s)
1 – Switch off the mobile phone and remove the rear cover and battery.
2 – Insert the SIM card correctly in the card slot(s). (See figure below)
3 – Finally insert the battery and replace the rear cover of the mobile phone.
INSERT MEMORY CARD
1 – Power off the mobile phone and remove the rear cover and battery.
2 – Insert the microSD card into the slot. (See figure below)
3 – Finally insert the battery and replace the rear cover of the mobile phone.
NOTE: After inserting the microSD card into the slot, you must reboot the mobile phone; otherwise
the mobile phone will not identify the microSD card. Use only compatible memory cards for use
with this device. Incompatible memory cards may damage the card or the device and corrupt the
data stored in the card.

Charge the Battery / Connect to a Computer
You can charge the battery of the phone by connecting the USB cable (supplied with this phone) to
the computer, or via a generic USB wall charger (not included).
Note Please use the specific supplied battery, otherwise it may cause an explosion; while your
mobile phone is running normally, it is suggested that you do not pull the battery out of the phone at
random times, as it may cause accidents and issues, i.e. loss of important data, corrupt firmware etc.
KEYS AND PARTS
KEYS AND PARTS
The Agora smartphone offers you amazing functionality, such as the 8 megapixel camera, video
recorder, FM radio, music and sound recording. You are able to install various APPs, games and
more (supports APK format) by downloading them from Android markets.
ocking and Unlocking the Screen
Press the power button to enter sleep mode, at which point the screen will be locked. Press the
power button again to wake the phone up, then drag to lock icon to the righthand side with your
finger to unlock the handset.

MAKE IT YOURS – CUSTOMIZING THE HANDSET
1 – Home Screen It is your starting point to access all the features on your phone. It displays icons,
widgets, shortcuts and other features.
2 – Notification Bar At the top of the screen, the status bar displays the time, status and
notifications. If there is a new message, missed call or something in the notification bar, you can
drag it down to open the panel, then you can click the desired notification to view. When you have
finished, you can close it again by dragging the panel up or by pressing “Back”.
3 – Launcher Touch the Launcher icon at the bottom of the screen to view all installed applications.
(1)
(1) (2)
(2) (3)
(3)
Adding Widgets and more icons to the Home Screen
Enter the launcher and hold your finger down on an application until the screen vibrates, then
release your finger.
Rearranging (1) or removing (2) widgets and icons from the Home Screen
1 – Hold down your finger on the icon that you want to move. Once the phone vibrates, don't
release your finger, but instead drag the widget or icon to a new location on the screen.
2 – Hold down your finger on the icon of the widget that you want to remove. Once the phone
vibrates, drag the widget up to the “X Remove” text, which will turn red. Release the icon
over this text and the widget will disappear from your Home Screen. (See figure below)

THE AUNCHER
THE AUNCHER
Opening and Switching Applications
The launcher holds icons for all of the applications on your
phone, including any applications that you have downloaded
from the Android Market or other sources. On the Home Screen,
touch the Launcher Icon to open the main menu. Press the
Home Icon or the Back Button to close the Launcher again.
Switch to Recently Used Applications
Press and hold the home icon (center icon on the bottom front
of the screen) for a few seconds.
You will then see the screen below, showing the recently used
applications still running in the background.
Making a Call
Making a Call
On the start screen, select the small green phone icon, then enter
a complete phone number to make a call. If using Dual SIM cards,
you can select which SIM is to be used to make the phone call at
the bottom of the screen.
Call og
Call og
In the call log options, you can make a call, add a new contact or send messages etc..

Rejecting a Call by Sending a Busy Message
While there is an incoming call, there will be times when it is inconvenient or undesirable to accept
the call. In these cases you can send a busy message for rejecting the call. To do so, simply drag
the circle up to
the circle up to , at which point you will get a list of messages that can be sent out. Tap your
, at which point you will get a list of messages that can be sent out. Tap your
desired busy message.
Adding Contacts
Adding Contacts
Tap
Tap and enter Contacts, then add a contact (see figures below.)
and enter Contacts, then add a contact (see figures below.)
Tap
Tap to add a new contact to the Phone or SIM card.
to add a new contact to the Phone or SIM card.
Sending and Receiving Messages
Enter messaging, and then compose a new message. You touch the text
field where you want to enter the text, which will open the keyboard.
1 – When composing a new text message, you can select text for cutting
or copying. The selected text will be highlighted in blue.
Touch the text field or portion that contains the text (as shown in the
figure below). You can then select all contexts of copy, cut and paste.
2 – When a new message arrives, you can read
it by dragging the notification panel down and
clicking on the message, or by entering the
Messaging section to read it directly.
Further Messaging Options
1 – Long press on a message thread, then you
can delete the entire conversation.
2 – Touch and hold a message in the message
thread view, at which point you will receive a
menu with message options. You can then follow these options, which
include forwarding the messages to other numbers.

Browsing the Web
Browsing the Web
To browse the internet, you will need to switch on Data connection or turn on Wi-Fi if it is
available.
available.
To do this, press the Menu button on the handset while on the Home Screen, then select “System
Settings”. You will then see the option to toggle Wi-Fi ON or OFF.
Once you have a viable data connection, you may open the web browser and surf the internet
successfully.
successfully.
Downloading Applications from the Android Market
1 – Add your Google Account. You can do this from the “Add Account” link in the System
Settings.
Settings.
2 – Enter the Android Market (Google Play Store) and download apps.
Manage Applications / Move to microSD card
Enter Settings > Apps, then manage the applications.
As you install downloaded apps, you will need to turn on “Unknown Sources” in your security
settings.
settings.

Maintenance and Safety
Please read and observe the following information for the safe and proper use of you phone to
prevent damage. Also, keep the users guide in an accessible place at all times after reading it.
1 –
1 – After Sales Service
After Sales Service
Contact the Kogan customer support team for all enquiries.
2 –
2 – Charger and Adaptor Safety
Charger and Adaptor Safety
Charger and adapter are designed for indoor use only.
3 –
3 – Battery Information and Care
Battery Information and Care
•
•Please use the specific battery supplied, otherwise it may cause catastrophic failure.
Please use the specific battery supplied, otherwise it may cause catastrophic failure.
•
•Please dispose of the battery properly.
Please dispose of the battery properly.
•
•Do not disassemble or short-circuit the battery.
Do not disassemble or short-circuit the battery.
•
•Keep the battery's metal contacts clean.
Keep the battery's metal contacts clean.
•
•Recharge the battery after long periods of non-use to maximize the battery life.
Recharge the battery after long periods of non-use to maximize the battery life.
•
•Battery life may vary due to usage patterns and environmental conditions.
Battery life may vary due to usage patterns and environmental conditions.
•
•The self-protection function of the battery cuts the power of the phone when it's operation is
The self-protection function of the battery cuts the power of the phone when it's operation is
in an abnormal status. In this case, remove the battery from the phone, wait 10 seconds,
reinsert the battery and then turn the phone on.
4 –
4 – General Notice
General Notice
•
•Using a damaged battery or placing the battery in your mouth may cause serious injury.
Using a damaged battery or placing the battery in your mouth may cause serious injury.
•
•Do not place items containing magnetic components such as a credit card, phone card, bank
Do not place items containing magnetic components such as a credit card, phone card, bank
book or electronic public transport ticket near the phone. The magnetism of the phone may
damage the data stored in the magnetic strip.
•
•Talking on your phone for long periods of time may reduce call quality due to heat
Talking on your phone for long periods of time may reduce call quality due to heat
generated during use.
•
•When the phone is not being used for a long time, store it in a safe place with the power
When the phone is not being used for a long time, store it in a safe place with the power
cord unplugged.
cord unplugged.
•
•Using the phone in proximity to receiving equipment (ie a TV or radio) may cause
Using the phone in proximity to receiving equipment (ie a TV or radio) may cause
interference on the phone.
•
•Do not immerse your phone in water. If this happens, remove the battery and contact the
Do not immerse your phone in water. If this happens, remove the battery and contact the
Kogan customer support team for further instructions, however repairs will not be covered
by warranty.
by warranty.
•
•Do not paint your phone.
Do not paint your phone.
•
•The data saved in your phone may be deleted due to careless use, repair of the phone or by
The data saved in your phone may be deleted due to careless use, repair of the phone or by
upgrading the software. Please backup your important phone contacts and files. Ring tones,
text messages, voice messages, pictures and videos may all also be deleted. Kogan is not
liable for damages caused by loss of data.
•
•Do not turn your phone on or off when it is close to your ear.
Do not turn your phone on or off when it is close to your ear.
•
•Do not throw the phone at a person or animal.
Do not throw the phone at a person or animal.
Kogan will NOT bear responsibility for any non-compliance with the above guidelines or improper
use of the mobile phone. Our company keeps the right to make modifications to any of the content
contained in this user guide without public announcement in advance. The contents of this manual
may vary from the actual content contained in the device, in which case the content on the phone
shall govern.
shall govern.
What's new in Android?
•
•Gesture Typing
Gesture Typing (Android 4.2)
(Android 4.2)
Instead of typing each letter, use Gesture Typing to input a word without lifting your finger. You
don't need to worry about adding spaces because they're added automatically for you.
Glide your fingers over the letters you want to type, and lift it after each word.
•
•Photo Sphere Mode
Photo Sphere Mode (Android 4.2)
(Android 4.2)
Use Photo Sphere mode in the Camera app to capture 360-degree photos.
Touch the Camera icon to open the app, then touch the mode options to select the Photo phere
mode.
mode.
•
•Google Play Widgets
Google Play Widgets
New widgets on your Home screens display recently used apps, music, movies, books or games that
you already have – including preloaded content that comes with the device. Other widgets offer
suggestions for browsing Google Play.
Touch a widget to access its content on Google Play. Touch & hold a widget to resize it or remove it.
•
•Quick Settings
Quick Settings (Android 4.2)
(Android 4.2)
Use Quick Settings to easily access Wi-Fi settings, manage display brightness, open the main
Settings menu and more.
wipe down with two fingers from the top of the screen to open Quick ettings, then touch one of the
boxes to open a specific setting.
•
•Expandable Notifications
Expandable Notifications
Expandable notifications were introduced in Android 4.1, including the option to perform actions
from the notification itself. In Android 4.2, you can expand notifications more easily with a swipe of
your finger.
your finger.
wipe down the notification shake from the top of the screen, then glide your finger down the
notifications to expand them. Touch an icon inside a notification to handle a task directly.
•
•Rearrange Home Screens
Rearrange Home Screens
Slide an icon slowly to move other icons or widgets gently aside.
Touch & hold an icon and slide slowly to the location of your choice. lide an icon quickly over
another icon to create a folder.
•
•Screen Magnification
Screen Magnification (Android 4.2)
(Android 4.2)
Users with visual impairments can enter full-screen magnification by triple-tapping the screen.
Go to
Go to Settings > System > Accessibility > Magnification Gestures
Settings > System > Accessibility > Magnification Gestures to turn on screen magnification.
to turn on screen magnification.
•
•Google Now
Google Now
Google Now shows you information at just the right time, such as today's weather before you start
your day, how much traffic to expect before you leave for work, and even your favourite team's score
while they're still playing.
wipe up from the bottom of any screen, or touch the Google earch bar on any home screen.
•
•Say “Google” to Search
Say “Google” to Search
When the Google Now screen is open, you can say “Google” to activate a voice search.
Open Google Now, then say “Google” and your query to search.

Swipe up for Google Now
Google Now is about getting you just the right information, at just the right time.
It tells you today’s weather before you start your day, how much traffic to expect before you leave
for work, and even your favourite team’s score while they’re playing.
All of this happens automatically. Google Now intelligently brings you the information you want to
see, when you want to see it. No digging required.
For example, here’s a Google Now card that appears when you’re about to start your commute
home
home
Give it a try! Swipe your finger up from the bottom of any screen, or touch the Google Search bar at
the top of the Home screen.
When you want to see more cards, touch
When you want to see more cards, touch Show more cards
Show more cards at the bottom of the screen. When you
at the bottom of the screen. When you
don’t need them any more, swipe them out of the way.
You are in control!
You are in control!
When you decide to use Google Now, you’re turning on location reporting and location history.
Google Now also uses location information provided by Google’s location service and GPS, if those
are currently turned on.
Google Now also uses data that you may have stored in other Google products. For example, if you
have searches stored in your Web History, Google Now can show cards based on sports scores,
flight status, and so on.
Similarly, Google Now can use data that you may have stored in third-party products that you allow
Google to access. For example, your phone’s synced calendar may include entries from non-Google
calendar products. If you have a synced calendar entry for a dentist appointment that includes the
dentist’s address, Google Now can check traffic and suggest when to leave.
You’re in control. You can choose exactly which cards you’d like to see, adjust the de-tails of what
they display, and adjust your privacy settings.

Swipe down for notifications & settings
Notifications alert you to the arrival of new messages, calendar events, and alarms, as well as
ongoing events, such as video downloads.
When a notification arrives, its icon appears at the top of the screen. Icons for pending notifications
appear on the left, and system icons showing things like Wi-Fi signal or battery strength on the
right
right
To open the notification shade, swipe down from the top of any screen.
Certain notifications can be expanded to show more information, such as email pre-views or
calendar events. The one at the top is always expanded when possible.
To open the related app, touch the notification icon on the left. Some notifications also allow you to
take specific actions by touching icons within the notification For ex-ample, Calendar notifications
allow you to Snooze (remind you later) or send email to other guests.
When you’re finished with a notification, just swipe it away. To dismiss all notifications, touch the
Dismiss icon at the top right of the notification shade.
You can perform these actions from the notification shade

Quick Settings
Quick Settings
Use Quick Settings to easily access Wi-Fi settings, manage display brightness, open the main
Settings menu, and more.
To open Quick Settings, do one of the following
•
•Swipe down the notification shade and touch the Quick Settings icon at the top right.
Swipe down the notification shade and touch the Quick Settings icon at the top right.
•
•Swipe down with two fingers from the top of any screen.
Swipe down with two fingers from the top of any screen.
Relax with Google Play
Google Play brings together all your favorite content in one place – movies, TV shows, books,
music, magazines, apps, and more – so you can reach it from any of your devices.
Use Google Play widgets
These widgets are available on your Home screens
•
•My ibrary
My ibrary. Displays your most recently used music, books, and so on. Touch any of the
. Displays your most recently used music, books, and so on. Touch any of the
images to see your content.
•
•Recommended on Play
Recommended on Play. Suggests music, movies, and other content that may interest you.
. Suggests music, movies, and other content that may interest you.
Touch the suggestion to learn more about it.
•
•Recommended apps
Recommended apps. Recommends apps that you can add to your Home screen. Touch the
. Recommends apps that you can add to your Home screen. Touch the
recommendation to learn more about it.

To resize a widget, touch & hold, then let go and drag the blue dots. To remove it, touch & hold,
then drag it to the Remove icon at the top of the screen.
To add another Google Play widget, touch the All Apps icon, then Widgets, and swipe from
right to left until you see the one you want. Then touch & hold, and let go in the Home screen
location you want.
location you want.
Shop on Google Play
Shop on Google Play
To open the Google Play Store app, touch the Play Store icon in your Favourites tray
on every Home screen.
Most things you purchase on Google Play are available from your computer as well
as from any of your Android mobile devices. (Android apps are one exception – they
run only on Android devices.)
Sign in to play.google.com to get your entertainment from anywhere.
Find your content
Find your content
If you purchased on Google Play in the past, you’ll automatically have access to this content on
your handset — just make sure you’re signed in using the same account that you used to purchase
it.
it.
You can get to your content using any of the Google Play icons in your Favourites tray, including
Books, Magazines, Movies, and Music.
Or, touch the Play Store icon to open Google Play, and then go to one of the main sections, such
as Apps, Music, and so on. When you touch the Menu icon in any section, the first item in the
menu is always something like My Apps or My Music, which will bring you your content for that
section of Google Play.
You can quickly access your content this way, from the Google Play Store app, even if you
originally purchased it on Google Play using a different phone or tablet. If you get a new device, all
your media will automatically be waiting for you here when you turn on and sign in.

Google Play settings
To adjust your Google Play settings, switch accounts, or get help, choose the option you want from
the Menu in the top right corner.
The Google Play Settings screen lets you control when you’re notified about updates to apps and
games, clear your search history, and enable user controls. To filter Android apps based on maturity
level or require a PIN before completing any purchase, touch
level or require a PIN before completing any purchase, touch Content filtering
Content filtering or
or Set or change
Set or change
PIN
PIN.
.
Google Play support
Google Play support
For more detailed information about Google Play, including phone and email support options, visit
support.google.com/googleplay.
Use & customize the lock screen
This information applies to Android 4.2.1 and higher. If an earlier version is installed on your
device and you haven’t accepted the latest system update, some details will differ. To check for
updates, go to
updates, go to Settings > System > About phone > System updates
Settings > System > About phone > System updates.
.
You can add widgets to the top of the lock screen and swipe between them. Lock screen widgets let
you scan recent Gmail messages, Calendar entries, and other app content without unlocking your
screen.
screen.
To set or change the type of lock, go to
To set or change the type of lock, go to Settings > Personal > Security > Screen lock
Settings > Personal > Security > Screen lock.
.
Navigate the lock screen
Clock is the default widget. To hide the PIN, pattern, or password lock, swipe down from the clock
or other widget at the top of the lock screen. Touch the lock icon at the bottom of the screen to show
the lock again.
the lock again.
To open Google Now, swipe up from the bottom of the lock screen. Enter your PIN, pattern, or
password if prompted.
To access the Camera app without unlocking the screen
1.
1. Swipe left from the right edge of the screen.
Swipe left from the right edge of the screen.
2.
2. If necessary, switch to the mode you want. The mode is indicated by the camera or other
If necessary, switch to the mode you want. The mode is indicated by the camera or other
icon at the lower left in portrait mode.
3.
3. Start taking photos or videos.
Start taking photos or videos.
To view what you captured, swipe left to open the Filmstrip view of your Gallery. The image or
video is automatically saved to your Gallery, but you can’t view any of your other photos and
videos until you unlock your screen. To get back to the main Camera app, swipe right.
To close the Camera app, touch the bottom of your screen to bring up the navigation buttons, then
touch one of the buttons.

Add a widget to the lock screen
1.
1. Swipe from left to right across the top of the screen until you see the Plus icon.
Swipe from left to right across the top of the screen until you see the Plus icon.
2.
2. Touch the Plus icon. If prompted, enter your PIN, pattern, or password. A list of widgets
Touch the Plus icon. If prompted, enter your PIN, pattern, or password. A list of widgets
appears. Apps that support lock screen widgets can add their own widgets to this list.
3.
3. Touch the widget you want to add.
Touch the widget you want to add.
You can add up to five widgets to your lock screen. To move between them, swipe between screens.
Reorder lock screen widgets
1.
1. Touch & hold a widget.
Touch & hold a widget.
2.
2. Drag the widget and release it in the location of your choice.
Drag the widget and release it in the location of your choice.
Remove a lock screen widget
Touch & hold the widget, then drag it onto the Remove icon.
Try Face Unlock
Try Face Unlock
You can set an automatic screen lock for your phone. If a lock is set, the screen locks when your
phone’s display goes to sleep or if you press the Power button.
You can set locks of different strengths using lock settings
1.
1. Go to
Go to Settings > Personal > Security > Screen lock
Settings > Personal > Security > Screen lock.
.
2.
2. Touch the type of lock you’d like to use.
Touch the type of lock you’d like to use.
Face Unlock is one of the options available. After you’ve set it up, you can unlock your phone
simply by looking at it. Although Face Unlock is not very secure, it can be convenient and fun to
use.
use.
TIP
TIP After you set up Face Unlock, look under
After you set up Face Unlock, look under Settings > Personal > Security
Settings > Personal > Security for two additional
for two additional
settings
settings Improve face matching
Improve face matching and
and iveness check
iveness check. Use these to make Face Unlock more
. Use these to make Face Unlock more
reliable and secure.

Share content with Android Beam
You can beam a web page, a video, or other content from your screen to another device by bringing
the devices together (typically back to back).
Before you begin
Before you begin Make sure both devices are unlocked, support Near Field Communication
Make sure both devices are unlocked, support Near Field Communication
(NFC), and have both NFC and Android Beam turned on.
1.
1. Open a screen that contains something you’d like to share, such as a webpage, YouTube
Open a screen that contains something you’d like to share, such as a webpage, YouTube
video, or place page in Maps.
2.
2. Move the back of your phone toward the back of the other device. When the devices
Move the back of your phone toward the back of the other device. When the devices
connect, you hear a sound, the image on your screen reduces in size, and you see the
message Touch to beam.
3.
3. Touch your screen anywhere. Your friend’s device displays the transferred content. Or, if the
Touch your screen anywhere. Your friend’s device displays the transferred content. Or, if the
necessary app isn’t installed, Google Play opens to a screen where your friend can download
the app.
the app.
Change the wallpaper
To change the wallpaper that’s displayed on your Home screens
1.
1. Touch & hold anywhere on a Home screen that’s not occupied.
Touch & hold anywhere on a Home screen that’s not occupied.
A list of options appears.
2.
2. Touch a wallpaper source
Touch a wallpaper source
Gallery
Gallery. Choose from pictures that you’ve synced with your phone.
. Choose from pictures that you’ve synced with your phone.
ive Wallpapers
ive Wallpapers. Choose from a scrolling list of animated wallpapers.
. Choose from a scrolling list of animated wallpapers.
Wallpapers
Wallpapers. Choose from thumbnails of default images, or touch a thumbnail for a larger
. Choose from thumbnails of default images, or touch a thumbnail for a larger
version.
version.
You can download additional wallpapers on Google Play.
3.
3. To set a wallpaper, touch
To set a wallpaper, touch Set wallpaper
Set wallpaper or, for Gallery images, drag the blue dots to
or, for Gallery images, drag the blue dots to
determine the cropping and touch
determine the cropping and touch OK
OK.
.
To change your phone’s wallpaper, go to
To change your phone’s wallpaper, go to Settings > Device > Display > Wallpaper
Settings > Device > Display > Wallpaper.
.
Take a screenshot
Take a screenshot
You can easily take a screenshot on your phone that you can save in your Gallery or share with
others
others
1.
1. Make sure the image you want to capture is displayed on the screen.
Make sure the image you want to capture is displayed on the screen.
2.
2. Press the Power and Volume down buttons simultaneously.
Press the Power and Volume down buttons simultaneously.
The screenshot is automatically saved in your Gallery.
TIP To easily share your screenshot via Gmail, Google+, and more, swipe down the notification
shade and touch the Share icon next to the preview of your screenshot.

Connecting to keyboards, mice, & other devices
You can connect a keyboard, mouse, or even a joystick or other input device to your phone via
Bluetooth and use it just as you would with a PC. USB is not supported for connecting the handset
to such devices.
to such devices.
IMPORTANT
IMPORTANT Continuous use of a mouse via Bluetooth will cause a significant additional drain
Continuous use of a mouse via Bluetooth will cause a significant additional drain
on your battery.
on your battery.
You pair and connect Bluetooth input devices to your phone in the same way as any other Bluetooth
device.
device.
Keyboards
Keyboards
In addition to entering text, you can use your keyboard to navigate your phone’s features
•
•Use the arrow keys to select items on screen.
Use the arrow keys to select items on screen.
•
•Pressing Return when an item is selected is equivalent to touching that item.
Pressing Return when an item is selected is equivalent to touching that item.
•
•Pressing Escape is equivalent to touching Back.
Pressing Escape is equivalent to touching Back.
•
•Press Tab or Shift-Tab to move from field to field in a form or other screen with multiple
Press Tab or Shift-Tab to move from field to field in a form or other screen with multiple
text fields.
text fields.
Mice
Mice
When you connect a mouse to your phone via Bluetooth and move the mouse, an arrow-shaped
cursor appears, just as on a computer
•
•Use the mouse to move the cursor.
Use the mouse to move the cursor.
•
•Clicking, pressing, and dragging with the mouse button is equivalent to touching, touching
Clicking, pressing, and dragging with the mouse button is equivalent to touching, touching
& holding, and dragging with your finger.
•
•Only one mouse button is supported.
Only one mouse button is supported.
•
•If your mouse has a trackball or scroll wheel, you can use it to scroll both vertically and
If your mouse has a trackball or scroll wheel, you can use it to scroll both vertically and
horizontally.
horizontally.
Other input devices
Other input devices
You can connect joysticks, gamepads, and other input devices to your phone via Bluetooth. If they
work without special drivers or adapters on your PC, they will likely work with your phone.
However, games and other apps must be designed to support any special features of an input device,
such as dedicated buttons or other controls, to take full advantage of them.

About Google Now
About Google Now
Google Now gives you just the right information at just the right time. Swipe up from the bottom of
your tablet to get commute traffic before work, popular nearby places, your favorite team’s current
score, and more.
score, and more.
You can turn Google Now on or off at any time. Swipe up the same way and touch
You can turn Google Now on or off at any time. Swipe up the same way and touch Menu >
Menu >
Settings > Google Now
Settings > Google Now. If the keyboard’s covering the menu, touch the modified Back
. If the keyboard’s covering the menu, touch the modified Back
button to lower it.
button to lower it.
After you decide to start using Google Now, you don’t need to do anything else. If you like, you can
fine-tune some settings, but Google Now doesn’t need any elaborate setup. The information you
need is always at your fingertips.
To know when to display what information, Google Now uses contextual data from your tablet and
from other Google products, plus data from third-party products that you allow Google Now to
access.
access.
For example, Google Now uses the time of day, your current location, and your location history to
show you what the traffic on your commute is like when you wake up in the morning. It also uses
information from Google services such as your Web History for sports or flight updates, or from
your synced calendar entries for appointment reminders.
About Google Now cards
A Google Now card is a short snippet of useful information that slides into view right when you’re
most likely to need it. For example, here’s a traffic card
To see some sample cards from the main Google Now screen, touch
To see some sample cards from the main Google Now screen, touch Menu > Sample cards
Menu > Sample cards. When
. When
you’re finished and want to get back to the main Google Now screen, touch
you’re finished and want to get back to the main Google Now screen, touch Hide sample cards
Hide sample cards.
.
In addition to the cards shown in the list of samples, you may also see a Public Alerts card.
Public Alerts provide emergency information from sources such as the National Weather Service
and the U.S. Geological Survey.
Coverage is currently provided by a limited number of key partners, only in the United States
(excepting U.S. Geological Survey earthquake alerts). Google can’t guarantee that you’ll see every
relevant alert. However, Google Now attempts to show you what’s important when you need it, in
the hope that such alerts are a useful additional source of information. To learn more, visit
support.google.com/publicalerts.

About location access, reporting, & history
Location access
Location access settings determine whether your tablet can use your current location. When
settings determine whether your tablet can use your current location. When
location access is turned on, apps can use it to give you more relevant information, such as nearby
restaurants or commute traffic.
To turn off location access for all apps, go to
To turn off location access for all apps, go to Settings > Personal > ocation access
Settings > Personal > ocation access. If you prefer,
. If you prefer,
you can turn off location access by Google apps while still permitting its use by non-Google apps –
just go to
just go to Settings > Accounts > Google > ocation settings
Settings > Accounts > Google > ocation settings.
.
Location reporting
Location reporting refers your tablet’s ability to report your current location for the purpose of
refers your tablet’s ability to report your current location for the purpose of
recording your location history.
Location history
Location history refers to your tablet’s ability to store your past locations, including home and
refers to your tablet’s ability to store your past locations, including home and
work.
work.
When you decide to use Google Now, you’ll start reporting your location and turn on your location
history. Google won’t share this information with other users or marketers without your permission.
If you opted in to location history in the past, Google Now uses your previously recorded locations
as well as ongoing locations when making suggestions. Turning off location history pauses the
collection of location information, but doesn’t delete your history. To manage or delete your
location details, visit google.com/locationhistory.
Along with location history, Google Now uses your tablet’s location access service, which must also
be turned on for Google Now to work. To manage this setting, go to
be turned on for Google Now to work. To manage this setting, go to Settings > Personal >
Settings > Personal >
ocation access
ocation access.
.
About Web History & other data
Google Now uses data from multiple sources to help predict what you need. For example, if you
have a synced calendar entry for a dentist appointment, Google Now can check traffic and suggest
when to leave. And if you have relevant searches saved in your Web History, such as for your
favorite sports team or for upcoming flights, Google Now can also show cards for sports scores,
flight status, and more.
To manage your Web History, visit google.com/history. You can delete or pause your Web History
and still use Google Now, but certain kinds of information, such as flight details, won’t show up.

Use Google Now
Use Google Now
To view the Google Now cards that are waiting for you at any particular time, swipe up from the
bottom of your tablet, or touch
bottom of your tablet, or touch Google
Google on any Home screen.
on any Home screen.
Google Now displays cards when they’re most likely to be useful and relevant based on the current
time and your current location. To expand that search and get additional ones, touch
time and your current location. To expand that search and get additional ones, touch Show more
Show more
cards
cards below the last card displayed.
below the last card displayed.
Swipe cards away
Swipe cards away
Swipe cards away when you don’t need them.
You’ll occasionally be asked whether a card was useful. By answering, you can help Google Now
learn which cards are most useful to you and when.
Turn cards off or on
1.
1. From the main Google Now screen, go to
From the main Google Now screen, go to Menu > Settings > Google Now
Menu > Settings > Google Now.
.
2.
2. Locate the type of card.
Locate the type of card.
3.
3. Touch the card’s On/Off switch.
Touch the card’s On/Off switch.
Edit card settings
Edit card settings
To learn why a card appears when it does, or to adjust your preferences for that card type, touch
the Info icon. The icon will turn blue, and the card expands downward, like this
The italicised text explains why the card has appeared at the current time or location.
In some cases, you can also adjust preferences related to that card (such as Fahrenheit instead of
Celsius for the Weather card). Some cards also let you answer questions that help Google Now fine-
tune its performance.
To hide this information, touch the icon again.
Some cards rely on details you specify about your home and work addresses, the sports team or
stocks you’re following, and so on. To edit such details, go to
stocks you’re following, and so on. To edit such details, go to Menu > Settings > My stuff
Menu > Settings > My stuff.
.
Table of contents
Other Kogan Cell Phone manuals

Kogan
Kogan Aurora 6Plus User manual

Kogan
Kogan KAPHN4G6PA User manual

Kogan
Kogan Agora 6Plus User manual

Kogan
Kogan Agora 4G Pro KHPHN4GOCA User manual

Kogan
Kogan Agora 6 User manual

Kogan
Kogan AGORA XI User manual

Kogan
Kogan Agora 6 User manual

Kogan
Kogan Agora Lite User manual

Kogan
Kogan KHPHN05ANDA User manual

Kogan
Kogan AGORA GO KAPH4AGMA User manual