Kogan KADCAM4KFRA User manual

WIFI DASH CAM FRONT
AND REAR
(4K/1080P)
KADCAM4KFRA

2
Safety & Warnings
3
Components
4
Overview
5
Installation
7
App Installation
12
Operation
17
Functions
19
Specifications
25
Troubleshooting
26
Notes
27

3
• Please read this user guide carefully before using the camera. It contains important
information for your safety as well as operating and maintenance instructions.
• Follow all safety precautions to prevent damage due to improper use of the camera.
• In the event of improper use or erroneous handling, no liability can be assumed for
any possible damage which may occur.
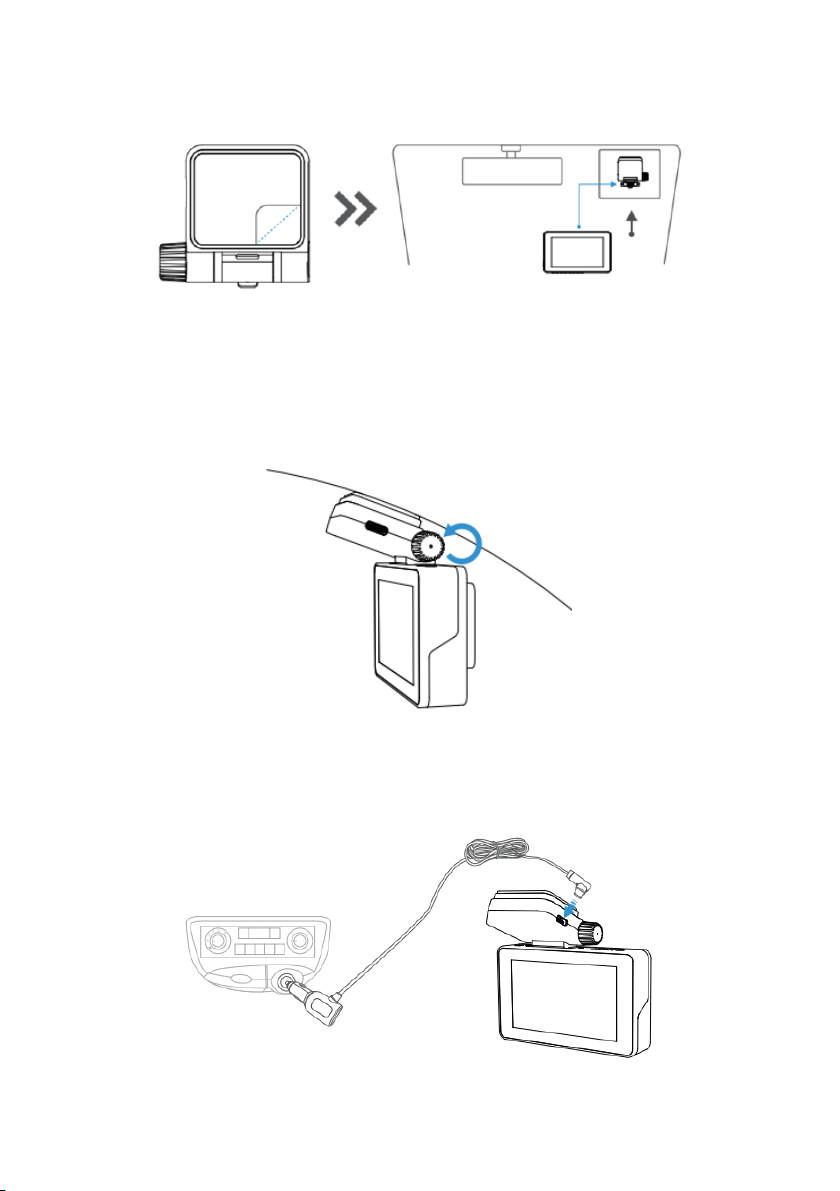
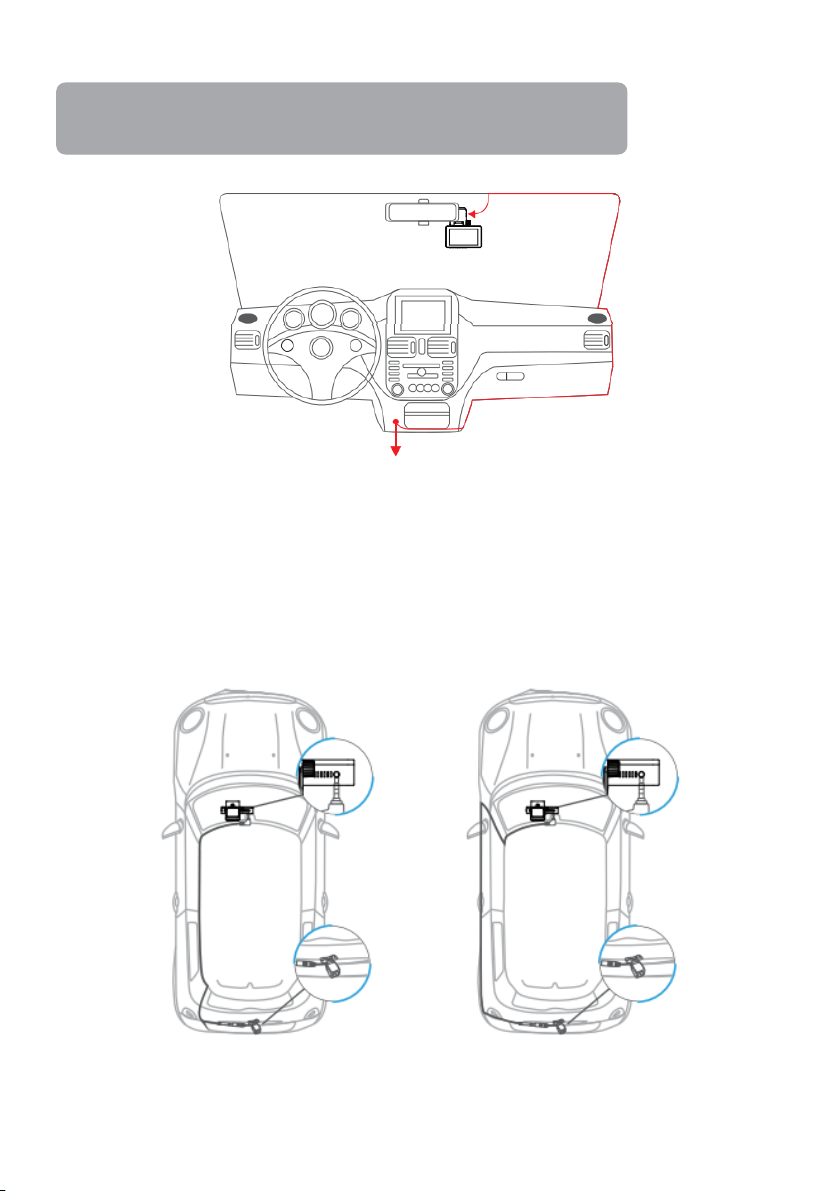
• You should not install this dash camera at a place that would obstruct or reduce a
driver's view. Make sure your usage complies with pertinent vehicle codes of your
state, province, territory or country.
• You should avoid extended exposure of the dash cam to direct sunlight or extreme
temperatures (either high or low temperature) which tend to degrade or damage the
unit and its normal functionality.
• Do not try to open the cover or try to repair it yourself. If the accessories for this
device have any problem, cease use and contact help.Kogan.com for support.
• Pay careful attention when cleaning the lens surface. Use a soft, moist cloth to clean
the lens to avoid compromising video quality.
• This device is intended to be used inside a vehicle only.
• Do not expose this product to rain, moisture or water under any circumstances or it
will result in external or internal damage.
• Do not operate or install the camera while driving or attempt to change any setting,
etc.
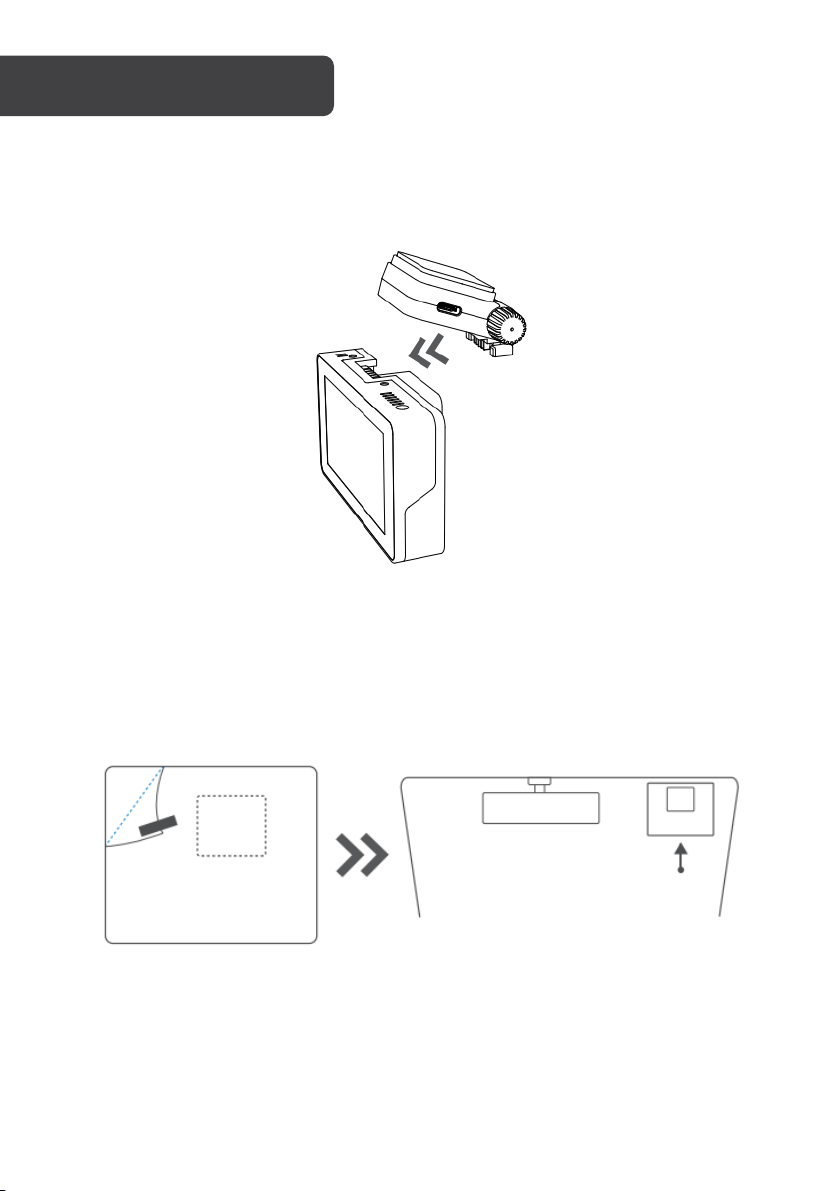
• Insert a formatted memory card into the product before your first use.
Disposal:
This marking indicates that this appliance should not be disposed with
other household wastes. To prevent possible harm to the environment or
human health from uncontrolled waste disposal, recycle it responsibly to
promote the sustainable reuse of material resources.
SAFETY & WARNINGS

4
Dash Camera
Stand
Trim Removal Tool
Rear Camera Kit
Mini USB Cable
Car Charger
Hardwire Cable
Electrostatic Sticker
User Guide
COMPONENTS

5
Camera
OVERVIEW
Stand Connector
Mini USB Port
Memory Card Slot
Microphone
Power Button
Reset
Speaker
Front Camera

6
Display
Down Button
Ok Button
Up Button
Menu Button

7
Stand
Rear Camera Kit
USB-C Port
Stand Adjustment
Screw
Camera Connector
3M Adhesive
Latch
Mounting Bracket
Rear Camera
AV Out Port

8
Step 1: Attach the stand to the dash camera. Align the connectors on the Stand with the
mating part on the Camera, the slide the stand into the camera until you hear it click.
Tip: To remove the camera from the stand, push the Latch on the stand upward and take it
out.
Step 2: Clean the front windshield and attach the electrostatic sticker to it.
INSTALLATION

9
Step 3: Peel off the 3M Adhesive on the stand and attach the stand onto the Electrostatic
Sticker.
Tip: It’s recommended to mount the camera in a position that is close to the rear mirror.
Step 4: Loosen the stand adjustment screw to adjust the angle of the dash camera for the
best view.
Step 5: Connect the USB-C connector of the car charger to the USB-C port on the stand
and connect another end to the vehicle’s 12V socket (cigarette lighter).
Camera

10
Step 6: Attach the AV out connector of the rear camera to the “AV In” port of the dash
camera, then route the black cable of the rear camera through the body of your vehicle to
the rear of it.
Step 7: Mount the Rear Camera to the rear of the vehicle.
Note:
For a clean install, route the cable down the side of the windshield.
12V socket (cigarette lighter)

11
Step 8: Insert the memory card into the dash camera and format it.
Step 9: Start the engine of your vehicle to check whether the dash camera is installed
correctly and works well.
Button Controls
Power Button
• Press and hold to turn the dash camera On/Off.
• Shortly press to turn on or turn off the screen when the
camera is on.
OK Button
• Press to confirm your selection.
• Press to start/end recording.
• Press to play/pause the selected video in playback mode.
• Press and hold to bring up the pop-up window of deleting a
file in playback mode.
Down Button
• Press to move to the previous option/file and adjust the value
for the date & time.
• Press to enable or disable the microphone in video mode.
• Press to check the saved videos and photos when the
camera is not recording.
• Press to turn off the Wi-Fi of the camera when Wi-Fi is on.

12
Menu Button
• Press to lock and unlock the current video in video mode.
• Press to check all the detailed camera settings when the
camera is not recording.
• Press and hold to directly turn on the Wi-Fi of the camera
when it’s not recording.
• Press to get back to the previous page.
Up Button
• Press to move to the next option/file and adjust the value for
the date & time.
• Press to take a photo in video mode.
• When the dash camera is not recording video, press and hold
it to switch camera views.

13
Option 1:
Search for the “RoadCam” app from App Store (iOS) or Google Play (Android), then
download and install it into your smart phone.
Option 2:
Scan the QR code below to download and install.
Option 3:
On the camera, go to “Settings àWiFi App” to scan the QR Code to download and install.
APP INSTALLATION

14
Wi-Fi Connection
Step 1:
Go to “Settings àWi-Fi” App to turn on the camera's Wi-Fi or when the camera is not
recording, long press “ ” to directly turn on the camera's Wi-Fi.
Step 2:
Go to the Wi-Fi setting of your smart phone, then connect to the Wi-Fi network
“T90X_*****” and input the password “12345678”.
Step 3:
On the RoadCam App and tap “ ” to connect the camera with the App.

15
Step 4:
After a successful connection, tap “ ” again to enter the recording interface.
Tip: To turn off the Wi-Fi, press to get back to the recording interface.
Settings
Switch Video Mode
and Photo Mode
Start/Stop Recording
Captured Photos
Recorded Videos

16
Video Mode
After the dash camera is powered on, it will enter the video mode by default. A flashing red
dot on the top left corner indicates that the camera is recording.
1
Parking Guard Disabled
7
Microphone On/Off
2
Resolution
8
Start/Stop Recording
3
G-Sensor Enabled
9
Photo
4
Microphone Enabled
10
Date and Time
5
Memory Card Inserted
11
Lock/Unlock
6
Battery Power Status
• Press to enable or disable the microphone.
• Press to start and stop recording.
• Press to take a photo when the camera is recording.
• Press to lock and unlock the current video.
OPERATION
1
2
3
4
5
6
7
8
9
10
11

17
Homepage
Press to stop recording and save a video, then enter the homepage.
• Press to check all the saved videos and photos.
• Press again to start recording another video.
• Press to switch the views from the front camera, rear camera and both
cameras.
• Press to check all the camera settings.
• Press and hold to directly turn on the Wi-Fi of the camera.

18
Check the videos and photos
When the camera is not recording a video, press to check all the video and photos.
Front standard video:Includes the video recorded by the front camera.
Front locked video:Includes the locked videos recorded by the front camera when there is
a collision during driving or parking and the videos that are manually locked by pressing
when the camera is recording.
Front photo:Includes the photos taken by the rear camera.
Rear standard videos recorded by the rear camera.
Rear locked video:Includes the locked videos recorded by the rear camera when there is a
collision during driving or parking and the videos that are manually locked by pressing
when the camera is recording.
Rear photo:Includes the photos taken by the rear camera.
[>] Press to move to the next option.
[] Press to move to the next option.
[<] Press to move to the next option.
[] Press to move to the next option.

19
How to play and delete a file?
Step 1:Press to enter the selected folder.
Step 2: Press / to select a file and press to play.
Tip: Long press to bring up the window of deleting this file.
Next file
Previous file
Back
Play/Pause

20
File Transfer
Option 1:
Remove the card from the camera, then connect it to your computer via a card reader (not
included) to make a file transfer.
Option 2:
Directly connect the camera to your computer via a micro-USB cable, then go to “Settings
àUSB Mode” to set it as USB storage. Then check, copy and delete the files.
Connect the camera with a smart phone via Wi-Fi, then download files to your phone in the
RoadCam App.
Settings
When the camera is not recording a video, press to check the detailed settings.
Note: The USB-C port on the stand is only for powering the camera, while the mini-
USB port on the camera is for data transfer.
Table of contents
Other Kogan Dashcam manuals

Kogan
Kogan Y2 Operator's manual

Kogan
Kogan KADCAMG98A User manual

Kogan
Kogan D6 DUAL LENS User manual

Kogan
Kogan KADCAMG12A User manual

Kogan
Kogan KARVMWDNRCA User manual

Kogan
Kogan KACARDCFHDA User manual

Kogan
Kogan KACAR12DVRA User manual

Kogan
Kogan KARVMWDNRCA User manual

Kogan
Kogan KACAR12DVRA User manual

Kogan
Kogan KADVR2CGPS User manual