manuals.online logo
Brands
  1. Home
  2. •
  3. Brands
  4. •
  5. Kogan
  6. •
  7. Vacuum Cleaner
  8. •
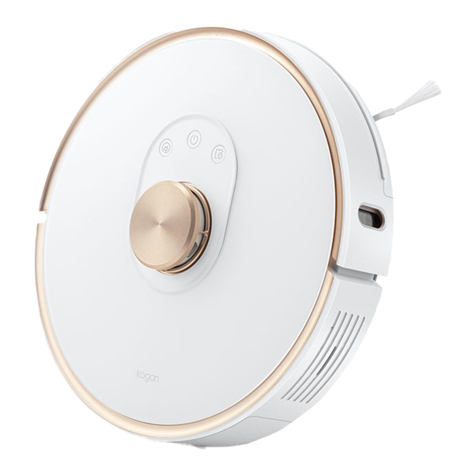
  9. Kogan KAROBOTVACCA User manual

Kogan KAROBOTVACCA User manual

Table of Contents
Safety Instructions..........................................................................................................................................2
Warnings.......................................................................................................................................................2
Product Features.............................................................................................................................................3
Powerful Suction........................................................................................................................................3
User Friendly Design................................................................................................................................3
Four Cleaning Modes...............................................................................................................................3
Product Parts....................................................................................................................................................4
Main Unit and Accessories.....................................................................................................................4
Main Unit and Dust in............................................................................................................................4
Charging Station........................................................................................................................................5
Remote Control Unit.................................................................................................................................6
Unit Display Panel......................................................................................................................................6
Product Operations........................................................................................................................................7
attery Charging........................................................................................................................................7
Start / Pause / Sleep................................................................................................................................8
Schedule Cleaning Time..........................................................................................................................8
Cleaning Modes..........................................................................................................................................8
Product Maintenance.....................................................................................................................................9
Cleaning Side rushes.............................................................................................................................9
Cleaning Dust in and Filter..................................................................................................................9
Cleaning Sensors......................................................................................................................................10
Water Tank..................................................................................................................................................10
Troubleshooting..............................................................................................................................................11
Error Codes..................................................................................................................................................11
Exploded Product Diagram.......................................................................................................................12
Product Specifications................................................................................................................................13
1
Safety Instructions
efore using this product, please read and obey the following safety instructions.
•Read the user manual thoroughly and carefully before using the product.
•Keep a copy of this user manual handy for reference.
•Follow these precautions to reduce risk or injury or damage.
Warnings
•This product should only ever be disassembled or serviced by a Kogan.com
technician or other certified technician.
•Only use the power adapter provided by Kogan.com. Using other non-authorized
adapters may result in electric shock, fire or damage.
•Do not touch the power cord, plug or adapter when your hands are wet.
•Do not allow clothing or body parts to be drawn into the product wheels.
•Do not use near flammables.
•Do not clean while the product is charging.
•Do not bend the power cord, or place large weights upon it.
•This product is for indoor use, and the cleaning of dry surface floors only.
•Do not sit on top of the product or place objects on top of it.
•Do not use this product in a wet or moist environment.
•efore use, remove any damageable objects (glass, textiles, papers etc..) that can
get caught in the cleaner's brush or vacuum intake.
•Do not place this object where it can easily fall (tables, chairs etc..)
•Turn the power switch off during transportation or when you will not need to use
this product for a long time.
•efore charging the battery, make sure that the adapter and outlet are properly
connected.
•To avoid injury, inform all people in the house that the vacuum is cleaning.
•Do not use this product when the dust bin is full.
•Do not use this product in high temperatures.
•Remove the battery from the unit before you recycle it.
•Disconnect the AC adapter before you remove the battery.
•The battery should be properly disposed of. Do not dispose of ANY parts of this
product with your regular household waste.
•Do not allow children to operate this product unless they are being supervised by
an adult.
2
Product Features
Powerful Suction
With 40W of power behind the vacuum, even the smallest bits of dirt and dust will be
sucked up.
There are two suction modes to choose from, normal and turbo modes.
•Normal: use for wooden/tile floors to save on power consumption.
•Turbo: use on carpet and extra dirty floors for more effective cleaning.
User Friendly Design
Voice message guidance and touch screen operations.
Just touch the CLEAN key to immediately start cleaning your floors.
Empty and wash the dust bin with water regularly for ultimate efficiency.
Four Cleaning Modes
1. Auto Cleaning Mode
The vacuum will clean and vacuum
the floor automatically, adjusting
the cleaning routine based on its
environment.
2. Spot Cleaning Mode
The cleaner will focus in a small area
to give it a thorough clean.
3. Edge Cleaning Mode
The cleaner will clean the edge and
corners of walls.
4. Scheduling Mode
You can schedule the cleaner to
start cleaning at a pre-defined time.
3
Product Parts
Main Unit and Accessories
Part Number Description Quantity
1 Main Unit 1
2 Self Charging ase 1
3 Remote Control (no battery included) 1
4 AC Adapter 1
5 Cleaning rush Tool 1
6 Water Tank 1
7 Spare Side rushes 2
8 HEPA Filter 1
Main Unit and Dust Bin
4
Infrared Signal Receiver
umpers
Main Pad
Cover
Charging Station
5
Auto Charging Sensor
Left Side rush
attery Cover
Roller rush
Left Wheel Module
Front Wheel
Right Side rush
Right Wheel Module
ottom Cover
Water Tank
Cover
Dust in
Power Switch and Socket
Dust in
Primary Filter
HEPA Filter
HEPA Filter Frame
Infrared Signal Transmitter
Signal Light
Top Cover
Charging Contacts
Power Supply Socket
emote Control Unit
Use the remote control to remotely control the vacuum unit. Make sure the unit is
switched on before using the remote. Point the remote towards the unit, then press the
button to control the unit in operation.
The remote control takes 2 x AAA batteries.
Do not use the remote control near the self-charging base.
Unit Display Panel
•“CLEAN” - Start/Stop touch button
•“1 2 3 4 5” - Display the scheduled cleaning hour delay
•ERROR CODE DISPLAY – Refer to page xx.
6
Power utton
Scheduling utton
Directional utton
Normal Suction utton
Auto Cleaning utton
Auto Charging utton
Spot Cleaning utton
Pause utton
Turbo Suction utton
Product Operations
Battery Charging
1. Place the Self charging base
Note: place the self charging base against the wall. Please
remove any obstacles from approximately 1m from the sides
and 2m to the front.
2. Turn on the Power Switch
Once turned on, the display will flash. If the unit does not receive any commands
for 20 seconds after being switched on, it will go into Sleep mode.
◦If the power switch is turned off, scheduling data will be erased.
◦If the power switch is turned off, the unit will not charge at the charging
station.
3. Manual attery Charge
A: Plug the adapter power cord into the unit power socket first, then plug the
AC adapter into a wall outlet.
: Then connect the charging base with the AC adapter to the wall outlet and
power on. Press HOME on the vacuum unit or the remote to make the vacuum
return to its charging base.
Notes:
◦Turn the power switch ON before starting to charge the battery.
◦When the cleaner is charging, it will display 1 to 5. Once fully charged, all
of the numbers “1 2 3 4 5” will be displayed.
◦efore the first use, charge the vacuum robot for 12 hours. When charging
is finished, the display will show “1 2 3 4 5”.
◦efore first time use, let the cleaner do cleaning until the battery is all used
up.
◦After the battery is used up, recharge the unit as quickly as possible.
◦If the cleaner is not to be used for a long time, please turn the power
switch off.
◦Do not operate the cleaner while it is charging.
4. Auto Charging
The cleaner will automatically return to the charging station once cleaning is
done, or the battery is running low.
◦When the battery is running low, the display will show “1 2” and the unit
will beep. Please keep the self-charging base plugged in, otherwise the
unit will not be able to locate the base to perform auto battery charging.
7
A
Start / Pause / Sleep
1. Starting
◦Make sure the power switch is “on”.
◦Please CLEAN on the cleaner unit or the remote control to start the unit
cleaning.
Note: if the cleaner is in sleep mode, press CLEAN to wake the cleaner up.
Then press CLEAN again a second time to get the unit to start cleaning.
2. Sleep Mode
To make the cleaner go into sleep mode:
a) The cleaner will go into sleep mode if it does not receive any instructions for
20 seconds after being switched on.
b) Otherwise, hold down the CLEAN button for 3 seconds.
Note: turn the power switch off if you will not be using the
cleaner for a long period of time.
Schedule Cleaning Time
You can schedule the cleaner to do cleaning at pre-defined times each day. There are no
real time clock setting functions, however you can set a schedule delay cleaning time on
the LED display of the cleaner by following these steps:
1. Turn the cleaner on.
2. Press “ ” on the remote control to enter into delay cleaning time settings, then
press “ ” or “ ” to choose the cleaning hour delays. (1 means start cleaning
one hour after the current time, likewise 5 means start cleaning in 5 hours time).
After choosing the delay cleaning time, press “ ” to save and finish the
scheduling. To cancel the scheduling, press “ ” and then press “ ”.
The current delay time will be erased.
3. When scheduling, ensure that the cleaner automatic delay start time is at least 4
hours away to allow sufficient time for a complete battery recharge.
4. Once the scheduled cleaning cycle is over and the robot is on a full charge (the
LED display shows “1 2 3 4 5”), you can press CLEAN on the LED display screen
or AUTO on the remote control to start the robot up for another cycle of cleaning
inbetween scheduled cleaning cycles.
Cleaning Modes
1. Auto Cleaning Mode
The cleaner will clean the area and adjust its cleaning routine according
to its environment. You can start this mode by simply pressing CLEAN
on the cleaner or remote.
2. Spot Cleaning Mode
Place the cleaner near a dirty area. Press SPOT to start cleaning, then
press CLEAN to stop. This mode will ensure the cleaner concentrates
on a certain area, and the mode will only stop when the area is clean.
8
3. Edge Cleaning Mode
When the cleaner detects an obstacle, it will use the side brushes to
clean the sides.
Product Maintenance
Cleaning Side Brushes
A) Check the side brushes for damage or foreign objects in the brush.
) Wipe the brushes clean with a soft dry cloth if they are excessively
dirty.
C) Once the brushes are completely worn, you can pull out the side
brushes, then replace them with replacement brushes.
Cleaning Dust Bin and Filter
Note: after taking out the dust bin, check if there are any foreign objects stuck or
blocking the vacuum passage. Clean it out if necessary.
1. Press “PUSH” to open the dust bin cover.
2. Take the dust bin out.
3. Separate the HEPA filter from the dust bin.
4. Pull out the dust bin top cover and remove the primary filter.
5. Empty the dust bin and wipe the dust.
6. Wash the dust bin with water. Clean the filters with a cleaning brush tool. DO
NOT wash the filters with water. Do not wash the HEPA filter. It will need to be
replaced after one year of use.
7. Install the primary filter and the HEPA filter into the dust bin.
8. Close the dust bin cover and install it back into the main unit.
9
Cleaning Sensors
A) Wipe the sensor window and auto charging sensors with a cleaning tool or a soft
dry cloth.
) Clean the charging contacts on the self-charging base.
C) Clean the vacuum intake and dust sensor.
Water Tank
Assembling the water tank
Open the water injection hole and fill with water. Once filled, close the injection hole
and fit the mop into position (as shown in images 1, 2 and 3).
Align tank with the holes in the body, then slot into position (image 4).
Notes:
•Ensure you have removed the water tank from the vacuum before filling with water.
•When installing the water tank, make sure there is no water on the outside of the tank.
•Do not overfill the tank.
10
Troubleshooting
Error Codes
Error codes will be shown on the display panel if there is a problem with the cleaner.
Error Code Error Solution
1 Cliff sensor fail Clean the cliff sensors with a cottontip.
2 Left/right wheel error Remove hair and/or debris from the
wheels, the push them in and out and turn
them to ensure they can turn freely.
3 Left/right side brush error Remove and clean the side brushes.
4 Unit not stable The unit is not sitting steadily on an even
steady surface. Please place the cleaner on
a flat floor.
12 Low Power Move the cleaner to the docking station for
recharging.
13 Power unavailable Turn power switch fully to ON, or remove
and then reinsert the battery correctly.
14 Front bumper error Firmly push the front bumped inwards.
This should reset the bumper sensor.
15 umper sensor error Clean the bumper sensor window.
23 NTC error Replace battery
Note: if the errors aren't resolved, try the following steps:
•Restart the unit by switching it off fully for 20 seconds, then switching back on.
•If the unit is still not functioning after these steps, contact the Kogan.com
customer support team for further information.
11
Exploded Product Diagram
12
Product Specifications
Classification Item Details
Mechanical specifications
Diameter 34cm
Height 90mm
Weight 2.5kgs
attery specifications Power Voltage 14.4V
attery specifications 2200mAh Li-ion
AC Adapter specifications Input 100-240V 50/60Hz 0.8A
Output 24.0V/1.0A
Cleaning specifications
Dust bin capacity 400ml
Charging type Auto charging
Cleaning modes Auto/sport/edge/daily/schedule
Charging time 3 – 5 hours
Cleaning time Approx 90 minutes
Main Unit utton Type : Touch LED Display
13

Other Kogan Vacuum Cleaner manuals

Kogan KAVACST296B User manual

Kogan

Kogan KAVACST296B User manual

Kogan KAVACCYC2WA User manual

Kogan

Kogan KAVACCYC2WA User manual

Kogan KAVACUV22CA User manual

Kogan

Kogan KAVACUV22CA User manual

Kogan MX10 PRO User manual

Kogan

Kogan MX10 PRO User manual

Kogan T10 Pro User manual

Kogan

Kogan T10 Pro User manual

Kogan KAURVAC900A User manual

Kogan

Kogan KAURVAC900A User manual

Kogan KA22BLDSVCA User manual

Kogan

Kogan KA22BLDSVCA User manual

Kogan SmarterHome LX10 User manual

Kogan

Kogan SmarterHome LX10 User manual

Kogan 3-IN-1 User manual

Kogan

Kogan 3-IN-1 User manual

Kogan MX10 PRO User manual

Kogan

Kogan MX10 PRO User manual

Kogan E8 User manual

Kogan

Kogan E8 User manual

Kogan X9 User manual

Kogan

Kogan X9 User manual

Kogan SMARTERHOME G80 User manual

Kogan

Kogan SMARTERHOME G80 User manual

Kogan KA600CDSTVA User manual

Kogan

Kogan KA600CDSTVA User manual

Kogan SMARTERHOME G40 User manual

Kogan

Kogan SMARTERHOME G40 User manual

Kogan Z11 PRO User manual

Kogan

Kogan Z11 PRO User manual

Kogan SMARTERHOME LX12 User manual

Kogan

Kogan SMARTERHOME LX12 User manual

Kogan MX12 User manual

Kogan

Kogan MX12 User manual

Kogan KAVAC20TRBA User manual

Kogan

Kogan KAVAC20TRBA User manual

Kogan M11 User manual

Kogan

Kogan M11 User manual

Kogan V8 PRO User manual

Kogan

Kogan V8 PRO User manual

Kogan MX11 PRO User manual

Kogan

Kogan MX11 PRO User manual

Kogan KAWDVAC21LA User manual

Kogan

Kogan KAWDVAC21LA User manual

Kogan SMARTERHOME LX8 User manual

Kogan

Kogan SMARTERHOME LX8 User manual

Popular Vacuum Cleaner manuals by other brands

Vax ASTRATA instruction manual

Vax

Vax ASTRATA instruction manual

Vax Essentials VEU-11 instruction manual

Vax

Vax Essentials VEU-11 instruction manual

Philips FC8297 manual

Philips

Philips FC8297 manual

LG VB78 H Series manual

LG

LG VB78 H Series manual

Amibot Spirit PREMIUM user manual

Amibot

Amibot Spirit PREMIUM user manual

Sencor SVC 682VT user manual

Sencor

Sencor SVC 682VT user manual

Sanyo SC-5006 Specification sheet

Sanyo

Sanyo SC-5006 Specification sheet

Sauber RVC-124116.2 Instructions for use

Sauber

Sauber RVC-124116.2 Instructions for use

Numatic NBV 190 Owner's instructions

Numatic

Numatic NBV 190 Owner's instructions

Samsung Vacuum cleaner operating instructions

Samsung

Samsung Vacuum cleaner operating instructions

Hoover FH50700 user manual

Hoover

Hoover FH50700 user manual

Bosch BHS4 Series Instructions for use

Bosch

Bosch BHS4 Series Instructions for use

LG VN7116HNT owner's manual

LG

LG VN7116HNT owner's manual

Menzer VC 620M Translation of the original operating instructions

Menzer

Menzer VC 620M Translation of the original operating instructions

AEG Liliput operating instructions

AEG

AEG Liliput operating instructions

AEG Electrolux smart 450 operating instructions

AEG Electrolux

AEG Electrolux smart 450 operating instructions

Royal Appliance COMMERCIAL owner's manual

Royal Appliance

Royal Appliance COMMERCIAL owner's manual

H-P Products Spot operating instructions

H-P Products

H-P Products Spot operating instructions

manuals.online logo
manuals.online logoBrands
  • About & Mission
  • Contact us
  • Privacy Policy
  • Terms and Conditions

Copyright 2025 Manuals.Online. All Rights Reserved.