Kogan KAGFLWAS10A User manual


Warning
Thoroughly read these safety instructions before use. The items indicated here are very
important safety precautions, which must be followed. Kogan.com cannot be held liable for
any damage caused by non-compliance with the warning and safety instructions or
resulting from incorrect use or operation.
Cleaning and user maintenance shall not be performed by children without supervision.
Children of less than 3 years should be kept away unless continuously supervised.
Ensure only the supplied hose-sets are used with this appliance. Do not re-use any old
existing hoses.
This appliance is not intended for use by persons (including children) with reduced physical,
sensory or mental capabilities or lack of experience and knowledge unless they under
supervision or instruction of an adult or carer.
Children should be supervised to ensure that they do not play with the appliance.
This appliance is intended to be used in household and similar applications such as:
• Staff kitchen areas in shops, offices and other working environments;
• Farmhouses;
• By clients in hotels, motels and other residential type environments;
• Bed and breakfast type environments;
• Areas for communal use in blocks of flats or launderettes.
Washing machines featuring ventilation openings in the base, must not be placed on
carpeted surfaces.
SAFETY & WARNINGS

Te c h n i c a l s a f e t y
• Before setting up the washing machine, check for any external visible damage. Do
not install or use a damaged washing machine.
• Before connecting the washing machine, ensure that the connection data on the
data plate (voltage and current) match the electricity supply. If in any doubt,
consult a qualified electrician.
• The electrical safety of this washing machine can only be guaranteed when it is
plugged into a power socket which complies with current local and national safety
regulations.
• It is important that this basic safety requirement is present and regularly tested.
Where there is any doubt, the household wiring system should be inspected by a
qualified electrician. Kogan.com cannot be held liable for the consequences of an
inadequate electrical system.
• Do not connect the washing machine to the power outlet with an extension lead.
Extension leads do not guarantee the required safety of the appliance.
• Unauthorised repairs could result in unforeseen dangers for the user, for which
Kogan.com cannot accept liability. Repairs should only be undertaken by an
approved service technician Ensure the washing machine is disconnected from the
power outlet until after maintenance or repair work has been carried out.
• If the supply cord is damaged, it must be replaced by the Kogan.com or a service
agent on behalf of Kogan.com.

Correct use
• To a v o i d t h e r i s k o f p e r s o n a l i n j u r y o r d a m a g e t o t h e w a s h i n g m a c h i n e , d o n o t
install it in any damp areas or somewhere which is exposed to rain.
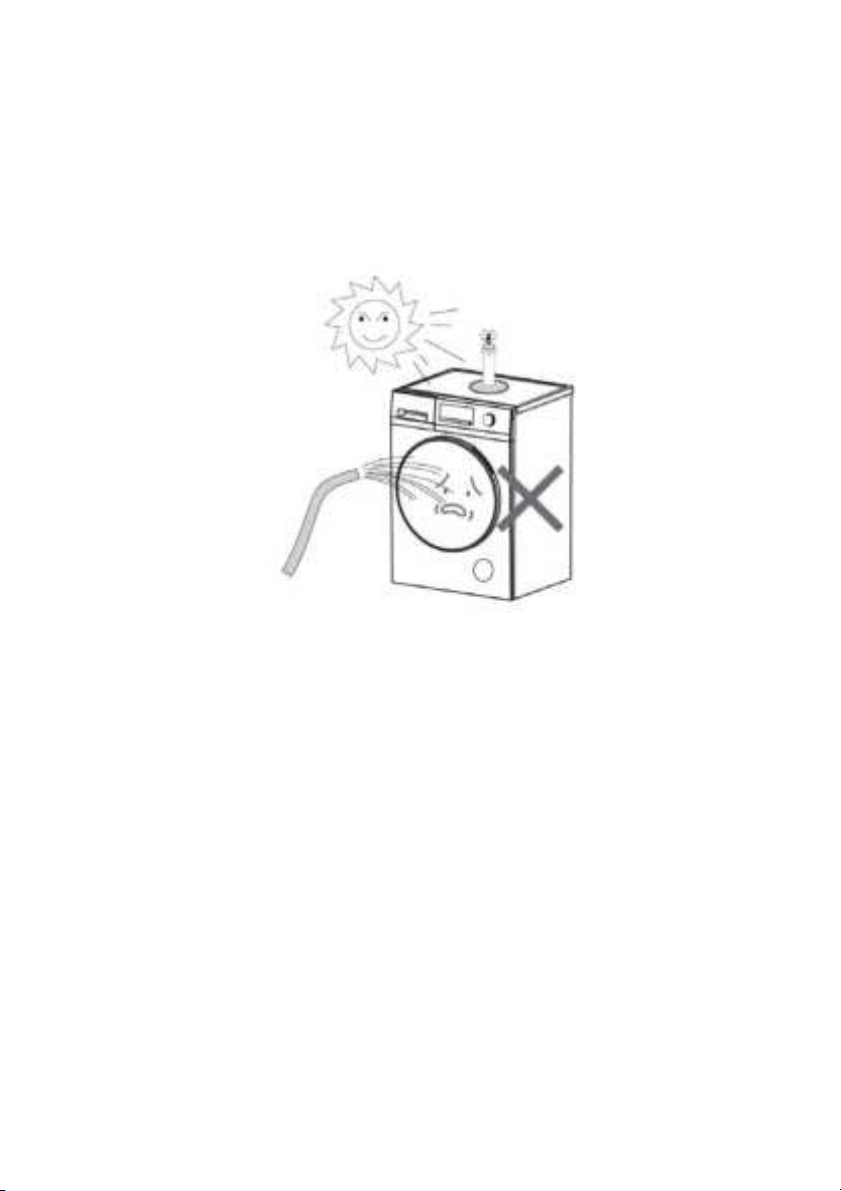
• Do not install the washing machine in areas with direct sun light, in which plastic or
other components may be damaged. This will shorten the life of your washing
machine.
• Do not install the washing machine in areas where temperatures fall below 0°C.
Frozen hoses may burst or split. The reliability of the electronic control unit may be
impaired at temperatures below freezing point.
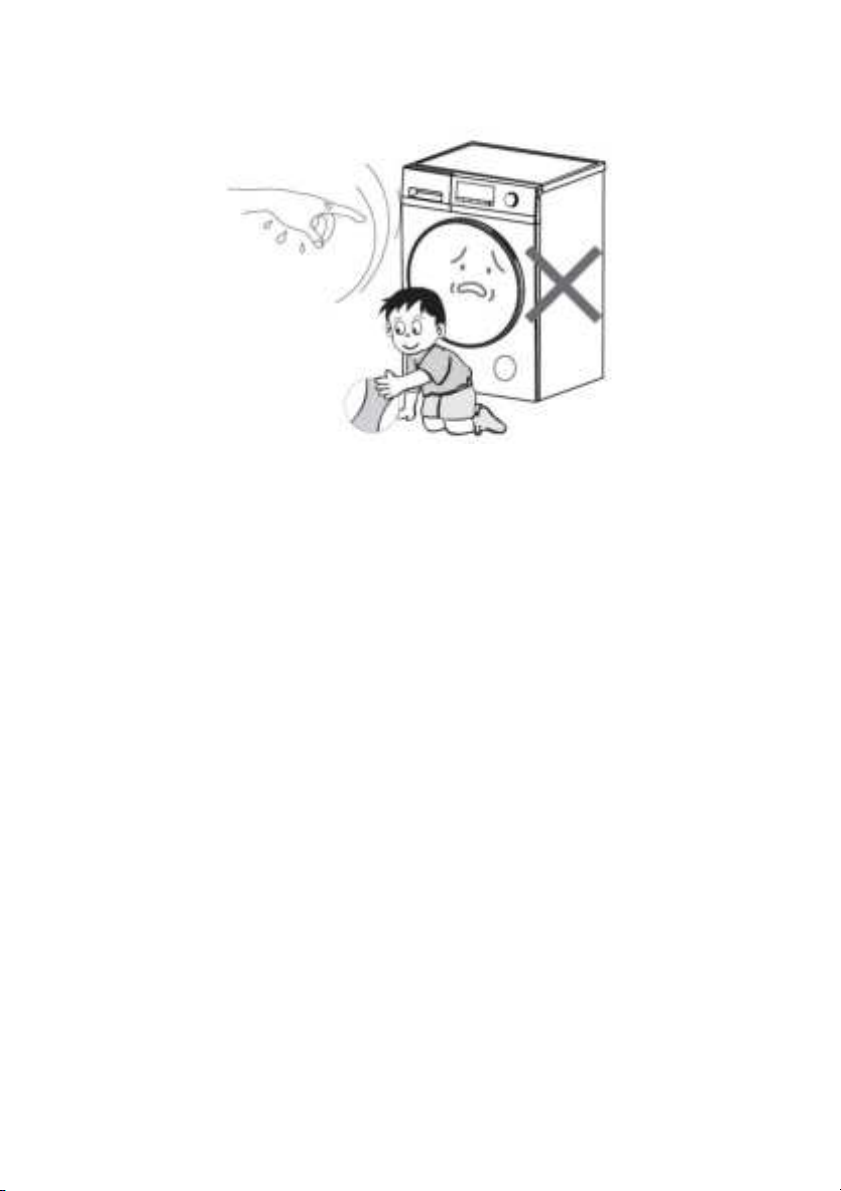
• Do not spray the washing machine with water during cleaning or maintenance.
• Keep the washing machine away from fire and other sources of heat.
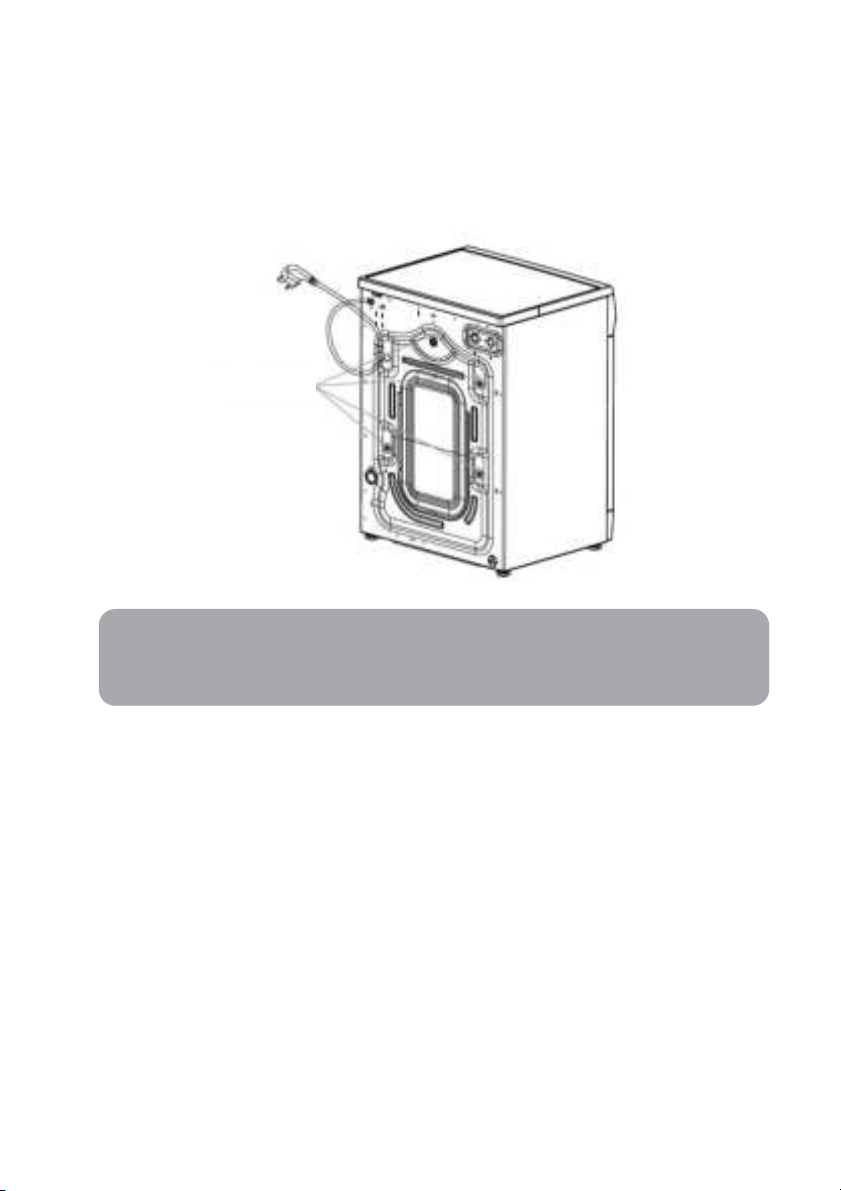
• Before using the washing machine for the first time, check that the transit bolts at
the rear of the machine have been removed. During spinning any transit bolts
which are still in place may result in damage to both the machine and any
adjacent furniture or appliances.
• Tu r n o f f t h e t a p i f t h e m a c h i n e i s t o b e l e f t f o r a n y length of time (e.g. holiday);
especially if there is no floor drain (gully) in the immediate vicinity.
• Ta ke c a r e t o e n s u r e t h a t f o r e i g n o b j e c t s ( e . g . n a i l s , p i n s , c o i n s , p a p e r c l i p s ) d o n o t
find their way into the machine with the laundry. These may damage components
of the machine (e.g. drum), which in turn can result in damage to the laundry.
• Do not wash water-repellent items (e.g. raincoats) with this washing machine.
• Only remove laundry from the washing machine once the drum has stopped
turning. Reaching into a moving drum is extremely dangerous and could result in
injury.

Safety with children
• Keep children away from the washing machine at all times. Do not allow children
to play on or near the machine and its controls. Always supervise children whilst
you are using it.
• Older children may only use the washing machine if its operation has been clearly
explained to them and they are able to use it safely and can recognising the
dangers of misuse.
• The door glass will be hot when washing at very high temperatures. Do not let
children touch it.

OVERVIEW
Note:
Unscrew the drain pump filter to allow the water to drain out when the machine is not
used for an extended period.
Control Panel
Drawer (for detergent
or fabric softener)
Door Glass
Door
Drainage Pump Damper
Drain Pump Filter
To p C o v e r
Control Knob
Case Body
Door Seal
Drain Hose
Adjustable Feet

Note:
The illustrations in this user guide are intended for reference only and may differ from
actual product.
Power Cord
Tr a n s i t B o l t s
Rear Cover
Cold Water
Inlet Valve

Packaging
• Remove all the packaging (Including the foam base).
• Properly dispose of all the packaging and keep them out of the reach of children.
• Some condensation may appear on the packaging plastic bag and the door glass.
Accessories
Make sure that you have received all of the items shown below.
Accessories
Name
Qty
Accessories
Name
Qty
Inlet hose
1
“U” piece
1
Tr a n s i t b o l t
caps
4
User guide
1
INSTALLATION

Removing transit bolts
• Remove all the transit bolts from the rear of the machine.
• Plug the holes using the supplied transit bolt caps.
• Keep the transit bolts for future transportation. Whenever the machine is
transported, the transit bolts must be refitted.
Note:
Strong vibration, noise or failures may occur if the transit bolts are not removed.
Tr a n s i t Bolts

Installation place requirement
• A concrete floor is the most suitable surface for the washing machine, being far less
prone to vibrations during the spin cycle than other surfaces.
• The machine must be level and securely positioned. The distance between the
machine and any walls must be more than 10cm.
• To a v o i d v i b r a t i o n s d u r i n g s p i n n i n g , t h e m a c h i n e s h o ul d n o t b e i n s t a l l ed o n s o f t
floor coverings.

Level adjustment
The machine must stand perfectly level on all four feet to ensure safe and proper operation.
Incorrect installation may increase electricity and water consumption and may cause the
machine to move during usage.
The level can be adjusted using the Adjustment feet on the bottom of the machine
• Using the spanner rotate the locknut in a clockwise direction. Then rotate the
locknuts together with adjustable feet to raise or lower.
• Use a spirit level to check the machine is level.
• Hold adjustable feet securely with a pipe wrench. Turn locknut again using the
spanner until it sits firmly up against the housing.
Note:
Vibration and noise may occur if the locknuts do not sit firmly up against the houses.
Locknuts
Raise
Lower
Loose
Locked
Adjustable Feet

Drain hose connection
1. Direct into a sink:
• If the outlet spigot has not been used before, remove the blanking plug (if present).
• Push the drain hose onto the spigot and secure with a clip if required, ensure a loop
is formed in the drain hose to prevent any waste from the sink entering the washing
machine.
• If required, the drain hose can be extended to a length of 4m.
2. Connected securely to a standpipe:
• Firstly, form a hook shape at the end of the drain hose using the supplied “U”
piece”.
• Place the drain hose into the standpipe, which should have an internal diameter of
approximately 38mm thus ensuring there is an air brake between the drain hose
and standpipe.
• When discharging into a standpipe ensure that the top of the standpipe Is no more
than 90cm and no less than 60cm above floor level.
“U” Piece
Loop

Water inlet connection
1. Connect the supplied inlet hose to a tap with a 3/4” thread.
2. Do not use any old existing hoses.
3. Installation should comply with your local water authority and building regulations’
requirements.
When there is a single inlet valve at the back of the machine, it must be connected to a
cold-water supply. If there are two inlet valves, one is connected to a cold-water supply and
the other is connected to a hot-water supply. Follow the indication of the picture below to
complete the connection.
Washing preparation
1. Connect the inlet hoses and turn on the tap.
2. After making sure the power socket is grounded reliably, insert the power plug into
the power socket. Switch on at wall.
3. Position the drainage hose (laundry sink or drain).
How to use Washer
Before washing close for the first time, you must run a complete cycle without clothes.
1. Tu r n t h e p r o g r a m s e l e c t k n o b t o “ S t a n d a r d ” p o s i t i o n .
2. Press “Start/Pause” button.
If there is any water leftover from quality testing, this will drain the water.
Cold Water Inlet valve
Inlet Hose with white nut

Control panel
1. Control Knob
Tu r n this knob clockwise or anti-clockwise to select the required wash program. (Note: At the
end of a wash cycle, the knob must be returned to the “O” position).
2. Start/Pause ( )
Press this button to start or pause a wash cycle. The door can't be opened once the
machine has started. You can press this button to pause the running cycle and turn the knob
to select another program and then press this button again to start the selected wash cycle.
3. Function
There are four basic functions: “Soft”, “Anti-Ironing”, “Water+” and “Pre-Wash”.
• Soft : This function can help reduce clothing wrinkles by running the “Steam
Fresh” program after the rinse and spin.
• Anti-Ironing : This function is to reduce the wrinkle of clothes during a washing
cycle. Once this function is selected, the machine will not execute the last drain
unless the “Start/Pause” button is pressed. (Note: The max running time of this
function is 12 hours. If it exceeds 12 hours, the machine will drain and spin
automatically)
• Water+ ”: This function will add an extra rinse on the program you selected.
• Pre-Wash : Select this function for very dirty clothes, the washing duration will
be extended.
4. Rinse:This function will add an extra rinse on the program you selected.
5. Wash+:This function will add extra time on the program you selected.
OPERATION

6. Delay:Press this button to set the delay time of starting a wash cycle from 1 hour up to
24 hours.
7. Speed:Press this button to change the spin speed.
8. Te m p :Press this button to change the wash temperature.
Child lock (“Delay” + “Wash+”)
The function will lock the control panel to prevent any misuse by children during a washing
cycle.
1. Press the “Delay” and “Wash+” buttons at the same time for 3 seconds. When the
icon “ ” is displayed up on the screen, the child lock is active. Press the “Delay”
and “Wash+” buttons at the same time for 3 seconds. The child lock is cancelled.
2. When this function is active, all controls are unavailable.
Mute
The “Mute” feature will silence all prompt tones and alert sounds. Press the “Rinse” button
for 3 seconds to activate or cancel this function.
Note:
Do not turn the knob to the position “o” and remove clothes while the machine is
running. The temperature of the water may be high and may scald you. The door lock
will open automatically at the end of a wash cycle when the temperature of the drum
has cooled down.

Control panel display
Digital display: This area will show the remaining time, delay hour and temperature.
Inlet timeout: This icon will be displayed when the water inlet sensor times out.
Please check the water tap and make sure it is open.
Delay: This icon will display when a delay timer has been set.
Foam reducing: If there is too much foam during the wash, the machine will run a
program to reduce the foam by itself and this icon will display.
Balance control: The machine has a balance control device to check and make
sure that the clothes have been evenly distributed into the drum before the spin. If
the balance control fails more than three times, this icon will be displayed and the
spin will be delayed.
Child lock: This icon will display once the child lock function is selected.
Door lock: This icon will display when the door lock is active.
1400-
600
Spin speed: Displays the speed of the spin cycle.
High water level: If the machine is paused during a wash cycle, but the door can’t
be opened due to the high-water level, this icon will display.
Weighing: The machine will weigh the clothes at the beginning of some programs.
This icon will display until the weighing process is complete.
Main wash: The icon will display in standby mode when this function is selected.
This icon will flash during operation and will display when the machine is paused,
the logo will be turn off when machine finishes washing.
Rinse: The icon will display in standby mode when this function is selected. This
icon will flash during operation and will display when the machine is paused, the
logo will be turn off when machine finishes washing.
Final spin: The icon will display in standby mode when this function is selected. This
icon will flash during operation and will display when the machine is paused, the
logo will be turn off when machine finishes washing.
Water hot: If paused during a washing cycle, but the door can’t be opened due to
the high water temperature (≥60°C), this icon will displayed until the button
“Start/Pause” is pressed to start the machine again.
Drum clean: If this icon is displayed, please run the “Drum Clean” program to clean
the drum.
Pump clean: If this icon is displayed, please check if the drain pump is still working.

The selectable options and functions of different programs
Program
Weight
(kg)
Time
(min)
Te m p ( ° C )
Rinse
times
Spin speed (rpm)
Standard
10
79
00/20/30/40/
60/95
2
0/600/800/1000/
1200/1400
*Cotton
10
129
00/20/30/40/
60/95
2
0/600/800/1000/
1200/1400
Anti-Allergy
6
130
95
2
0/600/800/1000/
1200/1400
Wool
4
42
00/20/30/40
3
0/600
Steam Wash
4.5
84
00/20/30/40/
60/95
2
0/600/800/1000/
1200/1400
Steam Fresh
2.5
15
---
---
---
Drum Clean
0
69
60/95
2
600
Spin
10
11
---
---
0/600/800/1000/
1200/1400
Rinse/Spin
10
17
---
1
0/600/800/1000/
1200/1400
DIY Wash
6
51
00/20/30/40/
60/95
2
0/600/800/1000/
1200/1400
Quick
3.5
18
00
2
0/600/800/1000/
1200
Mix
6
78
00/20/30/40/
60
2
0/600/800/1000/
1200/1400
Bulky Item
10
86
00/20/30/40/
60
2
0/600/800
Silk
4
42
00/20/30/40
2
0/600
Synthetic
5
72
00/20/30/40/
60
2
0/600/800

Program
Function Options
Weight
Delay
Pre-
wash
Wash+
Rinse+
Anti-
Ironing
Water+
Soft
Standard
(+25min)
(0/5/10/15/20min)
Cotton
(+25min)
(0/5/10/15/20min)
Anti-Allergy
(0/5/10/15/20min)
Wool
(0/5/10/15min)
Steam
Wash
(0/5/10/15/20min)
Steam Fresh
Drum Clean
Spin
Rinse/Spin
DIY Wash
(+25min)
(0/5/10/15/20/25/30
min)
Quick
(0/5/10/15min)
Mix
(+25min)
(0/5/10/15/20min)
Bulky Item
(+25min)
(0/5/10/15/20min)
Silk
(0/5/10/15min)
Synthetic
(+25min)
(0/5/10/15min)
Notes:
For a normally soiled cotton load, it is recommended to choose the program “Cotton “,
set the washing temperature to “60°C”, and select the spin speed to “1400rpm” (*).
The running time above is for the default programs, which is only for reference, it may differ
because of different laundries, weights and washing temperature. The “00” means the
temperature of water is normal. The default options of the program are in bold.

First use
Before washing clothes for the first time, you must run a complete cycle without clothes.
Connect the power and turn on the tap. Turn the knob to position “Standard” and press the
“Start/Pause” button. This will remove any water left in the machine during manufacturing.
Machine preparation
1. Connect the inlet hoses and turn on the tap(s).
2. Ensure the power cord is properly connected to the power socket.
3. Ensure the drain hose is plumbed correctly.
Preparation of clothes
1. Sort the laundry by colour and referring to the care label. Most garments have a
textile care label in the collar or side seam.
2. Ensure all pockets are empty, foreign objects (e.g. nails, coins, paper clips, etc.) can
cause damage to garments and components in the machine.
3. Close any zips, fasten hooks and eyes etc before washing.
4. Dark textiles often contain excess dye and should be washed separately several
times before being included in a mixed load. Always wash whites and coloureds
separately.
5. Badly soiled areas, stains etc. should be pre-treated with liquid detergent, stain
removers etc.
6. Tu r n any clothes which pill easily inside-out before putting them into the machine.
Diagram 3
Diagram 2
Diagram 1
Table of contents
Other Kogan Washer manuals

Kogan
Kogan androidtv 9 Series User manual

Kogan
Kogan KAGFLWASH9A User manual

Kogan
Kogan KAWWASHT85A User manual

Kogan
Kogan KAWWASHT10A User manual

Kogan
Kogan 8KG Series User manual

Kogan
Kogan androidtv 9 Series User manual

Kogan
Kogan KATTLWASH9A User manual

Kogan
Kogan 7 Series User manual

Kogan
Kogan KAWFLWASM9B User manual

Kogan
Kogan KA9FNTLODWA Parts list manual
Popular Washer manuals by other brands

Samsung
Samsung WW7 T3 Series user manual

Siemens
Siemens WM14YH89GB Instruction manual and installation instructions

LG
LG WD(M)-14331(6)AD owner's manual

Beko
Beko WTE 7512 XS0 user manual

GEAppliances
GEAppliances GTW680 series Owner's Manual & Installation Instructions

LVO Manufacturing
LVO Manufacturing FL25 owner's manual