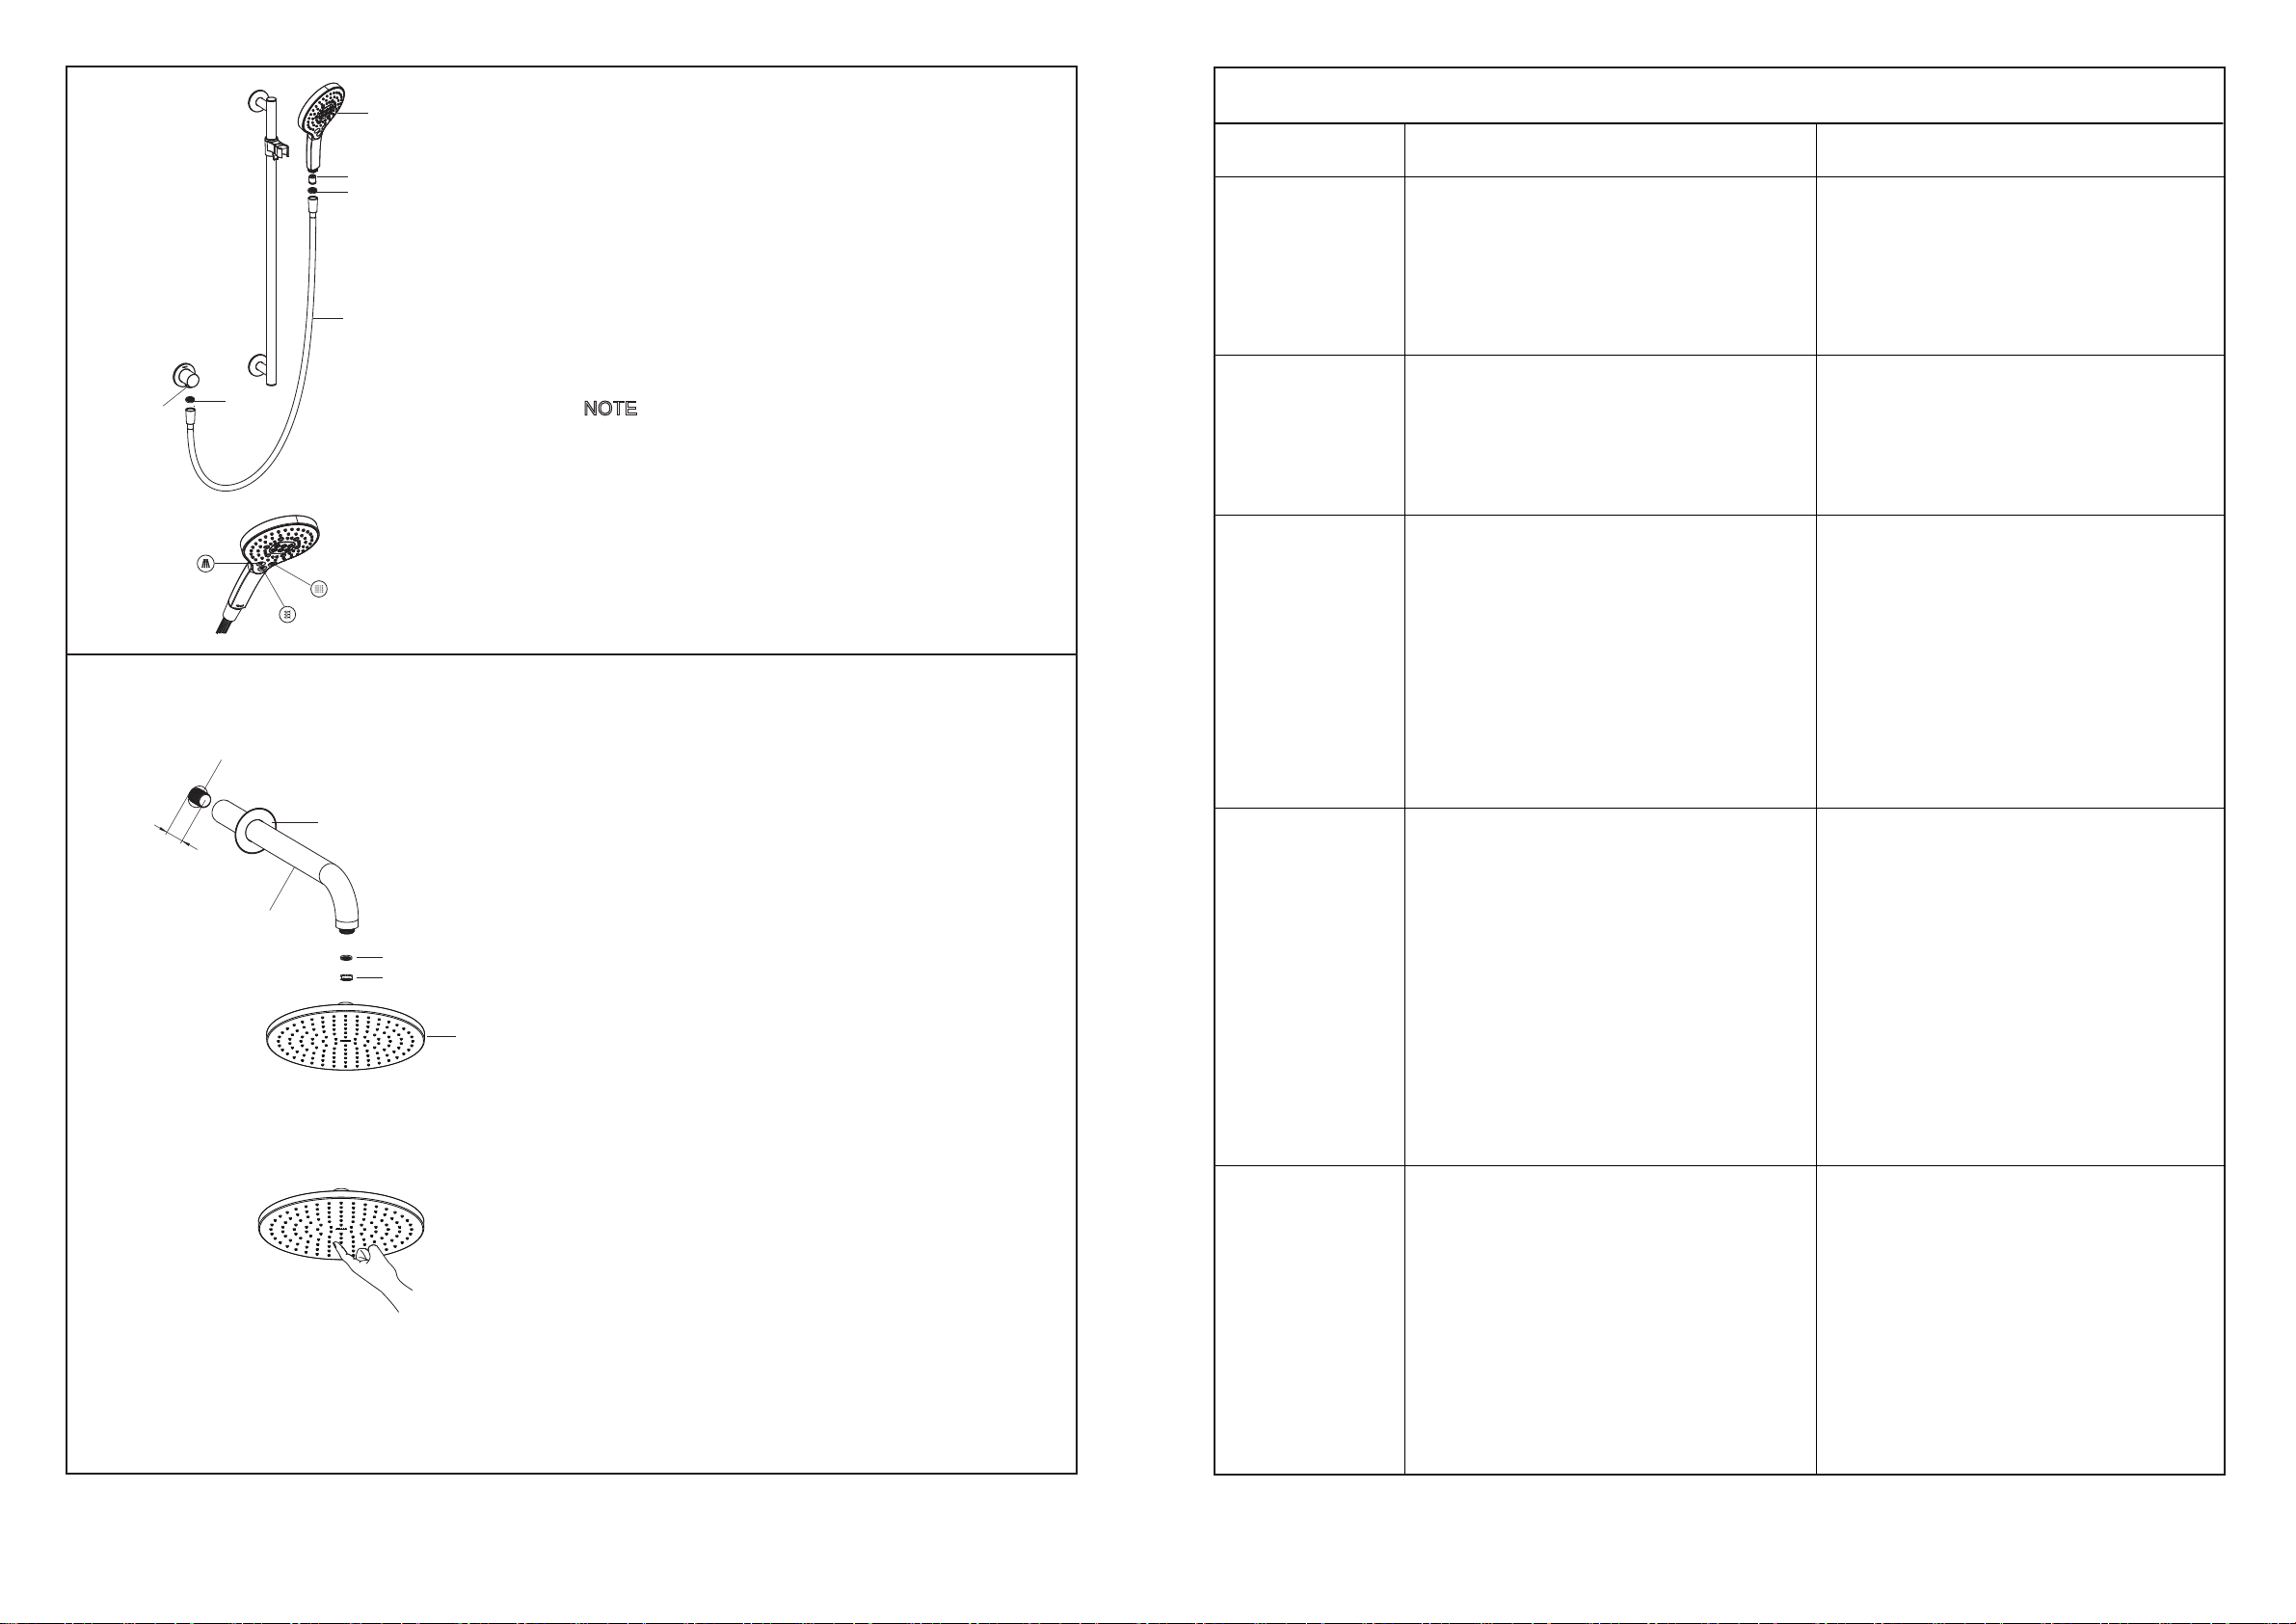
□ Apply tape or sealant to the exposed end of the
shower arm(22). Install the showerhead(26) with the
washer(24) onto the shower arm, tighten them with a
wrench.
□ Before installation, install regulator(25) if needed.
Take out washer(24) and install regulator as the figure
shown, reinstall washer. Adjust the showerhead to
keep it horizontal with provided bubble level after the
showerhead is installed.
How to Clean the Nozzle
Any debris or mineral build-up may cause the flow
stream become distorted or reduce the flowrate. To
remove the debris or mineral build-up, run water
through the showerhead, firmly press or rub your
finger back and forth across the rubber nozzles.
Install the Shower Arm and Showerhead
□ Apply tape or sealants to G1/2˝ nipple(21, not
provided) threads. Install the G1/2˝ nipple to extend
12-18mm beyond the finished wall.
□ Slide the escutcheon(23) onto the shower arm(22).
□ Thread the shower arm to the G1/2˝ nipple, tighten
by strap wrench. Adjust the shower arm downwards.
Push the escutcheon against the finished wall.
□ Flush both water supplies through the shower arm
for about one minute to remove debris.
Install the Handshower
□ Flush both water supplies for about one minute
before the handshower(16) is installed.
□ Put the screen washer(18) into the shower
hose(19) connector. Screw the handshower to the
hose. Install regulator(17) into the handshower inlet if
needed. Connect another end of shower hose to the
connector(20). Tighten all the connectors. Hang the
handshower on the bracket.
NOTE: Don’t over tighten.
Press the buttons on the handshower to change the
water flow.
26
25
24
21
12~18mm
22
23
Katalyst spray
Komotion spray
Massage spray
16
17
18
19
20 18
Symptoms Probable Cause Recommended Action
Troubleshooting Table(cont.)
4. Maximum blend
temperature too
hot or too cold.
A. Incorrect maximum temperature setting.
B. If the above recommended action does
not correct the symptom, the interface or
valve requires servicing.
A. Refer to the ″Set the Maximum
Temperature″ section.
B. Contact your Kohler Co. Authorized
Service Representative.
5. Continuous flow. A. System will not switch off.
B. Flow rate exceeds 10 gpm (45.5 L/min)
from one outlet.
A. Turn off the water and power supply and
contact your Kohler Co. Authorized Service
Representative.
B. Ensure flow restrictors are installed in
both outlets.
6. Only cold water
flows from the
outlets.
A. Hot water supply is either not turned on or
not connected to the valve inlet.
B. Hot water inlet is blocked.
C. The hot water supply is exhausted.
D. If none of the recommended actions for
the above issues correct the symptom, the
valve requires servicing.
A. Check if the hot water supply is turned on
and connected to the valve inlet.
B. Check the hot water inlet screen for
blockage. Clean or replace the inlet screen.
C. Allow time for the water heater to come
up to temperature.
D. Contact your Kohler Co. Authorized
Service Representative.
7. Fluctuating or
reduced flow rate.
Valve is functioning
properly.
A. Valve inlets may be blocked.
B. Fittings/Spray faces may be blocked.
C. Water outlet pressure is low.
D. Fluctuating supply pressure.
E. Water supply temperatures are not within
the recommended range.
A. Check the valve inlets for blockage
or debris. Clean the inlet screens. Refer to
the ″CARE AND MAINTENANCE″ section.
B. Clean the spray faces and any screens in
your fittings.
C. Check that the flow rate is at or above the
minimum rate required. Refer to
″SPECIFICATION″ section.
D. Verify that the dynamic inlet pressures
are within specifications.Refer to
″SPECIFICATION″ section.
E. Check if inlet water temperatures are
within the recommended range.
8. Blend tempera-
ture drift or tempera-
ture cycling.
A. Fluctuating water supply temperature.
B. Pressure difference greater than 5 psi
(34.5 kPa) between the hot and cold supply
lines.
C. If none of the recommended actions for
the above issues correct the symptom, the
valve requires servicing.
A. Check the inlet temperature differentials
and verify they are sufficient. Refer to
″SPECIFICATION″ section.
B. Install pressure regulators to bring the
supplies within 5 psi (34.5 kPa) of each
other.
C. Contact your Kohler Co. Authorized
Service Representative.
1354659-2A-C 11
1354659-2A-C 6