©
2010 Cycle Country Accessories
Corporation
5
BEFORE YOU BEGIN:
• Please read and understand all
instructions.
• Verify all parts and tools are accounted
for.
• To ensure a satisfactory installation, follow all
steps
correctly and in the sequence
described.
• All directions referring to right and left are when
the
rider is sitting on the
machine
TOOLS REQUIRED:
• Basic Hand Wrench and Socket
Set
• Torque
Wrench
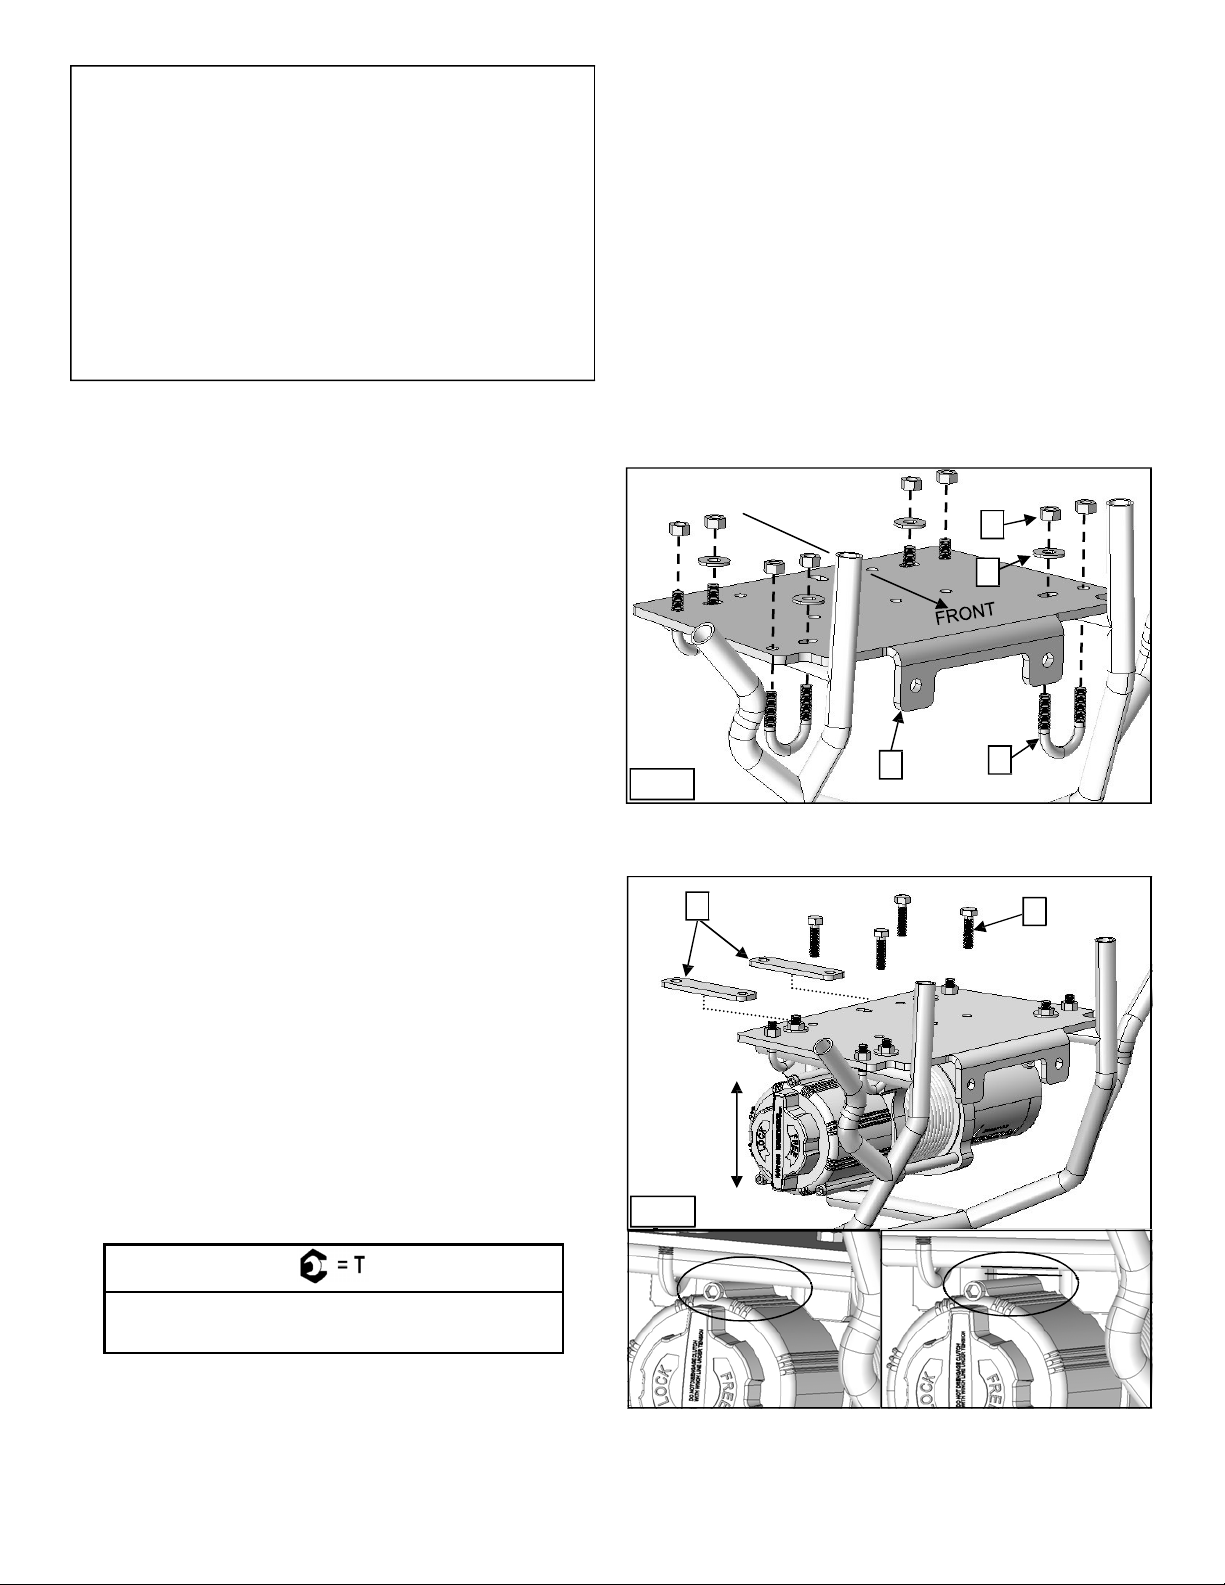
WINCH MOUNT PLATE
INSTRUCTIONS:
1. Remove bottom plastic shroud from the ATV.
2. Insert the winch mount plate, Item #1 into the front
5
opening of the ATV and position on top of the frame
4
tubes. Fasten plate using Item #2, Item #5 with
washers, Item #4, over the slotted holes as shown in
Illustration 1. Do not torque fasteners at this time.
1
2
ILL.
1
3. Position the winch under the mount plate and check
for interference. If interference occurs between the
winch gear casing and the horizontal tube of the
bumper frame, use spacers, Item #6 as needed to
eliminate the interference. See Illustration 2.
4. Secure winch with mount bolts, Item #7, through the
mount plate and into the winch mounting holes as
shown in Illustration 2. Tighten bolts according to the
winch installation instructions.
5. Re-verify the position of the assembled winch and
mount plate front-to-back to remove any interference.
6. Tighten U-bolt fasteners to specification.
6
7
ILL.
2
FASTENER
TORQUE:
30 ft. lbs. (41
Nm)