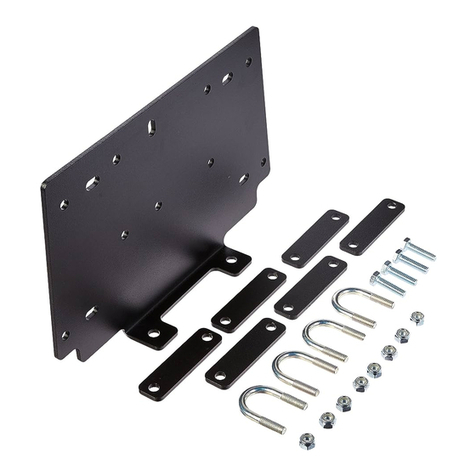
Kolpin Powersports Cycle Country 25-3260 User manual

WINCH
MOUNT KIT
For POLARIS ATVs
OWNER’S MANUAL
MODEL NUMBER: 25-3260
CUSTOMER MUST RECEIVE A COPY OF THIS
OWNER’S MANUAL AT TIME OF SALE
© 2006 Cycle Country Accessories Corp.
4/11/12
MAN0075

2
ITEM
NO. QTY. PART NO. DESCRIPTION
1
1
CYC5524 Winch Mount Plate
2
1
CYC5522 Winch Adapter Plate
3
1
CYC5523 Roller Hawse Mount Plate
4
2
CYC0019 Carriage Bolt M8 x 25mm
5
4
CYC0019 Flatwasher M8
6
4
CYC0019 M8 x 30mm Self Tapping Flange Bolt
7
4
CYC0019 Locknut M8 Nylock
8
2
CYC0019 M8 x 25mm Hex Bolt
Model Number 25-3260
Parts List
Please Note: The roller hawse, cable clamp and
cable stop are included with winch.
1
6
5
8
2
4
3
7
Hardware package part No. CYC0019

3
THIS WINCH MOUNTING KIT CAN BE USED TO MOUNT
CYCLE COUNTRY 1500/2500 WINCHES OR WARN
15RT/15XT/25RT/25XT/A2500/3000 WINCHES.
All directions referring to right and left are when the rider is sitting on the machine. Please Note:
The cable clamp, roller hawse, and cable stop are included with the winch.
MODEL NUMBER 25-3260
WINCH MOUNT INSTALLATION INSTRUCTIONS
Assemble the Winch to Winch Mount Plate, Winch Adapter Plate and Roller Hawse
Mount Plate on a bench prior to installing on ATV.
General Winch and Mount Assembly:
The winch cable must be configured to run out the top of the winch spool. If yours is
pre-configured to run out the side of the winch spool, you must change it to route out the
top of the winch.
1. Begin by setting the winch mount plate (Item 1) on a bench and orient the wiring
hole to the motor end of your specific winch. (See drawing below for proper
configuration). The plate is reversible: Position’s below are from the rider’s
perspective, when sitting on the ATV.

4
2. Install the two M8 x 25mm carriage bolts loosely into place on the winch adapter
plate (Item 2) with flatwashers and nylock nuts as shown on the parts page. (These
bolts need to be inserted into place now, because you may not be able to after the
winch is installed.)
3. Place the winch adapter plate in position onto the winch mount plate, over the holes
designated for your winch as shown in drawing on previous page. Place your winch
into place and insert bolts from the back side of the winch mount plate assembly.
See picture below.
CYCLE COUNTRY 1500 Winch
Use the included two 5/16” x 1” bolts, flatwashers and nylock nuts and insert from the
back side of winch mount plate (#1), through the winch adaptor plate and winch.
CYCLE COUNTRY 2500 and WARN 15RT/XT; 25RT/XT & 3000 Winches
Use the mounting bolts that came with your winch and insert from the back side of winch
mount plate (Item1), through the winch adaptor plate (Item 2) and into winch.
Position the winch so that it is straight on the winch mount plate and tighten bolts. If your
winch comes with a roller hawse mount plate, it will not be used with this installation.
4. Install the roller hawse mount plate (Item 3) onto the winch adaptor plate (Item 2)
after removing the nylock nuts from the carriage bolts installed earlier. Loosely
attach with flatwashers and nylock nuts. Allow the roller hawse mount plate to slide
down until it makes contact with the top of the winch housing, making sure that it
remains straight across top and side edges while still making good contact on both
sides of the winch housing, closest to the cable barrel. (See photo’s on next page)
Tighten all hardware. GO TO ROLLER HAWSE INSTRUCTIONS
Cycle Country
1500 Lb.
Winch Shown

5
Install Roller Hawse Assembly
Remove one of the long rollers and the two side rollers and feed the winch cable through
the roller hawse. Reinstall the rollers and be sure rollers move freely.
Attach the roller hawse to the roller hawse mount plate using the bolts and nylock nuts
provided with the winch. Tighten all hardware.
Cycle Country
1500 Lb.
Winch Shown
Tighten Carriage Bolts after
Roller Hawse Mount Plate
contacts Winch Case.

6
Installation of Winch Assembly:
5. Disconnect the headlight wiring harness from the bumper headlights.
6. Remove the front plastic “Polaris” shield on the front of your ATV by pushing in at
the bottom and pulling up. This cover will no longer be used after installing a winch.
7. Remove the front bumper by removing the four 5/16” Bolts on the front. Set bumper
aside for now. (Note: If installing on a Polaris Sportsman X2 500 or X2 800, there
will be an existing plate installed, remove this plate and discard.)
8. It may be beneficial to run your wiring for your winch at this time. After the winch is
in place, there will be limited access to the area behind where your winch is to be
installed without removing other access panels. See your winch’s installation
instructions for the wiring of your winch. Some winches have the wiring harness
already connected to the winch and wiring your winch may not be possible until it is
installed. Again, see your winch’s owners/installation manual for instructions.
9. Pre-start the four M8 self-tapping bolts into holes shown below and then remove
them. You will only need to run them in far enough to start the new grooves for the
bolts. This will aid in installation of the winch assembly.
Start Self-Tapping
Bolts into these holes

7
10. Route any wires through the wire access hole of the winch mount plate before
installing winch assembly. Set the winch assembly into place on the ATV and install
the four self-tapping bolts.
11. Re-install front bumper and re-attach headlight wiring harness.
See Winch Wiring Instructions supplied with the Winch for proper installation.
Self-Tapping Bolts

8
CAUTION
BE AWARE OF THE CABLE STOP CONTACTING THE ROLLER
HAWSE WHEN THE CABLE IS WOUND IN.
FAILURE TO RELEASE THE SWITCH
MAY CAUSE DAMAGE TO
WINCH PARTS OR TO THE ATV.
When using the Winch to raise and lower a Cycle Country Plow, a
Cable Stop must be installed.
Hook the Winch Cable to the CYC0345 (U608) (item #4 on your 15-0001 push tube
kit) through the slotted hole. Carefully raise the blade until the top of the push tube
are no closer than 1” anywhere on the ATV. Place the Cable Stop onto the Winch
Cable up against the Winch Hawse. Secure the Cable Stop to the Winch Cable using
the Cable Clamp Assembly as shown in the pictures below.

9
One Year Limited Warranty
For the period of one (1) year from the purchase date, Cycle Country (a Kolpin Powersports Brand) will replace
for the original purchaser, free of charge, any part or parts found upon examination by Cycle Country
to be defective in material, workmanship, or both.
All transportation costs incurred submitting product to Cycle Country for warranty consideration must be
borne by the purchaser. If Cycle Country determines that the product must be returned to the factory for
credit, please call 1-800-841-2222 for a Return Merchandise Authorization (RMA) number and shipping
instructions.
This warranty does not apply to parts that have been damaged by accident, alteration, abuse, improper
maintenance, normal wear, or other causes beyond the manufacturer’s control. In order to protect you and
your ATV, certain parts of the plow system and/or hardware are designed to fail when the equipment is
over-stressed.
Peripheral products such as engines, electric motors, and actuators may carry an original manufacturer’s
warranty. Please call Cycle Country for more information.
Table of contents
Other Kolpin Powersports Automobile Accessories manuals