Kompernass IUK 5 A1 User manual

GB
IE
Quick installation guide
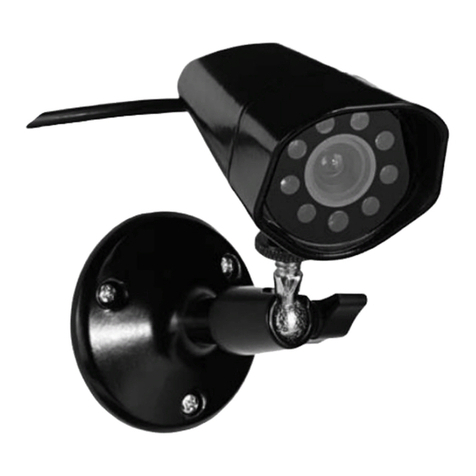
IP surveillance camera IUK 5 A1 (IAN 48807)
This guide shows you how to get your surveillance camera up and running in just a few steps using your smartphone or tablet. It also shows you how to connect to your Wi-Fi network.
LAN
WAN
Step 1 Step 2 Step 3 Step 4
■ Screw the Wi-Fi antenna onto the camera.
■ Connect the mains adapter to the camera and
a mains power socket.
■ Using the supplied network cable, connect the
camera to your network router or switch.
■ Ensure that your smartphone or tablet is con-
nected to your Wi-Fi network.
■ If you are using an Android smartphone or
tablet, install the app "IUK Viewer" from the
Google Play Store.
■ If you are using an iPhone or iPad, install the
app "IUK Viewer" from the Apple App Store.
■ Start the app and tap on "Add a new camera".
■ Select "Scan QR-Code" and scan the QR code
on the underside of the camera.
■ Once the QR code has been successfully
scanned, the corresponding camera ID
appears in the CAMERA INFO.
Then tap on "Done".
Visit our product support website on www.kompernass.com to download the latest version of the operating instructions, any firmware updates and additional control software.

Step 5 Step 6 Step 7 Step 8
■ The camera image will appear in the overview.
Tap on the arrow to switch to the settings menu.
■ Tap on "Wi-Fi settings". ■ Then the software will search for available
Wi-Fi networks in the vicinity. After a short
while, the available networks will appear in
the overview.
■ Select your Wi-Fi network.
■ Enter your network key in the "Password" field.
Then tap on "Join".
► The camera will restart and you can discon-
nect the network cable. The camera is now
installed on your Wi-Fi network and you can
operate the camera via the app. You will find
further information in the camera’s full operat-
ing instructions.
Visit our product support website on www.kompernass.com to download the latest version of the operating instructions, any firmware updates and additional control software.

DK Hurtig installationsvejledning
IP-overvågningskamera IUK 5 A1 (IAN 48807)
Denne vejledning viser med få trin, hvordan du kan starte IP-overvågningskameraet ved hjælp af din smartphone eller tablet og integrere det i WLAN-netværket.
LAN
WAN
Trin 1 Trin 2 Trin 3 Trin 4
■ Skru WLAN-antennen på kameraet.
■ Forbind netadapteren med kameraet og en
stikkontakt.
■ Forbind kameraet med din netværksrouter eller
-switch via det medfølgende netværkskabel.
■ Sørg for, at din smartphone eller tablet er
forbundet med WLAN-netværket.
■ Hvis du vil anvende en android-smartphone
eller -tablet, skal du installere app'en "IUK
viewer" fra Google Play Store.
■ Hvis du vil anvende en iPhone eller iPad, skal
du installere app'en "IUK viewer" fra Apple
App-Store.
■ Start app'en, og tryk på "Tilføj kamera".
■ Vælg "Scan QR-kode", og scan QR-koden på
undersiden af kameraet.
■ Når QR-koden er scannet korrekt, vises
kameraets ID under KAMERAINFO.
Tryk derefter på "Færdig".
Gå ind på vores produkthjælpe-webside under www.kompernass.com for at downloade den nyeste version af betjeningsvejledningen, eventuelle firmware-updates og ekstra betjeningssoftware.

Trin 5 Trin 6 Trin 7 Trin 8
■ Kamerabilledet vises i oversigten. Tryk på pilen
for at skifte indstillingsmenuen.
■ Tryk på "WLAN indstillinger". ■ Derefter søges der automatisk efter WLAN-
netværker i nærheden. Efter kort tid vises de
disponible WLAN-netværker i oversigten.
■ Vælg et WLAN-netværk.
■ Indtast dit netværkspassword i feltet "Password".
Tryk derefter på "Join".
► Kameraet startes nu op, og du kan fjerne net-
værkskablet. Nu er installationen af kameraet
i WLAN-netværket afsluttet, og du kan betjene
kameraet via app'en. Yderligere informationer
kan findes i den udførlige betjeningsvejledning
til kameraet.
Gå ind på vores produkthjælpe-webside under www.kompernass.com for at downloade den nyeste version af betjeningsvejledningen, eventuelle firmware-updates og ekstra betjeningssoftware.

NL Handleiding voor snelle installatie
IP-bewakingscamera IUK 5 A1 (IAN 48807)
Deze handleiding laat zien hoe u in enkele stappen de IP-bewakingscamera met behulp van uw smartphone of tablet in gebruik neemt en in uw WLAN-netwerk integreert.
LAN
WAN
Stap 1 Stap 2 Stap 3 Stap 4
■ Schroef de WLAN-antenne op de camera.
■ Verbind de netvoedingsadapter met de
camera en met een stopcontact.
■ Verbind de camera middels de meegeleverde
netwerkkabel met uw netwerkrouter of -switch.
■ Vergewis u ervan dat uw smartphone resp.
tablet met uw WLAN-netwerk verbonden is.
■ Gebruikt u een Android-smartphone resp.
-tablet, installeer dan de app “IUK viewer”
uit de Google Play Store.
■ Gebruikt u een iPhone resp. iPad, installeer
dan de app “IUK viewer” uit de Apple App
Store.
■ Start de app en tik op “Camera toevoegen”.
■ Kies “QR-code scannen” en scan de QR-code
op de onderkant van de camera.
■ Wanneer het scannen van de QR-code is
geslaagd, verschijnt in de CAMERA-INFO de
ID van de camera. Tik daarna op “Gereed”.
Bezoek onze website voor productondersteuning op www.kompernass.com, om de recentste versie van de gebruiksaanwijzing, eventuele firmware-updates en aanvullende bedieningssoftware te downloaden.

Stap 5 Stap 6 Stap 7 Stap 8
■ Het camerabeeld verschijnt in het overzicht.
Tik op de pijl om naar het instellingenmenu te
gaan.
■ Tik op “WLAN-instellingen”. ■ Er wordt nu automatisch naar beschikbare
WLAN-netwerken in de omgeving gezocht.
Na korte tijd verschijnen de beschikbare
WLAN-netwerken in het overzicht.
■ Selecteer uw WLAN-netwerk.
■ Voer in het veld “Wachtwoord” uw netwerk-
code in. Tik tot slot op “Join”.
► De camera wordt nu opnieuw gestart en u
kunt de netwerkkabel verwijderen. De instal-
latie van de camera in uw WLAN-netwerk is
nu voltooid en u kunt de camera via de app
bedienen. Verdere informatie vindt u in de
uitvoerige gebruiksaanwijzing van de camera.
Bezoek onze website voor productondersteuning op www.kompernass.com, om de recentste versie van de gebruiksaanwijzing, eventuele firmware-updates en aanvullende bedieningssoftware te downloaden.

DE
AT
CH
Schnellinstallationsanleitung
IP-Überwachungskamera IUK 5 A1 (IAN 48807)
Diese Anleitung zeigt Ihnen in wenigen Schritten, wie Sie die IP-Überwachungskamera mit Hilfe Ihres Smartphones oder Tablets in Betrieb nehmen und in Ihr WLAN-Netzwerk integrieren.
LAN
WAN
Schritt 1 Schritt 2 Schritt 3 Schritt 4
■ Schrauben Sie die WLAN-Antenne an die
Kamera.
■ Verbinden Sie den Netzadapter mit der
Kamera und einer Netzsteckdose.
■ Verbinden Sie die Kamera über das
mitgelieferte Netzwerkkabel mit Ihrem
Netzwerk-Router oder -switch.
■ Stellen Sie sicher, dass ihr Smartphone bzw.
Tablet mit Ihrem WLAN-Netzwerk verbunden ist.
■ Wenn Sie ein Android-Smartphone bzw.
Tablet verwenden, installieren Sie sich die App
„IUK viewer“ aus dem Google Play Store.
■ Wenn Sie ein iPhone bzw. iPad verwenden,
installieren Sie sich die App „IUK viewer“ aus
dem Apple App-Store.
■ Starten Sie die App und tippen Sie auf
„Kamera hinzufügen“.
■ Wählen Sie „QR-Code scannen“ und scannen
Sie den QR-Code auf der Unterseite der
Kamera.
■ Wenn der QR-Code erfolgreich gescannt
worden ist, erscheint in der KAMERA INFO
die entsprechende ID der Kamera. Tippen Sie
anschließend auf „Fertig“.
Besuchen Sie unsere Produktunterstützungs-Webseite unter www.kompernass.com, um die aktuellste Version der Bedienungsanleitung, eventuelle Firmware-Updates und zusätzliche Bediensoftware herunterzuladen.
Schritt 5 Schritt 6 Schritt 7 Schritt 8
■ Das Kamerabild erscheint in der Übersicht.
Tippen Sie auf den Pfeil, um zum Einstellungs-
menü zu wechseln.
■ Tippen Sie auf „WLAN Einstellungen“. ■ Anschließend wird automatisch nach verfüg-
baren WLAN-Netzwerken in der Umgebung
gesucht. Nach kurzer Zeit erscheinen die ver-
fügbaren WLAN-Netzwerke in der Übersicht.
■ Wählen Sie Ihr WLAN-Netzwerk aus.
■ Geben Sie im Feld „Passwort“ Ihren Netzwerk-
schlüssel ein. Tippen Sie abschließend auf „Join“.
► Die Kamera wird jetzt neu gestartet und Sie
können das Netzwerkkabel entfernen. Die
Installation der Kamera in Ihr WLAN-Netz-
werk ist jetzt abgeschlossen und Sie können
die Kamera über die App bedienen. Weitere
Informationen finden Sie in der ausführlichen
Bedienungsanleitung der Kamera.
Besuchen Sie unsere Produktunterstützungs-Webseite unter www.kompernass.com, um die aktuellste Version der Bedienungsanleitung, eventuelle Firmware-Updates und zusätzliche Bediensoftware herunterzuladen.
IAN 48807
IP SURVEILLANCE CAMERA IUK 5 A1
IP-ÜBERWACHUNGSKAMERA
Bedienungsanleitung
IP SURVEILLANCE CAMERA
Operating instructions IP-OVERVÅGNINGSKAMERA
Betjeningsvejledning
IP-BEWAKINGSCAMERA
Gebruiksaanwijzing

GB Operating instructions Page 1
DK Betjeningsvejledning Side 43
NL Gebruiksaanwijzing Pagina 85
DE/AT/CH Bedienungsanleitung Seite 127
Before reading, unfold both pages containing illustrations and familiarise yourself with all functions
of the device.
Før du læser, vend begge sidene med billeder frem og bliv bekendt med alle apparatets funktioner.
Vouw vóór het lezen de beide pagina‘s met de afbeeldingen open en maak u vertrouwd met alle
functies van het apparaat.
Klappen Sie vor dem Lesen die beiden Seiten mit den Abbildungen aus und machen Sie sich
anschließend mit allen Funktionen des Gerätes vertraut.

A
B

C
D

1IUK 5 A1
GB
Contents
Introduction ..................................................3
Information concerning these operating instructions ............................. 3
Copyright .............................................................. 3
Intended use............................................................ 3
Warning notes .......................................................... 3
Safety .......................................................4
Basic safety guidelines .................................................... 4
Possible infringements of the rights of third parties............................... 6
Operating components .........................................8
Setting up and connecting .......................................9
Package contents and transport inspection .................................... 9
Disposal of packaging materials ............................................ 9
Set-up location requirements. . . . . . . . . . . . . . . . . . . . . . . . . . . . . . . . . . . . . . . . . . . . . . . 10
Power supply ..........................................................11
Audio connection .......................................................11
LAN connection ........................................................11
Wi-Fi operation.........................................................11
Alarm connection .......................................................11
Handling and operation .......................................12
System requirements.....................................................12
Before use.............................................................13
Finding the camera in the network ..........................................13
Displaying the camera image in Internet Explorer 11 ...........................15
Meaning of the control buttons and fields ....................................18
Configuration via the browser interface ......................................21
The "Basic settings" page .................................................21
The "Alarm settings" page ................................................23
The "Network" page.....................................................26
The "Pan & Tilt" page ....................................................27
The "User settings" page..................................................28
Operating differences when using the smartphone preview ......................30
Displaying the camera image on a smartphone. . . . . . . . . . . . . . . . . . . . . . . . . . . . . . . . 30
Controlling the camera via smartphone ......................................31
Central monitoring via special software ......................................33

2IUK 5 A1
GB
Cleaning ....................................................38
Storage/Disposal ............................................38
Storage...............................................................38
Disposal of the device ...................................................38
Troubleshooting ..............................................38
Fault causes and rectification ..............................................39
Appendix ...................................................40
Notes on the Declaration of Conformity .....................................40
Technical data .........................................................40
Warranty.............................................................41
Service ...............................................................42
Importer..............................................................42

3IUK 5 A1
GB
Introduction
Information concerning these operating instructions
Congratulations on the purchase of your new device.
You have selected a high-quality product. The operating instructions are part of this product.
They contain important information on safety, usage and disposal. Before using the product,
familiarise yourself with all handling and safety guidelines. Use the product only as described and
for the range of applications specified. Please pass on all documentation incl. these operating
instructions to any future owner(s) if you sell this product or give it away.
Copyright
This documentation is protected by copyright.
Any copying or reproduction, including in the form of extracts, or any reproduction of images
(even in a modified state), is permitted only with the written authorisation of the manufacturer.
Intended use
This device is an information technology device designed for recording audio and video data as
well as their transmission to computer-based monitors by cable or wirelessly. It is not intended for
any other or more extensive use. This device is not intended for use in commercial or industrial
environments.
The manufacturer accepts no responsibility for damage caused by failure to observe these instructions,
improper use or repairs, unauthorised modifications or the use of unapproved replacement parts.
The operator bears sole liability.
Warning notes
The following warning notice types are used in these operating instructions:
DANGER
A warning notice at this hazard level indicates an imminently hazardous
situation.
If the hazardous situation is not avoided, it could result in death or serious physical injury.
► Follow the instructions in this warning notice to avoid the risk of death or serious injury.

4IUK 5 A1
GB
WARNING
A warning notice at this hazard level indicates a potentially hazardous situation.
Failure to avoid this hazardous situation could result in injury.
► Follow the instructions in this warning notice to prevent injury.
CAUTION
A warning notice at this hazard level indicates a potential for property damage.
Failure to avoid this situation could result in property damage.
► Follow the instructions in this warning notice to prevent property damage.
NOTE
► A note provides additional information that will assist you in using the device.
Safety
In this section, you will find important safety instructions for using the device.
The device complies with statutory safety regulations. Improper use may result in personal injury and
property damage.
Basic safety guidelines
To ensure safe operation of the device, follow the safety guidelines set out below:
■ Check the device for visible external damage before use. Do not operate a device that has been
damaged or dropped.
■ If the cables or connections are damaged, have them replaced by an authorised specialist or the
Customer Service department.
■ People who, due to their physical, intellectual or motor abilities, are incapable of operating the
device safely may only use the device under the supervision or direction of a responsible person.
■ DANGER! Do not allow children to play with the packaging material! Keep all packaging
materials out of the reach of children. Risk of suffocation!
■ When mounting the device, ensure that it cannot fall and injure anyone.

5IUK 5 A1
GB
■ Allow children to use the device only with supervision. Children are not always able to correctly
recognise potential dangers. WARNING! Some of the supplied parts can be swallowed.
If a part is swallowed, seek medical advice as soon as possible.
■ All repairs must be carried out by authorised specialist companies or by the Customer Service
department. Failure to make proper repairs may put the user at risk. It will also invalidate any
warranty claims. Never open the housing of the camera or of the mains adapter. There is a risk
of fire and/or electrical shock.
■ Repairs to the device during the warranty period may only be carried out by a customer service
department authorised by the manufacturer. Otherwise, no warranty claims will be held for any
subsequent damages.
■ Defective components must always be replaced with original replacement parts. Compliance
with the safety requirements can only be guaranteed by using these replacement parts.
■ Always use only the supplied mains adapter to operate the device.
■ Do not place any objects on the device.
■ Protect the product from moisture. Use it only in dry interior rooms; do not it use outdoors or in
moist environments.
■ Never operate the device directly near open flames (e.g. candles) or in extreme environmental
conditions (e.g. in an explosive atmosphere).
■ The camera may not be used in areas in which there may be a build-up of explosive gases, this
includes petrol stations or similar.
■ Notes on disconnecting from the power supply:
Even when the device is not in operation, it still draws power. To prevent this, disconnect the device
from the mains by pulling the mains adapter from the socket. Therefore, you should use the device
in such a way so as to ensure unrestricted access to the mains socket, so that you can remove the
mains adapter immediately in the case of an emergency. To prevent any risk of fire or unintentional
switching on, and to save energy costs, you should always unplug the device from the socket
when it is not in use.
■ Grip the mains adapter directly whenever you want to pull it from the socket. Do not pull on the
cable itself and never touch the mains adapter with wet hands, as this could result in either a
short circuit or electric shock. Do not place any furniture or similar items on the mains adapter
cable and ensure that it cannot become trapped. Never tie knots in the cable and do not bind it
together with other cables. Lay the mains cable and, if applicable, the network, audio or alarm
cable so that they cannot be stepped on or tripped over. A damaged mains adapter can cause a
fire or electrical shock. Check the mains adapter regularly. If it is damaged, contact your nearest
authorised customer service centre or your dealer to have it replaced.

6IUK 5 A1
GB
■ Please remove the mains adapter from the mains before a storm and/or thunderstorm.
■ The power socket used must be easily accessible so that the mains adapter can be easily discon-
nected in an emergency.
■ If you notice any unusual noises, smoke or similar uncertain situations, immediately disconnect the
mains adapter from the power supply. Have the device checked by a qualified specialist before
using it again (see section "Service").
Electrostatic discharge
■ In some rare cases, it is possible that the camera may malfunction due to electrostatic discharge.
In the event of a malfunction due to electrostatic discharge, the product must be reset. To do this,
disconnect the mains adapter from the wall socket and then wait for about ten seconds before
plugging the device back in again.
Possible infringements of the rights of third parties
Please note the following when using the surveillance camera:
Copyright protection
Every person owns the rights to their own image. According to copyright law, pictures of people may
only be published without their permission if the affected person appears merely as an incidental
feature in a landscape or other location. The question as to whether a person is merely an incidental
feature must be ascertained on a case by case basis. To avoid any legal uncertainty, a warning
notice about the camera should be provided in all cases in which identifiable persons might be
recorded (see section "Duty of notification").
Protection of privacy
The privacy of others may not be infringed by any published images. Do not set up the camera so it
points to the garden or an entrance of a neighbouring residence, even if these locations are easily
visible from your own residence or to the general public. This does not a constitute a right to publish
these views.
Personal identifiability
Personal identifiability exists when it can be established that a specific person was at a certain location
at a given time. This identification can be also made by means of an identifier related to a specific
person, e.g. a car license plate. Personal identifiability must avoided under all circumstances.
Surveillance cameras at the workplace
Surveillance at the workplace is subject to particularly strict regulations in Germany. Employers should
not use surveillance cameras in the workplace in any cases where this could lead to a possible
infringement of legal rights.

7IUK 5 A1
GB
Road traffic surveillance cameras
In the case of surveillance cameras directed at road traffic, it is advisable that the location of the
camera and the image frame be selected so that the road users cannot be identified by means of the
license plates. Inscriptions/logos on vehicles may also serve as a means of identifying a road user.
Duty of notification
If it is not possible to preclude the identification of persons, a notification informing of the presence
of the surveillance camera must be placed at clearly visible locations on all access routes to the
area within the filming range of the camera. Pedestrians must also be informed that by entering the
filming range of the camera they give their consent to be filmed/photographed and if they do not
consent then they should not access the affected area. The voluntary nature of this consent must be
considered. If the camera is located such that an affected person must pass by in order to reach a
destination (e.g. at the entrance to a place of interest) then the absence of voluntariness precludes
the granting of an effective consent.
The respective legal requirements of the country in which the camera is being used should always be
observed to avoid possible infringements of the rights of third parties.
Note on registered brand names and logos
The use of registered brand names and trade names as well as brand logos in these instructions
does not constitute an infringement of copyright, but rather merely serves as a reference. Even if
these are not specifically labelled as such in the respective passages of the text, the relevant legal
provisions apply.
The brand names and logos used are the property of their respective manufacturers and are subject
to their copyright provisions. Further information can be found in the respective publications of the
manufacturers.

8IUK 5 A1
GB
Operating components
(For illustrations see fold-out pages)
Figure A:
Light sensor for controlling exposure
Camera head
Loudspeaker
Camera head mounting
Connection panel
Camera base
Microphone
Red operating LED
Focus ring for manual focusing
Camera lens
Infrared LEDs
Figure B:
Yellow control LED for the network connection
Threaded connection for the Wi-Fi antenna
Contact for power supply from the mains adapter
Alarm connection (IN/OUT)
LAN connection
AUDIO output
Figure C:
Thread for attaching the mounting arm
Reset switch
QR code for quick synchronisation with smartphone
Mains adapter
Wi-Fi antenna
Mounting arm
Network cable
Figure D:
Data CD
Plug adapter for alarm connection
Mounting material
Operating instructions
Other manuals for IUK 5 A1
3
Table of contents
Languages:
Other Kompernass Security Camera manuals

Kompernass
Kompernass WK 5 A2 User manual

Kompernass
Kompernass WK 5 A1 User manual

Kompernass
Kompernass UK 8 A1 User manual

Kompernass
Kompernass WK 8 A1 User manual

Kompernass
Kompernass KAA 31 A1 User manual

Kompernass
Kompernass WK 8 B4 User manual

Kompernass
Kompernass WK 5 A3 User manual

Kompernass
Kompernass WK 5 A1 User manual

Kompernass
Kompernass UK 8 A1 User manual

Kompernass
Kompernass IUK 5 A1 User manual