Konnekt CA-BX User manual

25-Jun-21 page 1 of 3
VISUAL ALERT SETUP GUIDE
INTRODUCTION
This Guide describes how to setup and position the following equipment to provide a visual alert of an incoming call to the
Videophone in a different room ,....
•CA-BX Baby Sound Sensor (the "Transmitter")
•CA-RX Portable Receiver (the "Receiver")
•External Speaker
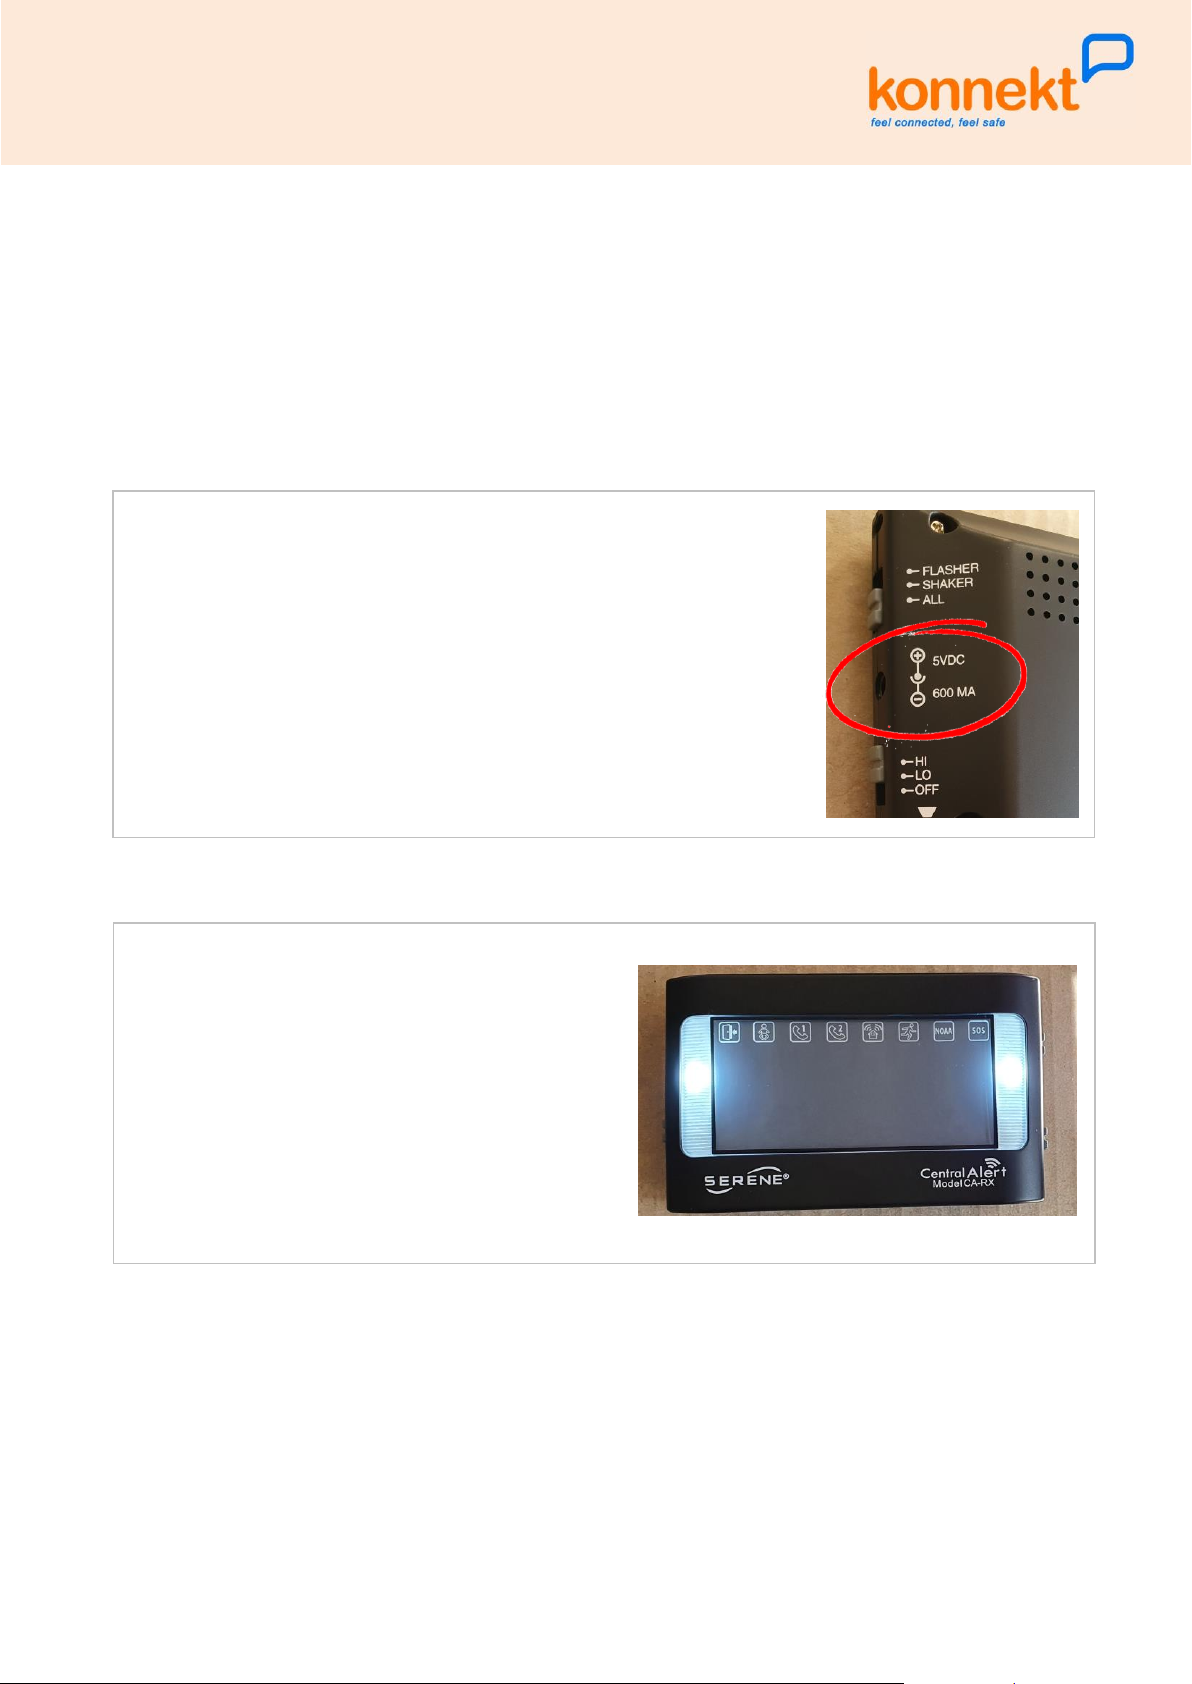
These three items work together, enabling users with hearing loss to be provided with a visual indication of Videophone
incoming call on the Receiver, on which two lights flash.
Please note that the Visual Alert system is designed to work with our optional External Speaker. If you do not have an
External Speaker, please contact Konnekt.
Description Of Operation
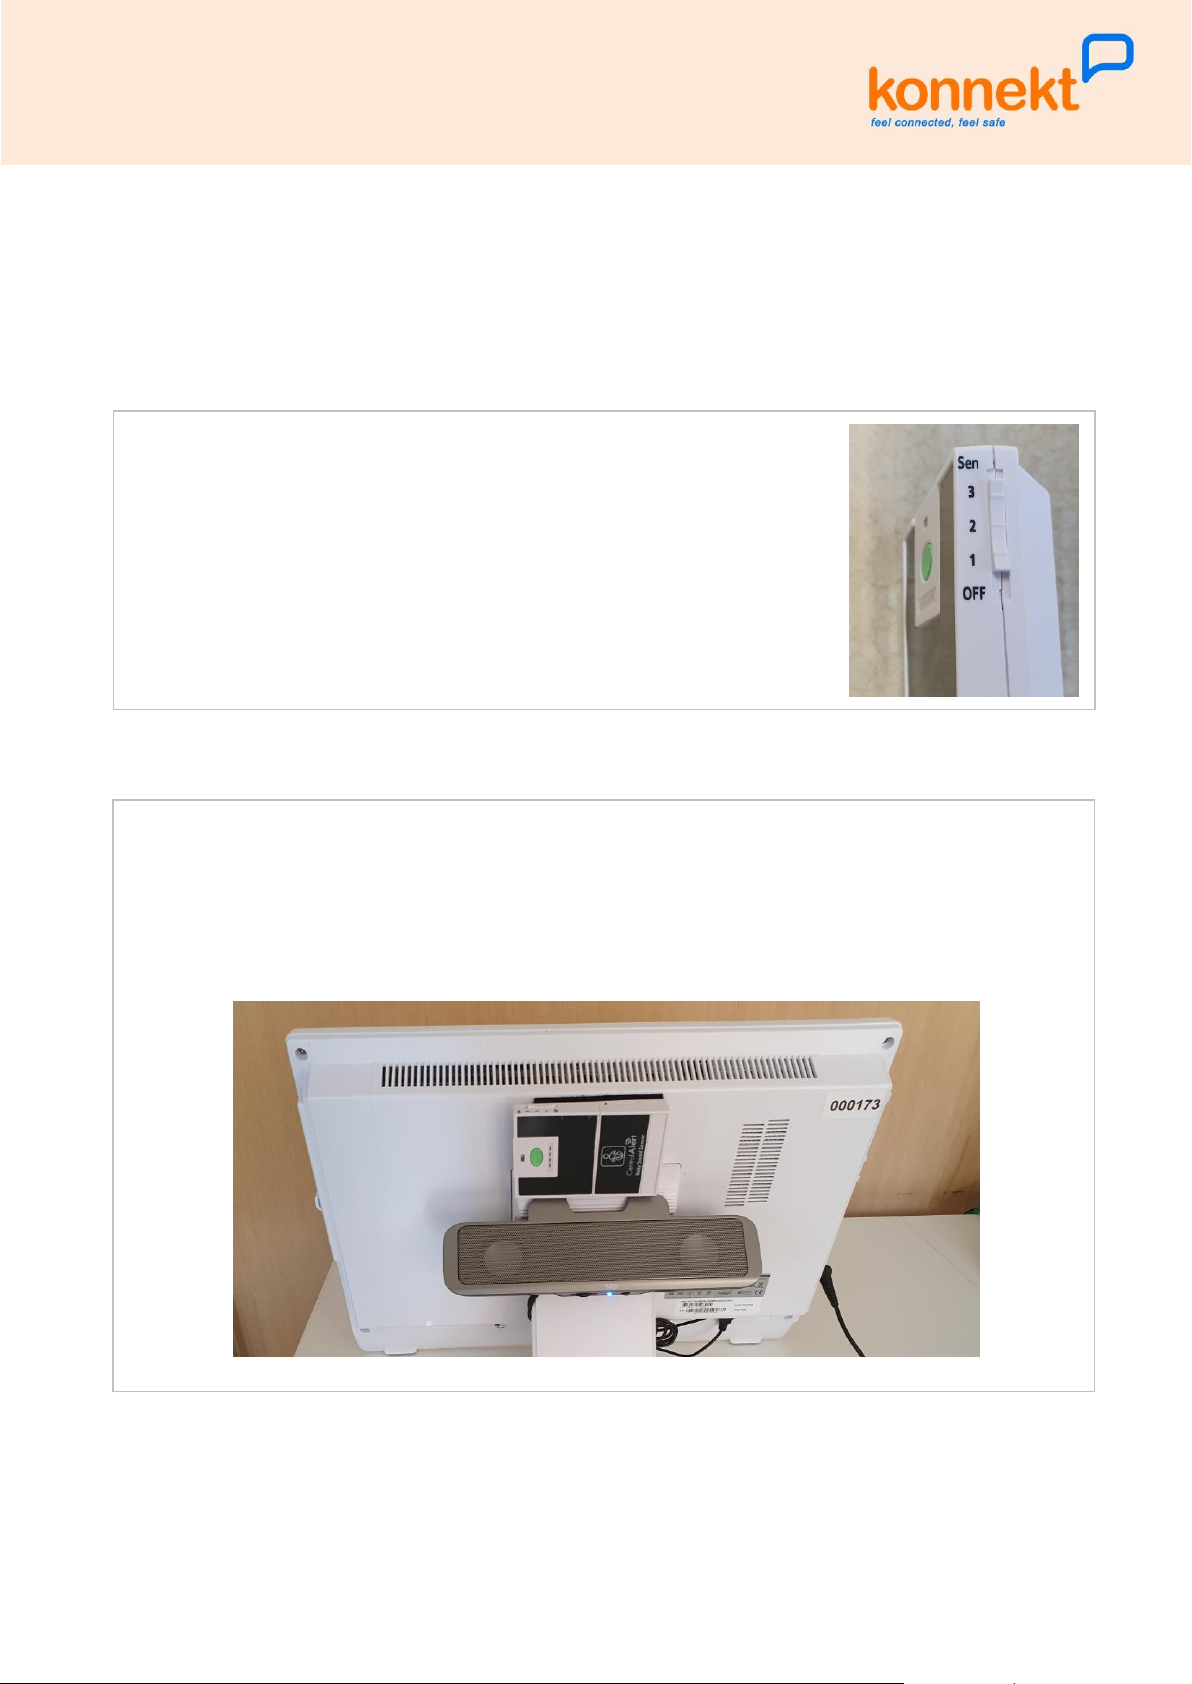
Konnekt will set the Videophone to use one of 4 specific ringtones that we know work reliably with the Transmitter. This
speaker must be correctly installed on the kickstand at the rear of the Videophone. The Transmitter is then placed next to
the External Speaker, with its microphone facing the External Speaker, to ensure reliable detection of sound.
When a call comes in, the ringtone plays on the External Speaker, and the Transmitter detects the sound and sends a
wireless signal to the Receiver. The Receiver beeps and flashes its lights while the Videophone is ringing.
The Receiver is battery powered and rechargeable. The batteries last around one day, and it is OK to have the Receiver
plugged in and charging all day. The Transmitter is battery powered, but not rechargeable. Its batteries last around 10
months.
Why Use A Baby Cry Transmitter?
Other more specialised Assistive Technology is quite expensive, and after searching for alternatives we came across a
company called Phoenix Hearing Instruments who have been successfully using the CA-BX and CA-RX for their clients with
hearing loss for telephone incoming call notification. After testing with the Videophone, we are happy to recommend this
equipment for Videophone incoming call notification, at less than half the cost of the alternative.
So please be aware that the Receiver will light up a small "baby" icon when the Videophone rings, as well as two large lights
on either side of the Receiver.
Range
The Transmitter and Receiver use the 2.4GHz radio band to communicate. This is the same frequency as used by many WiFi
networks, but the signal is independent. They do not use the WiFi protocol, nor do they require connection to your WiFi.
The Receiver will pick up signals from the Transmitter up to 60m away. This distance may be reduced if there are obstacles in
between. The 2.4GHz radio signals travel reasonably well through plaster board walls, through windows, and through
doorways. But the signal will be hampered by the following ....
•concrete or double brick walls
•concrete floors
•some tiled walls (eg. bathroom, kitchen)
•large appliances (fridge, freezer, washing machine and dryer, etc)
Ringtone Choices (Notes for Konnekt staff)
The Videophone ringtone must be set to one of the following ....
•HARP - Normal or Loud
•SKYPE RINGING IN - Normal or Loud
•MODERN AUSSIE PHONE - Loud
•MODERN USA PHONE - Normal or Loud

25-Jun-21 page 2 of 3
VISUAL ALERT SETUP GUIDE
SETUP THE TRANSMITTER
The CA-BX Transmitter must be placed onto the Videophone rear kickstand, adjacent to the optional External Speaker, so
that the Transmitter Microphone is right next to the External Speaker. We accomplish this using Velcro Tape, so that the
Transmitter can be removed in the future, for battery replacement.
Turn on the Transmitter
•Set the SENSITIVITY button on the side, labeled "Sen", to position 2.
Position the Transmitter
•Mount the Speaker Bar onto the kickstand, as detailed in the External Speaker Bar Guide.
•Stick the large piece of Velcro onto the Videophone, just above the kickstand, ie. covering the MSi logo.
•The Transmitter already has thin strips of Velcro on it, so it will stick to the large piece of Velcro . Place the
Transmitter EXACTLY as shown:
owith the Green Button facing outwards
owith the "Sen" selector switch facing upwards
The above describes installation of the Transmitter onto a Videophone that is on a desk or table, using the rear
kickstand. If your Videophone is mounted onto a bracket, please contact Konnekt. Depending on your particular
installation, you will need to find a way to position the Transmitter close to the External Speaker, perhaps using Velcro,
or cable ties or similar.

25-Jun-21 page 3 of 3
VISUAL ALERT SETUP GUIDE
SETUP THE RECEIVER
The CA-RX Portable Receiver should be placed at a location where you will notice the front lights flashing. The CA-RX will
also make a beeping sound when a call comes in, if you set the SPEAKER switch to HI as described below.
NOTE: The CA-RX does not work properly when the battery gets low. So we recommend that ....
•you keep it plugged into the charger all the time
OR
•you recharge it every night
Charging the Receiver
•Plug the charger into a power point, using the USA power adapter.
•Plug the charger into the 5VDC socket on the Receiver.
This is labeled as shown at right.
WARNING: The charger must ONLY be plugged into the 5VDC socket.
Please make sure you don't plug into any other socket.
•Charge up the Receiver for a few hours before first use. (eg. overnight).
Set the Receiver Switches and Controls
•Set the various switches and controls as follows:
oPOWER = ON
oMOTION SENSOR = OFF
oSPEAKER (HI, LO, OFF) = HI
oFLASHER/SHAKER = FLASHER
•Carry out a test as follows:
oon the Transmitter, press the Green Button
othe Receiver lights at left and right should flash
and the Receiver should beep, for a few seconds
OPTIONAL ADDITIONAL FUNCTION: Use the Receiver as a Torch
When not receicing a notification from the Transmitter, you can turn on the Receiver lights for use as a torch:
•press the Reset/Recall button on top to turn the lights ON
•press it again to turn the lights OFF
This manual suits for next models
1
Table of contents
Popular Security System manuals by other brands

Visonic
Visonic MCS-730 AC installation instructions

Whelen Engineering Company
Whelen Engineering Company 1502M INSTALLATION WIRING GUIDE

FBII
FBII XL-4B Hookup and installation instructions

Posey
Posey Personal Alarm instructions

Honeywell
Honeywell Galaxy 2 Series installation manual

Lorex
Lorex LW2700 SERIES quick start guide

Response Electronics
Response Electronics miGuard DS26 instructions

Gemini
Gemini 952N User's and installer's manual

ITI
ITI Simon 2 quick guide

Toa
Toa VX-3000 SERIES operating instructions

Bosch
Bosch Radion B810 installation guide

TIP TEMPerature Products
TIP TEMPerature Products LATALM001 quick start guide