Korg SP-170DX User manual

DIGITAL PIANO
Owner’s manual
Manuel d’utilisation
Bedienungsanleitung
E
F
G
1
Thank you for purchasing the Korg SP-170DX digtal piano.
Merci d’avoir choisi la piano numérique SP-170DX de Korg.
Vielen Dank, dass Sie sich für einen SP-170DX digtal-Klavier von Korg entschieden haben.

2
Precautions
Location
Using the unit in the following locations can result in a
malfunction.
• In direct sunlight
• Locations of extreme temperature or humidity
• Excessively dusty or dirty locations
• Locations of excessive vibration
• Close to magnetic elds
Power supply
Please connect the designated AC adapter to an AC outlet
of the correct voltage. Do not connect it to an AC outlet of
voltage other than that for which your unit is intended.
Interference with other electrical devices
Radios and televisions placed nearby may experience re-
ception interference. Operate this unit at a suitable distance
from radios and televisions.
Handling
To avoid breakage, do not apply excessive force to the
switches or controls.
Care
If the exterior becomes dirty, wipe it with a clean, dry
cloth. Do not use liquid cleaners such as benzene or thin-
ner, or cleaning compounds or ammable polishes.
Keep this manual
Aer reading this manual, please keep it for later reference.
Keeping foreign matter out of your equip-
ment
Never set any container with liquid in it near this equip-
ment. If liquid gets into the equipment, it could cause a
breakdown, re, or electrical shock.
Be careful not to let metal objects get into the equipment.
If something does slip into the equipment, unplug the AC
adapter from the wall outlet. Then contact your nearest
Korg dealer or the store where the equipment was pur-
chased.
*
All product names and company names are the trade-
marks or registered trademarks of their respective owners.
Table of Contents
Internal Setup and Connections ......................................3
Playing Different Sounds..................................................4
Using the pedal unit ..........................................................4
Using Other Functions ......................................................5
Key Functions ....................................................................6
MIDI .....................................................................................6
Troubleshooting ................................................................ 7
Specications ....................................................................7
IMPORTANT NOTICE TO CONSUMERS
This product has been manufactured according to strict speci-
fications and voltage requirements that are applicable in the
country in which it is intended that this product should be used.
If you have purchased this product via the internet, through
mail order, and/or via a telephone sale, you must verify that this
product is intended to be used in the country in which you re-
side.
WARNING: Use of this product in any country other than that
for which it is intended could be dangerous and could invali-
date the manufacturer’s or distributor’s warranty.
Please also retain your receipt as proof of purchase otherwise
your product may be disqualified from the manufacturer’s or
distributor’s warranty.
Notice regarding disposal (EU only)
If this symbol is shown on the product, manual, baery,
or package, you must dispose of it in the correct manner
to avoid harm to human health or damage to the envi-
ronment. Contact your local administrative body for de-
tails on the correct disposal method. If the baery con-
tains heavy metals in excess of the regulated amount, a
chemical symbol is displayed below the symbol on the baery
or baery package.
THE FCC REGULATION WARNING (for USA)
This equipment has been tested and found to comply with the
limits for a Class B digital device, pursuant to Part 15 of the FCC
Rules. These limits are designed to provide reasonable protec-
tion against harmful interference in a residential installation.
This equipment generates, uses, and can radiate radio frequency
energy and, if not installed and used in accordance with the in-
structions, may cause harmful interference to radio communica-
tions. However, there is no guarantee that interference will not
occur in a particular installation. If this equipment does cause
harmful interference to radio or television reception, which can
be determined by turning the equipment o and on, the user is
encouraged to try to correct the interference by one or more of
the following measures:
• Reorient or relocate the receiving antenna.
• Increase the separation between the equipment and receiver.
• Connect the equipment into an outlet on a circuit dierent
from that to which the receiver is connected.
• Consult the dealer or an experienced radio/TV technician for
help.
Unauthorized changes or modication to this system can void
the user’s authority to operate this equipment.

3
Internal Setup and Connections
1. Connecting the Power (Figure 1)
• Connect the supplied AC adapter to the power cord. Insert the DC plug end into the DC12V
jack on the rear panel of the unit. Next, plug the power cord into an AC outlet.
Pass the AC adapter cord through the cord hook so that the plug won’t be removed from
the jack accidentally. When you unhook the cord, don’t pull the cord with force.
Be sure to use the AC adapter that came with your unit. Using other AC adapters may
cause the unit to malfunction.
Be sure to plug the unit into an AC outlet of the appropriate voltage.
2. Turning the SP-170DX ON
•
Press the power switch that’s located on the le side of the top panel to turn the unit on. (Figure
2)
The power LED to the le of the music stand will light up. (Figure 2)
• Press the power switch again to turn the unit o.
The power LED will go dark.
3. Adjust the volume
• Rotate the VOLUME knob that’s located next to the power switch right toward “MAX” to
raise the volume level. Rotate it le toward “MIN” to lower the level. (Figure 2)
The VOLUME knob controls the output level of the built-in speakers and the headphones
jacks.
Using headphones
When you plug in headphones, the built-in speakers will be muted. This is useful when you
want to play the keyboard in the evening without bothering your family or your neighbors.
The SP-170DX features two headphone jacks so that two people can enjoy playing and lis-
tening.
• Insert the stereo headphone plug into one of the PHONES jacks on the rear panel. (Figure
3)
If your headphones feature a standard-to-mini adapter plug, be sure to hold the adapter
plug when you connect or disconnect the headphones.
To protect your hearing, do not listen to loud, high-volume sounds for a long period of
time through headphones.
Connecting audio components
You can use the PHONES jacks as line-out jacks to connect powered speakers or audio com-
ponents to the keyboard. For such connections, use commercially-available cables that are
appropriate for the components that you’re using.
Before connecting audio components, make sure that you turn o the power to the unit
and the audio components. Otherwise, damage to the unit or other components may
occur.
Using the music stand
• Insert the legs of the supplied music stand into the dedicated groove that’s located in the
middle of the top panel. (Figure 4)
To AC
outlet
Figure 1
AC adapter
DC plug
Power cord for
the AC adapter
Cord hook
Be careful not to
bend this part too
much when you
insert the power
cord.
Figure 2
Power LED
VOLUME
knob
Power switch
Figure 3 PHONES jacks
Figure 4

4
Playing Different Sounds
The SP-170DX features 10 preset sounds.
Pressing the SOUND buon repeatedly will change the sound in the following sequence.
Piano 1 → Piano 2 → E.Piano 1 → E.Piano 2 → Harpsichord → Clavichord → Vibraphone → P.Organ
→ E.Organ → Strings
Aer Strings, the sound will return to Piano 1. Pressing the PIANO PLAY buon will switch any
sound to Piano 1.
Whenever you turn on the unit, the default preset sound (Piano 1) will be recalled.
Piano 1: Elegant and warm grand piano
Piano 2: Clear and bright grand piano
E.Piano 1: Smooth, authentic electric piano
E.Piano 2: Modern, percussive electric piano
Harpsichord: Classical harpsichord
Clavichord: Expressive electric clavichord
Vibraphone: Smooth vibraphone
P.Organ: Pipe organ
E.Organ: Drawbar electronic organ
Strings: Ensemble string section
You can also change the sound by pressing one of the keys ranging from C7 to A7 while simulta-
neously pressing and holding down the PIANO PLAY and SOUND buons. (Please refer to “Key
Functions” on pages 6 and 7.)
Using the pedal unit
Connect the pedal unit included with the unit to the connector on the underside of the unit.
Once the pedal unit is connected you can eectively express your performances using the
damper, sostenuto and so functions.
Soft pedal
Pressing this pedal will make the tone soer. You can control the soness of the tone by
how far down you press the on pedal (“half-pedaling”).
Sostenuto pedal
Pressing this pedal will apply the damper eect only to the notes that are already being
held down on the keyboard, and will sustain only those notes. The damper eect will not
be applied to any additional notes that you play while holding down the Sostenuto pedal.
Damper pedal
Pressing this pedal will sustain the sound, producing a richly resonant decay. In addition,
you can change the applied conditions of the damper according to the depth that the tone
pedal of piano 1 and 2 is pressed. (“half-pedaling”).
Soft pedal
Sostenuto
pedal
Damper pedal
PIANO PLAY
button
SOUND
button
Installing the pedal unit
Make sure that the power of the unit is turned o when
connecting the pedal unit to it.
1. On the reverse side of the pedal unit, connect the pedal
cord in the correct direction according to the connector.
2. Route the connected pedal cord in the pedal unit groove
as shown in the gure.
3. Connect the pedal cord to the connector on the underside
of the unit and fasten it with the cord holder.
Cord holder
When using the pedal unit
on a floor where it can easily
slide or move during a perfor-
mance, place the non-slip mat
included with the unit on the
oor and use the pedal unit on
top of the mat.

5
Using Other Functions
The SP-170DX allows you to play back the songs or adjust various functions by pressing a specic
key while also pressing and holding down the PIANO PLAY and SOUND buons. Please refer to
the “MIDI” section on the next page for more information on MIDI channels and program change
messages.
While pressing and holding down the PIANO PLAY and SOUND buons, do not play the key-
board. Otherwise, you might get an unexpected result.
For information on the functions that are assigned to the keys, please refer to “Key Functions” on
pages 6 and 7.
About the conrmation sound
When you press a key to adjust seings for a function, you will hear the conrmation sound. To
turn this sound o, simultaneously press and hold down the PIANO PLAY and SOUND buons
and press the A#0 key. To turn on the conrmation sound, repeat the previous procedure but press
B0 instead of A#0. The conrmation sound is set to On by default (when you turn the unit on).
Playing Back Songs
The SP-170DX features 10 songs that use 10 preset sounds.
While pressing and holding down the PIANO PLAY and
SOUND buttons, press one of the keys ranging from C6 to
A6 (on the right side of the keyboard). The song assigned to
the key that you pressed (as shown below) will start playing.
Playback starts from the selected song, then continues and
repeats all songs in ascending order until you stop playback.
1
24 7 9
3 5 6 8 10
To stop playback, press the PIANO PLAY and SOUND but-
tons simultaneously.
During playback of a song, you can switch the sound us-
ing the PIANO PLAY and SOUND buons while playing
the keyboard. The eect seing of the song will also be
applied to the sound.
Even if you change the sound during playback of a song,
the corresponding MIDI data (such as MIDI Program
Change messages) will not be output.
Song name
1 (Piano 1): Fantaisie-Impromptu Op.66 /F.Chopin
2 (Piano 2): Amazing Grace/unknown (arr. : N.Nishi)
3 (E.Piano 1): Ramble/M.Sakaguchi
4 (E.Piano 2): KORG Orignal
5 (Harpsichord): Invention No.8/J.S.Bach
6 (Clavichord): KORG Orignal
7 (Vibraphone): KORG Orignal
8 (P.Organ): Toccata in D moll/J.S.Bach
9 (E.Organ): KORG Orignal
10 (Strings): First Snow/M.Sakaguchi
Effects (Reverb and Chorus)
You can use a reverb eect to add depth to the sound, and a
chorus eect to add width and space.
•
Simultaneously press and hold down the PIANO PLAY and
SOUND buons, and then press the A5 key to turn on the
reverb eect. To turn o the reverb eect, repeat the previ-
ous procedure but press the G#5 key instead of A5.
•
Simultaneously press and hold down the PIANO PLAY and
SOUND buons, and then press the B5 key to turn on the
chorus eect. To turn o the chorus eect, repeat the previ-
ous procedure but press the A#5 key instead of B5
.
You can apply eects to each preset sound.
When you turn on the power to the unit, the eects will use
the optimum seings for each preset sound.
Key Touch Control function
The Key Touch Control function enables you to change the
way your playing strength will aect the output level. You
can set this function by using the white keys in a range from
D2 to F2. (See the gure on the le.)
• To play fortissimo with so strokes (Light touch), press and
hold down the PIANO PLAY and SOUND buttons , and
then press the D2 key.
• To play fortissimo with very strong strokes (Heavy touch),
press and hold down the PIANO PLAY and SOUND but-
tons, and then press the F2 key.
• To simulate a normal piano touch (Standard touch), press
and hold down the PIANO PLAY and SOUND buons, and
then press the E2 key.
Loud
Loudness
Quiet
Quiet Loud
Playing
strength
Light
Standard
Heavy
The default seing (when you turn on the unit) is Standard
touch.

6
C1[24]* C2[36]* C3[48]* C4[60]*
C7[96]* C8[108]*
C5[72]* E5 F5
B3A3
E5 G5 C6[84]*
D2B0 E2 F2
24
5
79
10 12
14 16
16
86
11
13 15
31
24
5
79
10
8631
Down
Up
Reverb On/Off Chorus On/Off
Enabling/Disabling
Program Change
transmission
Enabling/Disabling
Control Change
transmission
Preset Sounds (C7–A7)
Demo Songs (C6–A6)
Key Touch
Std.
Transpose (F2–F3)
Light
Heavy
MIDI
Pitch
DIS
DIS
ENA
ENA
Off
Off
On
On
Piano 1
E. Piano 1
Clav
Vibraphone
P. Organ
E. Organ
Strings
Piano 2
E. Piano 2
Harpsi
FGACD
G A B C D E F
Off
On
A
5
A
0 G
3 A
3
G
5
Press and hold simultaneously
Confirmation sound On/Off
Key Functions [ ]* indicates MIDI Note number.
Transpose function (Shifting the key)
In some cases, a song may be wrien in a dicult key (e.g.,
using many black keys), or you may wish to shi the key to
match another instrument or vocalist. In such cases, you can
transpose (shi the key) to use an easier ngering, or to use
the same familiar ngering to play in a dierent key. This is
called the Transpose function. You can shi the key in a range
of eleven semitones.
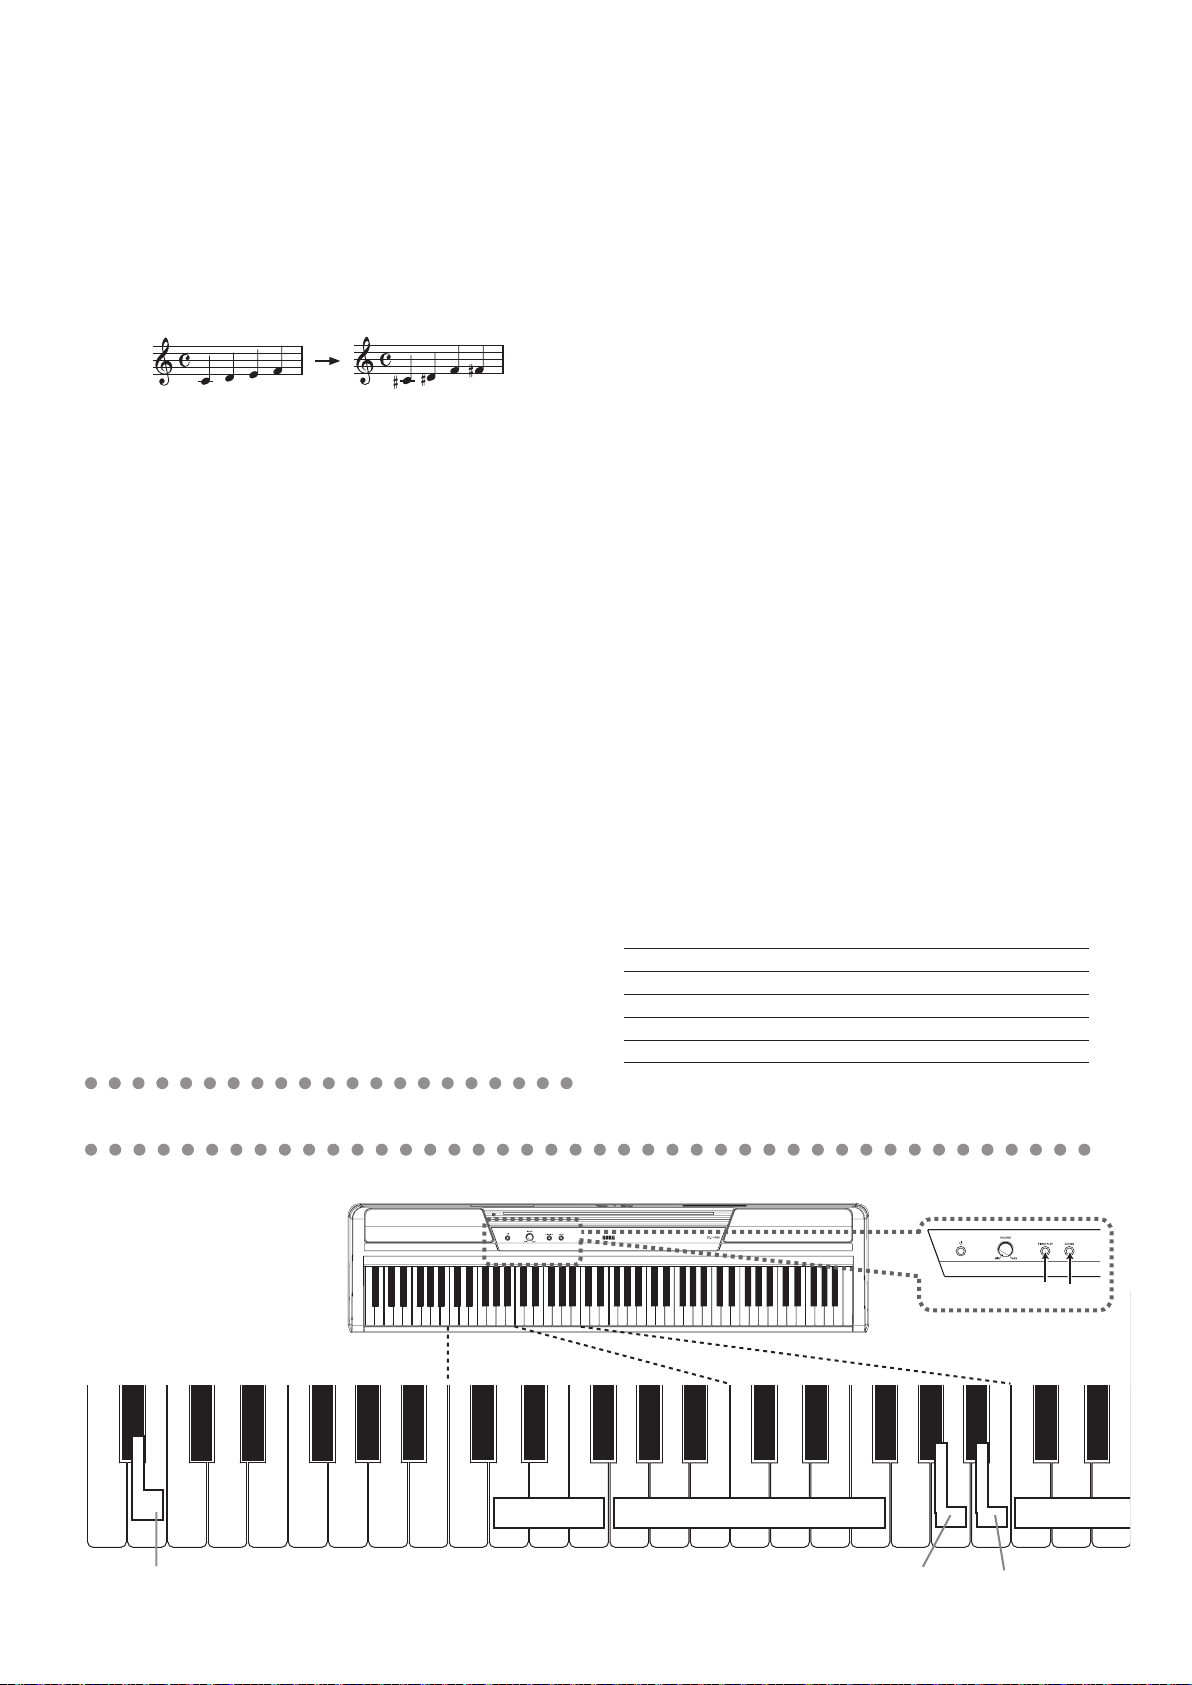
For example if you transpose upward by one semitone, play-
ing the notes shown in the score on the le below will pro-
duce the pitch that’s shown in the score on the right.
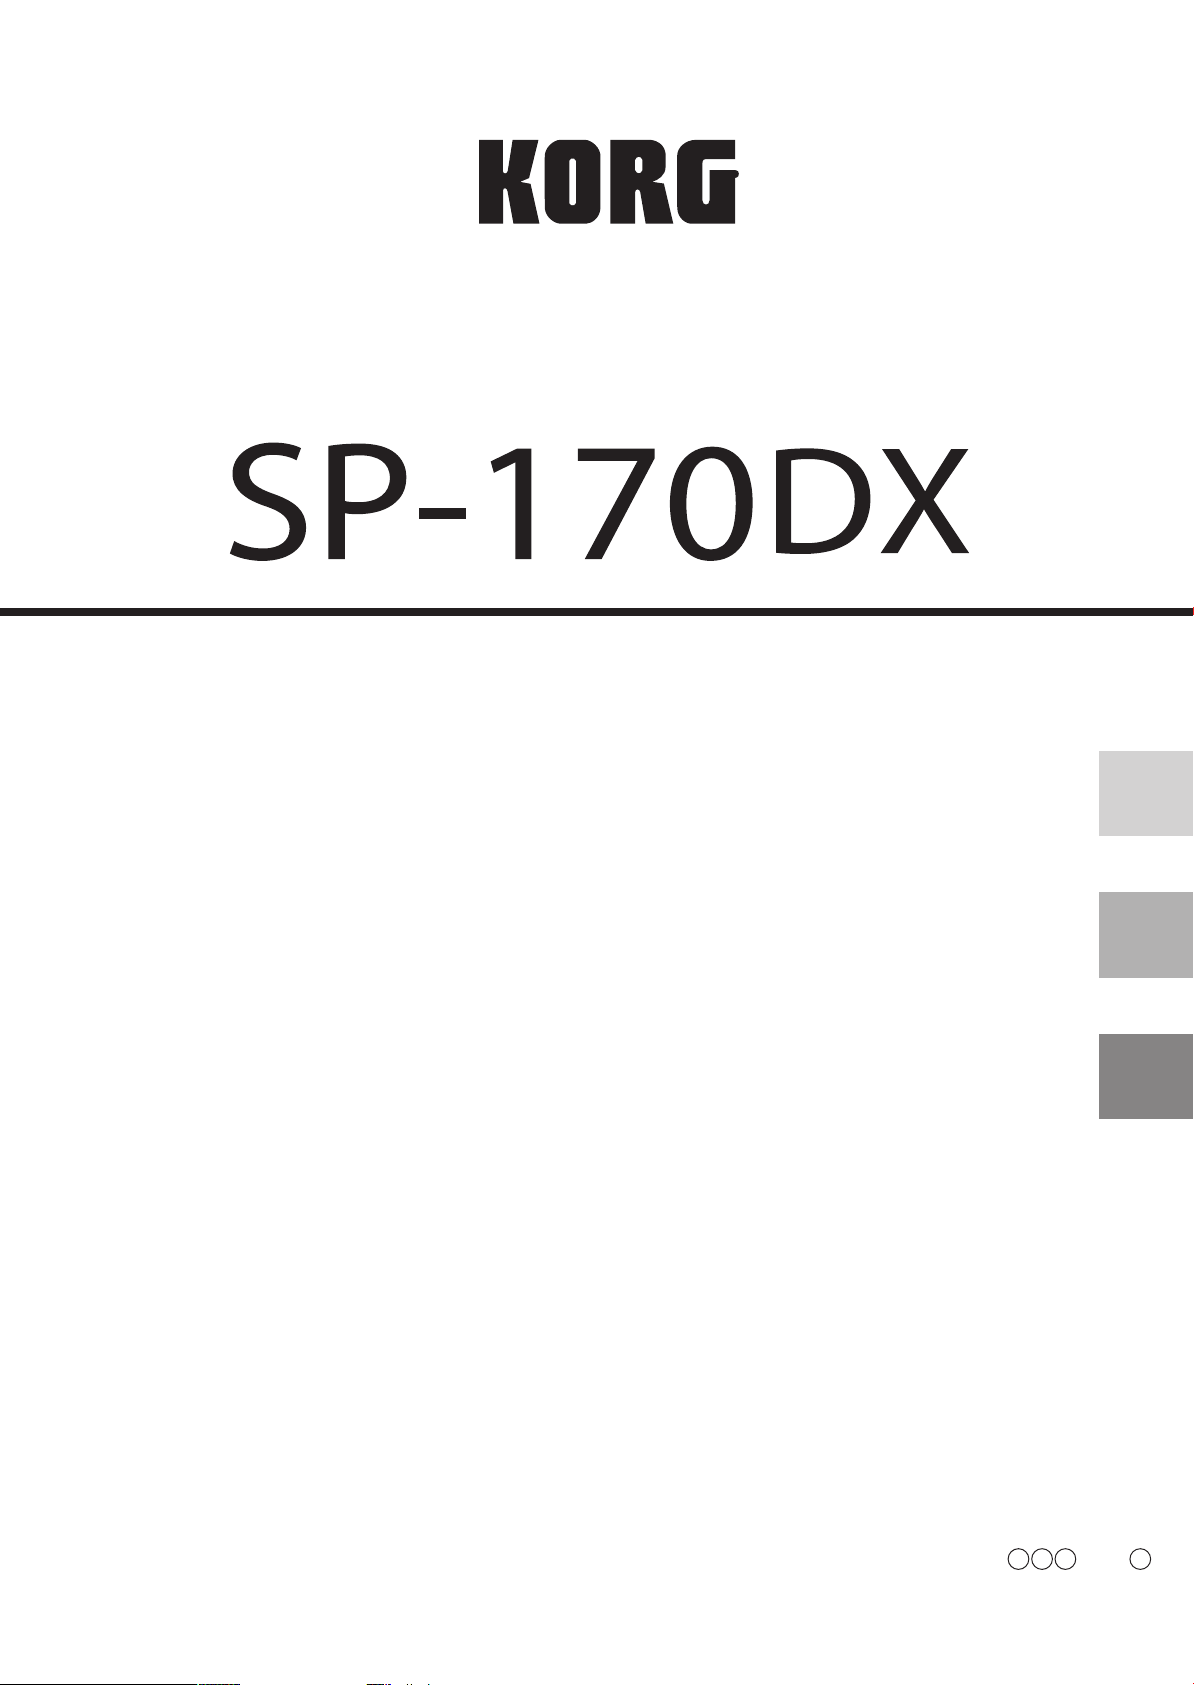
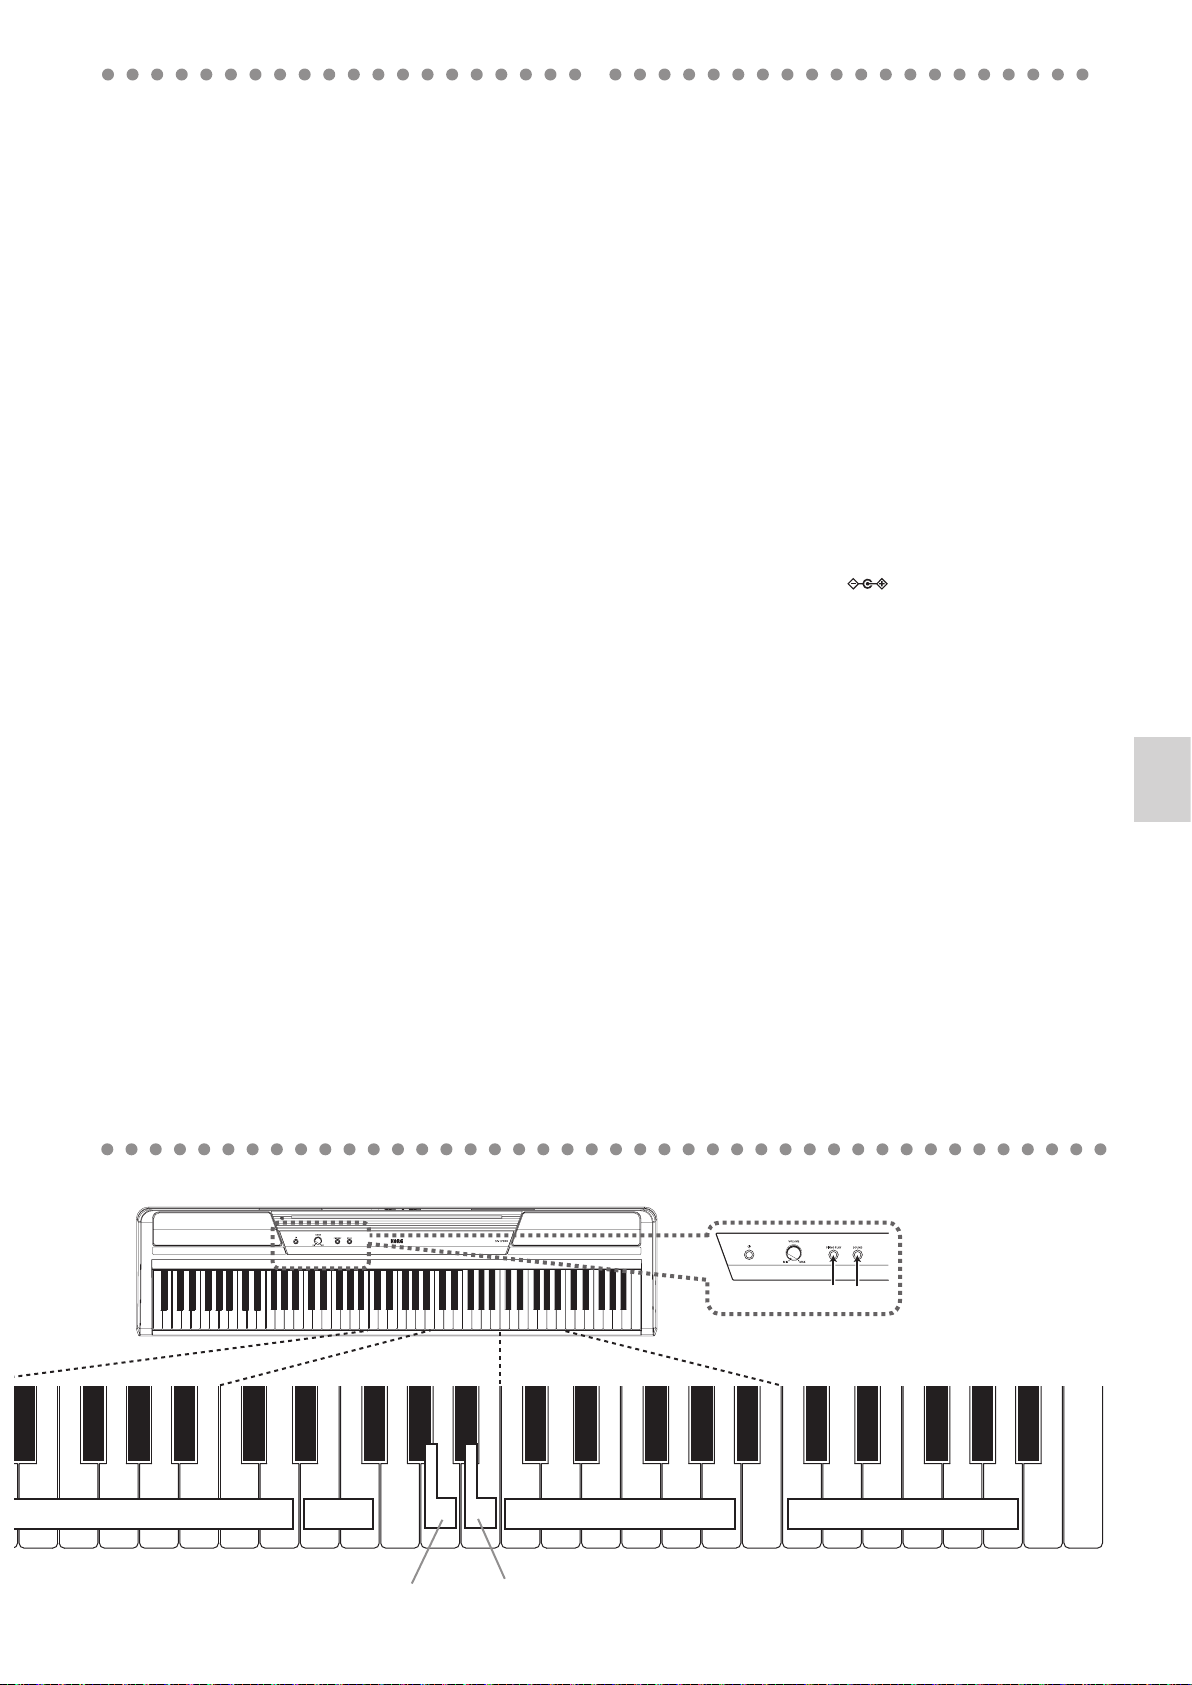
• To transpose the key, press and hold down the PIANO
PLAY and SOUND buons, and then press a key from F#2
to B3 or from C#3 to F3. The name of the key that you
pressed will become the transposed key.
For example, if you wish to use the C3 key to play note A2
(lower by three semitones), press and hold down the PIANO
PLAY and SOUND buons, and press the A2 key. If you wish
to use the C3 key to play note D#3 (higher by three semitones),
press and hold down the PIANO PLAY and SOUND buons,
and press the D#3 key.
To reset the Transpose function to “No Transposition (+/-0),”
press and hold down the PIANO PLAY and SOUND buons,
and then press the C3 key.
The default seing (when you turn on the unit) is “No Trans-
position.”
Pitch Control function (Tuning)
When you’re playing together with other instruments, you
can use this the Pitch Control function to x any slight dier-
ences in pitch between instruments. You can adjust the tun-
ing of the SP-170DX in half-step (0.5) Hz intervals over a range
of 427.5–452.5 Hz (Hertz) by using the E5 and F5 keys.
• Press and hold down the PIANO PLAY and SOUND but-
tons, then press the E5 key to lower the pitch in 0.5Hz steps
each time your press it, or press the F5 key repeatedly to
raise the pitch in 0.5Hz steps each time you press it.
• To reset the pitch to 440Hz, press and hold down the PIA-
NO PLAY and SOUND buttons, and press the E5 and F5
keys simultaneously.
The default seing (when you turn on the unit) is A4=440Hz.
MIDI
Please visit the Korg website (hp://www.korg.com/) to view
the MIDI Implementation Chart.
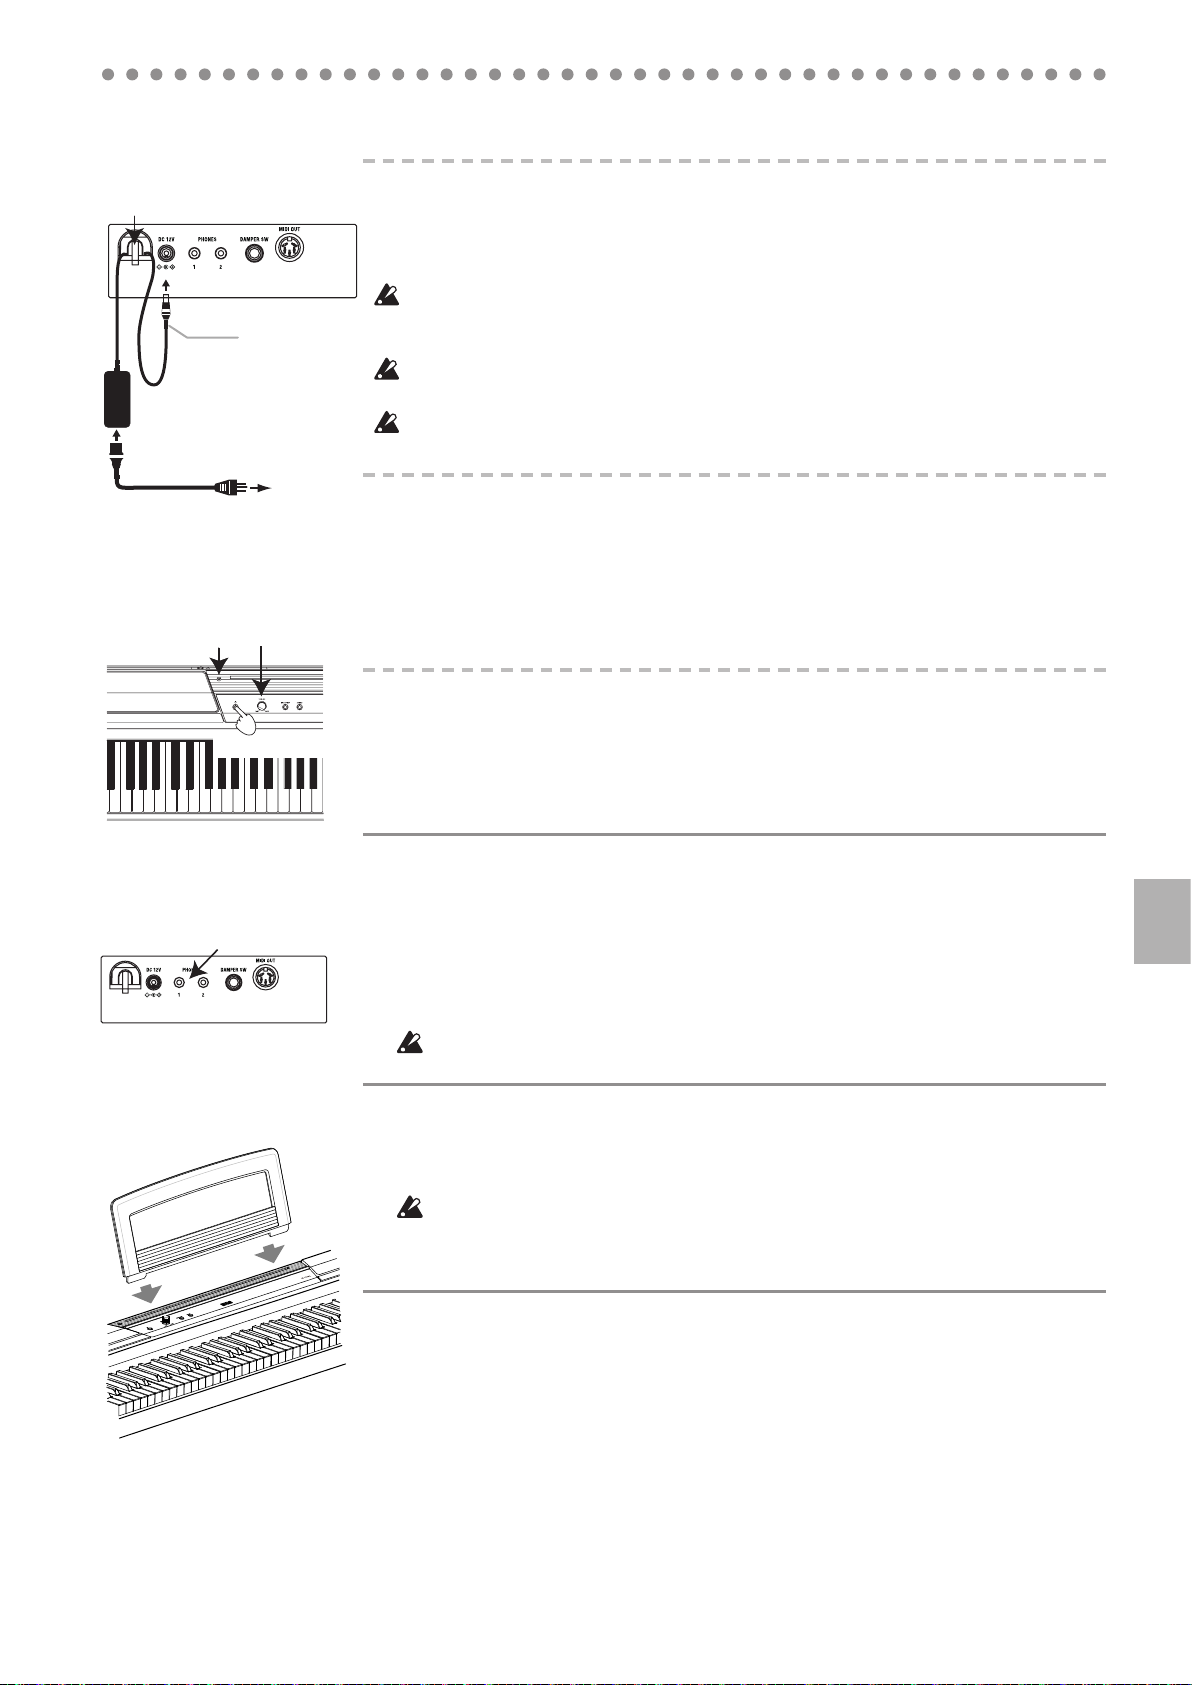
Using the MIDI OUT jack
The MIDI OUT jack transmits MIDI messages. When you play
the keyboard, the MIDI messages will be output to control (e.g,
play the sound of) an external MIDI device. Use an optional
MIDI cable to connect the MIDI OUT jack of the SP-170DX to
the MIDI IN jack of an external MIDI device.
Changing the MIDI channel
If you’re using the SP-170DX as a controller to play sounds from
a connected MIDI device, the MIDI channel of the SP-170DX
must match the MIDI channel the external MIDI device.
To change the MIDI channel (1–16) that MIDI data is being
transmied from via the MIDI OUT jack on the rear panel, press
and hold down the PIANO PLAY and SOUND buons simulta-
neously, and press one of the keys ranging from C4 to D#5.
The default MIDI channel (when you turn on the unit) is “1.”
Transmitting Program Change and Control
Change messages
You can change the program number of the connected MIDI
device from the SP-170DX.
When you select a preset sound on the SP-170DX (see “Playing
Different Sounds” on page 2), it transmits a MIDI Program
Change number (PC#) as shown in the table below. To dis-
able this transmission (DIS), press and hold down the PIANO
PLAY and SOUND buttons simultaneously, and then press
the G#3 key. To enable this transmission (ENA), repeat the
previous procedure but press the A3 key instead.
The SP-170DX also transmits Control Change messages to con-
trol Damper (CC64), Bank Select (CC00), etc. for the connected
MIDI device. To disable this transmission (DIS), press and hold
down the
PIANO PLAY and SOUND buons
simultaneously,
and then press the A#3 key. To enable this transmission (ENA),
repeat the previous procedure but press the B3 key instead.
The default seing (when you turn on the unit) is ENA (trans-
mied) for both Program and Control Change messages.
Program Change Table
BANK#
PC# Sound
BANK#
PC# Sound
0 0 Piano 1 0 7 Clavichord
0 1 Piano 2 0 11 Vibraphone
0 4 E.Piano 1 0 19 P.Organ
0 5 E.Piano 2 0 16 E.Organ
0 6 Harpsichord 0 48 Strings
CC00: Bank Select (MSB) for each sound is assigned to 121

7
Troubleshooting
If you perceive any malfunction, check the following sug-
gestions. If the problem persists, contact your nearest Korg
distributor.
Power does not turn on
• Make sure that the AC adapter is properly connected to the
SP-170DX and the AC outlet.
• Make sure that the power LED is illuminated.
No sound from the speakers
• Rotate the VOLUME knob on the rear panel to the right to-
ward MAX.
• The speakers will be muted if the headphones are con-
nected.
Sound is interrupted
• The preset sounds of the SP-170DX have been created by
sampling (recording) sounds of actual musical instru-
ments. When you press a key, some sounds play a single
piece of sampled data, while other sounds play two pieces
of sampled data. The SP-170DX uses two pieces of data for
most of its preset sounds. When one of these two-sample
sounds is selected (regardless of whether the damper pedal
is being pressed), the maximum polyphony is 60 notes.
However, with two Piano sounds, the maximum polyph-
ony is 120 notes. If the maximum polyphony is exceeded,
some of the notes will be lost.
The pitch or tone of the piano sounds wrong in some key re-
gions
• The SP-170DX’s piano sounds replicate the sound of an
actual piano as faithfully as possible. This means that in
some regions of the keyboard, you may feel that the over-
tones seem stronger, or that the tone or pitch seems wrong.
This is not a malfunction.
Pedal is not effective
• Make sure that the pedal cable is properly connected.
Connected MIDI device does not respond to MIDI messages
• Make sure that all MIDI cables are properly connected.
• Make sure that the SP-170DX is transmitting MIDI data on
the same MIDI channel as the connected MIDI device.
Specications
Keyboard NH Keyboard: 88 note (A0–C8)
Maximum polyphony 120 notes / 60 notes (Stereo)
Sounds Ten sounds
Jacks Headphones x 2 (also function as outputs),
MIDI OUT, Pedal unit connector,
*Damper SW (Pedal )
Amp output 9 W × 2
Speakers Oval (10cm x 5cm) x 2
Power supply DC 12 V
Power Consumption 9 W
Weight 22 kg / 48.50 lbs
(including Stand, excluding music stand)
Dimensions (W x D x H)
1312 × 325 × 781 mm / 51. 65" × 12. 8" × 30. 75"
(including Stand, including projections, but
excluding music stand)
Included items
AC adapter ( ), Music stand, Stand, Ped-
al unit, Pedal cord, Pedal unit non-slip mat
* You can use the PS-3 foot switch (sold separately) as a
damper pedal by connecting it to the DAMPER SW jack.
The DS-1H damper pedal (sold separately) can also be
used. In addition, the half damper supports the tone of
piano 1 and 2.
Specications and appearance are subject to change without
notice for improvement.
C1[24]* C2[36]* C3[48]* C4[60]*
C7[96]* C8[108]*
C5[72]* C6[84]*
2
4
5
79
10 12
14 16
16
86
11
13 15
31
24
5
79
10
8631
Down
Up
Reverb On/Off Chorus On/Off
Preset Sounds (C7–A7)
Songs (C6–A6)
Key Touch
Std.
Transpose
Light
Heavy
MIDI Channel (C4–D5)Pitch
DIS
DIS
ENA
ENA
Off
Off
On
On
Piano 1
E. Piano 1
Clavichord
Vibraphone
P. Organ
E. Organ
Strings
Piano 2
E. Piano 2
Harpsichord
FGACD
G A B C D E F
F5E5 A5 B5
G
5 A
5
Press and hold simultaneously

8
Précautions
Emplacement
L’utilisation de cet instrument dans les endroits suivants
peut en entraîner le mauvais fonctionnement.
• En plein soleil
• Endroits très chauds ou très humides
• Endroits sales ou fort poussiéreux
• Endroits soumis à de fortes vibrations
• A proximité de champs magnétiques
Alimentation
Branchez l’adaptateur secteur mentionné à une prise sec-
teur de tension appropriée. Evitez de brancher l’adaptateur
à une prise de courant dont la tension ne correspond pas à
celle pour laquelle l’appareil est conçu.
Interférences avec d’autres appareils
électriques
Les postes de radio et de télévision situés à proximité peu-
vent par conséquent sourir d’interférences à la réception.
Veuillez dès lors faire fonctionner cet appareil à une dis-
tance raisonnable de postes de radio et de télévision.
Maniement
Pour éviter de les endommager, manipulez les commandes
et les boutons de cet instrument avec soin.
Entretien
Lorsque l’instrument se salit, nettoyez-le avec un chiffon
propre et sec. Ne vous servez pas d’agents de nettoyage
liquides tels que du benzène ou du diluant, voire des pro-
duits inammables.
Conservez ce manuel
Après avoir lu ce manuel, veuillez le conserver soigneuse-
ment pour toute référence ultérieure.
Evitez toute intrusion d’objets ou de liquide
Ne placez jamais de récipient contenant du liquide près de
l’instrument. Si le liquide se renverse ou coule, il risque de
provoquer des dommages, un court-circuit ou une électro-
cution.
Veillez à ne pas laisser tomber des objets métalliques dans
le boîtier (trombones, par ex.). Si cela se produit, débran-
chez l’alimentation de la prise de courant et contactez votre
revendeur korg le plus proche ou la surface où vous avez
acheté l’instrument.
Note concernant les dispositions (Seulement EU)
Si ce symbole apparait sur le produit, le manuel,
les piles ou les packs de piles, cela signifie que
vous devez le recycler d’une manière correcte an
de prévenir les dommages pour la santé humaine
et les dommages potentiels pour l’environnement.
Contactez votre administration locale pour de plus
amples renseignements concernant la bonne méthode de
recyclage. Si la pile contient des métaux lourds au-delà
du seuil réglementé, un symbole chimique est aché en
dessous du symbole de la poubelle barrée d’une croix sur
la pile ou le pack de piles.
REMARQUE IMPORTANTE POUR LES CLIENTS
Ce produit a été fabriqué suivant des spécifications sé-
vères et des besoins en tension applicables dans le pays
où ce produit doit être utilisé. Si vous avez acheté ce
produit via l’internet, par vente par correspondance ou/
et vente par téléphone, vous devez vérier que ce produit
est bien utilisable dans le pays où vous résidez.
ATTENTION: L’utilisation de ce produit dans un pays
autre que celui pour lequel il a été conçu peut être dange-
reuse et annulera la garantie du fabricant ou du distribu-
teur. Conservez bien votre récépissé qui est la preuve de
votre achat, faute de quoi votre produit ne risque de ne
plus être couvert par la garantie du fabricant ou du dis-
tributeur.
* Tous les noms de produits et de sociétés sont des
marques commerciales ou déposées de leur détenteur
respectif.
Table des matières
Installation et connexions ................................................9
Jouer avec différents sons ............................................. 10
Utilisation du pédalier ..................................................... 10
Autres fonctions .............................................................. 11
Fonctions des touches ................................................... 12
MIDI ................................................................................... 12
Dépannage ....................................................................... 13
Spécication .................................................................... 13

9
Installation et connexions
1. Connexion au secteur (Illustration 1)
• Pour commencer, le SP-170DX est hors tension. Branchez le câble d’alimentation à l’adaptateur
secteur. Branchez la che de CC à la prise DC12V en face arrière. Branchez ensuite le câble
d’alimentation à une prise secteur.
Faites passer le câble de l’adaptateur par le crochet prévu à cet eet pour éviter que la che
ne se débranche accidentellement. Lorsque vous retirez le câble du crochet, évitez de tirer
sur le câble avec une force excessive.
Utilisez uniquement l’adaptateur secteur fourni. L’utilisation d’un autre adaptateur risque
d’entraîner des dysfonctionnements.
Veillez à brancher le produit à une prise secteur d’une tension adéquate.
2. Mise sous tension du SP-170DX
• Appuyez sur l’interrupteur situé à gauche, sur le panneau supérieur, pour mere l’instrument
sous tension. (Illustration 2)
Le témoin d’alimentation situé à gauche du pupitre s’allume. (Illustration 2)
• Appuyez sur l’interrupteur pour mere l’instrument hors tension.
Le témoin d’alimentation s’éteint.
3. Réglage du volume
• Tournez la commande VOLUME à droite vers “MAX” pour augmenter le volume. Tournez-la
à gauche vers “MIN” pour diminuer le volume. (Illustration 2)
La commande VOLUME règle le volume des haut-parleurs internes et des prises pour
casques.
Utilisation de casques
La connexion d’un casque coupe les haut-parleurs internes. Cela permet de jouer du clavier
le soir sans déranger votre entourage. Le SP-170DX dispose de deux prises pour casques, per-
meant à deux personnes d’écouter au casque.
• Branchez la che de casque stéréo à une des prises PHONES en face arrière. (Illustration 3)
Si votre casque est doté d’une che adaptatrice jack standard/mini-jack, veillez à tenir la che
adaptatrice lorsque vous branchez ou débranchez le casque.
Pour protéger votre ouïe, évitez une écoute au casque prolongée à volume élevé.
Connexion de périphériques audio
Vous pouvez utiliser les prises PHONES comme sorties lignes pour brancher des enceintes
actives ou d’autres périphériques audio au clavier. Utilisez pour cela des câbles conçus pour
ces périphériques et disponibles dans le commerce.
Avant de brancher des périphériques audio, n’oubliez pas de mere l’instrument et les
périphériques audio hors tension. Faute de quoi, vous risquez d’endommager l’instru-
ment ou les périphériques.
Utilisation du pupitre
• Insérez les pieds du pupitre fourni dans la fente située au centre du panneau supérieur.
(Illustration 4)
A une prise
de courant
Illustration 1
Adaptateur
secteur
Fiche CC
Câble de l’adaptateur
secteur
Crochet pour câble
Veillez à ne pas
plier cette partie
excessivement
lorsque vous fixez
le câble au crochet.
Illustration 2
Témoin
d’alimentation
Commande
VOLUME
Interrupteur
Prises PHONES
Illustration 3
Illustration 4

10
Jouer avec différents sons
Le SP-170DX propose 10 sons préprogrammés.
Appuyez plusieurs fois sur le bouton SOUND pour changer de son selon la séquence suivante:
Piano 1 → Piano 2 → E.Piano 1 → E.Piano 2 → Harpsichord → Clavichord → Vibraphone → P.Organ →
E.Organ → Strings
Après le son “Strings”, vous revenez au son “Piano 1”. Une pression sur le bouton PIANO PLAY sé-
lectionne automatiquement le son “Piano 1”.
Quand vous meez l’instrument sous tension, le son “Piano 1” est sélectionné par défaut.
Piano 1: Piano à queue chaud et riche
Piano 2: Piano à queue clair et brillant
E.Piano 1: Piano électrique authentique et uide
E.Piano 2: Piano électrique moderne et percutant
Harpsichord: Clavecin classique
Clavichord: Clavicorde électrique expressif
Vibraphone: Vibraphone au son velouté
P.Organ: Orgue à tuyaux
E.Organ: Orgue électronique à registres
Strings: Section de cordes
Vous pouvez aussi changer de son en appuyant sur une des touches de la plage Do7 à La7 tout
en maintenant les boutons PIANO PLAY et SOUND enfoncés. (Voyez la section “Fonctions des
touches” aux pages 12 et 13.)
Utilisation du pédalier
Branchez le pédalier fourni avec le clavier au connecteur sur le dessous de l'instrument.
Une fois branché, ce pédalier vous permet d'exploiter toutes les nuances d'expression avec ses
pédales douce, de soutien et de résonance.
Pédale douce (‘soft’)
Appuyez sur cee pédale pour adoucir le son. Vous pouvez contrôler le degré d'aénuation
du son en enfonçant plus ou moins la pédale douce (eet “mi-pédale”).
Pédale de soutien (‘sostenuto’)
L’eet de soutien s’applique uniquement aux notes dont les touches sont déjà enfoncées au
moment où vous appuyez sur la pédale; seules ces notes continuent de résonner tant que
la pédale de soutien est enfoncée. L’eet de soutien ne s’applique pas aux notes que vous
jouez après l’enfoncement de la pédale de soutien.
Pédale de résonance (‘damper’)
L’action de cee pédale soutient le son et produit un estompement des notes plein de réso-
nance. Vous pouvez en outre contrôler le degré de résonance des sons de piano 1 et 2 selon
la pression que vous exercez sur la pédale (eet “mi-pédale”).
Pédale
douce
Pédale de
soutien
Pédale de résonance
Bouton
PIANO PLAY
Bouton
SOUND
Installation du pédalier
Vériez que l’instrument est hors tension avant de bran-
cher le pédalier.
1. Branchez le câble de pédalier sur le dessous du pédalier,
en veillant à orienter correctement son connecteur.
2. Acheminez le câble de pédalier ainsi branché dans la fente
prévue à cet effet sur le pédalier comme illustré ci-des-
sous.
3. Branchez l’autre extrémité du câble de pédalier sur le
dessous de l’instrument, en veillant à xer le câble avec
le support prévu à cet eet.
Support de câble
Lorsque le pédalier est utilisé
sur un sol où il risque de glis-
ser ou de bouger facilement,
posez le tapis antidérapant
fourni avec l’instrument sur
le sol et placez le pédalier sur
son tapis.

11
Autres fonctions
Le SP-170DX vous permet de reproduire les morceaux ou de régler divers paramètres en appuyant
sur une touche spécique du clavier tout en maintenant les boutons PIANO PLAY et SOUND en-
foncés. Voyez la section “MIDI” à la page suivante pour en savoir plus sur les canaux et les change-
ments de programme MIDI.
Tant que vous maintenez les boutons PIANO PLAY et SOUND enfoncés, ne jouez pas sur le cla-
vier. Vous risquez d’obtenir un résultat inaendu.
Pour connaître les fonctions assignées aux touches, voyez la section “Fonctions des touches” aux
pages 12 et 13.
Signal de conrmation
Quand vous actionnez une touche pour régler un paramètre, vous entendez un signal de conrma-
tion. Vous pouvez désactiver ce signal de conrmation en maintenant les boutons PIANO PLAY et
SOUND enfoncés et en appuyant sur la touche La#0. Pour activer le signal de conrmation, faites de
même mais appuyez sur la touche Si0 au lieu de la touche La#0. Par défaut, à la mise sous tension de
l’instrument, le signal de conrmation est activé.
Ecouter les morceaux
Le SP-170DX propose 10 morceaux exploitant 10 sons pré-
programmés. Ecoutez les morceaux pour découvrir toute la
richesse et l’expressivité des sons.
En maintenant les boutons PIANO PLAY et SOUND enfoncés,
appuyez sur une des touches situées entre Do6 et La6 (du côté
droit du clavier). La lecture du morceau assigné à la touche
actionnée (voyez ci-dessous) démarre. La lecture commence
à partir du morceau sélectionné et se poursuit en boucle, par
ordre ascendant, jusqu’à ce que vous l’arrêtiez.
Pour arrêter la lecture, appuyez simultanément sur les bou-
tons PIANO PLAY et SOUND.
Durant la lecture d’un morceau, vous pouvez changer de
son en utilisant les boutons PIANO PLAY et SOUND
plus les touches du clavier. Le réglage d’effets du mor-
ceau s’applique au son sélectionné.
Quand vous changez de son durant la lecture d’un mor-
ceau, aucun message MIDI (de changement de pro-
gramme) n’est transmis.
Titre du morceau
1 (Piano 1): Fantaisie-Impromptu Op.66 /F.Chopin
2 (Piano 2): Amazing Grace/unknown (arr. : N.Nishi)
3 (E.Piano 1): Ramble/M.Sakaguchi
4 (E.Piano 2): KORG Orignal
5 (Harpsichord): Invention No.8/J.S.Bach
6 (Clavichord): KORG Orignal
7 (Vibraphone): KORG Orignal
8 (P.Organ): Toccata in D moll/J.S.Bach
9 (E.Organ): KORG Orignal
10 (Strings): First Snow/M.Sakaguchi
Effets (réverbération et chorus)
Vous pouvez utiliser un eet de réverbération pour conférer
plus de profondeur au son ou un eet chorus pour l’élargir et
l’enrichir.
• Maintenez les boutons PIANO PLAY et SOUND enfoncés,
et appuyez sur la touche La5 pour activer l’eet de réverbé-
ration. Pour couper l’eet de réverbération, faites de même
mais appuyez sur la touche Sol#5 au lieu de la touche La5.
• En maintenant les boutons PIANO PLAY et SOUND enfon-
cés simultanément, appuyez sur la touche Si5 pour activer
l’effet de chorus. Pour couper l’effet de chorus, faites de
même mais appuyez sur la touche La#5 au lieu de Si5.
Vous pouvez ajouter des eets à chacun des sons.
Quand vous meez l’instrument sous tension, les eets uti-
lisent des réglages optimisés pour chacun des sons prépro-
grammés.
Réglage de la réponse du clavier selon le
toucher
Le réglage de la réponse du clavier vous permet de détermi-
ner le rapport entre la force exercée sur les touches (toucher)
et le niveau de sortie du son. Vous pouvez régler ce paramètre
avec les touches blanches de la plage Ré2~Fa2. (Voyez l’illus-
tration à gauche.)
• Pour jouer fortissimo avec un toucher léger, maintenez les
boutons PIANO PLAY et SOUND enfoncés et actionnez la
touche Ré2.
• Pour jouer fortissimo avec un toucher lourd, maintenez les
touches boutons PIANO PLAY et SOUND enfoncés et ac-
tionnez la touche Fa2.
• Pour un toucher normal (standard), maintenez les boutons
PIANO PLAY et SOUND enfoncés et actionnez la touche
Mi2.
Le toucher standard est le réglage par défaut (à la mise sous
tension).
1
24 7 9
3 5 6 8 10
Fort
Puissance
sonore
Calme
Force du jeu
Léger
Std.
Lourd
Calme Fort

12
Transposition (décalage de hauteur)
Il peut arriver qu’un morceau soit écrit dans une tonalité
dicile (impliquant de nombreuses altérations) ou que vous
souhaitiez adapter la hauteur à celle d’un autre instrument ou
d’un chanteur. Dans ce cas, vous pouvez transposer le clavier
(décaler la hauteur des notes) afin de pouvoir jouer comme
vous en avez l’habitude mais dans une tonalité diérente. C’est
ce que nous appelons la fonction de transposition. Vous pou-
vez transposer la tonalité sur une plage de 11 demi-tons.
Si vous effectuez une transposition d’un demi-ton vers le
haut, par exemple, le fait de jouer les notes de la portée gauche
produit les notes de la portée droite.
• Pour effectuer la transposition, maintenez les boutons
PIANO PLAY et SOUND enfoncés et appuyez sur une
touche de la plage Fa#2~Si3 ou Do#3~Fa3. La transposition
est eectuée par rapport à une note de référence.
Si vous souhaitez une transposition telle que la touche Do3
(référence) produise la note La2 (transposition vers le bas
de trois demi-tons), maintenez les boutons PIANO PLAY et
SOUND enfoncés et appuyez sur la touche La2. Si vous sou-
haitez une transposition telle que la touche Do3 (référence)
produise la note Ré#3 (transposition vers le haut de trois
demi-tons), maintenez les boutons PIANO PLAY et SOUND
enfoncés et appuyez sur la touche Ré#3.
Pour annuler la transposition (±0), maintenez les boutons PIA-
NO PLAY et SOUND enfoncés et appuyez sur la touche Do3.
Par défaut (à la mise sous tension), il n’y a pas de transposition.
Réglage du diapason
La fonction de contrôle de tonalité intégrée vous permet d’ef-
fectuer des régla-ges précis de la tonalité du SP-170DX. Vous
pouvez utiliser cee fonction pour, parexemple, régler le SP-
170DX afn de le syntoniser avec d’autres instruments.
Vous pouvez modifier le diapason du SP-170DX par inter-
valles de 0,5Hz (Hertz) sur la plage 427,5~452,5Hz en utilisant
les touches Mi5 et Fa5.
• En maintenant les boutons PIANO PLAY et SOUND enfon-
cés (à l’extrémité droite du clavier), appuyez plusieurs fois
sur la touche Mi5 pour diminuer le diapason par pas de
0,5Hz ou sur la touche Fa5 pour augmenter le diapason par
pas de 0,5Hz.
• Pour retrouver le diapason La4=440Hz, maintenez les bou-
tons PIANO PLAY et SOUND enfoncés et appuyez simulta-
nément sur les touches Mi5 et Fa5.
Par défaut (à la mise sous tension), le diapason est réglé sur
La4=440Hz.
MIDI
Pour consulter le tableau d’équipement MIDI (“MIDI Imple-
mentation Chart”), veuillez vous rendre sur le site Korg (hp://
www.korg.com/).
Utiliser la prise MIDI OUT
La prise MIDI OUT transmet des messages MIDI. Les mes-
sages MIDI produits et transmis lorsque vous jouez sur le
clavier peuvent piloter un dispositif MIDI (pour jouer avec
les sons d’un module externe, par exemple). Utilisez un câble
MIDI optionnel pour brancher la prise MIDI OUT du SP-
170DX à la prise MIDI IN d’un autre dispositif MIDI.
Changer le canal MIDI
Pour que le SP-170DX puisse exploiter les sons d’un autre
dispositif MIDI, il faut que le canal MIDI du SP-170DX soit
le même que celui du dispositif MIDI externe. Pour changer
le canal MIDI (1~16) transmettant des données MIDI via la
prise MIDI OUT, maintenez les boutons PIANO PLAY et
SOUND enfoncés et appuyez sur une des touches de la plage
Do4~Ré#5.
Le canal MIDI sélectionné par défaut (à la mise sous tension)
est le canal “1”.
Transmission de changements de
programme et de commandes de contrôle
Vous pouvez changer le numéro de programme utilisé par
le dispositif MIDI externe à partir du SP-170DX. Quand vous
sélectionnez un son sur le SP-170DX (voyez “Jouer avec dié-
rents sons” à la page 6), vous transmeez un des numéros de
programme MIDI (“PC#”) indiqués dans le tableau ci-contre.
Pour désactiver (DES) cee transmission, maintenez les bou-
tons PIANO PLAY et SOUND enfoncés et appuyez sur la
touche Sol#3. Pour activer (ACT) cee transmission, faites de
même mais appuyez sur la touche La3. Le SP-170DX transmet
également des commandes de contrôle permeant de piloter
la fonction “Damper” (CC64), la sélection de banque (CC00)
etc. sur le dispositif MIDI branché. Pour désactiver (DES)
cette transmission, maintenez les boutons PIANO PLAY et
SOUND enfoncés et appuyez sur la touche La#3. Pour activer
(ACT) cee transmission, faites de même mais appuyez sur la
touche Si3.
Do1[24]* Do2[36]* Do3[48]* Do4[60]*
Do7[96]* Do8[108]*
Do5[72]* Do6[84]*
24
5
79
10 12
14 16
16
86
11
13 15
31
24
5
79
10
8631
Réverbération activée/coupée Chorus activé/coupé
Activation/désactivation de la trans-
mission de numéros de programme Activation/désactivation de la trans-
mission de commandes de contrôle
Sons internes
Morceaux
Toucher
Std.
Transposition
(Fa2~Fa3)
Léger
Lourd
Canal MIDI
Piano 1
E. Piano 1
Clav
Vibraphone
P. Organ
E. Organ
Strings
Piano 2
E. Piano 2
Harpsi
ACT
ACT
DES
DES
Sonorité de confirmation
activée/coupée
Activé
Coupé
Activé
Coupé
Activé
Coupé
Bas Haut
Hauteur
Maintenez ces
boutons enfoncés
Fa
Sol
La
Do
Ré
Sol
La Si Do Ré Mi Fa
Si0 Ré2 Mi2 Fa2 La3 Si3
La
0La
3Sol
3
Fonctions des touches [ ]* indique le numéro de note MIDI.

13
Par défaut (à la mise sous tension), la transmission des numé-
ros de programme et des commandes de contrôle est activée.
Tableau de numéros de programme
BANK#
PC# Son
BANK#
PC# Son
0 0 Piano 1 0 7 Clavichord
0 1 Piano 2 0 11 Vibraphone
0 4 E.Piano 1 0 19 P.Organ
0 5 E.Piano 2 0 16 E.Organ
0 6 Harpsichord 0 48 Strings
CC00: La banque sélectionnée (MSB) pour tous les sons in-
ternes est “121”.
Dépannage
Si vous rencontrez le moindre problème, vérifiez les points
suivants. Si le problème persiste, contactez le service après-
vente Korg le plus proche.
L’instrument ne s’allume pas
• Vérifiez que l’adaptateur secteur est correctement branché
au SP-170DX et à une prise secteur.
• Vérifiez que le témoin d’alimentation est allumé.
Les haut-parleurs ne produisent aucun son
• Tournez la commande VOLUME située en face arrière vers
la position “MAX”.
• Les haut-parleurs sont coupés si un casque est branché.
Il y a des interruptions du son
•
Les sons internes du SP-170DX résultent de l’échantillonnage
(l’enregistrement) de sons d’instruments réels suivi d’une
analyse et d’un traitement des échantillons. Certains sons
ne sont constitués que d’un échantillon par note alors que
d’autres en combinent deux. La plupart des sons internes du
SP-170DX utilise deux échantillons par note. Quand vous
sélectionnez un son à deux échantillons par note, la poly-
phonie maximum est de 60 notes (que la pédale forte soit ac-
tionnée ou non). Parmi les sons internes, deux sons de piano
autorisent une polyphonie de 120 notes. Si vous dépassez la
polyphonie maximum, des notes excédentaires sont perdues.
La hauteur tonale ou tonalité du piano semble incor-
recte dans certaines zones du clavier
• Les sonorités de piano du SP-170DX reproduisent aussi fdè-
lement que pos-sible celles d’un piano réel. Cela signife que
dans certaines régions duclavier, il est possible que le son
semble plus fort, ou que la tonalité ouhauteur tonale semble
incorrecte. C’est un phénomène normal.
La pédale ne fonctionne pas
• Vérifiez si le câble de la pédale est branché correctement.
Le dispositif MIDI branché ne réagit pas aux messages
MIDI transmis.
• Vérifiez si le câble MIDI est branché correctement.
• Vérifiez si le SP-170DX est bien réglé (et transmet les don-
nées MIDI) sur le même canal que l’autre dispositif MIDI.
Spécication
Clavier NH Clavier: 88 notes (La0–Do8)
Polyphonie maximale 120 notes / 60 notes (Stereo)
Sons 10 sons
Prises Casques x 2 (servent aussi de sorties),
MIDI OUT, Connecteur pour pédalier,
*Pédale (Damper)
Amplication 9 W × 2
Haut-parleurs Ovales (10cm x 5cm) x 2
Alimentation DC 12 V
Consommation 9 W
Poids 22 kg (avec support et sans pupitre)
Dimensions (L x P x H)
1312 × 325 × 781 mm (avec support, y compris
les saillies, mais sans pupitre)
Accessoires inclus
Adaptateur secteur ( ),
Pupitre,Support, pédalier, câble de pédalier,
tapis antidérapant pour pédalier
* Vous pouvez utiliser un commutateur au pied PS-3 (dis-
ponible en option) comme pédale de résonance (‘damper’)
en le branchant à la prise DAMPER SW. Vous pouvez aussi
utiliser une pédale de résonance DS-1H (disponible en op-
tion). En outre, la fonction de mi-pédale est disponible pour
les sons de piano 1 et 2.
Les caractéristiques et l’aspect du produit sont susceptibles
d’être modiés sans avis préalable en vue d’une amélioration.
Do1[24]* Do2[36]* Do3[48]*
Do4[60]*
Do7[96]* Do8[108]*
Do5[72]* Do6[84]*
2
4
5
79
10 12
14 16
16
86
11
13 15
31
24
5
79
10
8631
Bas
Haut
Std.
Canal MIDI
(Do4~Ré5)
Hauteur
Piano 1
E. Piano 1
Clavichord
Vibraphone
P. Organ
E. Organ
Strings
Piano 2
E. Piano 2
Harpsichord
Fa
Sol
La
Do
Ré
Sol
La Si Do Ré Mi Fa
Réverbération activée/coupée Chorus activé/coupé
Sons internes
(Do7~Ra7)
Morceaux
(Do6~Ra6)
Toucher Transposition
Léger
Lourd
ACT
ACT
DES
DES
Activé
Coupé
Activé
Coupé
Activé
Coupé
Maintenez ces
boutons enfoncés
La5Fa5Mi5 Si5
Sol
5
La
5

14
WICHTIGER HINWEIS FÜR KUNDEN
Dieses Produkt wurde unter strenger Beatung von Spezi-
kationen und Spannungsanforderungen hergestellt, die im
Bestimmungsland gelten. Wenn Sie dieses Produkt über das
Internet, per Postversand und/oder mit telefoniser Bestel-
lung gekau haben, müssen Sie bestätigen, dass dieses Pro-
dukt für Ihr Wohngebiet ausgelegt ist.
WARNUNG: Verwendung dieses Produkts in einem ande-
ren Land als dem, für das es bestimmt ist, verwendet wird,
kann gefährlich sein und die Garantie des Herstellers oder
Importeurs hinfällig lassen werden. Bie bewahren Sie diese
Quiung als Kaueleg auf, da andernfalls das Produkt von
der Garantie des Herstellers oder Importeurs ausgeslossen
werden kann.
Hinweis zur Entsorgung (Nur EU)
Wenn Sie das Symbol mit der „durchgekreuzten
Mülltonne“ auf Ihrem Produkt, der dazugehörigen
Bedienungsanleitung, der Batterie oder der Verpa-
ckung sehen, müssen Sie das Produkt in der vorge-
sriebenen Art und Weise entsorgen um Säden an
der menschlichen Gesundheit und der Umwelt zu
vermeiden. Baerien oder Akkus, die Sadstoe enthalten,
sind au mit dem Symbol einer durgekreuzten Mülltonne
gekennzeinet. In der Nähe zum Mülltonnensymbol ben-
det sich die chemische Bezeichnung des Schadstoffes. Cd
oder NiCd steht für Cadmium, Pb für Blei und Hg für Que-
silber.
Vorsichtsmaßnahmen
Aufstellungsort
Vermeiden Sie das Aufstellen des Geräts an Orten, an denen
• es direkter Sonneneinstrahlung ausgesetzt ist;
• hohe Feutigkeit oder Extremtemperaturen aureten können;
• Staub oder Smutz in großen Mengen vorhanden sind;
• das Gerät Ersüerungen ausgesetzt sein kann.
• in der Nähe eines Magnetfeldes.
Stromversorgung
Sließen Sie das optionale Netzteil nur an eine geeignete Stedo-
se an. Verbinden Sie es niemals mit einer Steckdose einer anderen
Spannung.
Störeinüsse auf andere Elektrogeräte
Dieser kann bei in der Nähe aufgestellten Rund-funkempfängern
oder Fernsehgeräten Empfangsstörungen hervorrufen. Betreiben Sie
sole Geräte nur in einem geeigneten Abstand von diesem Erzeug-
nis.
Bedienung
Vermeiden Sie bei der Bedienung von Saltern und Reglern unan-
gemessenen Kraaufwand.
Reinigung
Bei auretender Versmutzung können Sie das Gehäuse mit einem
troenen, sauberen Tu abwisen. Verwenden Sie keinerlei Flüssi-
greiniger wie beispielsweise Reinigungsbenzin, Verdünnungs- oder
Spülmiel. Verwenden Sie niemals brennbare Reiniger.
Bedienungsanleitung
Bewahren Sie diese Bedienungsanleitung gut auf, falls Sie sie später
no einmal benötigen.
Flüssigkeiten und Fremdkörper
Stellen Sie niemals Behältnisse mit Flüssigkeiten in der Nähe des
Geräts auf. Wenn Flüssigkeit in das Gerät gelangt, können Besädi-
gung des Geräts, Feuer oder ein elek-triser Slag die Folge sein.
Beaten Sie, daß keinerlei Fremdkörper in das Gerät gelangen. Soll-
te ein Fremdkörper in das Gerät gelangt sein, so trennen Sie es sofort
vom Netz. Wenden Sie si dann an Ihren KORG-Fahändler.
* Alle Produkt- und Firmennamen sind Warenzeien oder
eingetragene Warenzeien der betreenden Eigentümer.
Inhalt
Vorbereitungen und Anschlüsse ................................... 15
Spielen unterschiedlicher Klänge ................................. 16
Verwendung der Pedaleinheit ........................................ 16
Verwendung der übrigen Funktionen ........................... 17
Tastenfunktionen ............................................................ 18
MIDI ................................................................................... 18
Fehlersuche ..................................................................... 19
Technische Daten ............................................................ 19

15
Vorbereitungen und Anschlüsse
1. Anschließen ans Netz (Abbildung 1)
• Salten Sie das SP-170DX bei Bedarf AUS. Verbinden Sie das beiliegende Netzteil mit dem Netzkabel.
Verbinden Sie den kleinen Steer mit der DC12V-Buse auf der Rüseite. Verbinden Sie das Netzka-
bel mit einer Stedose.
Wieln Sie das Netzteilkabel um den Kabelhaken, um zu verhindern, dass si der Netzansluss
aus Versehen löst. Beim Entfernen des Kabels dürfen Sie nie mit Gewalt daran ziehen.
Verwenden Sie nur das beiliegende Netzteil. Bei Verwendung eines anderen Netzteils wird das Gerät
eventuell besädigt.
Verbinden Sie das Instrument aussließli mit einer Stedose der geeigneten Netzspannung.
2. Einschalten des SP-170DX
• Drüen Sie den Netzsalter links im Bedienfeld, um das Instrument einzusalten. (Abbildung 2)
Die Netzanzeige links neben dem Notenpult leutet. (Abbildung 2)
• Drüen Sie den Netzsalter erneut, um das Instrument wieder auszusalten.
Die Netzanzeige erlist wieder.
3. Einstellen der Lautstärke
• Drehen Sie den VOLUME-Regler neben dem Netzsalter in Ritung „MAX“, um die Lautstärke anzu-
heben. Drehen Sie ihn na links (zu „MIN“), um die Lautstärke zu verringern. (Abbildung 2)
Der VOLUME-Regler bestimmt den Pegel der internen Lautspreer und Kopörerbusen.
Kopfhörerbetrieb
Beim Ansließen eines Kopörers werden die internen Lautspreer stummgesaltet. Das ist z.B.
praktis, wenn Sie spät abends oder früh morgens üben oder spielen möten. Das SP-170DX ist mit
zwei Kopörerbusen ausgestaet, so dass jeweils zwei Personen spielen und zuhören können.
• Verbinden Sie die Klinke des Kopörers mit einer PHONES-Buse auf der Rüseite. (Abbildung 3)
Wenn Ihr Kopörer mit einem Standard–Miniklinken-Adapter versehen ist, müssen Sie zum Anslie-
ßen oder Lösen der Verbindung jeweils den Adapter festhalten.
Bedenken Sie, dass ein hoher Wiedergabepegel im Kopörer son na kurzer Zeit zu Hörsä-
den führen kann.
Anschließen anderer Audiogeräte
Die PHONES-Busen lassen si au als Audio-Ausgänge für Aktivboxen oder andere Audiogeräte
nutzen. Für eine sole Verbindung benötigen Sie handelsüblie Kabel mit den für Ihr Gerät geeigne-
ten Steern.
Vor dem Herstellen von Audioverbindungen müssen Sie das Instrument und die externen Audio-
geräte aussalten. Andernfalls könnten das Instrument und die übrigen Geräte besädigt wer-
den.
Verwendung des Notenpults
• Sieben Sie die Füße des beiliegenden Notenpults in die dafür vorgesehenen Aussparungen in der
Mie der Oberplae. (Abbildung 4)
Zu einer
Steckdose
Abbildung 1
Netzteil
Netzteilbuchse
Netzkabel für das Netzteil
Kabelhaken
Diese Partie darf
beim Arretieren
des Netzteilkabels
nicht zu stark
strapaziert
werden.
Abbildung 2
Netzanzeige
VOLUME-
Regler
Netzschalter
Abbildung 3
PHONES-Buchse
Abbildung 4

16
Spielen unterschiedlicher Klänge
Spielen untersiedlier Klänge
Bei wiederholtem Drüen des SOUND-Tasters ändert si die Klangfarbe na folgendem Muster.
Piano 1 → Piano 2 → E.Piano 1 → E.Piano 2 → Harpsiord → Claviord → Vibraphone → P.Organ → E.Organ
→ Strings
Na Anwahl von „Strings“ springen Sie wieder zurü zu „Piano 1“. Mit dem PIANO PLAY-Taster können Sie
jederzeit wieder die Klangfarbe „Piano 1“ aufrufen.
Unmielbar na dem Einsalten wählt das Instrument jeweils den „Piano 1“-Klang.
Piano 1: Wunderschöner Flügelklang
Piano 2: Heller und klarer Flügelklang
E.Piano 1: Runder, authentischer E-Pianoklang
E.Piano 2: Modernes, sehr perkussives E-Piano
Harpsichord: Klassisches Cembalo
Clavichord: Expressives elektrisches Cembalo
Vibraphone: Runder Vibraphonklang
P.Organ: Pfeifenorgel
E.Organ: Elektrische Zugriegelorgel
Strings: Klang einer Streichersektion
Wenn Sie eine Klangfarbe lieber direkt anwählen, müssen Sie den PIANO PLAY- und SOUND-Taster gedrüt
halten, während Sie eine Klaviaturtaste im Berei C7–A7 drüen. (Siehe „Tastenfunktionen“ auf Seite 18 und
19.)
Verwendung der Pedaleinheit
Verbinden Sie die im Lieferumfang enthaltene Pedaleinheit mit der Buse an der Unterseite des Ge-
räts. Wenn die Pedaleinheit angeslossen ist, können Sie Ihrem Spiel mit den Halte-, Sostenuto- und
Sofunktionen mehr Ausdru verleihen.
Softpedal
Dur Betätigen dieses Pedals wird der Ton saner. Die Säne des Tons hängt davon ab, wie tief das
Pedal betätigt wird („Halbpedal“).
Sostenutopedal
Dur Betätigen dieses Pedals werden nur diejenigen Noten, deren Tasten bereits gedrüt sind,
dämp und gehalten. Bei betätigtem Sostenutopedal zusätzli gespielte Noten werden nit ge-
dämp.
Haltepedal
Betätigen dieses Pedals hält den Ton an, sodass er sa nahallend abklingt. Außerdem können Sie
die Anwendung des Halteeekts davon abhängig maen, wie tief das Klangpedal für Piano 1 und 2
betätigt wird. („Halbpedal“)
Haltepedal
Sostenuto-
pedal
Softpedal
Anbringen der Pedaleinheit
Vergewissern Sie si, dass das Gerät ausgesaltet ist, bevor
Sie die Pedaleinheit daran ansließen.
1. Verbinden Sie das Pedalkabel mit der entspreenden Buse an
der Unterseite der Pedaleinheit.
2. Führen Sie das angeslossene Pedalkabel wie abgebildet dur
die Nut in der Pedaleinheit.
3. Verbinden Sie das Pedalkabel mit der entspreenden Buse
an der Unterseite des Geräts und befestigen Sie es mit dem Ka-
belhalter..
Kabelhalter
Bleibt die Pedaleinheit aufgrund
der Bodenbeschaffenheit beim
Spiel nicht fest am Platz, legen
Sie die im Lieferumfang enthal-
tene Gleitschutzmatte unter die
Pedaleinheit.
PIANO PLAY -
Taster
SOUND-
Taster

17
Verwendung der übrigen Funktionen
Das SP-170DX erlaubt das Abspielen von Stüen und das Einstellen bestimmter Funktionen, indem man den
PIANO PLAY- und SOUND-Taster gedrüt hält, während man die zugeordnete Klaviaturtaste betätigt. Im
„MIDI“-Absni auf der nästen Seite nden Sie Hinweise zu den MIDI-Kanälen und Programmweselbe-
fehlen.
Spielen Sie keine Noten, während Sie die Taster PIANO PLAY und SOUND gedrüt halten, weil sonst
eventuell etwas Unvorhergesehenes passiert.
Eine Übersit der Funktionen, die den Klaviaturtasten zugeordnet sind, nden Sie unter „Tastenfunktionen“
auf Seite 18 und 19.
Über den Bestätigungston
Wenn Sie eine Taste drüen, mit der eine Funktion eingestellt werden kann, erklingt ein Bestätigungston. Um
dieses Signal auszusalten, müssen Sie den PIANO PLAY- und SOUND-Taster gedrüt, während Sie die Taste
A#0 betätigen. Um den Bestätigungston wieder zu aktivieren, müssen Sie diesen Vorgang wiederholen, diesmal
aber die Taste H0 (sta A#0) betätigen. Beim Einsalten des Instruments wird die Bestätigungsfunktion auto-
matis aktiviert..
Abspielen der Songs
Das SP-170DX enthält 10 Songs, wele die 10 vorhandenen Klang-
farben vorführen.
Halten Sie den PIANO PLAY- und SOUND-Taster gedrüt, während
Sie eine Taste im Berei C6–A6 (rets auf der Tastatur) betätigen.
Das Stü der gedrüten Taste (siehe unten) wird abgespielt. Die Wie-
dergabe beginnt beim gewählten Stü, wird mit den nafolgenden
Stüen fortgesetzt und in einer Sleife abgespielt, bis Sie sie wieder
anhalten.
Drüen Sie den PIANO PLAY- und SOUND-Taster gleizeitig, um
die Wiedergabe anzuhalten.
To stop playback of the demo song, press the PIANO PLAY and
SOUND buons simultaneously.
Bei laufender Wiedergabe können Sie einen andere Klang wäh-
len, indem Sie den PIANO PLAY- und SOUND-Taster gedrüt
halten, während Sie auf der Tastatur spielen. Die Eekteinstel-
lungen des Stückes werden auch vom neu gewählten Klang
übernommen.
Selbst wenn Sie bei laufender Wiedergabe einen anderen Klang
wählen, werden die betreffenden MIDI-Befehle (Programm-
wesel usw.) nit ausgegeben.
Titel
1 (Piano 1): Fantaisie-Impromptu Op.66 /F.Chopin
2 (Piano 2): Amazing Grace/unknown (arr. : N.Nishi)
3 (E.Piano 1): Ramble/M.Sakaguchi
4 (E.Piano 2): KORG Origna
5 (Harpsichord): Invention No.8/J.S.Bach
6 (Clavichord): KORG Origna
7 (Vibraphone): KORG Origna
8 (P.Organ): Toccata in D moll/J.S.Bach
9 (E.Organ): KORG Origna
10 (Strings): First Snow/M.Sakaguchi
Effekte (Hall/Reverb und Chorus)
Mit dem Halleekt können Sie die gewünste Akustik simulieren.
Mit dem Chorus-Eekt können Sie den Klang breiter maen.
• Halten Sie den PIANO PLAY- und SOUND-Taster gedrüt, wäh-
rend Sie das A5 betätigen, um den Halleekt zu aktivieren. Um
den Halleekt auszusalten, müssen Sie diesen Vorgang wieder-
holen, aber die Taste G
#
5 (sta A5) betätigen.
• Halten Sie den PIANO PLAY- und SOUND-Taster gedrüt, wäh-
rend Sie das H5 betätigen, um den Chorus-Eekt zu aktivieren.
Um den Chorus-Eekt auszusalten, müssen Sie diesen Vorgang
wiederholen, aber die Taste A
#
5 (sta H5) betätigen.
Alle internen Klangfarben können mit Effekt versehen
werden.
Na dem Einsalten des Instruments verwendet jede Klang-
farbe die am besten geeigneten Eekteinstellungen.
Anschlagdynamik
Die Ansprae der Tastatur auf Ihre Anslagdynamik („Key Tou
Control“) lässt si ändern. Die gewünste Dynamikstufe kann mit
den weißen Tasten im Berei D2–F2 eingestellt werden. (Siehe die
Abbildung links.)
• Wenn Sie son mit leitem Anslag fortissimo spielen möten
(leite Ansprae), müssen Sie den PIANO PLAY- und SOUND-
Taster gedrüt halten, während Sie das D2 betätigen.
• Wenn Sie nur mit extrem hartem Anschlag fortissimo spielen
möten (swere Ansprae), müssen Sie den PIANO PLAY- und
SOUND-Taster gedrüt halten, während Sie das F2 betätigen.
• Die normale Ansprache (Standard) erzielen Sie, indem Sie den
PIANO PLAY- und SOUND-Taster gedrüt halten, während Sie
das E2 betätigen.
Unmielbar na dem Einsalten wird die Standard-Ansprae ge-
wählt.
1
24 7 9
3 5 6 8 10
Laut
Loudness
Ruhig
Ruhig Laut
Spielstärke
Standard
Weich
Stark

18
Transposition (Spielen in einer anderen Tonart)
Bestimmte Stücke verwenden eine schwierige Tonart (mit
vielen schwarzen Tasten). Und bestimmte Sänger bestehen
auf eine ganz bestimmte Tonart. Sta dann Ihren Fingersatz
zu ändern, können Sie die Tastatur „versieben“, um weiter-
hin in der vertrauten Tonart zu spielen und si nit um die
swarzen Tasten kümmern zu müssen. Das nennen wir die
„Transpositionsfunktion“. Die Tonhöhe kann um 11 Halbton-
srie versetzt werden.
Beispiel: Wenn Sie die Tastatur z.B. einen Halbton höher transponie-
ren, hören Sie beim Spielen der links abgebildeten Noten die rets
gezeigten Noten.
• Zum Einstellen des gewünsten Transpositionsintervalls müs-
sen Sie den PIANO PLAY- und SOUND-Taster gedrüt halten,
während Sie eine Taste im Berei F#2–B3 oder C#3–F3 betätigen.
Die Note der gedrüten Taste gibt die neue Tonart vor.
Beispiel: Wenn bei Drüen der Taste C3 die Note „A2“ (drei Halbtö-
ne tiefer) erklingen soll, müssen Sie den PIANO PLAY- und SOUND-
Tastergedrüt halten, während Sie das A2 betätigen. Wenn bei Drü-
en der Taste C3 die Note „D#3“ (drei Halbtöne höher) erklingen
soll, müssen Sie den PIANO PLAY- und SOUND-Taster gedrückt
halten, während Sie das D#3 betätigen.
Um wieder die normalen Notentonhöhen zu verwenden (±0), müs-
sen Sie den PIANO PLAY- und SOUND-Taster gedrückt halten,
während Sie das C3 betätigen.
Unmielbar na dem Einsalten wird die Normaltonhöhe (keine
Transposition) gewählt.
Ändern der Stimmung
Mit der integrierten Tonhöhenregelung können Sie die Tonhöhe
des SP-170DX feineinstellen. Verwenden Sie diese Funktion zum
Beispiel, um die Tonhöhe des SP-170DX an die Tonhöhe anderer Ins-
trumente anzupassen. Mit den Tasten E5 und F5 kan n die Gesamt-
stimmung des SP-170DX im Berei 427,5–452,5Hz (Hertz) in 0,5Hz-
Srien geändert werden.
• Halten den PIANO PLAY- und SOUND-Taster gedrüt, während
Sie die Tonhöhe mit der Taste E5 bei jedem Drüen um jeweils
0,5Hz absenken bzw. mit der Taste F5 um jeweils 0,5Hz anheben.
• Um die Kammertonfrequenz wieder auf 440Hz zu stellen, müs-
sen Sie den PIANO PLAY- und SOUND-Taster gedrüt halten,
während Sie das E5 und F5 gleizeitig betätigen.
Unmielbar na dem Einsalten wird die Stimmung A4=440Hz
gewählt.
MIDI
Die MIDI-Implementierungstabelle nden Sie auf der Korg-Webpage
(hp://www.korg.com/).
Verwendung der MIDI OUT-Buchse
Die MIDI OUT-Buse überträgt MIDI-Befehle. Wenn Sie auf der Tas-
tatur spielen, sendet das Instrument die entspreenden MIDI-Befeh-
le. Das externe Instrument empfängt sie und führt sie ebenfalls aus.
Verbinden Sie die MIDI OUT-Buse des SP-170DX über ein optionales
MIDI-Kabel mit der MIDI IN-Buse des externes MIDI-Geräts.
Einstellen des MIDI-Kanals
Wenn Sie das SP-170DX zum Ansteuern eines externen Instruments
oder Geräts verwenden möten, müssen Sie auf dem SP-170DX die-
selbe Kanalnummer wählen wie auf dem externen Instrument. Für
die Anwahl des MIDI-Kanals (1–16), auf dem die Befehle zur MIDI
OUT-Buchse übertragen werden, müssen Sie den PIANO PLAY-
und SOUND-Taster gedrüt halten, während Sie die entspreende
Taste im Berei C4–D#5 betätigen. Die Vorgabe-Einstellung für den
MIDI-Kanal ist „1“.
Senden von Programmwechsel- und
Steuerbefehlen
Das SP-170DX kann au Programmweselbefehle zum externen Ins-
trument senden. Bei Anwahl einer Klangfarbe auf dem SP-170DX (siehe
„Spielen untersiedlier Klänge“ auf Seite 10), wird die zugehörige
MIDI-Programmnummer (PC#) gesendet (siehe die Tabelle links).
Diese Übertragung kann au deaktiviert werden („AUS“): Halten Sie
den PIANO PLAY- und SOUND-Taster gedrüt, während Sie das G#3
betätigen. Um die Übertragung dana wieder zu aktivieren („AKT“),
müssen Sie diesen Vorgang wiederholen, aber die Taste A3 betätigen.
Das SP-170DX sendet auch Steuerbefehle: Wenn Sie das Dämpfer-
pedal betätigen wird ein CC64-Befehl gesendet.
Au Bankwesel
(CC00) usw. werden übertragen. Diese Übertragung kann deakti-
viert werden („AUS“): Halten Sie den PIANO PLAY- und SOUND-
Taster gedrüt, während Sie das A#3 betätigen. Um die Übertragung
danach wieder zu aktivieren („AKT“), müssen Sie diesen Vorgang
wiederholen, aber die Taste H3 betätigen. Unmielbar na dem Ein-
salten des Instruments ist die Übertragung von sowohl Programm-
wesel- als au Steuerbefehlen aktiv („AKT“)
Programmwechsel-Tabelle
BANK#
PC# Klang
BANK#
PC# Klang
0 0 Piano 1 0 7 Clavichord
0 1 Piano 2 0 11 Vibraphone
0 4 E.Piano 1 0 19 P.Organ
0 5 E.Piano 2 0 16 E.Organ
0 6 Harpsichord 0 48 Strings
CC00: Die Banknummer (MSB) aller Klänge lautet „121“.
C1[24]* C2[36]* C3[48]* C4[60]*
C7[96]* C8[108]*
C5[72]* C6[84]*
H0 D2 A3 B3E2 F2
24
5
79
10 12
14 16
16
86
11
13 15
31
24
5
79
10
8631
Tiefer
Höher
Hall an/aus Chorus an/aus
Übertragung von Programm-
wechselbefehlen an/aus Übertragung von
Steuerbefehlen an/aus
Interne Klangfarben
Songs
Anschlagdynamik
Std.
Transposition (F
2–F3)
Leicht
Schwer
MIDI-Kanal
Tonhöhe
AUS
AUS
AKT
AKT
Aus
Aus
An
An
Piano 1
E. Piano 1
Clav
Vibraphone
P. Organ
E. Organ
Strings
Piano 2
E. Piano 2
Harpsi
FGACD
G A H C D E F
Aus
An
A0 A3A0 G3
A0
Bestätigungston An/Aus
Gemeinsam gedrückt halten
Tastenfunktionen [ ]* vertreten MIDI-Notennummern number.

19
C1[24]* C2[36]* C3[48]* C4[60]*
C7[96]* C8[108]*
C5[72]* C6[84]*
24
5
79
10 12
14 16
16
86
11
13 15
31
24
5
79
10
8631
Piano 1
E. Piano 1
Clavichord
Vibraphone
P. Organ
E. Organ
Strings
Piano 2
E. Piano 2
Harpsichord
FGACD
G A H C D E F
Tiefer
Höher
Hall an/aus Chorus an/aus
Interne Klangfarben (C7–A7)
Songs (C6–A6)
Anschlagdynamik
Std.
Transposition
Leicht
Schwer
MIDI-Kanal (C4–D
5)
Tonhöhe
AUS
AUS
AKT
AKT
Aus
Aus
An
An
Aus
An
Gemeinsam gedrückt halten
A5G5
E5 F5 A5 B5
Fehlersuche
Wenn Sie den Eindruck haben, dass etwas nicht nach Plan läuft,
sollten Sie zunäst folgende Punkte überprüfen. Lässt si die Stö-
rung dadur nit beheben, so wenden Sie si bie an Ihren Korg-
Händler.
Das Instrument kann nicht eingeschaltet werden
• Schließen Sie das Netzteil ordnungsgemäß an das SP-170DX und
die Steckdose an.
• Schauen Sie nach, ob die Netzdiode leuchtet.
Die Lautsprecher bleiben stumm
• Drehen Sie den VOLUME-Regler auf der Rückseite in Richtung
„MAX“, um die Lautstärke zu erhöhen.
• Wenn Sie einen Kopfhörer anschließen, werden die Laut-
sprecher stummgeschaltet.
Sound is interrupted
• Die Klänge des SP-170DX beruhen auf Samples (Digital-Aufnahmen
von Natur- und anderen Klängen), die nach der Aufnahme noch
bearbeitet wurden. Bestimmte Klänge beruhen auf einem Sample,
das beim Drücken der Tasten angesteuert wird. Andere Klänge
steuern dagegen zwei Samples an. Die meisten Klangfarben des
SP-170DX beruhen auf jeweils zwei Samples. Bei Anwahl eines
solchen Klangs (und unabhängig davon, ob das Dämpferpedal ge-
drückt wird), beträgt die Polyphonie noch 60 Noten. Bei zwei Kla-
vierklängen beträgt die Polyphonie dagegen 120 Noten. Sobald die
Polyphonie überschritten wird, fallen die zuerst gespielten Noten
weg.
Die Tonlage oder der Ton des Klavies klingt in manchen Tonal-
regionen falsch
•
Die Piano-Sounds des SP-170DX replizieren den Sound eines echten
Kla-viers so treu wie möglich. Das bedeutet, dass in manchen Regio-
nen derTastatur das Gefühl entstehen kan, dass die Obertöne stärker
erschei-nen oder Ton oder Tonlage falsch wirkt. Dies ist keine Fehl-
funktion
.
Das Pedal funktioniert nicht
• Überprüfen Sie, ob das Pedalkabel ordnungsgemäß angeschlossen
wurde.
Das angeschlossene MIDI-Gerät wertet die gesendeten MIDI-
Befehle nicht aus
• Überprüfen Sie, ob das MIDI-Kabel ordnungsgemäß angeschlos-
sen wurde.
• Sorgen Sie dafür, dass das SP-170DX seine Daten auf dem Emp-
fangskanal des externen MIDI-Geräts sendet.
Technische Daten
Tastatur NH Tastatur: 88 Tasten (A0–C8)
Maximale Polyphonie 120 noten / 60 noten (Stereo)
Klänge 10 Klangfarben
Anschlüsse Kopörer x2 (fungieren au als Audio-Ausgän-
ge), MIDI OUT, Pedaleinheitsbuse,
*Pedal (Dämpfer)
Ausgangleistung 9 W × 2
Lautsprecher Oval (10cm x 5cm) x 2
Stromversorgung DC 12 V
Leistungsaufnahme 9 W
Gewicht 22 kg
(einsließli Ständer, aussließli Notenpult)
Abmessungen (B x T x H)
1312 × 325 × 781 mm
(einsließli Ständer und Vorsprüngen, aus-
sließli Notenpult)
Lieferumfang Netzteil ( ), Notenpults,
Ständer, Pedalein-
heit, Pedalkabel, Gleitschutzmatte für Pe-
daleinheit
* Sie können den Fußsalter S-3 (getrennt erhältli) als Haltepe-
dal einsetzen, wenn Sie ihn mit der Buse DAMPER SW verbin-
den. Das Haltepedal DS-1H (getrennt erhältli) kann ebenfalls
verwendet werden. Der Halbdämpfer unterstützt außerdem die
Klänge von Piano 1 und 2.
Änderungen der tenisen Daten und des Designs ohne vorherige
Ankündigung vorbehalten.

DIGITAL PIANO
Owner’s manual
Manuel d’utilisation
Bedienungsanleitung
E
F
G
1
Thank you for purchasing the Korg SP-170DX digtal piano.
Merci d’avoir choisi la piano numérique SP-170DX de Korg.
Vielen Dank, dass Sie sich für einen SP-170DX digtal-Klavier von Korg entschieden haben.
DIGITAL PIANO
E
F
G
1
© 2012 KORG INC.
4015-2 Yanokuchi, Inagi-city, Tokyo 206-0812 Japan
Table of contents
Languages:
Other Korg Musical Instrument manuals

Korg
Korg i3 HD User manual

Korg
Korg Triton Studio User manual

Korg
Korg KROSS User manual

Korg
Korg Karma User manual

Korg
Korg M3 User manual

Korg
Korg TouchView Trinity User manual

Korg
Korg SP-500 Installation guide

Korg
Korg TR music workstation Operation User manual

Korg
Korg micro arranger User manual

Korg
Korg SGPROX User manual
Popular Musical Instrument manuals by other brands

Percussion Play
Percussion Play Ground Fixed Grand Marimba installation instructions

Kawai
Kawai Anytime X2 ATX2-p owner's manual

Panasonic
Panasonic SXPX665 - ELECTRONIC PIANO operating manual

Roland
Roland G-70 owner's manual

DigiDesign
DigiDesign Digi 002 Getting started guide

Gibson
Gibson Digital Guitar owner's manual