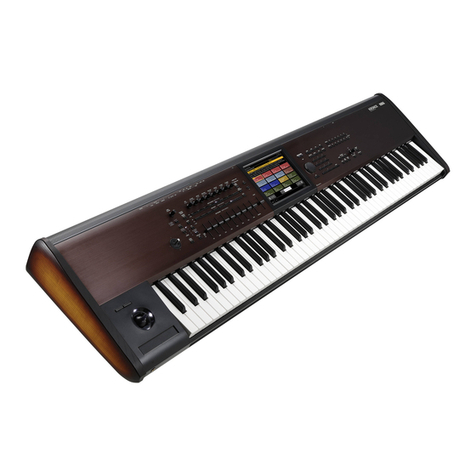
Korg Kronos X User manual

1
Operation Guide
5
E

iii
About this manual
The owner’s manuals and how to use them
References to the KRONOS and KRONOS X
ThesemanualsapplytoboththeKRONOSandthe
KRONOSX,collectivelyreferredtoas“theKRONOS.”
Thefrontpanelandrearpanelillustrationsshowthe
KRONOSX61‐keymodel,buttheyapplyidenticallyto
theothermodels.
Three manuals
TheKRONOSincludesthreeowner’smanuals:
•QuickStartGuide
•OperationGuide
• ParameterGuide
AllofthesemanualsareavailableasPDFsonAccessory
Disc2,andareincludedintheon‐boardHelpsystem.A
printedversionoftheQuickStartGuideisalsoincluded.
Quick Start Guide
Pleasereadthisfirst.Itintroducesallofthebasicfeatures
oftheKRONOS,andisdesignedtogetyouupand
runningquickly.
Operation Guide
Putsimply,theOperationGuideisdesignedtoanswer
thequestion,“HowdoIdothis?”
Itexplainsthenamesandfunctionsofeachpartofthe
KRONOS,basicoperation,anoverviewofeachmode,
howtoeditsounds,recordonthesequencer,sample,and
soon.Thisguidealsoexplainsthebasicsofeffects,
KARMA,DrumTrack,WaveSequences,andDrumKits.
Finally,italsocontainsatroubleshootingguideand
supplementalinformationsuchasspecifications.
Parameter Guide
TheParameterGuideisdesignedtoanswerthequestion,
“Whatdoesthisdo?”
Organizedbymodeandpage,theParameterGuide
includesinformationoneachandeveryparameterinthe
KRONOS.
PDF versions
TheKRONOSPDFmanualsaredesignedforeasy
navigationandsearching.TheyincludeextensivePDF
contentsinformation,whichgenerallyappearsonthe
sideofthewindowinyourPDFreaderandletsyoujump
quicklytoaspecificsection.Allcross‐referencesare
hyper‐links,sothatclickingonthemautomaticallytakes
youtothesourceofthereference.
On-board Help system*
TheHELPbuttongivesyoubuilt‐in,context‐sensitive
accesstotheusermanuals,rightfromthefrontpanel.
Forinformationonanyfront‐panelbutton,knob,slider,
orreal‐timecontroller,justholddownHELPandthen
pressthebuttonormovethecontrollerinquestion.
ForinformationonthecurrentLCDpage,pressand
releasetheHELPbutton.
FormoredetailsonusingtheHelpsystem,see“HELP
button”onpage 3.
*English‐languageonly.
Supplementary guides
Voice Name List
TheVoiceNameListlistsallofthesoundsandsetups
thatareintheKRONOSwhenitisshippedfromthe
factory,includingPrograms,Combinations,
Multisamples,DrumSamples,DrumKits,KARMAGEs,
WaveSequences,DrumTrackPatterns,TemplateSongs,
andEffectPresets.
Updating and restoring the KRONOS
Thisdocumentcontainsinformationonupdatingand
restoringtheKRONOSsoftware.It’sprovidedseparately
asaconvenience;allofitsinformationmayalsobefound
intheParameterGuide.
New features in KRONOS software version 1.5
Thisdocumentprovidesanoverviewofthenewfeatures
inKRONOSsoftwareversion1.5.It’sprovided
separatelyasaconvenience;allofitsinformationmay
alsobefoundintheOperationGuide.
Conventions in this manual
Abbreviations for the manuals: OG, PG, VNL
Inthedocumentation,referencestothemanualsare
abbreviatedasfollows.
QS:QuickStartGuide
OG:OperationGuide
PG:ParameterGuide
VNL:TheVoiceNameList
Symbols , , Note, Tips
Thesesymbolsrespectivelyindicateacaution,aMIDI‐
relatedexplanation,asupplementarynote,oratip.
Example screen displays
Theparametervaluesshownintheexamplescreensof
thismanualareonlyforexplanatorypurposes,andmay
notnecessarymatchthevaluesthatappearintheLCD
screenofyourinstrument.
MIDI-related explanations
CC#isanabbreviationforControlChangeNumber.
InexplanationsofMIDImessages,numbersinsquare
brackets[]alwaysindicatehexadecimalnumbers.
ThankyouforpurchasingtheKorgKRONOS/KRONOSX.Tohelpyougetthemostoutofyournewinstrument,
pleasereadthismanualcarefully.

iv
Contents
About this manual . . . . . . . . . . . . . . . . . . . . . . . . . . . iii
Introduction to KRONOS . . . . . . . . . . . . . . 1
Front and rear panels. . . . . . . . . . . . . . . . . . . . . . . . . 1
Frontpanel .................................1
Rearpanel..................................8
TouchViewuserinterface ....................10
Basic information . . . . . . . . . . . . . . . . . . . . . . . . . . . 13
AbouttheKRONOS’modes..................13
AbouttheKRONOS’PCMmemory ...........16
Aboutpolyphony...........................16
Basicoperations............................17
Setup . . . . . . . . . . . . . . . . . . . . . . . . . . . . . . . . . . . . . . 20
Turningthepoweron/off....................20
Connections................................20
Update information . . . . . . . . . . . . . . . . . . . . . . . . . 25
Newfeaturesinsoftwareversion2.0..........25
Newfeaturesinsoftwareversion1.5..........25
Playing and editing Programs . . . . . . . .27
Playing Programs . . . . . . . . . . . . . . . . . . . . . . . . . . . 27
SelectingPrograms..........................27
UsingControllers ...........................31
UsingtheChordPads.......................35
UsingChordmode..........................36
Easy Program Editing. . . . . . . . . . . . . . . . . . . . . . . . 39
Quickeditsusingtheknobs,sliders, and switches.
39
Detailed Program Editing. . . . . . . . . . . . . . . . . . . . 43
EditingHD‐1Programs......................43
UsingLFOsandEnvelopes(EGs).............45
UsingAlternateModulation(AMS)
and the AMS Mixers ........................47
ControllingPitch ...........................48
UsingFilters ...............................49
UsingtheAmpsection ......................51
UsingEXi..................................53
UsingVectorSynthesis......................55
Effects.....................................56
AutomaticallyimportingaProgram
into Sequencer mode ........................56
Playing and editing Combinations . . . .57
Playing Combinations . . . . . . . . . . . . . . . . . . . . . . . 57
SelectingCombinations......................57
Easy Combination editing . . . . . . . . . . . . . . . . . . . 60
ChangingtheProgramswithinaCombi.......60
Adjustingthemix...........................60
EasyKARMAediting .......................61
Detailed Combination editing. . . . . . . . . . . . . . . . 62
Combinationoverview......................62
Layers,Splits,andVelocitySwitches..........63
MIDISettings...............................64
AlteringProgramstofitwithin a Combination..65
Effects .....................................66
AutomaticallyimportingaCombination
into Sequencer mode.........................67
Savingyouredits ............................67
Creating songs (Sequencer mode) . . . .69
Sequencer overview . . . . . . . . . . . . . . . . . . . . . . . . . 69
AbouttheKRONOS’sequencer ...............69
Sequencermodestructure....................69
Playing Songs . . . . . . . . . . . . . . . . . . . . . . . . . . . . . . . 72
Playback ...................................72
ThecontrolsurfaceinSequencermode .........74
MIDI recording . . . . . . . . . . . . . . . . . . . . . . . . . . . . . . 76
Preparationsforrecording ....................76
RecordingMIDIinreal‐time..................78
MIDIsteprecording .........................81
RecordingthesoundofaCombinationor Program
82
RecordingmultipleMIDItracksfrom
an external sequencer........................84
RecordingSystemExclusiveevents............85
Recordingpatterns ..........................86
Otherwaystorecord.........................88
Audio recording. . . . . . . . . . . . . . . . . . . . . . . . . . . . . 89
Audiorecordingoverview ....................89
Audioinputsettingsandrecordingsourceselection
90
Recordingprocedure.........................93
Othervariationsofaudiotrackrecording .......99
PlacingaWAVEfileinanaudiotrack .........101
Song editing . . . . . . . . . . . . . . . . . . . . . . . . . . . . . . . 103
Songs.....................................103
MIDITracks...............................103
CommontoMIDItracksandaudiotracks .....104
AudioTracks ..............................105
Using RPPR (Realtime Pattern Play/Record) . . 106
CreatingRPPRdata.........................106
RPPRplayback.............................107
RecordinganRPPRperformance.............107
Sampling in Sequencer mode . . . . . . . . . . . . . . .109
Saving your Song . . . . . . . . . . . . . . . . . . . . . . . . . .110
Other notes about Sequencer mode . . . . . . . . . 111
KRONOSsequencerfileformats..............111
TheComparefunction ......................111
MemoryProtect ............................112
AboutMIDI ...............................112
Set Lists . . . . . . . . . . . . . . . . . . . . . . . . . . . .113
Set List Overview . . . . . . . . . . . . . . . . . . . . . . . . . . .113
Selecting and playing sounds . . . . . . . . . . . . . . .114
SelectingSetLists...........................114
SelectingSlots..............................115

v
Editing Set Lists. . . . . . . . . . . . . . . . . . . . . . . . . . . . 116
Selectingandre‐arrangingsounds...........116
DetailedSetListediting....................117
SetListsandtheControlSurface.............118
Smooth Sound Transitions . . . . . . . . . . . . . . . . . 120
Overview.................................120
UsingSmoothSoundTransitions............120
Sampling (Open Sampling System) . . 123
Sampling overview . . . . . . . . . . . . . . . . . . . . . . . . 123
AboutsamplingontheKRONOS ............123
Preparations for sampling . . . . . . . . . . . . . . . . . . 126
AudioSettings ............................126
Sampling and editing in Sampling mode . . . . 132
Creatingmultisampleindexesand sampling–
P0: Recording.............................133
Basicexamplesofsampling.................135
Editingloops..............................139
UsingTimeSlice...........................141
Samplewaveformediting...................144
Multisampleediting .......................145
SamplingfromanAudioCD ................145
Saving,convertingtoPrograms,andComparing..
146
Sampling in Program and Combination modes. . .
148
Overview.................................148
ResamplingaKARMAphraseinProgrammode..
148
AutoSamplingSetup ......................149
MixingaKARMAdrumphrasewith
a live guitar input, and samplingtheresult....149
Samplingaguitarfromtheaudioinputs,
while listeningtoaKARMAdrumphrase ....150
Sampling in Sequencer mode . . . . . . . . . . . . . . . 151
In‐TrackSampling .........................151
ResamplingasongtocreateaWavefile ......152
User Sample Banks. . . . . . . . . . . . . . . . . . . . . . . . . 154
Global Settings, Wave Seq., Drum Kits . . .
157
Global mode overview . . . . . . . . . . . . . . . . . . . . . 157
Global Settings . . . . . . . . . . . . . . . . . . . . . . . . . . . . 158
BasicSetup ...............................158
Globalaudiosettings.......................160
MIDIsettings .............................160
Pedalandothercontrollersettings...........161
Creatinguserscales ........................162
SettingCategoryNamesforPrograms,
Combinations,andKARMA ................163
Automatically loading sample data . . . . . . . . . 164
UsingtheKSCAuto‐Loadlisttoselect
which samples to load......................164
Creatingandsaving.KSCfiles...............165
Connecting to computers via USB Ethernet and
FTP. . . . . . . . . . . . . . . . . . . . . . . . . . . . . . . . . . . . . . . . 167
Using Wave Sequences . . . . . . . . . . . . . . . . . . . . . 168
WaveSequenceOverview...................168
ProgrammingBasics ........................168
Adjustingthesoundofanindividualstep .....169
UsingrhythmicWaveSequences.............171
Creatingsmooth,evolvingtimbres ...........173
ModulatingWaveSequences ................174
SavingWaveSequences .....................175
Using Drum Kits. . . . . . . . . . . . . . . . . . . . . . . . . . . . 176
DrumKitOverview ........................176
Beforeyoustartediting… ...................176
EditingDrumKits ..........................177
SavingDrumKits ..........................179
Loading & saving data, and creating CDs.
181
Saving data . . . . . . . . . . . . . . . . . . . . . . . . . . . . . . . . 181
Overview .................................181
Writingtointernalmemory..................182
Savingtodisks,CDs,andUSBmedia .........186
Loading data from disk . . . . . . . . . . . . . . . . . . . . . 190
LoadingSongs,sounds,samples,
and KARMA GEs together...................190
Loadingindividualbanksfroma.PCGfile.....193
Loadingdatabyindividualitemorbank......193
Creating and playing audio CDs . . . . . . . . . . . . . 195
CreatingaudioCDs.........................195
PlayingaudioCDs..........................197
Other disk operations . . . . . . . . . . . . . . . . . . . . . . 198
Settingthedateandtime....................198
Using Effects . . . . . . . . . . . . . . . . . . . . . . . 199
Effects overview . . . . . . . . . . . . . . . . . . . . . . . . . . . 199
Effectsbasics...............................199
EffectI/O ..................................200
Effectsineachmode........................200
Effects selection and routing. . . . . . . . . . . . . . . . 202
UsingeffectsinPrograms ...................202
UsingeffectsinCombinationsandSongs ......204
UsingeffectsinSamplingmode..............206
Usingeffectswiththeaudioinputs...........207
Detailed effects editing. . . . . . . . . . . . . . . . . . . . . 209
Dynamicmodulation(Dmod) ................209
MIDI/TempoSync ..........................209
CommonFXLFO...........................210
EffectPresets ..............................211
Using KARMA . . . . . . . . . . . . . . . . . . . . . . 213
Overview - What is KARMA?. . . . . . . . . . . . . . . . . 213
ThestructureofKARMA ....................213
Performing with KARMA . . . . . . . . . . . . . . . . . . . . 217
PerformingwithKARMAinProgrammode...217
vi
PerformingwithKARMAinCombinationmode..
220
Editing KARMA . . . . . . . . . . . . . . . . . . . . . . . . . . . . 223
EditingKARMAinProgrammode...........223
EditingKARMAinCombinationmode .......227
Using KARMA in Sequencer mode . . . . . . . . . . . 232
AutoSongSetup...........................232
RecordingusingKARMA(single‐trackrecording)
233
Multi‐trackrecordingusing
settings copied from a Combination ..........234
Synchronizing KARMA. . . . . . . . . . . . . . . . . . . . . . 235
Synchronizationbasics .....................235
The“QuantizeTrigger”parameter ...........235
Slaveoperation ............................236
Masteroperation ..........................236
Using the Drum Track . . . . . . . . . . . . . . .237
Overview . . . . . . . . . . . . . . . . . . . . . . . . . . . . . . . . . . 237
WhatistheDrumTrack? ...................237
Performing with the Drum Track . . . . . . . . . . . . 238
UsingtheDrumTrackinProgrammode......238
UsingtheDrumTrackinCombinationmode ..240
Drum Track settings . . . . . . . . . . . . . . . . . . . . . . . . 241
DrumTracksettingsinProgrammode .......241
DrumTracksettingsinCombinationmode....242
DrumTracksettingsinSequencermode......242
UsingKARMAandtheDrumTracktogether..243
SynchronizingtheDrumTrack..............244
Creating Drum Track patterns. . . . . . . . . . . . . . . 245
Preparingauserpattern....................245
ConvertingaSequencerpattern
to a Drum Track pattern....................245
Appendices . . . . . . . . . . . . . . . . . . . . . . . .247
Troubleshooting . . . . . . . . . . . . . . . . . . . . . . . . . . . 247
Powersupply.............................247
LCDscreen ...............................247
Audioinputandoutput....................248
ProgramsandCombinations................249
Songs ....................................250
SetLists ..................................251
Sampling.................................251
KARMA ..................................252
DrumTrack...............................253
Vector....................................253
DrumKits................................253
WaveSequences ...........................253
Effects....................................254
MIDI .....................................254
Disks,CDs,andUSBMedia .................254
Otherproblems............................255
Error and confirmation messages . . . . . . . . . . . 256
A(ADC–AreYouSure).....................256
B(Buffer).................................256
C(Can’tcalibrate–Completed)...............256
D(Destination–Disk) .......................257
E(Error–Exceeded) ........................258
F(File–Front) ..............................259
I(Illegal–Index) ............................260
H.........................................261
K.........................................261
M(Master–Multisample)....................261
N(Nodata–Notenoughsongmemory) .......262
O(Obeycopyrightrules–Oscillator)...........264
P(Pattern–Program)........................264
R(Rearsample–Root).......................265
S(Sample–Source) ..........................265
T(Theclock–Track) .........................266
U(Unabletocreatedirectory–USBHub).......266
W(Wave) .................................267
Y(You)....................................267
TypesofmediasupportedbytheKRONOS ....268
OperationsthattheKRONOS
can perform on media.......................268
Restoringthefactorysettings.................269
Specifications . . . . . . . . . . . . . . . . . . . . . . . . . . . . . .270

vii

1
Introduction to KRONOS
Front and rear panels
Front panel
1. MAIN VOLUME knob
ThisadjuststhevolumeofthemainL/Raudiooutputs,
aswellasthevolumeoftheheadphonejack.
Itdoesnotaffectanyoftheotheraudiooutputs,
includingS/P DIF,individualoutputs1‐4,ortheUSB
output.
2. Control Surface
TheControlSurfaceisthesetof9sliders,8knobs,and
16switchestotheleftoftheLCDscreen.Itlookslikea
mixer,butcandoavarietyofthingssuchasediting
sounds,controllingKARMA,andsendingMIDI
messagestoexternaldevices.Youcanfreelychange
backandforthbetweenthedifferentfunctionswithout
losinganyofyouredits.
CONTROL ASSIGN buttons
Asexplainedbelow,youcanusethefrontpanel
CONTROLASSIGNbuttonstoswitchbetweenthe
variouscontrolsurfacefunctions.Youcanalsoview
andeditthecontrolsurfacesettingsontheLCDscreen
(P0–ControlSurfacepageineachmode).
TIMBRE/TRACK
TIMBRE/TRACKletsyouusethecontrolsurfaceto
adjustthevolume,pan,EQ,andsendlevelsforOSC
1/2,EXi1/2,ortheDrumTrackinProgrammode,the
currentMultisampleinSamplemode,andeachofthe
16TimbresorTracksinCombiandSequencemodes.
TheLEDstotherightoftheswitchshowwhether
you’recurrentlyeditingTimbres(orTracks)1‐8or9‐16;
presstheTIMBRE/TRACKbuttontotogglebetween
thetwo.
9. Vector
Joystick
11. SW 1&2
12. Joystick
13. Ribbon
14. Headphone Jack
1. Volume 2. Control Surface 5. Mode
4. Disk Access Indicator
6. Utility 7. Bank Select
18. Sampling16. Sequencer15. Exit
17. Tempo
3. Data Entry
19. TouchView
Display
8. KARMA
10. Drum
Track

Introduction to KRONOS
2
IfyouswitchtooneoftheotherControlAssignmodes,
andthengobacktoTIMBRE/TRACK,itwill
automaticallyreturntothepreviouslyselectedgroup
(1‐8or9‐16).
AUDIO
AUDIOletsyouusethecontrolsurfacetoadjustthe
volume,play/mutestatus,solo,pan,andsendlevelsof
theanalog,S/P DIF,andUSBaudioinputs.In
Sequencermode,youcanalsochoosetocontrolaudio
tracks1–8(HDR1‐8)or9–16(HDR9‐16).
AswithTIMBRE/TRACK,ifyouswitchtooneofthe
otherControlAssignmodes,andthengobackto
AUDIO,itwillautomaticallyreturntothepreviously
selectedgroup(Inputs,HDR1‐8orHDR9‐16).
EXT
EXT(External)letsyouusethecontrolsurfaceto
transmitMIDImessagestoexternalMIDIdevices.
RT KNOBS/KARMA
RTKNOBS/KARMAletsyoumodulatesoundsand
effectswiththeknobs,andcontrolKARMAwiththe
slidersandswitches.
TONE ADJ/EQ
TONEADJ(ToneAdjust)givesyouhands‐onaccessto
soundediting,usingthesliders,knobs,andswitches.
InCombiandSequencemodes,italsoletsyouedit
ProgramswithinthecontextoftheCombiorSong,
withoutmakinganychangestotheoriginalProgram
data.
EQisavailableonlyinSetLists.Thisisanine‐band
graphicEQappliedtothesoundafterTFX2,which
tailorsthesoundfromthemainstereooutputs
(includingtheanalogL/Routputs,S/PDIF,andUSB).
YoucanusethisEQtocompensatefortheacoustic
environmentofaspecificcluborotherperformance
venue.Theslidersaremappedtotheninebandsofthe
EQ,forquickandintuitiveadjustments.
More information on the Control Surface
FormoreinformationonhowtheControlSurface
worksinthedifferentmodes,see:
•Programmode:“0–9:ControlSurface”onpage 21
oftheParameterGuide
•Combimode:“0–9:ControlSurface”onpage 428of
theParameterGuide
•Sequencemode:“0–9:ControlSurface”onpage 534
oftheParameterGuide
MIXER KNOBS button
ThisappliesonlywhenCONTROLASSIGNissetto
TIMBRE/TRACKorAUDIO.Ittogglestheknobs
betweencontrollingthepanofallchannelsor
controllingthepan,EQ,andsendsofthecurrently
selectedchannel.
RESET CONTROLS button
ThisfeatureletsyouresettheVectorJoysticktothe
centerposition,orresetanyoftheControlSurface
sliders,knobs,orswitchestotheirsavedvalue.
Toresetasinglecontrol,holddownRESET
CONTROLSandthenmoveaControlSurfaceslideror
knob,pressoneofthecontrolsurfacebuttons,ormove
theVectorJoystick.
Toresetallofthesliders,knobs,andswitchesofthe
currentCONTROLASSIGNmodeatonce,holddown
RESETCONTROLSandthenpressthecurrently‐lit
CONTROLASSIGNbuttonagain.
Youcanalsoresetalloftheslidersandswitchesinthe
KARMAModulebyholdingRESETCONTROLSand
thenpressingtheKARMAMODULECONTROL
button.Similarly,toresetasingleKARMAScene,hold
RESETCONTROLSandpressanyoftheSCENE
buttons.
Finally,youcanalsousethistoclearallsolos,by
holdingRESETCONTROLSandthenpressingthe
SOLObutton.
Formoreinformation,see“RESETCONTROLS”on
page 22oftheParameterGuide.
SOLO button
ThisappliesonlywhenCONTROLASSIGNissetto
TIMBRE/TRACKorAUDIO.IttogglestheSELECT
buttonsbetweenselectingthecurrentOscillator,
Timbre,Track,orAudioInput(whenSOLOisoff)or
soloingthechannel(whenSOLOison).
FormoreinformationonSOLOinthevariousmodes,
see:
Programs:“SOLOswitchandSELECTswitches1–3”
onpage 24oftheParameterGuide
Combinations:“SoloswitchandSelectswitches1–8”
onpage 430oftheParameterGuide
Sequencer:“SoloswitchandSelectswitches1/9–8/16”
onpage 536oftheParameterGuide
3. Data entry
Whenyou’veselectedaparameterontheTouchView
display,youcanedititusinganyofthefourfront‐
paneldataentrycontrols:
•TheVALUEslider
•TheIncandDecbuttons
•TheVALUEdial
•Thenumerickeypad

Front and rear panels Front panel
3
VALUE slider
Usethistoedittheselectedparameter’s
value.Thiscontrolisconvenientformaking
largechangestothevalue,suchasmoving
quicklytotheminimumormaximum
setting.
YoucanalsousetheVALUEsliderasa
modulationsource,butonlywhenthe
followingaretrue:
•You’reontheProgrammodeP0‐Main
page,andthebigProgramnameis
selected,or
•You’reontheCombinationmodeP0–
ProgSelect/Mixerpage,andthebig
Combinationnameisselected.
•You’reontheSetListP0‐Playpage.
Inthesecasesonly,theVALUEslidersendsMIDI
CC#18,andcanbeusedasamodulationsource.
Inc and Dec buttons
Theseareusedtoincreaseordecreasetheparameter
valuebyindividualsteps.They’reconvenientfor
makingfineparameteradjustments.
VALUE dial
Usethisdialtoedittheselectedparameter’svalue.
Thiscontrolisconvenientwhenyouwanttoscroll
throughaverylonglistofselections.
0-9, –, ., and ENTER buttons
Thesebuttonsareconvenientwhenyouknowthe
exactvaluethatyouwanttoenter.Usethe0–9,–,and
decimal(.)buttonstoenterthevalue,andthenpress
theENTERbuttontoconfirmtheentry.
The–buttoninvertsthesign(+/–)oftheparameter
value;thedecimal(.)buttoninsertsadecimal,for
enteringfractionalvalues.
Special functions of the ENTER button
ENTERhasafewspecialfunctionswhenitispressed
incombinationwithotherbuttons.
Wheneveranon‐screenparameterletsyouentera
musicalnote(suchasG4orC#2),oravelocitylevel,
youcanenterthenoteorvelocitydirectlybyholding
downENTERwhileplayinganoteonthekeyboard.
ByholdingdowntheENTERbuttonwhileyoupressa
numericbutton(0–9),youcanselectuptotenmenu
commandsfromthecurrentpage.
InProgramandCombinationmodes,youcanhold
downtheENTERbuttonandpresstheSEQUENCER
REC/WRITEbuttontousetheAutoSongSetup
function.ThisimportsthecurrentProgramorCombi
intoSequencemodeforquickandeasyrecording.
4. DISK access indicator
ThisLEDlightsupwhendataisbeingsavedtoorread
fromtheinternaldisk.
NeverturnoffthepowerwhilethisLEDislit.
Doingsocancauseallorpartofthedataonthedisk
tobelost,ormaycausemalfunctionssuchasdisk
damage.
5. MODE buttons
KRONOShassevendifferentoperationalmodes,each
oneoptimizedforaspecificsetoffunctions.These
buttonsselectthecurrentmode.
EachbuttonhasanLED,whichlightsuptoshowthe
modeyou’veselected.
SET LIST button
ThisselectsSetListmode.SetListsmakeitsimpleto
playandorganizeanyofthesoundsloadedintothe
KRONOS,withoutregardforwhatbankthey’restored
inorwhetherthey’rePrograms,Combinations,oreven
Songs.
COMBI button
ThisselectsCombinationmode,forplayingand
editingcomplexsplitsandlayersofPrograms.
PROG button
ThisselectsProgrammode,forplayingandediting
basicsounds.
SEQ button
ThisselectsSequencermode,forrecording,playing,
andeditingaudioandMIDItracks.
SAMPLING button
ThisselectsSamplingmode,forrecordingandediting
audiosamplesandmultisamples.
GLOBAL button
ThisselectsGlobalmode,formakingoverallsettings,
editingWaveSequencesandDrumKits,andmore.
DISK button
ThisselectsDiskmode,forsavingandloadingdatato
andfromtheinternaldiskorexternalUSB2.0storage
devices.YoucanalsocreateaudioCDsusingaUSB
CD‐Rdrive(notincluded).
6. UTILITY buttons
HELP button
TheHELPbuttongivesyoubuilt‐in,
context‐sensitiveaccesstotheuser
manuals,rightfromthefrontpanel.

Introduction to KRONOS
4
Forinformationonanyfront‐panelbutton,knob,
slider,orreal‐timecontroller,justholddownHELP
andthenpressthebuttonormovethecontrollerin
question.
ForinformationonthecurrentLCDpage,pressand
releasetheHELPbutton.
Whilethehelppageisonthescreen,youcantouchany
oftheon‐screenlinks(highlightedinbluetext)for
moreinformation.Youcanscrollthroughthetextby
usingtheon‐screenscrollbars,pressingtheIncand
Decbuttons,orspinningtheValuedial.
ThetopoftheHelppagehas“breadcrumb”links,
whichshowthehierarchyofpagesabovethecurrent
one.Touchanyoftheselinkstojumptothe
correspondingpage.
Thebackwardsandforwardsbuttonsfunctionlikethe
similarbuttonsonastandardwebbrowser.Ifyouuse
linkstojumpbetweenpages,youcanthenusethe
backwardsandforwardsbuttonstomovethroughthe
pagesyou’vealreadyviewed.
TheContentspageletsyouaccessanypartoftheHelp
system,includingalmostallofthetextandgraphicsin
boththeParameterandOperationGuides.TheIndex
containsashorterlistoflinkstoimportantarticles.
Toclosethehelpdisplay,justpresstheHELPbutton
again,presstheEXITbutton,orpresstheon‐screen
Donebutton.
COMPARE button
UsethisbuttontocomparethesoundoftheProgram
orCombinationthatyouarecurrentlyeditingwiththe
saved,un‐editedversionofthesound.Youcanalsouse
thisbuttontomake“beforeandafter”comparisons
whenrecordingoreditinginSequencermode.
7. BANK SELECT buttons
Usethesebuttonstochangebankswhenselecting
ProgramsorCombinations.TheLEDsinthebuttons
lightuptoshowthecurrentbank.
InProgrammode,thesebuttonsselecttheProgram
bank.TheyareactiveonlyonthePlaypages.
InCombinationmode,thesebuttonshavetwo
functions:
•Whenyou’reselectingCombinations,theychoose
theCombinationbank.
•Whenyou’reassigningaProgramtoatimbre
withintheCombi,theyselecttheProgrambank.
InSequencermode,whenatrack’sProgramnameis
selected,thesebuttonschangetheProgrambank.
General MIDI banks
SelectingGeneralMIDIProgrambanksisalittle
differentfromselectingotherbanks.Eachtimeyou
presstheINT‐Gbutton,thebankwillsteptothenext
GM(2)bankorGMdrumbankinthefollowingorder:
G,g(1),g(2)–g(8),g(9),g(d),G,g(1),etc.
What’s in each bank?
FordetailsonthecontentsoftheProgrambanks,see
“Programbankcontents”onpage 27.Fordetailsonthe
Combibanks,see“Combinationbankcontents”on
page 57.
8. KARMA buttons
KARMAstandsfor“Kay
AlgorithmicRealtimeMusic
Architecture.”It’sanimmensely
powerfulrecordingandlive
performancetool,whichcan
provideawiderangeofmusical
effectsincluding:
• Arpeggiation
•Drumandinstrumentgrooves
•ComplexCCgestures(asifit
wasautomaticallymoving
knobsorjoysticksforyou)
•Musicalphrasegeneration
•Gatedandchoppeddanceproductioneffects
•A
nycombinationoftheabove
• …andmuchmore.
ON/OFF button
ThisswitchesKARMAonandoff.Aswiththeother
KARMAbuttons,thebutton’sLEDwilllightupto
showyouthatitisturnedon.
LATCH button
WhenLATCHisturnedon,KARMAwillcontinueto
playevenafteryou’vestoppedholdingnotesonthe
keyboardorMIDIIn.
Thisisconvenientwhenyouwanttoplayontopofa
KARMA‐generatedgroove,forinstance.
MODULE CONTROL button
InCombiandSequencermodes,KARMAhasfour
independentModules,eachofwhichcanbegenerating
adifferentmusicaleffect.Whenusedtocontrol
KARMA,theControlSurfaceslidersandswitchesare
fivelayersdeep:oneforeachModule(A‐D),andthen
aMasterLayerwhichcontrolsselectedparameters
fromalloftheModulesatonce.
TheMODULECONTROLbuttonselectswhetherthe
KARMASLIDERS,SWITCHES,andSCENESwill
controleitherasingleModuleindependently,orthe
MasterLayer.InProgrammode,onlyasingleModule
isavailable,andtheMasterLayerisusedtocontrolit;
youcannotselectothersettings).

Front and rear panels Front panel
5
9. Vector Joystick
TheVectorJoystickisapowerfulreal‐timecontroller.
DependingontheparticularProgram,Combi,orSong,
itmaymodulateProgramoreffectsparameters,or
adjustthevolumesofdifferentcomponentsofthe
sound.
FormoreinformationonhowVectorSynthesisworks,
see“UsingVectorSynthesis”onpage 55.
10. Drum Track
TheDrumTrackisabuilt‐indrummachine,fueledby
theKRONOS’shigh‐qualitydrumsounds.Thisbutton
turnstheDrumTrackonandoff.
Dependingonvarioussettings,theDrumTrackmay
begintoplayimmediately,ormaywaituntilyoustart
toplayonthekeyboard.Ifthebutton’sLEDisblinking
onandoff,it’swaitingforyoutoplay.
LINKED LED
IfthefrontpanelLINKEDLEDandKARMAON/OFF
switchesarelit,KARMAwillstartandstoptogether
withtheDrumTrack.Formoreinformation,see
“UsingKARMAandtheDrumTracktogether”on
page 243.
11. SW1 and SW2
Theseon/offswitchescanperformanumberof
differentfunctions,suchasmodulatingsoundsor
lockingthemodulationvaluesofthejoystick,ribbon,
oraftertouch.
Also,eachonemayworkeitherasatoggle,orasa
momentaryswitch.Intogglemode,eachpress
alternatesbetweenonandoff;inmomentarymode,the
switchonlychangesforaslongasyouholditdown.
EachswitchhasanLED,whichlightsupwhenthe
switchison.
EachProgram,Combination,andSongstoresitsown
settingsforwhattheswitcheswilldo,andwhether
eachswitchdefaultstobeingonoroff.
12. Joystick
Thejoystickmovesinfourdirections:left,right,
forwards(awayfromyourself),andbackwards
(towardsyourself).Eachofthefourdirectionscanbe
usedtocontroldifferentprogramoreffects
parameters.
Thespecificassignmentscanchangedependingonthe
currentProgram,Combi,orSong.Generally,though,
theywilldosomethinglikethefunctionsshown
below:
StandardJoystickfunctions
13. Ribbon controller
TheRibboncontrollerletsyoumodulateProgramor
effectsparametersbyslidingyourfingerleftandright
alongitstouch‐sensitivestrip.
Aswiththeothercontrollers,itsspecificfunctionwill
changedependingonthecurrentProgram,Combi,or
Song.
14. Headphone jack
Thisstereo1/4”headphonejackcarriesthesamesignal
astheMainL/Routputs.
TheheadphonevolumeiscontrolledbytheMAIN
VOLUMEknob.
15. EXIT button
Thisbuttonmakesiteasytoreturntothemainpageof
thecurrentmode:
•Pressitoncetogotothepreviously‐selectedtabon
themainP0page.
•PressitagaintogotothefirsttabonthemainP0
page(suchasthemainProgramPlaypage).Ifyou
hadpreviouslyselectedaparameteronthispage,
thatparameterwillbeselected.
•Pressitathirdtimetoselectthemainparameteron
theP0page,suchastheProgramnameinProgram
mode.
WhereveryouareinProgram,Combi,orSequencer
modes,pressingEXITthreetimes(orfewer)willtake
youbacktoProgram/Combination/SongSelect,where
youcanimmediatelyusethenumerickeysor/
switchestoselectaProgram,Combination,orSong.
Whenadialogboxisopen,thisbuttoncancelsthe
settingsmadeinthedialogboxandclosesthedialog
box,justlikepressingtheCancelbutton.Ifapopup
menuorpagemenuisopen,pressingEXITclosesthe
menu.
16. SEQUENCER buttons
Mostofthebuttonsinthissectionapplyonlyto
Sequencermodeand,inDiskandSamplingmodes,to
audioCDplaybackfromaconnectedUSBCDdrive.
REC/WRITEistheexception;ithasspecialfunctionsin
Program,Combination,andGlobalmodes,as
describedbelow.
Move the
joystick…
Controller
Name Normally controls…
Left JS–X Pitch bend down
Right JS+X Pitch bend up
Forwards
(away from yourself) JS+Y Vibrato
Backwards
(towards yourself) JS–Y Filter LFO (wah)

Introduction to KRONOS
6
PAUSE button
InSequencermode,thisbuttonpausestheplaybackof
thesong.Whenpaused,thebutton’sLEDwilllightup.
PressPAUSEonceagaintoresumeplayback,andthe
LEDwillturnoff.
InDiskandSamplingmodes,thisbuttonpausesaudio
CDplayback.
<<REW button
InSequencermode,whentheSongisplayingor
paused,thisbuttonwillrewindthesong.Whenyou
pressandholdthisbutton,itsLEDwilllightup,and
theplaybackwillrewind.(Rewindisdisabledduring
recording,andwhiletheSongisstopped.)
InDiskandSamplingmodes,thisbuttonrewindsthe
audioCD.
FF>> button
InSequencermode,whentheSongisplayingor
paused,thisbuttonwillfast‐forwardthesong.When
youpressandholdthisbutton,thebuttonwilllight,
andtheplaybackwillfast‐forward.(Fast‐forwardis
disabledduringrecording,andwhiletheSongis
stopped.)
InDiskandSamplingmodes,thisbuttonfast‐forwards
theaudioCD.
LOCATE button
InSequencermode,thisbuttonwilladvanceorrewind
thesongtothespecifiedlocatepoint.Thisletsyou
jumpimmediatelytoanypointinthecurrentSong.
Thedefaultlocatepointisthefirstbeatofmeasure1.
Tosetthelocatepointtothecurrentposition,hold
downENTERandthenpressLOCATE.Youcanalso
settheLocatepointdirectlyviatheon‐screenmenu.
REC/WRITE button
InSequencermode,pressingthisbuttonwillenter
record‐readymode.Onceyou’reinrecord‐readymode
(shownbythebutton’slitLED),youcanbegin
recordingbypressingtheSEQUENCER START/STOP
button.Formoreinformation,see“RecordingMIDIin
real‐time”onpage 78.
InProgram,Combination,SetList,andGlobalmodes,
pressingREC/WRITEwillopentheSavedialogbox.
Formoredetails,see“Writingtointernalmemory”on
page 182,and“UsingtheSEQUENCERREC/WRITE
button”onpage 182.
InProgramandCombinationmodes,youcanhold
downtheENTERbuttonandpresstheSEQUENCER
REC/WRITEbuttontousetheAutoSongSetup
function.ThisimportsthecurrentProgramorCombi
intoSequencemodeforquickandeasyrecording.For
moreinformation,see“A u t o ‐SongSetup”onpage 2of
theParameterGuide.
START/STOP button
Thisstartsorstopsrecordingandplaybackin
Sequencermode.
InDiskandSamplingmodes,thisbuttonstartsand
stopsplaybackontheaudioCD.
17. TEMPO controls
TEMPO knob
Thisknobadjuststhetempoforthe
KRONOSasawhole,includingSongs,
KARMA,theDrumTrack,Tempo‐
syncedLFOsandBPMdelays,andEXi
StepSequencers.
TheLEDwillblinkatquarter‐note
intervalsofthecurrenttempo.
Note:IftheGLOBALMIDIpageMIDICLOCK
parameterissettoExternalMIDIorUSB,orifitisset
toAutoandaclockiscurrentlybeingreceived,then
neithertheTEMPOKnobnortheTAPTEMPObutton
willhaveanyeffect.
TAP TEMPO button
Thisbuttonletsyouentertempossimplybytapping
yourfingeronthebutton.Youcanusethis
interchangeablywiththe“TEMPOknob,”above.Two
tapsareenoughtochangethetempo;forgreater
accuracy,youcancontinuetapping,andthetempowill
beaveragedoverthemostrecent16taps.
Forexample,youcanuseTAPTEMPOtocontrolthe
KARMAtempo:
1. InProgrammodeorCombinationmode,start
KARMArunning.
TurnontheKARMAON/OFFswitch,andplayakey
orapad.IfyouturnontheLATCHswitch,KARMA
willcontinueplayingevenafteryouliftupyourhands.
2. LightlypresstheTAPTEMPOswitchseveral
timesatthedesiredtempo.
Noticethatthe“q=”intheupperrightoftheLCD
screenwillchangetoshowthenewtempo.
IfyoupresstheTAPTEMPOswitchatshorter
intervals,theplaybacktempowillbecome
correspondinglyfaster.
Note:Youcanalsotaptemposusingafootswitch.For
moreinformation,see“FootSwitchAssignments”on
page 1106oftheParameterGuide.
18. SAMPLING buttons
REC button
InSampling,Program,Combination,and
Sequencermodes,pressingthisbutton
enterstheinitialsampling‐readymode.
Thebutton’sLEDwilllightup.
Tocontinue,presstheSAMPLINGSTART/STOP
button,asdescribedbelow.
START/STOP button
InSampling,Program,Combination,andSequencer
modes,pressingthiswhentheSAMPLINGREC
buttonislitwilldooneofthreethings,dependingon
thesettingoftheTriggerparameter(ontheSampling
modeRecording‐AudioInputpage):
•IfTriggerissettoSamplingSTARTSW,sampling
willbeginimmediately.

Front and rear panels Front panel
7
•IfTriggerissettoNoteOn,samplingwillbeginas
soonasyouplayanoteonthekeyboard.
•IfTriggerissettoThreshold,samplingwillbegin
assoonastheselectedaudiosourcereachesa
presetvolumelevel.
OntheSamplingmode’sP1:SampleEditpage,
pressingthisbuttonwillplaytheselectedsample.
ThisbuttonisalsousedtoplaybackWAVfilesfrom
thedisk.YoucanplaybackWAVfilesinthedirectory
windowofvariousDiskmodepages,intheDiskmode
MakeAudioCDpage,intheSequencermodeaudio
trackeditingdialogboxes,andintheSelect
Directory/FileforSampletoDiskmenucommandin
Program,Combination,Sequencer,andSampling
modes.
19. TouchView display
TheKRONOSfeaturesourexclusiveTouchView
graphicinterface,basedonatouch‐panelLCDscreen.
BytouchingitemsontheLCDscreen,youcanselect
pages,tabs,andparameters,andsetparametervalues
viaon‐screenmenusandbuttons.
Shortcuts
Thefront‐panelcontrolsofferanumberofshortcuts
forcommonly‐usedfeatures,asdetailedbelow.
ENTER + numeric keys 0–9: Menu commands
Eachpagehasasetofmenucommands,which
provideaccesstodifferentutilities,commands,and
options,dependingonthepageyou’recurrentlyon.
Youcanusethemenucommandsentirelyfromthe
touch‐screen,bypressingthemenubuttoninthe
upperright‐handcornerofthescreenandthen
selectinganoptionfromthemenuthatappears.
Eventhougheachpagemayhaveitsownunique
menucommands,themenusarestandardizedasmuch
aspossible.Forinstance,WRITEisalmostalwaysthe
firstmenuiteminProgram,Combination,andGlobal
modes.
Youcantakeadvantageofthisstandardizationby
usingashortcuttoaccessanyofthefirsttenmenu
items:
1. HolddowntheENTERbutton.
2. Pressanumber(0‐9)onthenumerickeypadto
selectthedesiredmenucommand,startingwith0.
Forinstance,press0forthefirstmenucommand,1for
thesecond,andsoon.
Ifthemenucommandjusttogglesanoptiononandoff
(suchasExclusiveSolo),thenyou’redone.Ifthe
commandcallsupadialogbox,thedialogwillappear
ontheLCD,andyoucanproceedjustasifyou’d
selectedthecommandfromthetouch‐screen.
ENTER + REC/WRITE: Auto Song Setup
TheAutoSongSetupfeaturecopiesthecurrent
ProgramorCombinationintoaSong,andthenputs
theKRONOSinrecord‐readymode.
Ifinspirationforaphraseorsongstrikesyouwhile
you’replaying,youcanusethisfunctiontostart
recordingimmediately.Todoso:
1. HolddowntheENTERkeyandpressthe
SEQUENCERREC/WRITEkey.
TheSetuptoRecorddialogboxwillopenandask“A r e
yousure?”
2. PressOK.
YouwillautomaticallyenterSequencermode,andwill
beintherecord‐readystate.
3. PresstheSTART/STOPkeytostartthesequencer
andbeginrecording.
ENTER + keyboard: Enter note or velocity value
Generally,ifaparameterspecifiesanotenumberor
velocity,youcanenterthevaluebyplayingonthe
keyboard.Todoso:
1. SelectoneoftheKeyparameters.
2. HolddowntheENTERbutton.
3. WhileholdingENTER,playanoteonthe
keyboard.
YoucanusethisshortcutthroughouttheKRONOS,
suchasforsettingkeyboardandvelocityzones,or
selectingthenotetoeditinDrumKits,Multisamples,
orRPPRsetups.
ENTER + LOCATE: Set locate point
ThisshortcutsetstheSequencer’slocatepointtothe
currentmeasure,beat,andtick,similartousingtheSet
Locationmenucommand(see“SetLocation(for
LocateKey)”onpage 626oftheParameterGuide).
1. HolddowntheENTERbutton.
2. WhileholdingENTER,presstheLOCATEkey.
Afterthis,pressingLOCATEreturnstheSongtothe
newlysetmeasure,beat,andtick.
CONTROL ASSIGN RT KNOBS/KARMA switch (LED
ON) + KARMA MODULE CONTROL switch
InCombinationandSequencermodes,thissetsthe
ModuleControltoMaster.Thisisthesameassetting
ModuleControltoMinP0:ControlSurface–
RT/KARMA.
CONTROL ASSIGN TONE ADJ/EQ switch
(LED ON) + SWITCH 1…16 switches
InCombinationandSequencermodes,youcanusea
shortcuttochangethecurrentTimbredirectlyfromthe
ControlSurface,withoutleavingToneAdjustmode:
1. PressandholdtheTONEADJ/EQbutton.
2. WhileholdingTONEADJ/EQ,pressa
PLAY/MUTEorSELECTbuttontoselectaTimbre.
ThePLAY/MUTEbuttonsselectTimbres1–8,andthe
SELECTbuttonsselectTimbres9–16.
ThisisthesameastheselectedTimbre/Trackin
TIMBRE/TRACKmode;changingonewillalsochange
theother.
3. ReleasetheTONEADJ/EQbutton.
TheControlSurfaceandscreenwillchangetoshow
theToneAdjustparametersforthenewlyselected
Timbre.

Introduction to KRONOS
8
EXIT switch: Return to main page
Thisbuttonmakesiteasytoreturntothemainpageof
thecurrentmode:
•Pressitoncetogotothepreviously‐selectedtabon
themainP0page.
•PressitagaintogotothefirsttabonthemainP0
page.
•Pressitathirdtimetoselectthemainparameteron
theP0page,suchastheProgramnameinProgram
mode.
WhereveryouareinProgram,Combi,orSequencer
modes,pressingEXITthreetimes(orfewer)willtake
youbacktoProgram/Combination/SongSelect,where
youcanimmediatelyusethenumerickeysor/
switchestoselectaProgram,Combination,orSong.
EXIT switch: Cancel in dialog boxes
Whenadialogboxisdisplayed,thishasthesame
functionastheCancel,Done,orExitbutton.
Rear panel
1. AC Power connector
Connecttheincludedpowercablehere.
Werecommendthatyoufirstconnectthepowercable
totheKRONOS,andthenconnecttheotherendofthe
cabletoanACoutlet(see“1.Connectingthepower
cable”onpage 20).
2. POWER switch
Thisswitchturnsthepoweronandoff.Beforeturning
KRONOSoff,makesurethatyou’vesavedanyeditsto
yourPrograms,Combis,Songs,orotheruserdata.
Afterturningthepoweroff,pleasewaitforatleast
tensecondsbeforeyouturnthepoweronagain.
3. USB ports
USB A ports
Therearetwoexternal,high‐speedUSB2.0ports.You
canusethesetoconnectstoragemediasuchashard
disks,flashmedia,etc,aswellasclass‐compliantUSB
MIDIcontrollers.Formoreinformation,see“5.
ConnectingUSBdevices”onpage 23.
USB B port
Thishigh‐speedUSB2.0portletsyouconnecttoaMac
orWindowsPC,forsendingandreceivingMIDIand
audio,andforconnectingtothecomputereditor
program.Formoreinformation,see“7.Connectionto
acomputerviaUSB”onpage 24.
4. Analog AUDIO INPUTS
Youcanusetheaudioinputsforrecording,sampling,
andreal‐timemixingthroughthebuilt‐ineffects.
Mic/Line Inputs 1 and 2
Inputs1and2provide1/4”TRSbalancedconnectors.
Youcanusetheseforeithermicrophone‐levelorline‐
levelsignals.Thetwoinputshaveidenticalsetsof
controls,asdescribedbelow.
MIC/LINE switches
Thesesettheinput’snominalsignallevel.Setthese
switchesaccordingtothetypeofdevicethatyou’re
connecting,andthenusetheLEVELknobs(described
below)tooptimizethegain.
UsetheLINEsetting(buttonpressedin)when
connectingtomixers,computeraudiosystems,signal
processors,orothersynthesizers.Thenominallevelis
+4dBu,with12dBofheadroom.
UsetheMICsetting(buttonpoppedout)onlywhen
connectingamicrophone.
LEVEL knobs
Theseknobsletyoumakemorepreciseadjustmentsto
theinputlevel,aftersettingthebasiclevelswiththe
MIC/LINEswitches.
TheMINsettingisunitygain;theMAXsetting
providesabout40dBofgainaboveunity.
2. Power Switch 5. Analog
Audio Outputs
4. Analog
Audio Inputs
3. USB
8. Pedals6. MIDI
1. AC Power
connector
7. S/PDIF
In & Out

Front and rear panels Rear panel
9
5. Analog AUDIO OUTPUTS
AlloftheanalogaudiooutputsusebalancedTRS1/4”
phonejacks,referencedtoa+4dBusignallevel.
Connecttheseoutputstotheinputjacksofyouramp
ormixer.InadditiontotheL/MONOandRmain
stereoaudiooutputs,theKRONOSprovidesfour
individualaudiooutputs.
Thesoundfromeachoscillator,drum,timbre/track,or
inserteffectcanbefreelyroutedtoanyoutput.
Additionally,youcanroutethemetronomesoundto
anindividualoutput,toseparateitfromthestereo
mix.Formoreinformation,see“Effectsselectionand
routing”onpage 202.
(MAIN) L/MONO, R
Thesearethemainstereooutputs;theirvolumeis
controlledbytheMAINVOLUMEknob.Allofthe
factoryProgramsandCombisareprogrammedtoplay
throughtheseoutputs.
Wheneditingsounds,orwhensettingupaSongin
Sequencermode,youcanaccessthemainoutputsby
settingBusSelecttoL/R.
IfnocableisconnectedtotheRoutput,L/MONOwill
carryamonosummationofthestereosignal.So,ifyou
areconnectingtoadevicewhichdoesnothavestereo
inputs(suchasasimplekeyboardamp),usethe
L/MONOoutput.
(INDIVIDUAL) 1…4
These4additionalaudiooutputsletyouisolate
sounds,audioinputs,oraudiotracksforrecordingor
complexlivesoundsetups.
Thesecanbeusedasstereoormonooutputs,inany
combination.YoucanalsousetheGlobalAudiopage
LRBusIndiv.Assignparametertomapthemain
stereooutputstoanyoftheseoutputpairs,ifyoulike.
Notethattheindividualoutputsarenotaffectedbythe
MAINVOLUMEknob.
6. MIDI
MIDIletsyouconnectKRONOStocomputersorother
MIDIdevices,forsendingandreceivingnotes,
controllergestures,soundsettings,andsoon.For
moreinformationonMIDIconnections,pleasesee
“MIDIapplications”onpage 1127oftheParameter
Guide.
MIDI THRU connector
MIDIdatareceivedattheMIDIINconnectorisre‐
transmittedwithoutchangefromtheMIDITHRU
connector.
YoucanusethistochainmultipleMIDIdevices
together.
MIDI OUT connector
ThisconnectortransmitsMIDIdata.Usethistocontrol
externalMIDIdevices,ortorecordintoanexternal
sequencer.
MIDI IN connector
ThisconnectorreceivesMIDIdata.Usethistoplaythe
KRONOSfromanotherMIDIdevice,orfroman
externalsequencer.
7. S/P DIF IN & OUT
Thesejacksprovide24‐bit,48kHzopticalS/P DIFinput
andoutput,forconnectingtocomputeraudiosystems,
digitalmixers,etc.
OpticalS/P DIFissometimescalledTOSLINK,and
formallynamed(holdyourbreath!)IEC60958,EIAJ
CP‐1201.Makesuretouseopticalcablesdesignedfor
digitalaudio.
Wheneveryouusedigitalaudioconnections,make
surethatallconnectedsystemsaresetsothatthereis
oneandonlyonewordclockmaster.Youcansetthe
wordclockfortheKRONOSusingtheGlobalpage
SystemClockparameter.Formoreinformation,see
“SystemClock”onpage 756oftheParameterGuide.
OUT(MAIN) jack
ThisopticalS/P DIFoutputcarriesadigitalversionof
themainL/Routputs.
NotethattheMAINVOLUMEknobdoesnotadjust
theS/P DIFoutputlevel.
IN jack
YoucanusethisopticalS/P DIFinputforrecording,
sampling,andreal‐timemixingthroughthebuilt‐in
effects.
ItcanbeusedsimultaneouslywiththeanalogandUSB
audioinputs,ifyoulike.
8. Pedals
DAMPER jack
Forthedamper–alsoknownasthesustainpedal–you
canconnecteitherastandardfootswitch,orKorg’s
specialhalf‐damperpedal,theoptionalDS‐1H.
TheDS‐1Hisacontinuouspedaldesignedspecifically
forpiano‐styledampercontrol,withthelookandfeel
ofanacousticpiano’ssustainpedal.Itallowsmore
subtlecontrolofthedamperthanasimpleswitch;the
furtherdownyoupressthepedal,themorethatthe

Introduction to KRONOS
10
soundsustains.Formoreinformation,see“Half‐
DamperPedalandReleaseTime”onpage 40ofthe
ParameterGuide.
Youcanalsoconnectasimplefootswitch,whichwill
workasastandardon/offdamperpedal.
Inordertoensurethatthepedalfunctionscorrectly,
pleaseadjusttheswitchpolarity(see“Damper
Polarity”onpage 781oftheParameterGuide)andthe
half‐dampersensitivity(see“HalfDamper
Calibration”onpage 807oftheParameterGuide).
ASSIGNABLE SWITCH jack
Thisletsyouconnectasimpleon/offfootswitch,such
astheoptionalKorgPS‐1.Thefootswitchcanperform
awidevarietyoffunctions,suchasmodulatingsounds
andeffects,taptempo,sequencerstart/stop,etc.
Theswitch’sfunctionissetinGlobalmode(onthe
ControllerstaboftheControllers/Scalespage),sothat
italwaysworksthesameregardlessofthecurrent
Program,Combi,orSong.Formoreinformation,
pleasesee“SettinguptheAssignableSwitchand
Pedal”onpage 161.
ASSIGNABLE PEDAL jack
Thisletsyouconnectacontinuouscontrollerpedal,
suchastheKorgEXP‐2footcontrollerorKorgXVP‐10
EXP/VOLpedal,touseasanassignablemodulation
source.
LiketheASSIGNABLESWITCH,thepedal’sfunction
issetinGlobalmode.Formoreinformation,pleasesee
“SettinguptheAssignableSwitchandPedal”on
page 161.
TouchView user interface
TheKRONOSusesKorg’sTouchViewgraphicaluser
interface.BytouchingobjectsdisplayedintheLCD
screen,youcanselectpages,setparametervalues,
entertext,connectvirtualpatchcables,andmore.
a: Current page
Fromtheleft,thetopofthedisplayshowsthecurrent
mode,thenumberandnameofthepagegroup,and
finallythenameoftheindividualpage.
b: Category button
Whenyoupressthisbutton,atabbedpopupmenuwill
appear,allowingyoutoselectPrograms,
Combinations,orGEsorganizedbycategory.
Formoreinformation,see“Tabbedpopupmenus,”
below.
c: Popup button & menu
Whenthisbuttonispressed,apopupmenuwill
appear,showingthealistofoptions.Insomecases,
thesewillbeparametervalues.Inothers,theymaybe
listsofitems,suchasMultisamplesorFXPresets.
Toenteraparametervalue,touchthedesiredvalue.
h: Page group Tab
e: Knob
f: Slider
g: Page tab
a: Current page
d: Edit cell
b: Category popup button
c: Popup button
i: Check box j: Page menu buttonMode name Page namePage group number and name

Front and rear panels TouchView user interface
11
Pin
Manypopupmenushavea“Pin”inthe
upperleft.Thiscontrolswhathappens
afteryouselectavalue.Touchthepin
graphictoswitchbetweenopen
(unlocked)andclosed(locked).
Whenlocked(pinclosed),thepopupmenuwillremain
displayedevenafteryouselectaparametervalue.To
closethepopup,eitherunlockthepin,orpressEXIT.
Whenunlocked(pinopen),thepopupmenuwillclose
immediatelywhenyoupressaparametervalue,or
whenyoutouchthescreenoutsidethemenu.
Tabbed popup menus
Somepopupshavealargenumberofitemsdivided
intogroups.Thegroupsarerepresentedbytabsonthe
left‐handsideofthescreen.Theseinclude:
• Bank/ProgramSelectandBank/CombinationSelect:
SelectProgramsorCombinationsbybank
•MultisampleSelect:SelectaMultisamplefora
Programoscillatorbycategory
• WaveSequenceSelectandDrumKitSelect:Selecta
WaveSequencesorDrumKitforaProgram
oscillatorsbybank
• EffectSelect:Selectaneffectbycategory
•SelectauserSampleforauserMultisample
•SelectaKARMAGE
Tocloseatabbedpopupmenu,presstheOKbuttonor
Cancelbutton.
Scroll bar
Whenalististoolongforallitemstofitonthescreen
atonce,thepopupincludesscrollbars.Youcantouch
intheemptyareasofthescrollbartomovebackand
forthinthelist,ortouchanddragthescrollhandle.
d: Edit cell
WhenyoutouchaparameterintheLCDscreen,the
parameterorparametervaluewillusuallybe
highlighted(displayedininversevideo).Thisiscalled
theeditcell,andthehighlighteditemisnowselected
forediting.
Theparametervalueoftheeditcellcanbemodified
usingtheVALUEcontrollers.Insomecases,youmay
alsouseapopupmenu,asdescribedbelow.
Forparametersthatacceptanotenumberoravelocity
value,youcanalsoholddowntheENTERswitchand
playanoteonthekeyboardtoenterthenotenumber
orvelocityvalue.
e & f: On-screen sliders and knobs
Tomodifythevalueofanon‐screensliderorknob,first
touchtheobject,andthenusetheVALUEcontrollers
tomodifythevalue.
g & h: Page group tabs and Page tabs
Pressthelowerrowoftabstoselectthepagegroup,
andthenpresstheupperrowoftabstoselectthepage.
Thetopofthescreenshowsthenameofthecurrent
pageandgroup,asdescribedunder“a:Currentpage”
onpage 10.
i: Page menu button
Whenthisbuttonispressed,alistofmenucommands
willappear.Theavailablecommandswillvary
dependingonthecurrentpage.Toselectacommand,
justtouchit.
ThepagemenuwillclosewhenyoupresstheLCD
screenatalocationotherthanthepagemenu,orwhen
youpresstheEXITswitch.
Eventhougheachpagemayhaveitsownunique
menucommands,themenusarestandardizedasmuch
aspossible.Forinstance,WRITEisalmostalwaysthe
firstmenuiteminProgram,Combination,SetList,and
Globalmodes.
Menu shortcut: ENTER + numeric keypad
Youcanuseashortcuttoaccessanyofthefirstten
menuitems:
1. HolddowntheENTERkey.
2. Pressanumber(0‐9)onthenumerickeypadto
selectthedesiredmenucommand,startingwith0.
Forinstance,press0forthefirstmenucommand,1for
thesecond,andsoon.
Ifthemenucommandjusttogglesanoptiononandoff
(suchasExclusiveSolo),thenyou’redone.Ifthe
commandcallsupadialogbox,thedialogwillappear
ontheLCD,andyoucanproceedjustasifyou’d
selectedthecommandfromthetouch‐screen.
Dialog box
Manymenucommandsusedialogboxestomake
additionalsettings.Thedialogboxthatappearswill
dependonthecurrentlyselectedmenucommand.
Toconfirmsettingsinadialogbox,presstheOK
button.Toexitwithoutmakingchanges,pressthe
Cancelbutton.AfterpressingeitherOKorCancel,the
dialogboxwillclose.
Pin
Press here and slide to left or right to
scroll to the desired location.
Press here to scroll to left or right.
Press here to scroll to the
corresponding location.

Introduction to KRONOS
12
Text edit button
Pressingthisbuttonbringsupanon‐screenkeyboard,
forchangingthenameofPrograms,Combis,Songs,
WaveSequences,DrumKits,etc.Formore
information,see“Editingnames”onpage 184.
Other objects
j: Radio button
Pressaradiobuttontoselectonevaluefromtwoor
morechoices.
k: Check box
Eachtimeyoupressacheckbox,italternatesbetween
thechecked(red)anduncheckedstates.
Theparameterwillbeactiveifitischecked,and
inactiveifitisunchecked.
Patch panel
TheMS‐20EXandMOD‐7useon‐screenpatchpanels
torouteaudioandcontrolsignals.Tomakea
connectionbetweentwopatchpoints:
1. Touchoneofthetwojacks(eitherinputoroutput).
Ayellowsquarewillappeararoundtheselectedjack.
2. Touchthesamejackagain.
Theyellowsquarewillbegintoblink,showingthat
you’reabouttomakeaconnection.Tocancelthisand
returntothenormalselectedstate,justtouchthesame
jackathirdtime.
3. Touchtheotherjack.
Thetwojackswillnowbeconnected.
Todeleteaconnectionbetweentwopatchpoints:
1. Touchtheinputjack.
Note:youcanalsoselecttheoutputjack.However,if
theoutputisconnectedtomorethanoneinput,allof
theconnectionsfromthatoutputwillbeaffected.
2. PresstheDisconnectbutton.
Theselectedconnectionwillbedeleted.
Program Play page Overview/Jump graphics
ThemainP0PlaypageinProgramModefeaturesan
interactiveoverviewofthemostimportantparameters,
suchasoscillators,filters,envelopes,LFOs,andsoon.
Justtouchanyoftheseoverviewareas,andyou’lljump
tothecorrespondingeditpage.
Toggle buttons
Thistypeofbuttonwillchangeitsfunctionorswitch
on/offeachtimeitispressed.
Play/Rec/MutebuttonsinSequencermode:
SoloOn/OffbuttonsinSequencermode:
EffectsOn/Offbuttons:
Cancel button OK button
Text edit button
j: Radio button
k: Check box

Basic information About the KRONOS’ modes
13
Basic information
About the KRONOS’ modes
TheKRONOShasalargenumberoffeaturesthatlet
youplayandeditprogramsandcombinations,record
andplaysequencedata,recordandplaybacksamples,
andmanagedataondisk.Thelargestunitusedto
organizethesefeaturesiscalledamode.
TheKRONOShassevenmodes.
Set List mode
SetListsmakeitsimpletoplayandorganizeanyofthe
soundsloadedintotheKRONOS,withoutregardfor
whatbankthey’restoredinorwhetherthey’re
Programs,Combinations,orevenSongs.
Largeon‐screenbuttonsmakesoundselectionfastand
foolproof,andtheProgramUporDownfootswitch
assignmentscanbeusedforhands‐freesound
changes.Cut,copy,paste,andinserttoolsmakere‐
orderingasnap.
SmoothSoundTransitions(SST)lettheprevioussound
anditseffectsringoutnaturally,makingiteasyto
changesoundsduringaliveperformance.SSTisactive
inalloftheKRONOSmodes,butSetListsgiveyou
greatercontroloverthetransitions.Youcanfine‐tune
thering‐outtimeforeachsound,sothat(forinstance)
onesoundfadesoutveryquickly,whileanother
sound’sdelayscontinuetorepeatfortenortwenty
seconds.
SetListsaregreatforliveperformance,butthey’realso
handyfororganizingsoundsingeneral.Forexample,
youcouldcreateaSetListwithallofyourfavorite
Stringsounds,includingbothProgramsand
Combinations.
Program mode
ProgramsarethebasicsoundsofKRONOS.In
Programmode,youcan:
•SelectandplayPrograms
•EditPrograms
Makedetailedsettingsforoscillators,filters,amps,
EGs,LFOs,effects,KARMA,vectorsynthesis,etc.
Thespecificparameterswillvarydependingonthe
synthesistype:HD‐1,AL‐1,CX‐3,STR‐1,MS‐20EX,
PolysixEX,MOD‐7,EP‐1,orSGX‐1.
• Createdrumprogramsusingdrumkits(ascreated
inGlobalmode)
•PlayandcontroloneKARMAmodule
•Sampleandresample
Forexample,youcansampleanexternalaudio
sourcewhilelisteningtoaperformancegenerated
byKARMA,oryoucanplayaProgramand
resampleyourperformance.
Combination mode
Combinationsaresetsofupto16Programsthatcanbe
playedsimultaneously,lettingyoucreatesoundsmore
complexthanasingleProgram.InCombinationmode,
youcan:
•SelectandplayCombinations
•UseKRONOSasa16‐trackmultitimbraltone
generator
•EditCombinations
AssignProgramstoeachofthe16Timbres,each
withseparatevolume,pan,EQ,andkeyboardand
velocityzones;makesettingsforeffects,vector
synthesis,DrumTrack,andKARMA.
• ControlandplayuptofourKARMAmodules
• Sampleorresample
Forexampleyoucansampleanexternalaudio
sourcewhilelisteningtotheperformanceofthe
KARMA,orresampleaperformanceyouplayusing
acombination.
Sequencer mode
Sequencermodeletsyourecord,playback,andedit
MIDItracksandaudiotracks.Youcan:
•SelectandplaySongs
•EditSongs
AssignProgramstoeachofthe16MIDITracks,
withseparatevolume,pan,EQ,andkeyboardand
velocityzones;makesettingsforeffects,vector
synthesis,DrumTrack,andKARMA
•RecorduptosixteenMIDItrackssimultaneously
•Recorduptofourofthesixteenaudiotracks
simultaneously,mixusingautomation,andimport
WAVEfiles.
• ControlandplayuptofourKARMAmodules
• Sampleorresample
Youcansampleanexternalaudioinputsource
whileplayingasong,anduseIn‐TrackSamplingto
automaticallycreateanoteeventthattriggersthe
sampleatthesametimeasitwasrecorded.
Youcanalsoresampleanentiresong,andthenuse
DiskmodetocreateanaudioCD.
•UseKRONOSasa16‐trackmultitimbraltone
generator
•Recordpatternsandassignthemtoindividual
keys,usingRPPR(RealtimePattern
Play/Recording)
• CreateyourownDrumTrackPatterns

Introduction to KRONOS
14
Sampling mode
Samplingmodeletsyourecordandedityourown
SamplesandMultisamples.Forexample,youcan:
•Recordsamplesfromexternalaudiosources,
includingsamplingthrougheffects
•Edittherecordedsamples,orsamplesloadedfrom
disk;setlooppoints,truncate,time‐slice,etc.
• CreateandeditMultisamples,whichconsistofone
ormoreSamplesspreadoutacrossthekeyboard
•Q
uicklyconvertMultisamplesintoPrograms
•WithaUSBCD‐Rdrive(notincluded),sample
directlyfromaudioCDs
• Createmassivesoundsusingthegenerousinternal
RAM(uptoabout2GBfortheKRONOSX,orfor
theKRONOSwithmemoryexpansion)—ifyou
like,asingleMultisamplecanusemorethan6
hoursofsamplingtime
•Loadanumberofthese6‐hourMultisamplesat
once,viaUserSampleBanksandVirtualMemory
Global mode
Globalmodeletsyoumakeoverallsettingsforthe
entireKRONOS,andeditwavesequencesanddrum
kits.Forinstance,youcan:
• MakesettingsthataffecttheentireKRONOS,such
asmastertuneandglobalMIDIchannel
•Setupsampleauto‐loadingatstartup
• Managecurrentlyloadedsamples
• Createuserscales
• CreateuserDrumKitsandWaveSequencesusing
samplesfromROM,EXs,UserSampleBanksor
SamplingMode
• RenameProgram,Combination,andKARMAGE
categories
•Setthefunctionoftheassignablepedalsand
assignableswitches
•TransmitMIDISystemExclusivedatadumps
Disk mode
Diskmodeletsyousave,load,andmanagedatausing
theinternaldiskandexternalUSB2.0storagedevices.
Youcan:
• SaveandloadPrograms,Combinations,Songs,
Samples,andGlobalsetupdata
•Formatdisksandstoragemedia,copyandrename
files,etc.
•LoadAKAI,SoundFont2.0,AIFF,andWAVE
samples,andexportRAMsamplesinAIFFor
WAVEformats
•ExportandimportsequencestoandfromSMF
(StandardMIDIFiles)
•UsetheDataFilerfunctiontosaveorloadMIDI
SystemExclusivedata
•WithaUSBCD‐Rdrive(notincluded),createand
playbackaudioCDs
Other manuals for Kronos X
3
Table of contents
Other Korg Musical Instrument manuals

Korg
Korg microPIANO-BK User manual

Korg
Korg LP-380 User manual

Korg
Korg SP 250 User manual

Korg
Korg C-520 User manual

Korg
Korg TRITON Le Product information sheet

Korg
Korg S3 User manual

Korg
Korg M3 User manual

Korg
Korg iS35 User manual

Korg
Korg TR Product information sheet

Korg
Korg Concert NC-500 Series User manual

Korg
Korg SG-1D User manual

Korg
Korg TRITON Le User guide

Korg
Korg RK-100S 2 User manual

Korg
Korg DIGITAL PIANO LP-350 User manual

Korg
Korg SP-170DX User manual

Korg
Korg Karma User manual

Korg
Korg X2 User guide

Korg
Korg NAUTILUS Series User manual

Korg
Korg B1 User manual

Korg
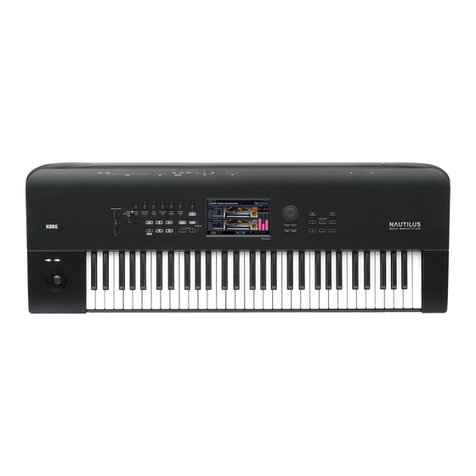
Korg TRITON Extreme TRITON Extreme User manual