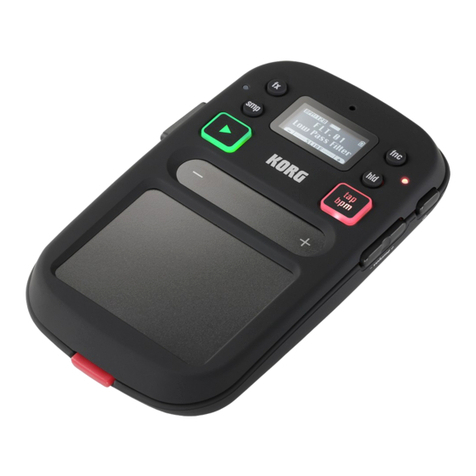
Korg KAOSS PAD User manual

1


3
Precautions
Location
Using the unit in the following locations can
result in a malfunction.
In direct sunlight•
Locations of extreme temperature or hu-•
midity
Excessively dusty or dirty locations•
Locations of excessive vibration•
Closetomagneticelds•
Power supply
Please connect the designated AC adapter to
an AC outlet of the correct voltage. Do not con-
nect it to an AC outlet of voltage other than that
for which your unit is intended.
Interference with other electrical devices
Radios and televisions placed nearby may
experience reception interference. Operate
this unit at a suitable distance from radios and
televisions.
Handling
To avoid breakage, do not apply excessive
force to the switches or controls.
Care
If the exterior becomes dirty, wipe it with a
clean, dry cloth. Do not use liquid cleaners
such as benzene or thinner, or cleaning com-
poundsorammablepolishes.
Keep this manual
After reading this manual, please keep it for
later reference.
Keeping foreign matter out of your equipment
Never set any container with liquid in it near
this equipment. If liquid gets into the equip-
ment,itcouldcauseabreakdown,re,orelec-
trical shock.
Be careful not to let metal objects get into the
equipment. If something does slip into the
equipment, unplug the AC adapter from the
wall outlet. Then contact your nearest Korg
dealer or the store where the equipment was
purchased.
THE FCC REGULATION WARNING (for USA)
This equipment has been tested and found to
comply with the limits for a Class B digital device,
pursuant to Part 15 of the FCC Rules. These limits
are designed to provide reasonable protection
against harmful interference in a residential instal-
lation. This equipment generates, uses, and can
radiate radio frequency energy and, if not installed
and used in accordance with the instructions, may
cause harmful interference to radio communica-
tions. However, there is no guarantee that interfer-
ence will not occur in a particular installation. If
this equipment does cause harmful interference
to radio or television reception, which can be de-
termined by turning the equipment off and on, the
user is encouraged to try to correct the interfer-
ence by one or more of the following measures:
Reorient or relocate the receiving antenna.
Increase the separation between the equipment
and receiver.
Connect the equipment into an outlet on a circuit
different from that to which the receiver is con-
nected.
Consult the dealer or an experienced radio/TV
technician for help.
Unauthorizedchangesormodicationtothissys-
tem can void the user’s authority to operate this
equipment.
Notice regarding disposal (EU only)
When this “crossed-out wheeled bin” sym-
bol is displayed on the product, owner’s
manual, battery, or battery package, it sig-
niesthatwhenyouwishtodisposeofthis
product, manual, package or battery you
must do so in an approved manner. Do not
discard this product, manual, package or
battery along with ordinary household waste. Dis-
posing in the correct manner will prevent harm to
human health and potential damage to the envi-
ronment. Since the correct method of disposal will
depend on the applicable laws and regulations in
your locality, please contact your local administra-
tive body for details. If the battery contains heavy
metals in excess of the regulated amount, a
chemical symbol is displayed below the “crossed-
out wheeled bin” symbol on the battery or battery
package.
* All product names and company names are the
trademarks or registered trademarks of their respec-
tive owners.

4
Introduction
Thank you for purchasing the Korg KAOSS
PAD QUAD dynamic effect processor. To en-
joy the KAOSS PAD QUAD to the fullest po-
tential, please read this manual carefully and
use the KAOSS PAD QUAD only as directed.
Main features
Create custom KAOSS eects combinations
You can combine up to four different effects
to create your custom KAOSS effect combina-
tions, with literally hundreds of possibilities.
Since switching is as easy as hitting a button
and touching the touch pad, you can also swap
effects as often as desired as the song pro-
gresses.
Total control and smooth playability
Simplytouch,taporrubyourngeracrossthe
surface of the touch pad, and you will be in
total control of the effects.
Flexible Looping
In addition to the normal Looper function,
the KAOSS PAD QUAD features a Reverse
Looper, and a Loop Slicer that slices recorded
samples and then loops them automatically
between manually adjusted points. You can
switch the type of the Looper during playback.
These newly-designed Looper effects increase
the variety of performance possibilities.
New Vinyl Break eect
The Vinyl Break effect simulates how a turn-
table platter slows down gradually before stop-
ping. The effect also simulates Scratch play
on a turntable. These turntable effects can be
useful for DJ performances.
Tap Tempo and Auto BPM
The KAOSS PAD QUAD’s Auto BPM circuit
derives tempo information from any audio
source and can sync effects to play in time.
You can also tap the Tap button along with the
beat to sync with the music’s BPM.
Freeze function
Pressing the FREEZE button while touching
the pad will memorize your position on the
pad, allowing you to remove your nger and
keep the effect(s) playing. Since each effect
module features its own FREEZE button, the
looper can play a phrase repeatedly using the
same “frozen” effect, while you control other
effects via the touch pad. Creative freedom is
all yours. Turning an effect on or off, or chang-
ing the effect within one of the four banks, will
call up the effect with the “frozen” position on
the pad.

5
Getting ready
Connections
MIXER, DJ MIXER
AC
CD PLAYER
AC ADAPTER
Connecting your monitor amp or mixer to the output
jacks
Connect the KAOSS PAD QUAD’s LINE OUT
jacks to your mixer or powered monitors (am-
pliedspeakers).
If you’re using headphones, connect them to
the PHONES jack.
TIP The KAOSS PAD QUAD’s sound will still be out-
put from the LINE OUT jacks even if headphones are
connected.
Connecting your mic or audio source to the input
jacks
If you’re using a mic, connect it to the MIC
jack.
If you want to connect a sampler or other audio
source device, connect its output jacks to the
KAOSS PAD QUAD’s LINE IN jacks.
Always connect devices to your KAOSS PAD QUAD
with the power turned off. Careless operation can damage
your speaker system or cause other issues.
If you are not using a mic, turn the MIC VOLUME knob
all the way down.
Connecting the KAOSS PAD QUAD to send/return jacks
You can use the KAOSS PAD QUAD as an ex-
ternal effect unit by connecting it to the send
and return jacks of a mixer. For this connec-
tion, set the CONNECTION switch to SEND.
DIREC T: Both input and effect sounds will be
output from the KAOSS PAD QUAD. When
you are not touching the touch pad, the input
sound will be output as is. “Controlling the ef-
fect depth (p.7)”
SEND: Only the effect sound (not the input
sound) will be output from the KAOSS PAD
QUAD.
TIP For more information on the send and return
jacks, refer to the owner’s manual for the device that
you are connecting.
TIP When you are using the KAOSS PAD QUAD as
an external effects unit, the return level may be lower
than expected. In such cases, adjust the input level
on the KAOSS PAD QUAD. “Adjusting the volume
(p.6)”

6
Operation
Using the power switch
1. Connect the KAOSS PAD QUAD to your
other equipment as shown in the diagrams
on the preceding pages, and connect the AC
adapter to an electrical outlet.
Never use any AC adapter other than the one that’s in-
cluded.
2. Press the Power button to turn the KAOSS
PAD QUAD on. The display will light up.
To turn the KAOSS PAD QUAD off, press and
hold down the Power button until the display
indicators turn off.
The settings will not be retained after the power is
turned off.
Auto Power O
The KAOSS PAD QUAD features an Auto
Power Off function, which turns the unit off
automatically if the unit is left unused for ap-
proximately four hours.
TIP If any sound is being input, this function will not
kick in.
Disabling the Auto Power O function
Follow the steps below to disable the Auto
Power Off function.
1. Turn the KAOSS PAD QUAD on while
pressing and holding down the 1DELAY but-
ton.
The unit will indicate the current settings on
the display.
2. Rotate the BPM knob to select “dis” on the
display.
3. Press the TAP button to store this setting.
The unit will automatically restart.
4. To enable the Auto Power Off function, turn
the KAOSS PAD QUAD on while pressing and
holding down the 1DELAY button. Rotate the
BPM knob to select “Ena” on the display, then
press the TAP button.
TIP If you turn the unit off without pressing the TAP
button in the steps above, the changes to the setting
will not be applied.
TIP The initial factory setting is “Ena” for the Auto
Power Off function.
Adjusting the volume
1. Use the INPUT VOLUME knob to adjust
the input level.
Adjust the level as high as possible without
making the peak indicator light up red when
audio is input from the connected equipment.
If you are using the mic jack, adjust the MIC
VOLUME knob as appropriate for the sensi-
tivity of the mic, so that the sound is not dis-
torted.
2. If you are listening through headphones,
use the PHONES VOLUME knob to adjust the
headphone level.
TIP The PHONES VOLUME knob does not affect the
level at the LINE OUT jack.
Selecting an eect
The KAOSS PAD QUAD features four effect
modules (1–4). You can assign a different ef-
fect to each of these four models.
Touching the touch pad will cause all selected
effects to be applied to the sound. You can
also continue applying the effects by pressing
the FREEZE button. “Freeze (p.7)”
TIP Effects are applied in ascending order of the ef-
fect modules (1 to 4).
1. Select an effect by pressing the corre-
sponding Effect Type button. The selected Ef-
fect Type button indicator will light up.
2. To turn the effect off, press the illuminated
Effect Type button. The Effect Type button in-
dicator will go dark and the corresponding ef-
fect turns off.
3. To switch to a different effect for an effect
module, press the corresponding Effect Type
button. A different effect will be selected for
that effect module.
TIP Some combinations of certain effects may dis-
tort the sound.

7
Controlling the eect depth
Use the FX DEPTH knob to adjust the depth of
the effect. Rotating the knob all the way to the
left will turn the effect off. Rotating the knob
all the way to the right will maximize the effect
depth.
INPUT OUTPUT
During performance, if you rotate the FX
DEPTH knob all the way to the left or release
your ngers from the touch pad, the effect
sound will continue until its delay or reverb
sound decays and dissipates.
Using the touch pad
Youcancontrolthesoundbyusingyournger
to rub or tap the touch pad.
TIPAfx the included protective sheetto the touch
pad before using it.
Touch pad care
Never press the touch pad with excessive
force, or place heavy objects on it. It may
crack or break if handled roughly. Press the
touch pad only with your nger, since rub-
bing or pressing the touch pad with a sharp
object will scratch it. To clean the touch pad,
wipe it lightly with a soft dry cloth. Do not
use solvents such as thinner, since this may
cause deformation.
Freeze
If you press the FREEZE button, the KAOSS
PAD QUAD will remember the current touch
pad position at the time you press the button,
and will continue to apply the same effects.
You can use the Freeze function for each ef-
fect module. Even if you switch the effects in-
side the effect modules, the unit remembers
the touch pad position.
1. Whileyourngerisonthetouchpad,press
the FREEZE button. The effect sound being
used at that point will be retained.
TIP Touching the touch pad will not change
the sound of the “frozen” effect modules. How-
ever, the sound of “non-frozen” effect modules
will change.
2. Press the FREEZE button again to cancel
the Freeze function.
TIP If you press the FREEZE button again immedi-
ately after you cancel the Freeze function, the same
touch pad position information will be recalled.
Touch pad LED
The touch pad LED lights up in different pat-
terns depending on the selected effects, the
Freeze or BPM setting, and operation of the
touch pad.
Adjusting the brightness of the touch pad LED
1. While pressing and holding down the LPF
button, turn on the power to the KAOSS PAD
QUAD.
The touch pad LED will light up, and the bright-
ness value will appear on the display. The
higher the value, the brighter the LED.
2. Rotate the BPM knob to adjust the bright-
ness.
3. Press the TAP button to store the setting.
The unit automatically restarts.
TIP If you turn the unit off without pressing the TAP
button as described in the step above, changes to
the setting will not be applied.
TIP The initial factory setting is maximum bright-
ness.
Specifying the BPM
What is BPM?
BPM (Beats Per Minute) is the tempo of the
song expressed as the number of beats (quar-
ter notes) that occur in one minute. A higher
BPM value means a faster tempo.
TIP When you turn on the KAOSS PAD QUAD, the
BPM will be set to 120.0.
Manually setting the BPM
Use the BPM knob to adjust the BPM value.
TIP The Auto BPM is automatically turned off.

8
Using Tap Tempo to set the BPM
If you’re not certain of the BPM value of a song,
you can set the BPM by pressing the TAP but-
ton in rhythm with the beat of the song.
Press the TAP button three or more times in
rhythm with the beat of the song. The KAOSS
PAD QUAD will detect the interval at which
you press the button, the corresponding BPM
value will appear in the display, and that BPM
value will be set.
Auto BPM detection
The KAOSS PAD QUAD can set the BPM val-
ue automatically by detecting the beat of the
song. If the song’s BPM changes, the KAOSS
PAD QUAD’s BPM value will change in sync.
1. Press and hold down the TAP button to
turn on Auto BPM detection. The AUTO indi-
cator will light up. The BPM of the incoming
audio source will be detected automatically.
If the KAOSS PAD QUAD is unable to detect the BPM
Press the TAP button several times in time
with the beat of the song; the KAOSS PAD
QUAD will automatically detect the BPM using
the beat you manually tapped as a guideline.
Because of the way that the Auto BPM func-
tion operates, it may erroneously detect a val-
ue that is 1/2 or 2/3 of the correct BPM value,
or small deviations may arise. In such cases,
you can use the TAP button to make compen-
sations. If you press the TAP button while Auto
BPM detection is active, the value you specify
by tapping will become the center value of the
BPM range.
TIP It’s not possible to detect the BPM value from
music that does not have a clear sense of beat. The
detectable BPM range is from 80 to 160.
Turning o Auto BPM
Press and hold down the TAP button until the
AUTO indicator goes dark. The Auto BPM
function will turn off, and the unit will use the
BPM value obtained at the point you turned off
the function.
Eects guide
1. Looper category
LOOPER
The Looper samples (records) a phrase and
plays it back repeatedly. You can add some
variety to a song by looping a phrase while
changing the length of the phrase by rubbing
thetouchpadupanddownwithyournger.
TIP When your nger touches the touch pad, re-
cording will start. As soon as a phrase is recorded,
the phrase will play repeatedly.
REV LOOPER REVERSE LOOPER
As you touch the touch pad with your nger,
a phrase will play in reverse. You can play a
phrase repeatedly while changing the length
of the phrase by rubbing the touch pad up and
downwithyournger.
TIP The Looper always records the input audio, and
starts looping as soon as you touch the touch pad.
LOOP SLICER
A sampled phrase of one measure can be
sliced into parts of various length. You can as-
sign these parts onto the x axis of the touch
pad, then play the desired parts repeatedly.
TIP The Looper always records the input audio, and
starts looping as soon as you touch the touch pad.
GRAIN SHIFTER
The looper samples a sound for a short pe-
riod of time on a certain cycle, and plays it re-
peatedly. This effect is useful for sounds that
change their tone frequently.
VINYL BREAK
This effect simulates the sound heard when a
turntable is stopped. Rubbing the touch pad
will simulate the scratch technique.

9
2. Mod category
DIST DISTORTION
This effect distorts the input sound. Distortion
will add an edginess to the sound.
DECIMATOR
This effect reduces the sampling frequency
or data bit length, creating a gritty and rough
cheap sampler sound.
DUCKING COMP
This compressor effect responds to the bass
range of the input sound. It emphasizes off-
beats, creating a well-framed sound.
TIP The effect may be subtle under certain circum-
stances.
FLANGER
This effect adds a substantial swell and rolling
pitch. It is very effective with sounds that con-
tain a lot of harmonics.
PHASER
This effect offsets the phase of the sound, cre-
ating a swell.
3. Filter category
LPF
Thisltercutsthetrebleandbooststhebass.
HPF
Thisltercutsthebassandbooststhetreble.
BPF+
Thislteremphasizesacertainbandbasedon
the current touch pad position.
JET
Thisltercreatesaneffectofthehighswishing
whine of a jet plane.
PITCH SHIFTER
This lter changes the pitch of the input
sound.
4. Delay/Rev category
1DELAY
This effect delays the input sound and plays
just one delay sound.
DELAY
This is a standard stereo delay effect.
TAPE ECHO
This effect simulates a tape echo, which repro-
duces distortion or tonal changes on magnetic
tapes.
REVERB
This effect simulates the ambient reverbera-
tion of a hall.
DELAY REVERB
This effect combines the DELAY and REVERB
effects. First the DELAY effect is applied, fol-
lowed by the REVERB effect.

10
Specications
Main controllers Touch pad, EFFECT TYPE button, FX DEPTH
knob
Connectors LINE OUT L/R (RCA jacks), LINE IN L/R (RCA
jacks), MIC IN (unbalanced 6.3 mm phone jack),
HEADPHONES (6.3 mm stereo phone jack)
Power supply DC9V
Dimensions and weight 185 (W) x 213 (D) x 44 (H) mm, 754g
7.28” x 8.39” x 1.73”, 1.66 lbs.
Operating temperature 0–+40˚C(non-condensing)
Included items AC adapter, protective sheet for touch pad
*Specicationsandappearancearesubjecttochangewithoutnoticeforimprovement.
Parts of the KAOSS PAD QUAD
1
2
4
3
5 9
10
6
7
8
12 1311
1. Effect type button
2. FREEZE button
3. Peak indicator
4. INPUT VOLUME knob
5. FX DEPTH knob
6. Display
7. BPM knob
8. AUTO indicator
9. TAP button
10
.Touch pad
11.
MIC VOLUME knob
12.
Power button
13.
PHONES VOLUME knob

11
Précautions
Emplacement
L’utilisation de cet instrument dans les endroits sui-
vants peut en entraîner le mauvais fonctionnement.
En plein soleil•
Endroits très chauds ou très humides•
Endroits sales ou fort poussiéreux•
Endroits soumis à de fortes vibrations•
A proximité de champs magnétiques•
Alimentation
Branchez l’adaptateur secteur mentionné à une prise
secteur de tension appropriée. Evitez de brancher
l’adaptateur à une prise de courant dont la tension
ne correspond pas à celle pour laquelle l’appareil est
conçu.
Interférences avec d’autres appareils électriques
Les postes de radio et de télévision situés à proxi-
mité peuvent par conséquent souffrir d’interférences
à la réception. Veuillez dès lors faire fonctionner cet
appareil à une distance raisonnable de postes de ra-
dio et de télévision.
Maniement
Pour éviter de les endommager, manipulez les com-
mandes et les boutons de cet instrument avec soin.
Entretien
Lorsque l’instrument se salit, nettoyez-le avec un
chiffon propre et sec. Ne vous servez pas d’agents
de nettoyage liquides tels que du benzène ou du di-
luant,voiredesproduitsinammables.
Conservez ce manuel
Après avoir lu ce manuel, veuillez le conserver soi-
gneusement pour toute référence ultérieure.
Evitez toute intrusion d’objets ou de liquide
Ne placez jamais de récipient contenant du liquide
près de l’instrument. Si le liquide se renverse ou cou-
le, il risque de provoquer des dommages, un court-
circuit ou une électrocution.
Veillez à ne pas laisser tomber des objets métalli-
ques dans le boîtier (trombones, par ex.). Si cela se
produit, débranchez l’alimentation de la prise de cou-
rant et contactez votre revendeur korg le plus proche
ou la surface où vous avez acheté l’instrument.
Note concernant les dispositions (Seulement EU)
Quand un symbole avec une poubelle bar-
rée d’une croix apparait sur le produit, le
mode d’emploi, les piles ou le pack de piles,
celasigniequeceproduit,manueloupi-
les doit être déposé chez un représentant
compétent, et non pas dans une poubelle
ou toute autre déchetterie conventionnelle.
Disposer de cette manière, de préve-
nir les dommages pour la santé humaine et les
dommages potentiels pour l'environnement. La
bonne méthode d'élimination dépendra des lois
et règlements applicables dans votre localité, s’il
vous plaît, contactez votre organisme administratif
pour plus de détails. Si la pile contient des métaux
lourds au-delà du seuil réglementé, un symbole
chimiqueestafchéendessousdusymboledela
poubelle barrée d’une croix sur la pile ou le pack
de piles.
* Tous les noms de produits et de sociétés sont des
marques commerciales ou déposées de leur déten-
teur respectif.

12
Introduction
Nous vous remercions d’avoir choisi le pro-
cesseur d’effets dynamique Korg KAOSS PAD
QUAD. An de pouvoir exploiter au mieux
toutes les fonctions du KAOSS PAD QUAD,
veuillez lire attentivement ce manuel et utiliser
l’instrument de la manière préconisée.
Caractéristiques principales
Création de combinaisons personnelles d’eets KA-
OSS
Vous pouvez assembler jusqu’à quatre effets
différents pour créer des ensembles d’effets
KAOSS très personnels. Les possibilités de
combinaisons se comptent par centaines. Le
changement d’effet se faisant d’une simple
pression sur un bouton et du pad tactile, vous
pouvez changer d’effet autant de fois que vous
le voulez au cours d’un morceau.
Contrôle total et plaisir de jeu inégalé
Touchez, tapez ou frottez du doigt la surface
du pad tactile pour contrôler parfaitement les
effets.
Boucles exibles à souhait
En plus de la fonction “Looper” traditionnelle,
le KAOSS PAD QUAD propose les fonctions
“Reverse Looper” et “Loop Slicer”. Cette der-
nière “tranche” les échantillons puis les met
automatiquement en boucle entre deux points
choisis manuellement. De plus, vous pouvez
changer de type de fonction “Loop” en cours
de reproduction. Ces nouvelles fonctions de
boucle étendent encore les possibilités de
jeu.
Nouvel eet ‘Vinyl Break’
L’effet “Vinyl Break” simule la façon dont une
platine vinyle ralentit progressivement avant de
s’arrêter. Cet effet simule aussi l’effet Scratch
sur un vinyle. Ces effets de platine vinyle sont
principalement destinés aux DJ.
‘Tap Tempo’ et ‘Auto BPM’
Le circuit “Auto BPM” du KAOSS PAD QUAD
détecte les informations de tempo de n’im-
porte quelle source audio et peut synchroniser
les effets avec ce tempo. Vous pouvez aussi
régler la valeur BPM en tapant sur le bouton
Tap selon le rythme de la musique.
Fonction ‘Freeze’
En appuyant sur le bouton FREEZE tout en
touchant le pad, vous mémorisez la position
sur le pad, ce qui vous permet de relâcher le
pad tout en conservant l’effet. Comme cha-
que module dispose de son propre bouton
FREEZE, vous pouvez “geler” un module à la
fois pour produire son effet en boucle tandis
que vous continuez à piloter les autres modu-
les avec le pad tactile. Votre liberté artistique
a toute latitude. Quand vous changez d’effet
sur un module que vous avez “gelé”, le son du
nouvel effet adopte automatiquement le ré-
glage correspondant à la position “gelée” sur
le pad.

13
Préparations
Connexions
SECTEUR
MÉLANGEUR, MÉLANGEUR DJ
LECTEUR CD
ADAPTATEUR SECTEUR
Connexion d’enceintes actives ou d’une console de
mixage aux sorties
Branchez les prises LINE OUT du KAOSS
PAD QUAD aux entrées de votre console de
mixage ou de vos enceintes actives.
Si vous utilisez un casque, branchez-le à la
prise PHONES.
ASTUCE: Le son du KAOSS PAD QUAD est toujours
envoyé aux prises LINE OUT même quand vous
branchez un casque.
Connexion d’un micro ou d’un dispositif audio aux
entrées
Si vous utilisez un micro, branchez-le à la
prise MIC.
Vous pouvez brancher les sorties d’un échan-
tillonneur ou d’une autre source audio aux pri-
ses LINE IN du KAOSS PAD QUAD.
Coupez toujours l’alimentation avant de brancher des
périphériques au KAOSS PAD QUAD. Un mauvais manie-
ment risque d’endommager vos enceintes ou d’entraîner
d’autres problèmes.
Si vous n’utilisez pas de micro, réglez la commande MIC
VOLUME au minimum.
Connexion du KAOSS PAD QUAD à des départ/retour
Vous pouvez utiliser le KAOSS PAD QUAD
comme processeur d’effet externe et le bran-
cher aux prises de départ et de retour d’une
console de mixage. Pour cette connexion,
réglez le commutateur CONNECTION sur
“SEND”.
DIREC T: Le signal d’entrée et le signal d’effet
sont transmis par le KAOSS PAD QUAD. Si
vous ne touchez pas le pad tactile, le signal
d’entrée est retransmis tel quel. “Réglage de
l’intensité de l’effet (p.15)”
SEND: Seul le signal d’effet (et non le signal
d’entrée) est transmis par le KAOSS PAD
QUAD.
ASTUCE Pour en savoir plus sur les prises de départ
et de retour, voyez le mode d’emploi du dispositif
branché.
ASTUCE Quand vous utilisez le KAOSS PAD QUAD
comme processeur d’effet externe, le niveau de re-
tour peut être trop faible. Dans ce cas, réglez le ni-
veau d’entrée sur le KAOSS PAD QUAD. “Réglage
du volume(p.14)”

14
Fonctionnement
Interrupteur d’alimentation
1. Branchez le KAOSS PAD QUAD à votre
matériel en vous référant aux illustrations des
pages précédentes puis branchez l’adaptateur
secteur à une prise de courant.
N’utilisez jamais d’autre adaptateur secteur que l’adap-
tateur fourni.
2. Appuyez sur l’interrupteur d’alimentation
pour mettre le KAOSS PAD QUAD sous ten-
sion. L’écran s’allume.
Pour mettre le KAOSS PAD QUAD hors ten-
sion, maintenez l’interrupteur d’alimentation
enfoncé jusqu’à ce que l’écran s’éteigne.
Les réglages ne sont pas conservés après la mise hors
tension.
Mise hors tension automatique
Le KAOSS PAD QUAD dispose d’une fonction
“Auto Power Off” qui met automatiquement
l’appareil hors tension s’il reste inutilisé durant
environ quatre heures.
ASTUCE Si un signal d’entrée arrive, l’instrument
n’est pas mis hors tension.
Désactivation de la fonction ‘Auto Power O’
Effectuez les opérations suivantes pour dé-
sactiver la fonction “Auto Power Off”.
1. Mettez le KAOSS PAD QUAD sous tension
tout en maintenant le bouton 1DELAY enfon-
cé.
L’écranafcheleréglageenvigueuràl’écran.
2. Tournez la commande BPM pour sélec-
tionner “dis” à l’écran.
3. Appuyez sur le bouton TAP pour sauvegar-
der ce réglage. L’instrument redémarre auto-
matiquement.
4. Pour activer la fonction “Auto Power Off”,
mettez le KAOSS PAD QUAD hors tension
tout en maintenant le bouton 1DELAY enfoncé.
Tournez la commande BPM pour sélectionner
“Ena” à l’écran puis appuyez sur le bouton
TA P.
ASTUCE Si vous coupez l’alimentation sans appuyer
sur le bouton TAP ci-dessus, le changement de ré-
glage n’est pas appliqué.
ASTUCE A la sortie d’usine, la fonction “Auto Power
Off” est réglée sur “Ena”.
Réglage du volume
1. Utilisez la commande INPUT VOLUME
pour régler le niveau d’entrée.
Choisissez un niveau aussi élevé que possible
tout en évitant que le témoin PEAK ne s’allume
en rouge quand il reçoit des signaux audio.
Si vous utilisez un micro, réglez la commande
MIC VOLUME en fonction de la sensibilité du mi-
croand’éviterunedistorsiondusignalaudio.
2. Si vous écoutez au casque, réglez le vo-
lume du casque avec la commande PHONES
VOLUME.
ASTUCELacommandePHONESVOLUMEn’inuen-
ce pas le niveau de sortie de la prise LINE OUT.
Sélection d’un eet
Le KAOSS PAD QUAD dispose de quatre mo-
dules d’effet (1~4). Vous pouvez assigner un
effet différent à chacun de ces modules.
En touchant le pad tactile, vous appliquez tous
les effets sélectionnés au son. Vous pouvez
aussi maintenir (“geler”) les effets en appuyant
sur le bouton FREEZE. “Freeze (p.15)”
ASTUCE Les effets sont appliqués dans l’ordre des
modules (1~4).
1. Choisissez un type d’effet en appuyant sur
le bouton de type d’effet correspondant. Le
témoin du bouton de type d’effet sélectionné
s’allume.
2. Pour couper l’effet, appuyez sur le bouton
de type d’effet allumé. Le témoin du bouton de
type d’effet s’éteint et l’effet correspondant est
coupé.
3. Pour changer l’effet d’un module, appuyez
sur le bouton de type d’effet voulu. Le module
en question utilise alors le nouvel effet.
ASTUCE Certaines combinaisons de certains effets
peuvent entraîner de la distorsion.

15
Réglage de l’intensité de l’eet
Utilisez la commande FX DEPTH pour régler
l’intensité de l’effet. Tournez la commande à
bout de course vers la gauche pour couper le
signal d’effet. Inversement, tournez la com-
mande à fond vers la droite pour obtenir l’in-
tensité d’effet maximale.
INPUT OUTPUT
Si vous tournez la commande FX DEPTH à
fond vers la gauche durant le jeu ou si vous
relâchez le pad tactile, le signal d’effet reste
audible jusqu’à la disparition naturelle du delay
ou de la réverbération.
Pad tactile
Vous pouvez contrôler le son en glissant ou en
tapant du doigt sur le pad tactile.
ASTUCE: Avant d’utiliser le pad tactile, apposez le
lmprotecteursurlepad.
Précautions liées au pad tactile
N’exercez jamais de force excessive sur le
pad tactile et évitez d’y déposer des objets
lourds. Il risque de se fêler ou de se casser
en cas de maniement brutal. Jouez unique-
ment avec le doigt sur le pad tactile: si vous
le frottez ou appuyez dessus avec un objet
acéré, vous risquez de le griffer. Nettoyez le
pad tactile en le frottant délicatement avec
un chiffon sec et doux. N’utilisez pas de sol-
vants comme de la térébenthine car cela
peut entraîner des déformations.
Freeze
Si vous appuyez sur le bouton FREEZE, le
KAOSS PAD QUAD mémorise la position sur
le pad tactile au moment où vous appuyez sur
le bouton et continue à appliquer les effets
même si vous relâchez le pad.
Vous pouvez utiliser la fonction “Freeze” pour
chaque module d’effet. La position mémorisée
sur le pad s’applique même quand vous chan-
gez d’effet au sein d’un module.
1. Appuyez sur le bouton FREEZE quand vo-
tre doigt est sur le pad. Les réglages d’effet
correspondant à cette position sont mémori-
sés.
ASTUCE Les modules pour lesquels le bouton FREE-
ZE est activé ne changent pas leurs réglages d’effet
quand vous touchez le pad. Cependant, l’effet des
modules non “gelés” change.
2. Appuyez de nouveau sur le bouton FREE-
ZE pour couper la fonction “Freeze”.
ASTUCE Si vous appuyez de nouveau sur le bouton
FREEZE immédiatement après avoir coupé la fonc-
tion “Freeze”, les réglages d’effet correspondant à
la position mémorisée au préalable sont à nouveau
chargés.
Diode du pad tactile
La diode du pad tactile s’allume selon diffé-
rents motifs en fonction des effets sélection-
nés, des réglages “Freeze” ou “BPM” et de
l’utilisation faite du pad.
Réglage de la luminosité de la diode du pad tactile
1. Maintenez le bouton LPF enfoncé et met-
tez le KAOSS PAD QUAD sous tension.
La diode du pad tactile s’allume et la valeur de
luminosités’afcheàl’écran.Pluslavaleurest
élevée, plus la diode est lumineuse.
2. Réglez la luminosité avec la commande
BPM.
3. Appuyez sur le bouton TAP pour mémori-
ser le réglage. L’instrument redémarre auto-
matiquement.
ASTUCE Si vous coupez l’alimentation sans appuyer
sur le bouton TAP ci-dessus, le changement de ré-
glage n’est pas mémorisé.
ASTUCE A la sortie d’usine, la luminosité a son ré-
glage maximum.
Réglage du BPM
Qu’est-ce que le BPM ?
BPM (Beats Per Minute) est le tempo du mor-
ceau exprimé sous la forme du nombre de
temps (noires) par minute. Plus la valeur du
BPM est élevée, plus le tempo est rapide.
ASTUCE Quand vous mettez le KAOSS PAD QUAD
soustension, le BPM est réglé sur 120,0.

16
Réglage manuel du BPM
Utilisez la commande BPM pour régler la va-
leur BPM.
ASTUCE La fonction “Auto BPM” est alors automati-
quement désactivée.
Régler la valeur BPM avec ‘Tap Tempo’
Si vous ne connaissez pas la valeur BPM d’un
morceau, vous pouvez la déterminer en ap-
puyant sur le bouton TAP selon la pulsation du
morceau.
Appuyez au moins trois fois sur le bouton TAP
en suivant la pulsation du morceau. Le KAOSS
PAD QUAD détecte la vitesse à laquelle vous
appuyezsurlebouton.IlafchelavaleurBPM
correspondante à l’écran et l’adopte.
Fonction AUTO BPM
Le KAOSS PAD QUAD peut régler automa-
tiquement la valeur du BPM en identiant le
temps du morceau. Si le BPM du morceau
change, le BPM du KAOSS PAD QUAD chan-
gera de manière synchronisée.
1. Maintenez le bouton TAP enfoncé pour ac-
tiver la fonction “Auto BPM”. Le témoin AUTO
s’allume. La valeur BPM du signal d’entrée
audio est automatiquement détectée.
Si le KAOSS PAD QUAD n’arrive pas à détecter le BPM
Appuyez plusieurs fois sur la touche TAP en
suivant le temps du morceau. Le KAOSS PAD
QUAD détectera automatiquement le BPM
en utilisant les battements de votre doigt. Les
modalités de fonctionnement d’AUTO BPM
rendent possible la détection par erreur d’une
valeur représentant 1/2 ou 1/3 de celle du BPM
correct, ou bien de légères déviations peuvent
survenir. Dans ce cas, vous pouvez utiliser la
touche TAP pour effectuer des corrections.
Si vous appuyez sur la touche TAP alors que
AUTOBPMest activé, lavaleur spéciée en
tapant manuellement deviendra la valeur cen-
trale d’une gamme de valeurs de BPM.
ASTUCE Il n’est pas possible de détecter la valeur
de BPM d’un morceau dont les temps ne sont pas
prononcés.LagammedeBPMidentiablesestcom-
prise entre 80 et 160.
Désactivation de la fonction ‘Auto BPM’
Maintenez le bouton TAP enfoncé jusqu’à ce
que le témoin AUTO s’éteigne. La fonction
“Auto BPM” est désactivée et l’instrument utili-
se la valeur BPM en vigueur lorsque vous avez
désactivé la fonction.

17
Guide des eets
1. Catégorie ‘Looper’
LOOPER
Le “Looper” échantillonne (enregistre) des
phrases et les reproduit en boucle. Vous pou-
vez modier la longueur des phrases durant
la reproduction en glissant le doigt sur le pad
vers le haut ou vers le bas.
ASTUCE L’enregistrement démarre quand votre doigt
touche le pad. Dès qu’une phrase est enregistrée,
elle est reproduite en boucle.
REV LOOPER REVERSE LOOPER
Quand vous touchez le pad du doigt, une phra-
se est reproduite à l’envers. Vous pouvez re-
produireunephraseenboucleetenmodier
la longueur en glissant le doigt sur le pad vers
le haut ou vers le bas.
ASTUCE Le Looper enregistre les signaux audio en-
trant en continu et les met en boucle dès que vous
touchez le pad tactile.
LOOP SLICER
Une phrase échantillonnée d’une mesure peut
être “tranchée” en sections de longueurs diffé-
rentes. Vous pouvez assigner ces sections à
l’axe X du pad et les reproduire en boucle.
ASTUCE Le Looper enregistre les signaux audio en-
trant en continu et les met en boucle dès que vous
touchez le pad tactile.
GRAIN SHIFTER
Le Looper enregistre un bref signal audio se-
lon un certain cycle et le reproduit en boucle.
Cet effet est particulièrement destiné aux sons
dont le timbre change fréquemment.
VINYL BREAK
Cet effet simule le son obtenu lors de l’arrêt
d’une platine vinyle. Frottez le pad tactile pour
simuler l’effet scratch sur vinyle.
2. Catégorie ‘Mod’
DIST DISTORTION
Cet effet ajoute de la distorsion au signal d’en-
trée et rend le son plus rugueux.
DECIMATOR
Cet effet réduit la fréquence d’échantillonnage
oule débit enbitset recrée l’effet“lo-” d’un
vieil échantillonneur.
DUCKING COMP
Ce compresseur est déclenché par les basses
fréquences du signal d’entrée. Il souligne les
temps pairs et produit un son bien cadré.
ASTUCE L’effet obtenu peut être à peine perceptible
selon les circonstances.
FLANGER
Cet effet gone considérablement le son et
plus particulièrement son timbre. Il donne très
bien avec des sons contenant beaucoup d’har-
moniques.
PHASER
Cet effet déphase du son, rendant ce dernier
plus vaste.
3. Catégorie ‘Filter’
LPF
Celtrecoupel’aiguetaccentuelegrave.
HPF
Celtrecoupelegraveetaccentuel’aigu.
BPF+
Celtreaccentueunecertainebandedépen-
dant de la position du doigt sur le pad tactile.
JET
Ce ltresimulele son produitpar unavion à
réaction.
PITCH SHIFTER
Cet effet change la hauteur du signal d’en-
trée.

18
4. Catégorie ‘Delay/Rev’
1DELAY
Cet effet retarde le signal d’entrée et ne pro-
duit pas de répétitions.
DELAY
Cet effet est un delay stéréo standard.
TAPE ECHO
Cet effet simule un écho à bande qui reproduit
la distorsion ou les changements de timbre
des bandes magnétiques.
REVERB
Cet effet simule la réverbération d’une salle.
DELAY REVERB
Cet effet combine les effets DELAY et RE-
VERB. Il applique d’abord l’effet DELAY puis
l’effet REVERB.

19
Description du KAOSS PAD QUAD
1
2
4
3
5 9
10
6
7
8
12 1311
1. Bouton de type d’effet
2. Bouton FREEZE
3. Témoins PEAK
4. Commande INPUT VOLUME
5. Commande FX DEPTH
6. Ecran
7. Commande BPM
8. Témoin AUTO
9. Bouton TAP
10
.Pad tactile
11.
commande MIC VOLUME
12.
Interrupteur d’alimentation
13.
commande PHONES VOLUME
Fiche technique
Contrôleurs principaux Pad tactile, Bouton de type d’effet, Commande
FX DEPTH
Prises LINE OUT (prises stéréo RCA/cinch), LINE IN
(prises stéréo RCA/cinch), MIC IN (mini-jack
asymétrique de 6,3mm), HEADPHONES (mini-
jack stéréo de 6,3mm)
Alimentation DC9V
Dimensions et poids 185 (W) x 213 (D) x 44 (H) mm, 754g
Température de fonctionnement 0~+40˚C(sanscondensation)
Accessoires fournis Adaptateur secteur, Film protecteur du pad tactile
*Lescaractéristiquesetl’aspectduproduitsontsusceptiblesd’êtremodiéssansavispréalable
en vue d’une amélioration.

20
Vorsichtsmaßnahmen
Aufstellungsort
Vermeiden Sie das Aufstellen des Geräts an Orten, an
denen
es direkter Sonneneinstrahlung ausgesetzt ist;•
hohe Feuchtigkeit oder Extremtemperaturen auf-•
treten können;
Staub oder Schmutz in großen Mengen vorhanden•
sind;
das Gerät Erschütterungen ausgesetzt sein kann.•
in der Nähe eines Magnetfeldes.•
Stromversorgung
Schließen Sie das optionale Netzteil nur an eine geeig-
nete Steckdose an. Verbinden Sie es niemals mit einer
Steckdose einer anderen Spannung.
Störeinüsse auf andere Elektrogeräte
Dieser kann bei in der Nähe aufgestellten Rund-funk-
empfängern oder Fernsehgeräten Empfangsstörungen
hervorrufen. Betreiben Sie solche Geräte nur in einem
geeigneten Abstand von diesem Erzeugnis.
Bedienung
Vermeiden Sie bei der Bedienung von Schaltern und
Reglern unangemessenen Kraftaufwand.
Reinigung
Bei auftretender Verschmutzung können Sie das Ge-
häuse mit einem trockenen, sauberen Tuch abwischen.
Verwenden Sie keinerlei Flüssigreiniger wie beispiels-
weise Reinigungsbenzin, Verdünnungs- oder Spülmit-
tel. Verwenden Sie niemals brennbare Reiniger.
Bedienungsanleitung
Bewahren Sie diese Bedienungsanleitung gut auf, falls
Sie sie später noch einmal benötigen.
Flüssigkeiten und Fremdkörper
Stellen Sie niemals Behältnisse mit Flüssigkeiten in
der Nähe des Geräts auf. Wenn Flüssigkeit in das Ge-
rät gelangt, können Beschädigung des Geräts, Feuer
oder ein elek-trischer Schlag die Folge sein.
Beachten Sie, daß keinerlei Fremdkörper in das Gerät
gelangen. Sollte ein Fremdkörper in das Gerät gelangt
sein, so trennen Sie es sofort vom Netz. Wenden Sie
sich dann an Ihren KORG-Fachhändler.
Hinweis zur Entsorgung (Nur EU)
Wenn Sie das Symbol mit der „durchge-
kreuzten Mülltonne“ auf Ihrem Produkt, der
dazugehörigen Bedienungsanleitung, der
Batterie oder dem Batteriefach sehen, müs-
sen Sie das Produkt in der vorgeschriebenen
Art und Weise entsorgen. Dies bedeutet,
dass dieses Produkt mit elektrischen und
elektronischen Komponenten nicht mit dem
normalen Hausmüll entsorgt werden darf. Für Pro-
dukte dieser Art existiert ein separates, gesetzlich
festgelegtes Entsorgungssystem. Gebrauchte elekt-
rische und elektronische Geräte müssen separat
entsorgt werden, um ein umweltgerechtes Recycling
sicherzustellen. Diese Produkte müssen bei benann-
ten Sammelstellen abgegeben werden. Die Entsor-
gung ist für den Endverbraucher kostenfrei! Bitte er-
kundigen sie sich bei ihrer zuständigen Behörde, wo
sie diese Produkte zur fachgerechten Entsorgung
abgeben können.
Falls ihr Produkt mit Batterien oder Akkumulatoren
ausgerüstet ist, müssen sie diese vor Abgabe des
Produktes entfernen und separat entsorgen (siehe
oben). Die Abgabe dieses Produktes bei einer zu-
ständigen Stelle hilft ihnen, dass das Produkt um-
weltgerecht entsorgt wird. Damit leisten sie persön-
lich einen nicht unerheblichen Beitrag zum Schutz
der Umwelt und der menschlichen Gesundheit vor
möglichen negativen Effekten durch unsachgemä-
ße Entsorgung von Müll. Batterien oder Akkus, die
Schadstoffe enthalten, sind auch mit dem Symbol
einer durchgekreuzten Mülltonne gekennzeichnet.
InderNähezumMülltonnensymbolbendetsichdie
chemische Bezeichnung des Schadstoffes.
Cd oder NiCd steht für Cadmium, Pb für Blei und Hg
für Quecksilber.
* Alle Produkt- und Firmennamen sind Warenzeichen
oder eingetragene Warenzeichen der betreffenden Ei-
gentümer.
Other manuals for KAOSS PAD
1
Table of contents
Languages:
Other Korg Recording Equipment manuals
Korg
Korg KPC-1 EFG User manual
Korg
Korg Electribe ESX-1 Product information sheet

Korg
Korg volca sample User manual
Korg
Korg Trinity series User manual
Korg
Korg i30 User manual
Korg
Korg Pandora Stomp User manual
Korg
Korg SE-500 User manual
Korg
Korg MR-1000 Technical manual
Korg
Korg K25 User manual
Korg
Korg ElecTribe ES-1 MkII User manual
