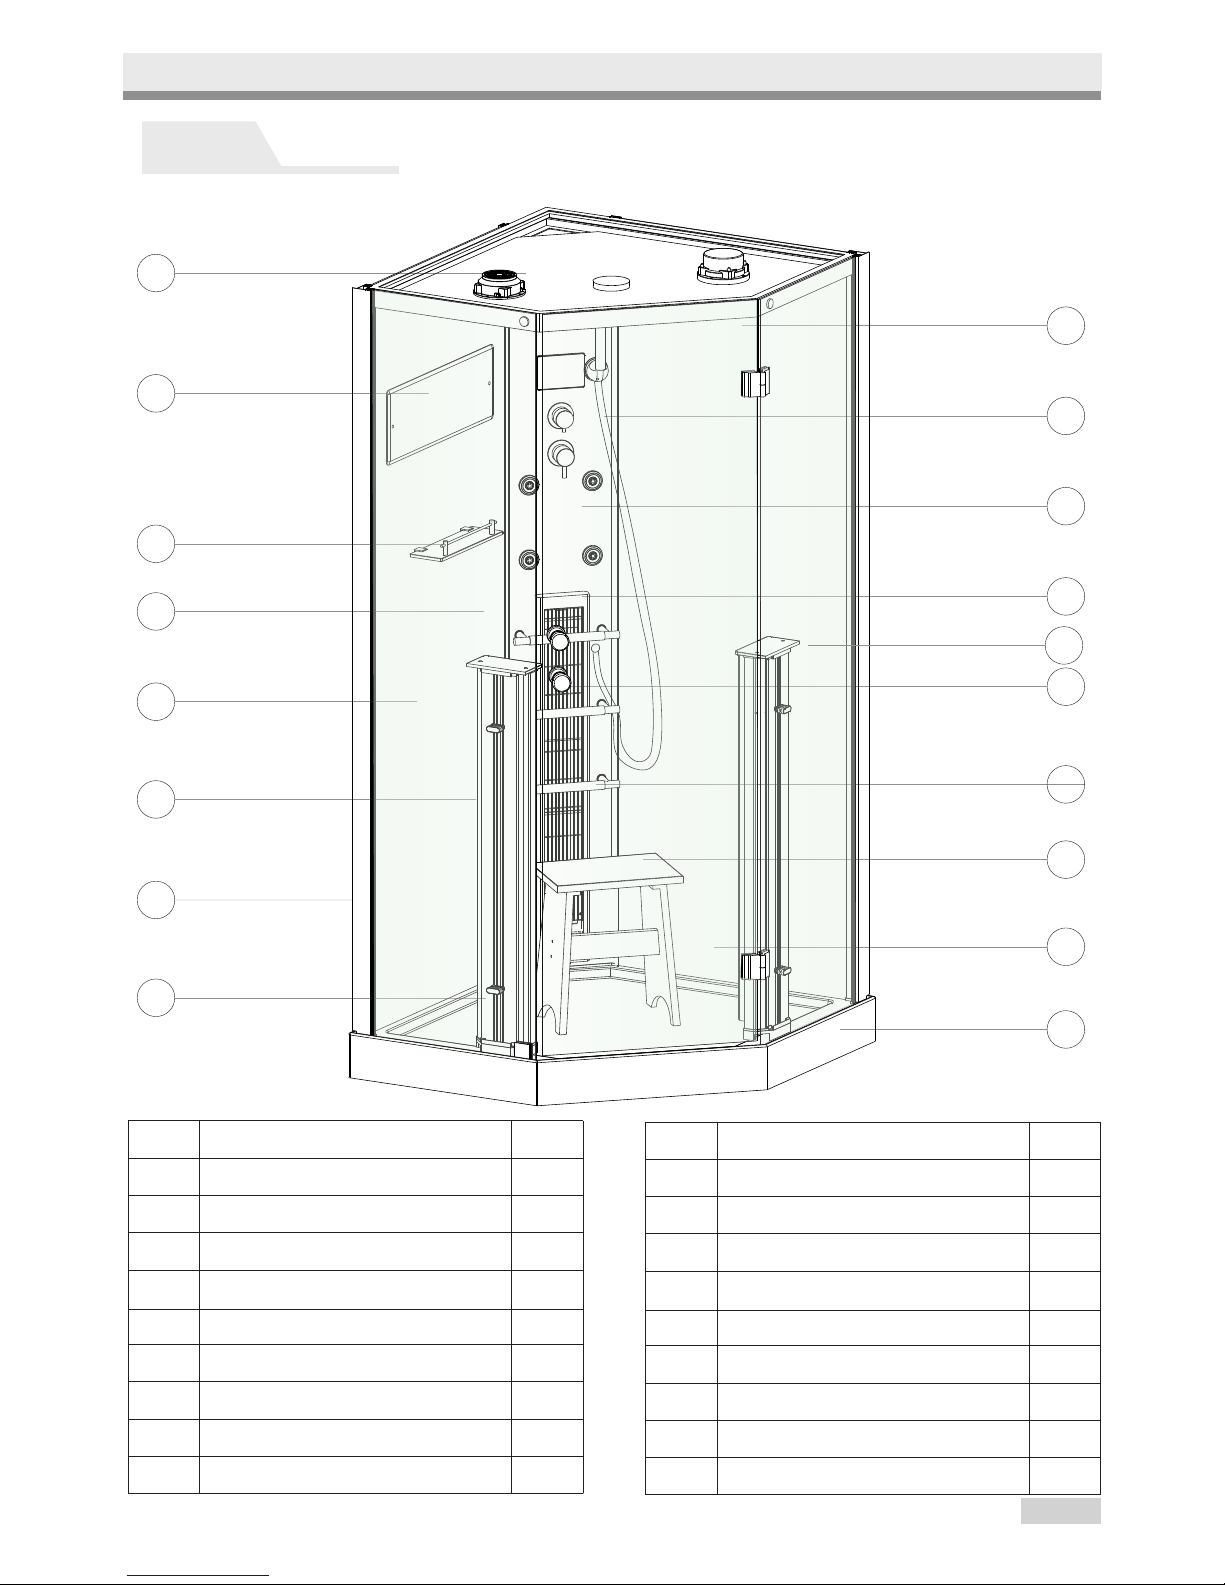
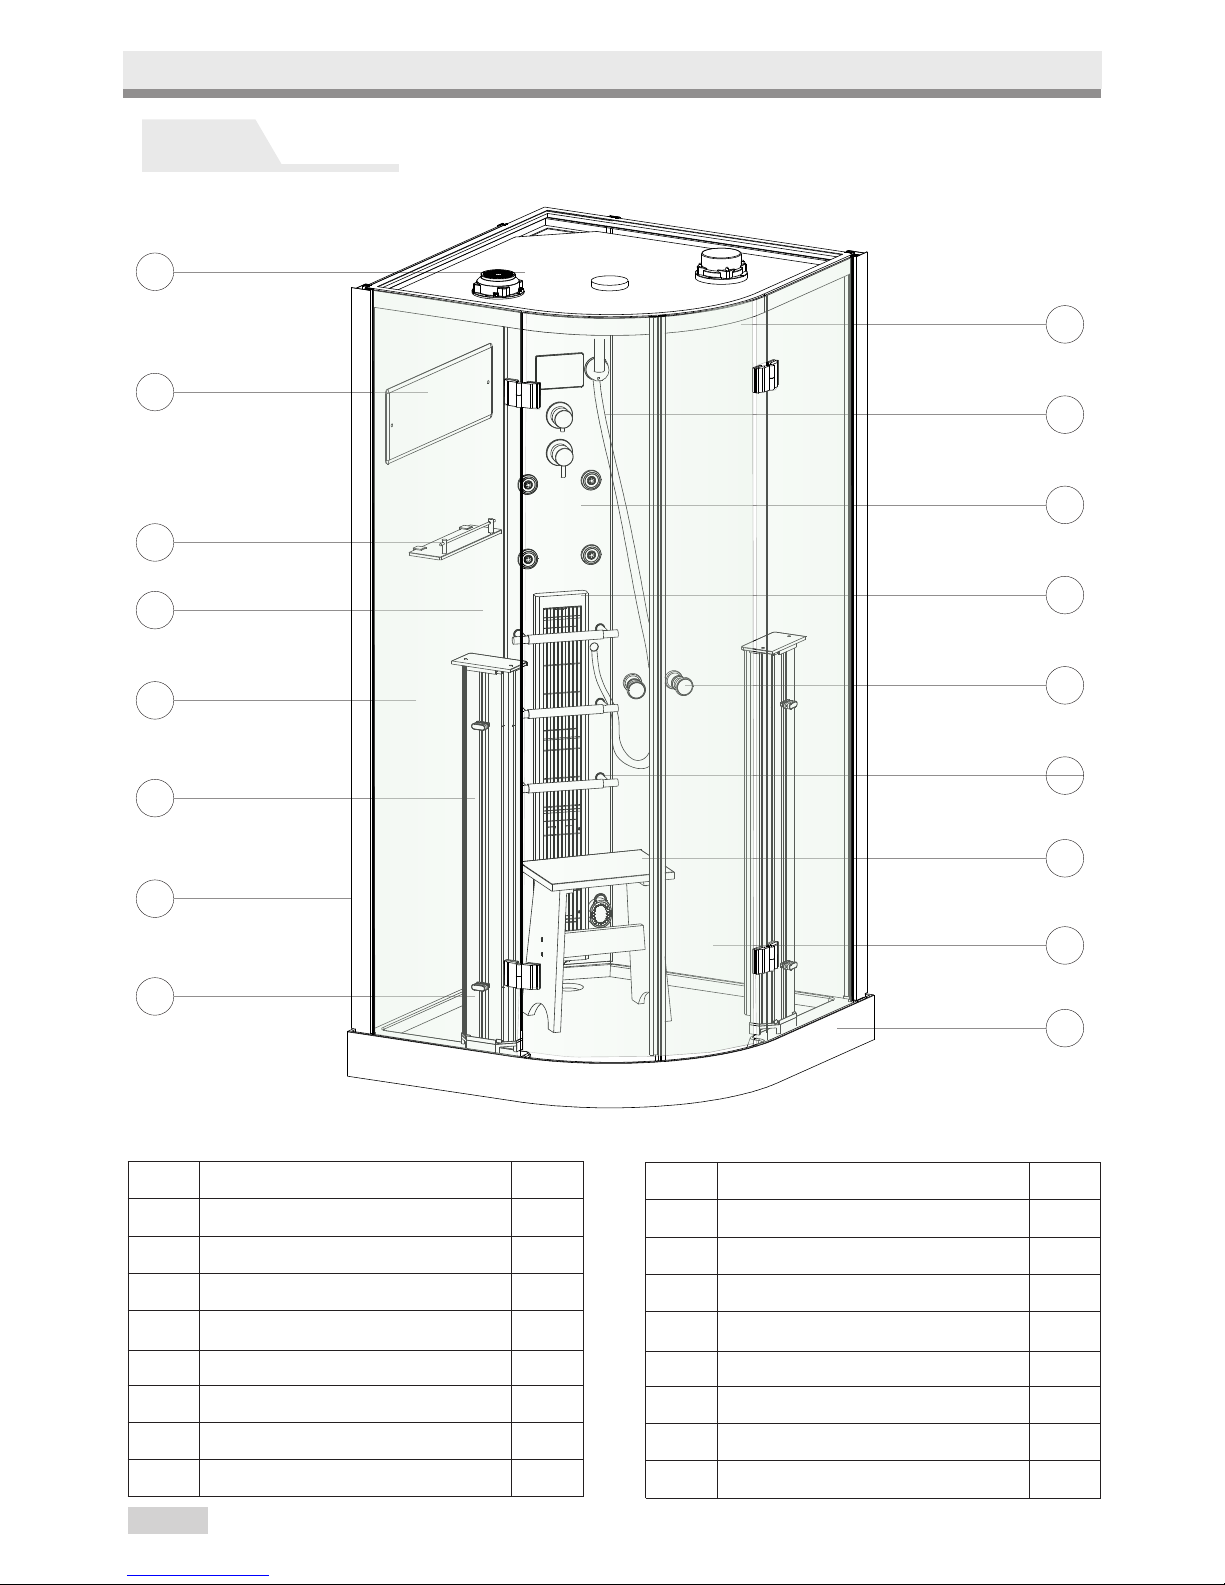
Area for drain mouth
Inside shadow round part
Power socket
200
200
≈800
≈0012
Hotwater switch
Coldwater switch
Creepage
protect switch
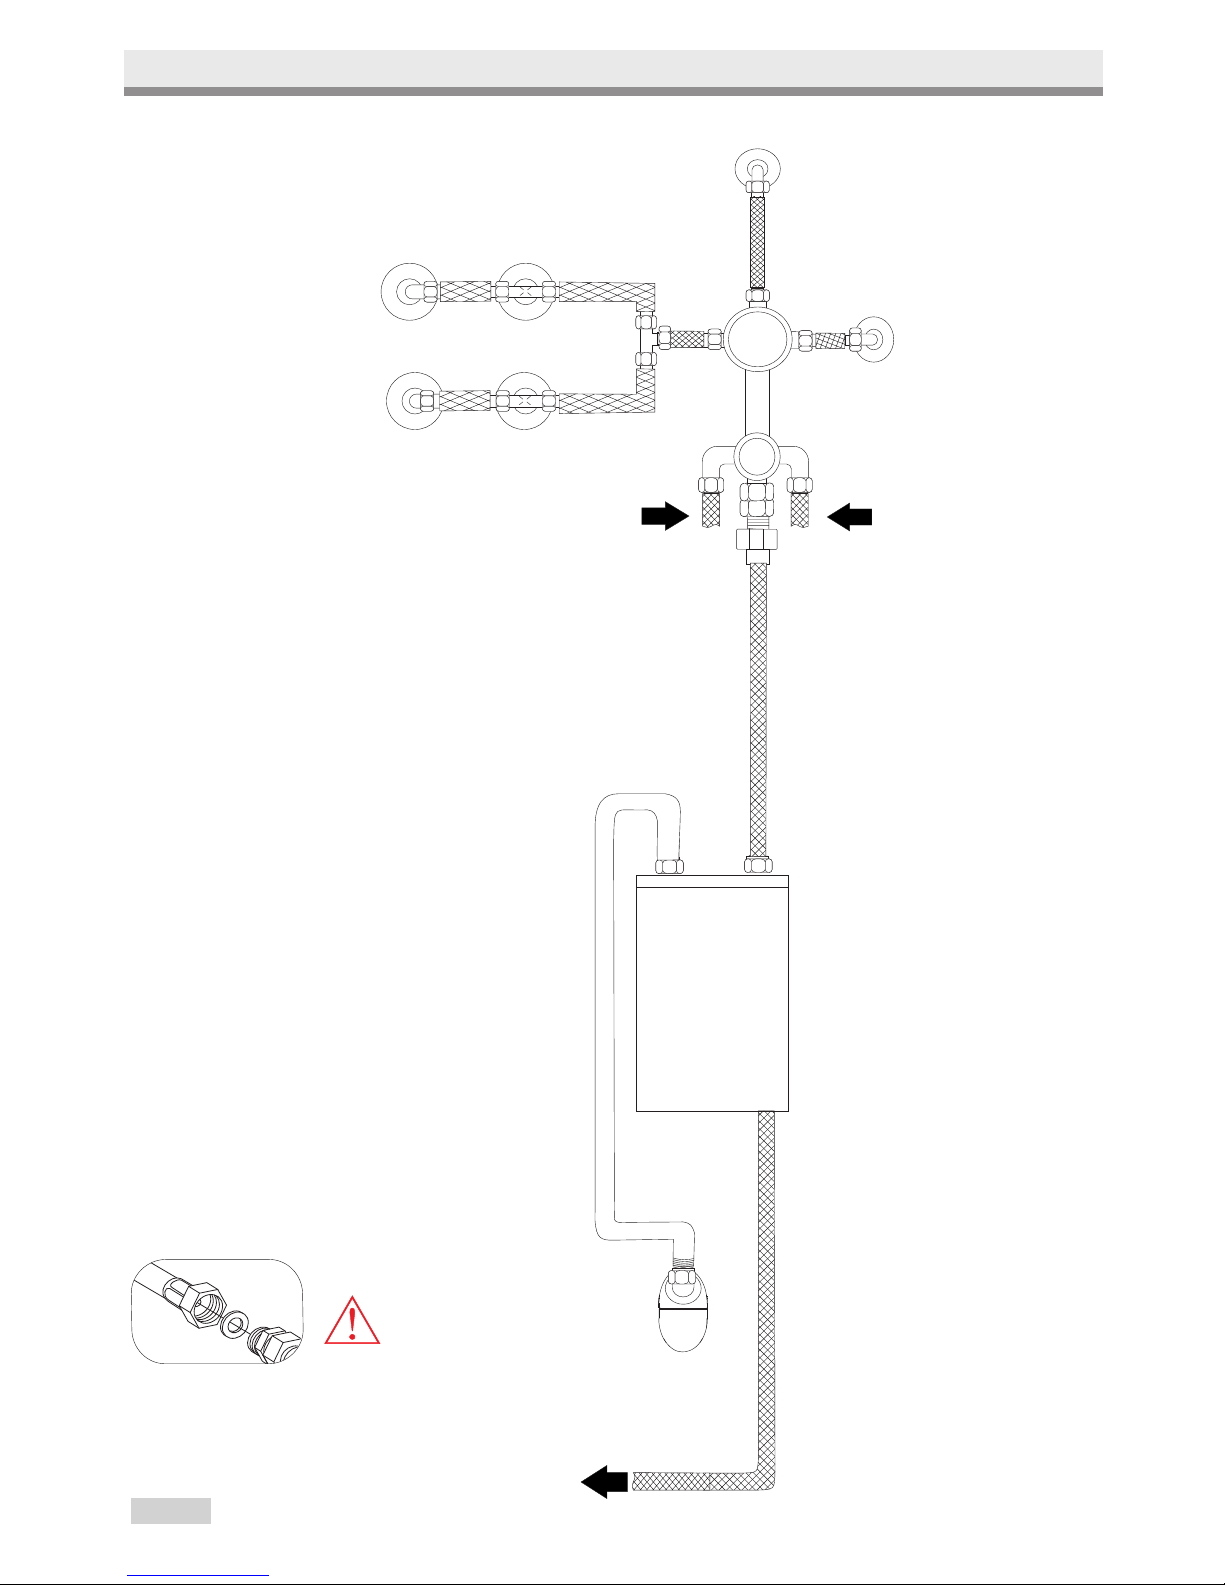
Cabin placement
Hot water:G1/2 galvanize zinc pipe,height 800mm;
Cold water :G1/2 galvanize zinc pipe,height :800mm;
Power:230V/50Hz single phase three line system,above 16A load
capability,1200mm high from earth;
Sinkhole:The diameter of the sinkhole underground should be Φ60 。
Attention:
1.When turn on the steam,please be sure that there`s enough cold water,
otherwise,the steam generator will be damaged;
2.Power and water resource should be controled by divide switch,switch must
be placed in the convenient place;
3.After enjoying your shower,the power and water resource must be turn off。
Water&electricty install drawing
05