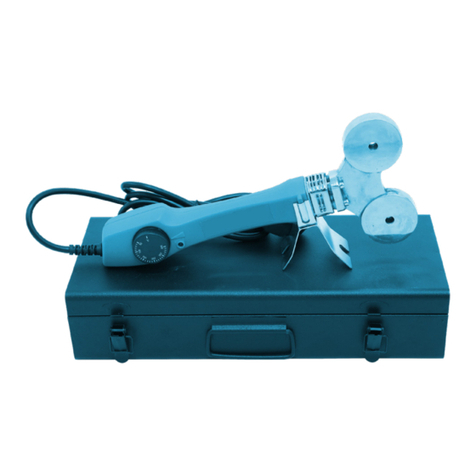
Kraissmann 2500 EMS 3 User manual

ûGEBRAUCHSANWEISUNG
∆INSTRUCTION MANUAL
τ ПОСІБНИК З ЕКСПЛУАТАЦІЇ
2500EMS3
ûELEKTRO-MUFFENSCHWEISSGERÄTE
∆ELECTRIC SOCKET WELDER
τЕЛЕКТРИЧНИЙ АПАРАТ ДЛЯ РОЗТРУБНОГО ЗВАРЮВАННЯ

2
WICHTIGE HINWEISE
Diese Gebrauchsanweisung vermittelt alle für den si-
cheren Betrieb des Gerätes erforderlichen Kenntnisse.
• Stellen Sie sicher, dass diese Gebrauchsanweisung
dem Benutzer übergeben wird.
• Bewahren Sie die Gebrauchsanweisung an einem
leicht zugänglichen Ort auf, so dass der Benutzer je-
derzeit darin Einsicht nehmen kann.
• -
rätes diese Anleitung aufmerksam durch und befol-
gen Sie die darin enthaltenen Anweisungen und Hin-
weise.
• Die Einhaltung der folgenden Sicherheitsbestimmun-
gen muss garatiert werden, um Verletzungen und
Unfälle durch Brand, Stromschlag usw. zu verhindern.
Die Personen, die mit diesem Gerät arbeiten, müssen
unbedingt vorher diese Gebrauchsanweisung gelesen
und verstanden haben.
• Vergewissern Sie sich, dass die Personen, die das
-
chen Voraussetzungen und Fähigkeiten besitzen.
• -
brauchsanweisung beschriebenen Art und Weise ver-
wendet werden.
GEFAHRENHINWEISE
Das Gerät zu dieser Gebrauchsanweisung entspricht
dem aktuellen Stand der Technik und erfüllt alle gültigen
Sicherheitsanforderungen. Trotzdem kann es bei seiner
Verwendung, bedingt durch die Natur des Gerätes, zu
gefährliche Situationen kommen. Zur Vermeidung von
Unfällen müssen alle in dieser Gebrauchsanweisung be-
schriebenen Sicherheitshinweise beachtet werden.
Diese sind in der gesamten Anweisung mit folgenden
Symbolen gekennzeichnet.
⚠ GEFAHR
Weist auf Gefahrensituationen hin, in denen für den Be-
diener Lebens- oder Verletzungsgefahr besteht.
VORSICHT
Weist auf Gefahrensituationen hin, in denen die Gefahr
von Personen- oder Sachschäden besteht.
HINWEIS
Enthält hilfreiche Angaben für eine optimale Ar-
beitsdurchführung sowie zusätzliche Informationen.
• Stellen Sie sicher, dass diese für die Sicherheit we-
sentlichen Gefahrenhinweise strikt beachtet werden.
DEUTSCH ELEKTRO-MUFFENSCHWEISSGERÄTE 2500EMS3
• Fordern Sie unverzüglich eine neue Gebrauchsan-
weisung von unserem Vertreter an, falls diese verlo-
ren geht oder beschädigt wird.
technische Daten können zur Qualitätsverbesserung
ohne Vorankündigung geändert werden. In diesem
-
dukt abweichen.
SICHERHEITSBESTIMMUNGEN
1) Stellen Sie die Verwendung der korrekten Span-
nung sicher. Verwenden Sie die auf dem Typenschild
der Haupteinheit bzw. in der Gebrauchsanweisung an-
gegebene Spannung. Weicht die Spannung von dieser
Vorgabe ab, kann es zu Überhitzung, Rauchbildung
oder Brand kommen.
2) Das Gerät darf nur an das Stromnetz angeschlos-
wird. Die Bodenständer sind für den Umgang mit dem
Gerät in kaltem Zustand vorgesehen, bis das Gerät
-
netz angeschlossen wird.
3) Berühren sie die Stecker nicht mit nassen Händen.
4) Berücksichtigen Sie die Bedingungen am Aufstel-
lungsort. Verwenden Sie das Gerät nicht im Regen, an
feuchten oder nassen Orten oder an Orten, an
denen leicht Wasser in das Gerät eindringen kann.
Verwenden Sie das Gerät nicht in der Nähe von ent-
zündlichen Flüssigkeiten oder Gasen, wie Benzin oder
-
gefahr.
5) Verwenden Sie nur die angegebenen Zubehörteile
und Anbauteile.
Verwenden Sie nie andere Zubehörteile oder An-
bauteile als die in der Gebrauchsanweisung oder in
unserem Katalog angegebenen. Andernfalls besteht
Unfall- und Verletzungsgefahr.
6) Schalten Sie das Gerät sofort aus, wenn Sie Un-
regelmässigkeiten, wie ungewöhnliche Gerüche, Vi-
brationen oder Geräusche bemerken. Versuchen Sie
nicht, das Gerät zu zerlegen und setzen Sie sich beim
dem örtlichen Fachhändler in Verbindung.
7) Halten Sie den Arbeitsplatz sauber. Halten Sie Ar-
beitstisch und Arbeitsplatz in einwandfreiem Zustand
und sorgen Sie für eine gute Beleuchtung. Unordentli-

3
fällt, besteht Verletzungsgefahr.
15) Bewahren Sie das Gerät bei Nichtbenutzung
sorgfältig auf. Lagern Sie es unter Verschluss an ei-
-
ben.
16) Fordern Sie zur Demontage und Reparatur des
Gerätes die Hilfe einer von KRAISSMANN autorisierten
-
-
dert werden. Alle anfallenden Reparaturen müssen
ausnahmslos über Ihren Vertreter oder unseren lo-
kalen Fachhändler abgewickelt werden. Reparaturen,
Personal vorgenommen werden, können die Funkti-
onstüchtigkeit des
Gerätes beeinträchtigen und Unfälle oder Verlet-
zungen verursachen.
TECHNISCHE DATEN
Spannung: 230 V AC
Leistungsaufnahme Stromstärke:
Nennleistung = 2500 W
Frequenz: 50/60 Hz
Arbeitsbereich:
75-110 mm
Temperaturbereich:
INBETRIEBNAHME
Das Gerät wird komplett fertiggestellt und bereit zum
Gebrauch ausgeliefert. Es sind keine Einstellungen
und Justierungen mehr erforderlich.
BEDIENUNGSANLEITUNG
Der Gerätebetrieb besteht aus drei Phasen:
• Vorbereiten des Rohres
•
•
A) VORBEREITEN DES ROHRES
8) Verhindern Sie, dass Unbefugte Zugang zum
Gerät haben. Sorgen Sie dafür, dass nur autorisierte
Personen das Gerät bedienen dürfen und Zugang zum
Stromversorgungskabel haben. Verbieten Sie den Zu-
gang zum Arbeitsbereich für nicht autorisierte Perso-
nen, insbesondere Kinder.
9) Das Gerät darf nicht überlastet werden. Verwen-
-
gen, für die es ausgelegt ist.
10) Tragen Sie anliegende Kleidung. Arbeiten Sie
nicht mit Krawatten,
-
dungsstücken, Ketten und anderen Schmuckstücken
usw.
11) Arbeiten Sie nie in einer gezwungenen Stellung.
Stellen Sie sich zur Bewahrung des Gleichgewichts
sicher auf beide Beine, um Stürze und Verletzungen
zu vermeiden.
Arbeiten Sie immer mit besonderer Sorgfalt. Unauf-
merksamkeiten können zu Unfällen und Verletzungen
führen. Arbeiten Sie nicht mit dem Gerät, wenn Sie sich
schlecht konzentrieren können, wie beispielsweise
Alkohol oder Medikamenten.
13) Seien Sie vorsichtig beim Umgang mit dem
Stromversorgungskabel.
Halten Sie das Gerät nicht am Kabel hängend fest
und ziehen Sie zum Ausstecken nicht am Kabel. Las-
sen Sie das Kabel nicht in der Nähe von
-
ben Messern und Gegenständen mit scharfen Kanten
liegen. Achten Sie darauf, nicht auf das Kabel zu tre-
ten, nicht daran zu ziehen und es nicht zu verdrehen,
um Beschädigungen zu vermeiden. Andernfalls kann
es zu Stromschlägen oder Kurzschlüssen mit Brand-
gefahr kommen.
14) Überprüfen Sie regelmässig das Stromversor-
gungskabel und den Stecker. Wenn Sie eine Beschädi-
gung feststellen, fordern Sie bei Ihrem Vertreter oder
dem örtlichen Fachhändler die Reparatur an. Wenn
ein Verlängerungskabel benutzt wird, überprüfen Sie
dieses regelmässig und tauschen Sie es bei Beschä-
digung aus. Bei Verwendung von Verlängerungen im
Aussenbereich, müssen diese für den Einsatz im Frei-
en ausgelegt sein, um Stromschläge, Kurzschlüsse
oder Brände zu verhindern. Achten Sie darauf, die Ein-
spannteile für eine sichere Bedienung trocken, sauber,
fett- und ölfrei zu halten. Wenn das Gerät hinunter-

4
HINWEIS
-
-
klemmstück zur sicheren Befestigung und Stabilisie-
rung des Gerätes am Arbeitstisch geliefert.
• Führen Sie den oberen Teil des Klemmstücks in die
Aussparung auf der Geräteunterseite ein.
Tischklemmstück einsetzen
• Schieben Sie die gesamte Einheit auf die Kante der
Werkbank und drehen Sie den beweglichen Teil des
Klemmstücks fest bis die Einheit sicher befestigt
ist.
Befestigung ohne Tischklemmstück
• Klappen Sie die Bodenständer aus und stellen Sie
Sie dabei darauf, dass das Gerät stabil steht
VORSICHT
Das Gerät darf nur an das Stromnetz angeschlos-
Tischklemmstück eingesetzt wurde. Die Bodenstän-
der können verwendet werden, um das Gerät nach
kalten Zustand Buchsen und Dornen zu befestigen.
• Halten Sie die Heizbuchse und den Heizdorn an
beide Seiten der Heizplatte und schrauben Sie sie mit
Hilfe des beiliegenden Inbusschlüssels fest.
VORSICHT
Vergewissern Sie sich vor der Befestigung von Buch-
sen und Dornen an der Heizplatte, dass diese kalt und
nicht an das Stromnetz angeschlossen ist.
• Überprüfen Sie, ob sich beim Einschalten des Gerä-
tes die Betriebsanzeige-Kontrollleuchte (rot) ein-
schaltet.
• Das elektronisch regelbare Modell besitzt eine
Temperaturskala 200 C bis 300 C 260 C - 280 C
Betriebsposition.
5) Vergewisserg Sie sich, dass das
Schweißgerät die optimale Arbeitstem-
pertatur erreicht.
-
peratur erreicht hat, beginnt die Temperatur-Kontroll-
leuchte (grün) zu blinken. Bis das Gerät die optimale
Temperatur erreicht hat dauert es ca. 5 bis 7 min.
DEUTSCH ELEKTRO-MUFFENSCHWEISSGERÄTE 2500EMS3

5
VORSICHT
Die in Abb. 14 hervorgehobenen Geräteteile können
Temperaturen zwischen 100 und 300 ?C erreichen.
Hantieren Sie nicht an der Heizplatte, solange das
Heizbuchsen oder -dorne von der Heizplatte abge-
nommen oder an ihr befestigt werden. Verwenden Sie
die Heizelemente nur unter absolut sicheren Einsatz-
bedingungen.
HINWEIS
-
heitsthermostaten ausgestatt, die das Gerät aus-
schalten, wenn eine Temperatur von 330 ºC erreicht
wird und wieder einschalten, sobald die Temperatur
auf 265 ºC gesunken ist.
C) SCHWEISSVORGANG
Dieser besteht aus vier Phasen: Erhitzen, Zusam-
menbau (Umstellen), Schmelzen und Abkühlen.
1) Erhitzen
• Stecken Sie mit leichtem Druck zugleich das Rohr
auf die Heizbuchse und das Formstück auf den
Heizdorn.
• Lassen Sie Rohr und Formstück während der in der
den Heizelementen.
Schieben Sie die beiden Teile sofort (ohne Verdre-
hen) bis zur Einstecktiefenmarkierung ineinander. Die-
ser Arbeitsschritt muss so schnell und sorgfältig wie
möglich erfolgen und darf nicht länger dauern als die
in Tabelle 2 angegebene MAX. UMSTELLZEIT.

6
3) Schmelsen
• Halten Sie die zusammengeschobene Verbin-
SCHMELZZEIT angegeben.
HINWEIS
während dieser Zeit keiner Belastung ausgesetztwird.
4) Abkuhlen
Lassen Sie das Rohr für die in Tabelle 2 angegebene
Zeit (ABKÜHLZEIT) abkühlen.
Nach Ablauf dieser Zeit können Rohr und Formstück
bereits entsprechend den Angaben des Rohrher-
stellers verwendet werden.
DEUTSCH ELEKTRO-MUFFENSCHWEISSGERÄTE 2500EMS3
Tabelle 2 Zeitangaben für den Schweißprozzes von PP-Rohren
Rohr
Anwärmzeit
(s)
Max. Wechselzeit
(s)
Schmelzzeit
(s)
Abkuhlzeit
(min)
Durchmesser
(mm)
Fase
(mm)
20 2.5 5 4 5 2
25 2.7 7 4 7 2
32 3.0 8 6 8 4
40 3.7 12 6 12 4
50 4.6 18 6 18 4
63 3.6 24 8 24 6

7
FEHLERBEHEBUNG
-
-
schluss (230 V / 110 V) angeschlossen?
Stellung?
Wenn diese Punkte mit Ja beantwortet werden
können und das Gerät trotzdem nicht korrekt funkti-
oniert, verständigen Sie Ihren Vertreter oder örtlichen
Fachhändler.
AUFBEWAHRUNG
Wenn Sie das Gerät nicht mehr verwenden, sollten
Sie es vor der Aufbewahrung ausschalten und abküh-
len lassen.
Bewahren Sie es sorgfältig und an einem trockenen
Verschluss auf.
VORSICHT
Tragekasten legen, müssen Sie unbedingt auf die rich-
tige Lage achten.
Wird es falsch eingelegt, kann das Gerät selbst so-
wie der Kasten beschädigt werden.
WARTUNG UND PFLEGE
Überprüfen Sie die Heizbuchsen und -dorne, vor der
Verwendung.
Wenn an diesen noch Materialreste von früheren
entfernt werden.
VORSICHT
Verwenden Sie keine metallischen Gegenstände
oder Lösungsmittel zum Entfernen der Rückstände.
Andernfalls kann die Beschichtung der Heizbuchsen
und -dorne beschädigt werden.
HINWEIS
Nach Ablauf ihrer nützlichen
Lebensdauer werfen Sie die Maschine
bitte nicht in den Hausmüll, sondern
überreichen Sie sie zum Recycling ei-
ner zugelassenen Entsorgungsstelle.

8
phs and illustrations, etc., in this manual may not
correspond to the product supplied.
SAFETY ADVICE
⚠DANGER
1). Ensure that the voltage supply is correct. The cor-
rect voltage is indicated on the name plate of the
main unit or in the instruction manual. If the wrong
voltage is used, this may cause overheating, smo-
2). The unit should only be connected to the mains
supply and used for welding once the unit is at-
tached to the workbench using the G-Clamp. The
legs of the unit should only be used to handle the
the G-clamp and connected to the mains supply.
3). Never touch the mains plug with wet hands.
4). Ensure that the unit is installed in a suitable locati-
on. Do not use this equipment in the rain, in damp
or wet locations, or in locations where water could
easily enter the unit. Never use it in the vicinity of
-
5). -
ments. Never use accessories or attachments
-
nual or in our catalogue, otherwise, accidents or
injuries could be produced.
6). If any anomaly is detected, such as strange
-
diately. Do not attempt to disassemble the unit. In
case of problems, contact our local representative
or distributor.
7). Keep the workplace clean and tidy. Ensure that
the workbench and the work area are kept in per-
fect condition and well lit. Untidy work areas or
workbenches cause accidents.
8). Do not allow unauthorised personnel to have ac-
cess to this equipment. Do not allow unauthorised
persons to handle the unit or to have access to the
power lead. Do not allow unauthorised persons
into the workplace, especially children.
9). Do not overload the equipment. Use it only accor-
ding to its design conditions.
10). Use proper clothing. Do not work wearing a tie,
IMPORTANT
This manual contains information required for
safe use of this equipment.
• Ensure that the user receives a copy of this manual.
• Keep this manual in a location where the operator
can easily consult it whenever necessary.
• Before using the socket welding device, read this
manual carefully and follow the instructions and
advice it contains.
• Take care to comply with the Safety Measures de-
scribed in this manual, to avoid accidents such as
-
al that the personnel that use this equipment read
and understand this manual.
• Ensure that the persons that use this equipment
have the necessary attitudes and aptitudes.
• Do not use the socket welding device in any way
SAFETY PRECAUTIONS
The equipment that you are about to use has
been designed according to the latest techniques
and complies with applicable safety regulations.
Nevertheless, given its nature, its use is poten-
tially dangerous. To avoid accidents, observe the
safety instructions given in this manual.
These safety instructions are indicated in this ma-
nual by the following icons.
⚠ DANGER
Indicates situations that can lead to death or se-
vere injury for the user.
PRECAUTION
Indicates risk situations that can lead to injuries
or damage to property.
NOTE
Indicates advice that can help to produce the best
results, and other information.
• Please pay attention to these warnings, since they
are important for safe use of the equipment.
• If this instruction manual is lost or damaged, re-
quest a replacement immediately from our repre-
sentative.
• -
ange without prior notice, in order to improve the
quality or operation of the equipment or to comply
with safety regulations. In this case, the photogra-
ENGLISH ELECTRIC SOCKET WELDER 2500EMS3

9
TECHNICAL CHARACTERISTICS
Voltage: 230 V AC
Power/ Current: Nominal power = 2500 W
Frequency: 50/60 Hz
Working range: 75-110 mm
Temperature range: min. 0ooC
PREPARATION FOR USE
This equipment leaves the factory completely
preparation for use.
OPERATING INSTRUCTIONS
Welding with this unit consists of three phases:
• preparing the tube
• preparing the socket welding device
• the welding process
A) PREPARING THE TUBE
Cut the tube straight across using a suitable tool
(pipe cutter or cropper)
• Clean the surface
to be welded and the
adapters with cellu-
lose tissue dampene
Mark the length of
• Mark the length
of the weld on the
tube
necklaces, etc.
11). Do not work in uncomfortable positions. Keep
injuries.
12). Take great care when using this equipment. Al-
ways pay attention while working. Carelessness
can cause accidents and injuries. Never use this
equipment when you cannot concentrate properly,
13). Do not mishandle the power lead. Do not carry
the unit by the power lead, nor unplug it by pulling
on the lead. Do not leave the power lead close to
hot objects, grease or oil, or near blades or other
objects with sharp edges. Take care not to step on
the cable, and avoid pulling or straining it, to avoid
damage. Failure to observe this precaution could
lead to electric shock or short circuits that could
14). Inspect the electric power lead and the plug re-
gularly. If they are damaged, ask our local repre-
lead is used, this should be inspected periodically
are used in the open, they should be suitable for
outdoor use to avoid the risks of electric shock,
etc., dry, clean and grease- and oil-free, to ensure
safe handling. If the unit is dropped, this could lead
to injury.
15). When you are not using the equipment, store it
carefully. Keep it locked in a dry place out of the
reach of children.
16). Always ask for assistance from an authorised
KRAISSMANN agent if the equipment must be
disassembled for repair. Our products comply
with applicable safety regulations. Do not mo-
dify them. All repairs should be carried out by
our local representative or distributor. Repairs
-
-
ment and could cause accidents or injuries.
DESCRIPTION OF THE EQUIPMENT
The SOCKET WELDER P63-S6 has been designed
to weld tubes and accessories made of PE, PP, PB
and PVDF, both in the workshop and on worksites.

10
3) Connect the unit to the power source
(230V/110V)
Check that the red power LED lights when the unit
is plugged in.
4) Select the working temperature with the
regulator knob turn th eregulator knob to the
working position.
This model have a temperature scale marked from
200oC to 300oC
5) Wait until the socket welding device reaches
its working temperature.
• When the socket welding device has reached its
optimum working temperature, the green tempe-
raturecontrol LED will start to blink.
The time required to reach working temperature is
PRECAUTION
The parts of the equipment indicated can reach tem-
peratures between 100 and 300 °C. Never handle the
heating plate while the unit is hot.
Never attach or remove adapters while the heating
plate is hot. Only handle items that could be hot when
it is safe to do so.
NOTE
The socket welder is equipped with two safety ther-
mostats which disconnect the unit if the temperature
reaches 330 ºC and reconnects it when the tempera-
ture has fallen to 265 ºC.
C) THE WELDING PROCESS
This consists of four steps: heating, assembly, set-
ting and cooling.
1) Heating
• Using light pressure, insert the tube and the acces-
sory simultaneously onto the corresponding adap-
ters (tube in the female adapter, accessory on the
male adapter).
The surfaces to be welded must be cleaned immedi-
ately before welding.
Protect the surfaces from weather conditions.
B) PREPARING THE SOCKET WELDING
DEVICE
1) Mount the socket welding device
Mounting using the G-clamp
The socket welding device is supplied with a
-
bench.
• Introduce the top section of the G-clamp into the
slot in the bottom of the unit.
• Mount the unit on the edge of the workbench and
tighten the screw of the G-clamp until the unit is
Mounting without G-clamp
• Spread out the legs and rest the socket welding
PRECAUTION
The unit must not be connected to the mains supply
and used for welding whilst the G-clamp has not been
mounted. The legs can be used to position the unit
once it has been removed from the case, to mount the
adapters when cold, etc.
2) Mount the correct adapters for the diameter
of the tubeto be welded onto the heating plate
• Locate the male and female adapter halves on
each side of the heating plate and bolt them to it
using the allen key supplied with the equipment
PRECAUTION
In order to mount the adapters onto the heating pla-
te, make sure that the plate is cold and that the unit
is unplugged.
ENGLISH ELECTRIC SOCKET WELDER 2500EMS3

11
• Maintain the tube and the accessory on the adap-
ters during the time indicated under HEATING TIME
in table 2.
2) Assembly
• Remove the tube and the accessory from
the adapters.
• Without rotating them, introduce the tube into the
accessory until the weld-length mark is reached.
This operation should be carried out as quickly and
carefully as possible, within the time (MAX AS-
SEMBLY TIME) shown in Table 2).
Hold the two parts together during the time indica-
ted under SETTING TIME in Table 2 (page 23).
NOTE
Ensure that the region of the weld is not subjected
to any force during this time.
4) Cooling
• Allow the tube to cool for the time recommended
in Table 2 (COOLING TIME).
and accessories can be used as recommended by
the tube manufacturer.

12
ENGLISH ELECTRIC SOCKET WELDER 2500EMS3
Table 2 Process time for welding PP tubing
Tube
Heating time,
(sec)
Max. Assembly
time, (sec)
Setting time
(sec)
Cooling time
(min)
Diameter,
(mm)
Wall thickness,
(mm)
20 2.5 5 4 5 2
25 2.7 7 4 7 2
32 3.0 8 6 8 4
40 3.7 12 6 12 4
50 4.6 18 6 18 4
63 3.6 24 8 24 6

13
TROUBLESHOOTING
If the socket welding device does not operate cor-
rectly, check the following points:
• Check that the unit is connected to a functioning
power source of the correct voltage (230 V / 110 V).
• Check that the temperature regulator is in the cor-
rect position.
STORAGE
When the equipment is no longer going to be used,
in order to store it. Store it carefully in a locked, dry
place out of reach of children.
PRECAUTION
If the socket welding device is packed into its stora-
ge case while it is still hot, take care to place it in the
correct position.
Incorrect storage could damage the equipment and
the storage case.
CARE AND MAINTENANCE
Inspect the adapters before using them.
Cacefuly remove any material remaining from previ-
ous welding operation.
PRECAUTION
Do not use metallic items or solvents to remove
residues, as these could damage the surface of the
adapter.
NOTE
Check the condition of the adapters from time to
time, to ensure correct welding.
When its useful life is over, do not
dipose or the machine into the do-
mestic waste, please send it to au-
horised places for recycling.

14
ЗАСТОСУВАННЯ
-
-
-
-
-
-
ПОРЯДОК РОБОТИ
•
•
•
ПІДГОТОВКА ТРУБИ
•
• -
ПІДГОТОВКА АПАРАТУ ДО РОБОТИ
•
• -
-
•
•
ВСТАНОВЛЕННЯ ТЕМПЕРАТУРИ
НАГРІВАЛЬНОГО ЕЛЕМЕНТУ
ПВД 250-270 оС
ПНД 220-250 оС
ПП або ППРС 240-270 оС
•
-
•
-
УКРАЇНСЬКА ЕЛЕКТРИЧНИЙ АПАРАТ ДЛЯ РОЗТРУБНОГО ЗВАРЮВАННЯ 2500 EMS3

15
УВАГА! Для підключення апарату необ-
хідна наявність розетки із заземленням
на 220В, обладнаної запобіжним вими-
качем не менш як на 6А.
-
-
-
ЗВАРЮВАННЯ
-
-
1). -
-
-
час нагрівання).
2). -
-
час перестанов-
ки).
3). -
-
час сплав-
лення).
4). -
час охо-
лодження
-
-
.
-
•
•
• -
-
-
•
-
СПЛАВЛЕННЯ
ОХОЛОДЖЕННЯ

16
ЗАКІНЧЕННЯ РОБОТИ
-
-
УКРАЇНСЬКА ЕЛЕКТРИЧНИЙ АПАРАТ ДЛЯ РОЗТРУБНОГО ЗВАРЮВАННЯ 2500 EMS3

17
Таблиця 1 Рекомендації для розтрубного зварювання труб з ППРС або ПП-3
Діаметр труби,
(мм)
Тривалість
нагрівання труби
та фітінгу, (с)
Тривалість
перестановки, не
більше, (с)
Тривалість
сплавлення,
(с)
Час
охолодження,
(хв)
20 6 4 5 2
25 7 4 7 2
32 8 6 8 4
40 12 6 12 4
50 18 6 18 4
63 24 8 24 6
Таблиця 2 Рекомендації для розтрубного зварювання труб з ПНТ
Товщина стінок
труби, (мм)
Тривалість
нагрівання, (с)
Тривалість
перестановки, не
більше, (с)
Час
охолодження,
(хв)
2.5 5 4 5
2.7 7 4 7
3.0 8 6 8
3.7 12 6 12
4.6 18 6 18
3.6 24 8 24

18

19

2500 EMS3
ELECTRIC SOCKET WELDER
KRAISSMANN STROMERZEUGUNG MASCHINEN, GMBH,
NORDRHEIN-WESTFALEN, DÜSSELDORF
DEUTSCHLAND
Table of contents
Languages:
Other Kraissmann Welding System manuals