6
EN
pack in air temperatures below 0
°C
, or above 40
°C
.
This is important as it can prevent serious damage to
the battery pack.
3. Never freeze your charger or immerse charger in water
or any other liquid.
4. When the battery pack fails to produce sufcient
power on jobs that were previously done easily,
please recharge you battery, do not continue to use
under this condition. You may charge a partially used
pack whenever you desire with no adverse affect on
the battery pack.
5. When charging it is normal that the charger and
battery pack may become warm to touch.
6. If the battery pack does not charge properly:
a. Check current at power outlet by plugging in another
appliance.
b. Plug and unplug to check whether the charger is ok
c. Check whether the battery has been damaged
d. Move the charger and battery pack to a location
where the surrounding air temperature is
approximately 18
°C
-24
°C
.
e. If the charging problem persists, take the tool, battery
pack and charger to an authorized service center.
f. Under certain conditions, when the charger is plugged
into the power supply, the exposed charging contacts
inside the charger can be shorted by foreign material.
Foreign materials of a conductive nature such as
metallic particles should be kept away from charger
cavities. Always unplug the charger from the power
supply when there is no battery pack in the charger or
before attempting to clean.
PROBLEM SOLUTION
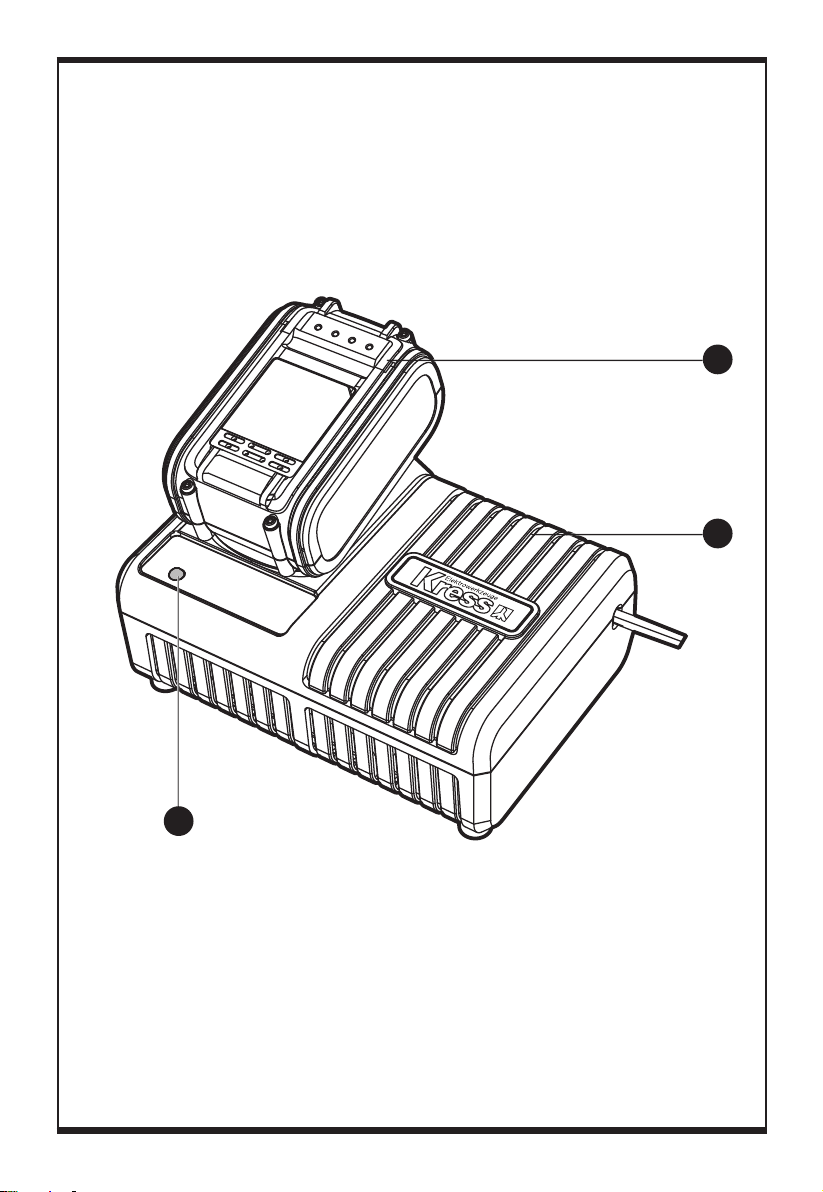
I CANNOT FIT THE BATTERY INTO THE
BATTERY CHARGER. WHY?
a) Check if the charger and the battery pack are
specically designed for working together.
b) The battery can be inserted into the charger only in
one direction. Turn the battery around until it can be
inserted into the slot, the indicator light should be
green and ash when the battery is charging.
REASONS FOR DIFFERENT CHARGING TIMES
The charging time can be affected by many reasons which
are not defects in your product.
a) If the battery pack is only partly discharged it may be
re-charged in less than rated charging time.
b) If the battery pack and ambient temperature are very
cold/ hot, it may take longer to re-charge. Please
nd an appropriate environment with proper air
temperature to start charging.
c) If the battery pack is very hot, remove battery pack
from the charger and allow battery pack to cool rst
to ambient temperature and then recharging can be
started.
MAINTENANCE
Remove the plug from the socket before
carrying out any adjustment, servicing or
maintenance.
Your tool requires no additional lubrication or
maintenance. Never use water or chemical cleaners to
clean your tool. Wipe clean with a dry cloth. Always store
your tool in a dry place.
If the supply cord is damaged, it must be replaced by
the manufacturer, its service agent or similarly qualied
persons in order to avoid a hazard.
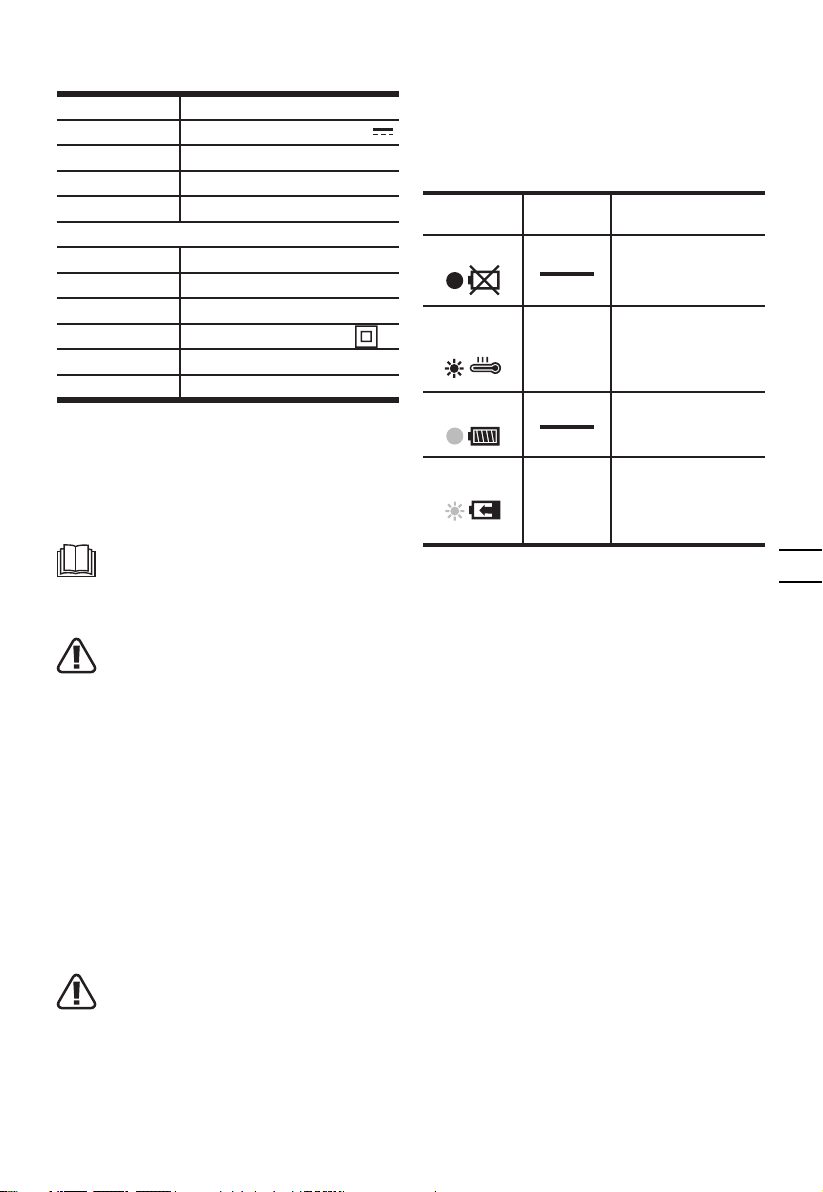
ENVIRONMENTAL
PROTECTION
Waste electrical products must not be disposed
of with household waste. Please recycle where
facilities exist. Check with your local authorities
or retailer for recycling advice.
PLUG REPLACEMENT
( ONLY FOR REWIRABLE
PLUG OF UK & IRELAND )
If you need to replace the tted plug then follow the
instructions below.
IMPORTANT
The wires in the mains lead are colored in accordance
with the following code:
BLUE =NEUTRAL
Brown = Live
As the colors of the wires in the mains lead of this
appliance may not correspond with the colored markings
identifying the terminals in your plug, proceed as follows.
The wire which is colored blue must be connected to
the terminal which is marked with N. The wire which is
colored brown must be connected to the terminal which
is marked with L.
Warning!
Never connect live or neutral wires to the earth
terminal of the plug. Only t an approved 13A BS1363/A
plug and the correct rated fuse.
Note:
If a moulded plug is tted and has to be removed
take great care in disposing of the plug and severed
cable, it must be destroyed to prevent engaging into a
socket.
Connect
Blue to N
(neutral)
Outer sleeve
firmly clamped
Cable grip
Brown L (live)
13 Amp fuse approved
to BS1362