• Also ensure that there is enough ceiling/
wall space to accommodate the speaker
enclosure.
Connecting
To ensure optimum performance, it is
important that your speaker system is
connected properly:
Turn off all electronic equipment and
disconnect from the power point.
• Follow the connection instructions
supplied with your amplier and media
player.
• Install speaker cable in the wall or the
ceiling cavity, or run cable along the wall
surface. Allow approximately 300mm of
excess cable to facilitate the loudspeaker
installation.
• Follow the connection instructions
supplied with your amplier to connect
the speaker cables to amplier. Take
care to assign the same cable colour or
trace to the positive (+) connector on the
amplier as the positive (+) connector on
the speaker.
• Prepare the speaker cables for connecting
to speakers by neatly stripping the cable
ends.
Care should be taken to eliminate loose
strands of wire that may present a short
circuit hazard.
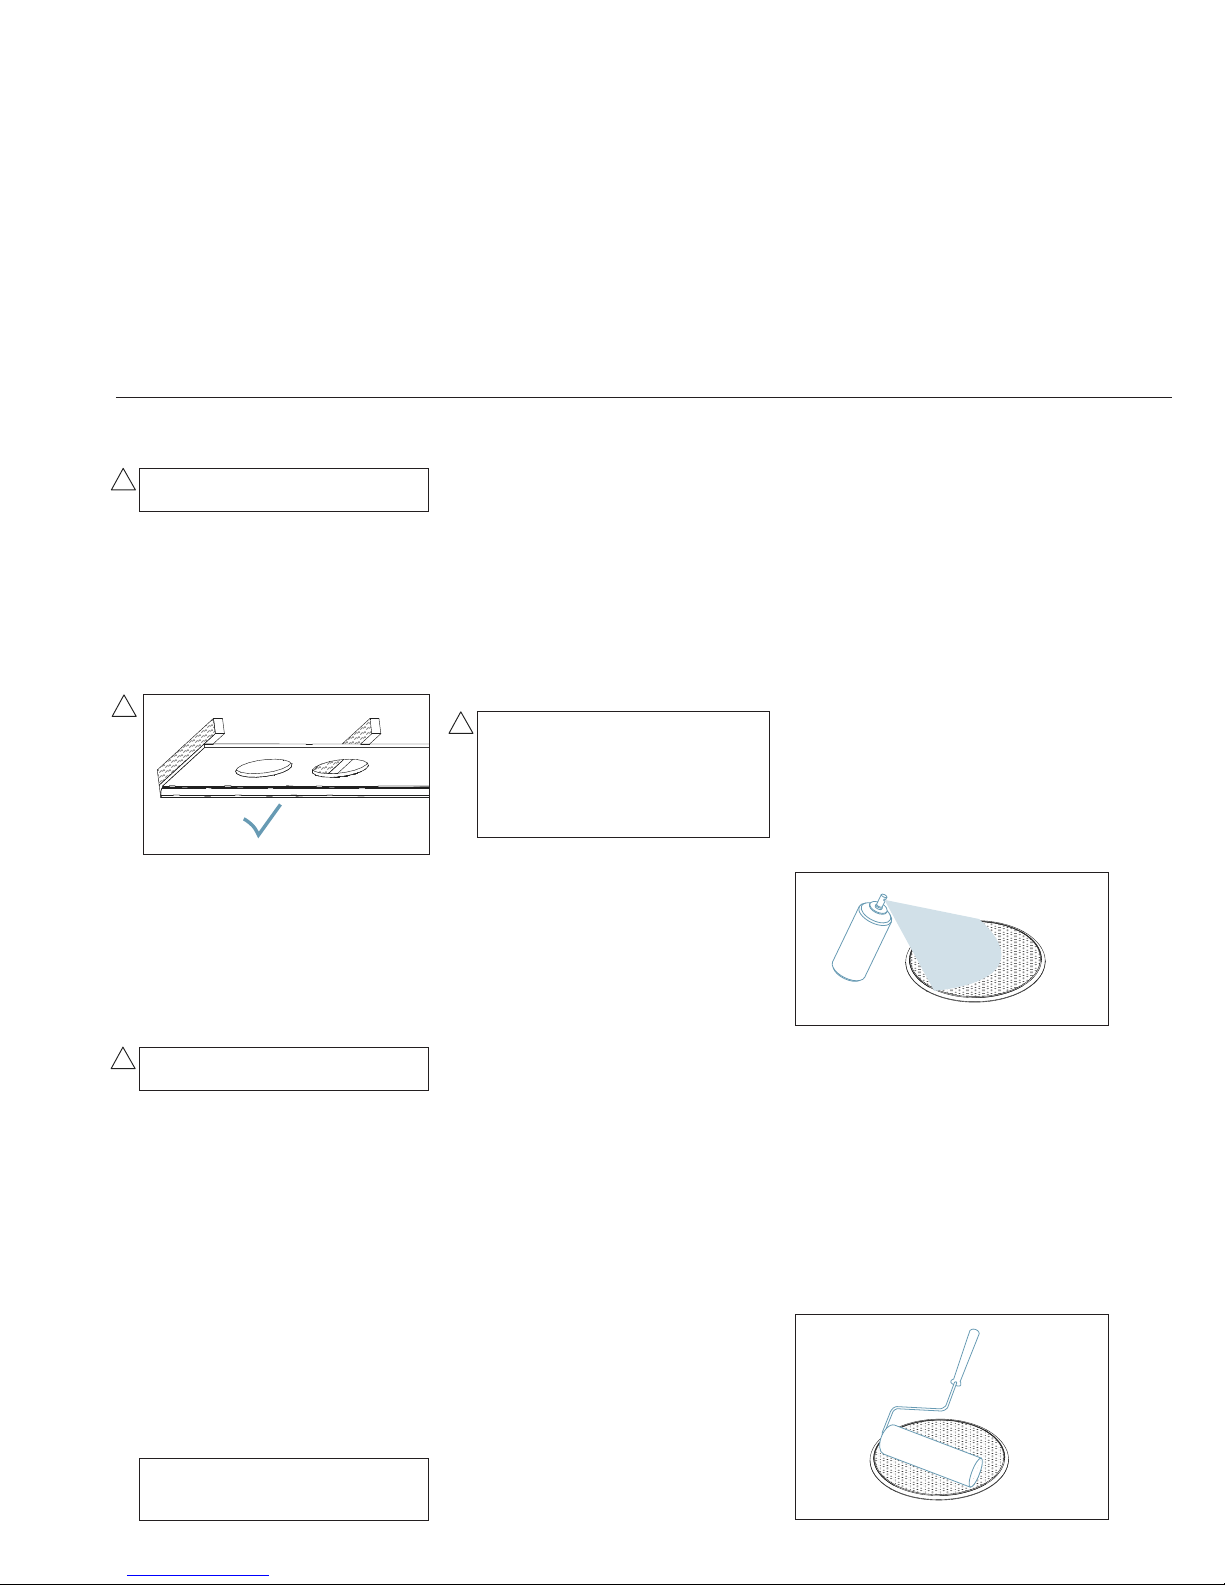
Painting
• If the speaker grille requires painting it is
recommended to use a spray can for ease
of application. Alternatively, it is possible
to apply acrylic or enamel paint using a
small foam roller but this will require more
applications to achieve a good result.
Spray can application
• Use a spray can to apply a light coat of
paint. Rotate the product at 90° intervals
and apply three more light coats to ensure
an even coverage (gure 5).
• Be careful in applying single heavy coats
of paint as there is a higher probability
of blocking the holes in the grille. If the
grill does become blocked by paint,
use a small pin or similar to release the
blockage, while the paint is still wet.
Roller application
• Load a foam roller with a light coverage
of thin paint and then roll onto the grille.
Try to avoiding blocking the holes in the
grille. If the grille does become blocked
by paint, use a small pin or similar to
release the blockage, while the paint is
still wet.
• Allow the paint to dry. Apply three or more
light coats to ensure an even coverage
(gure 6).
Installation
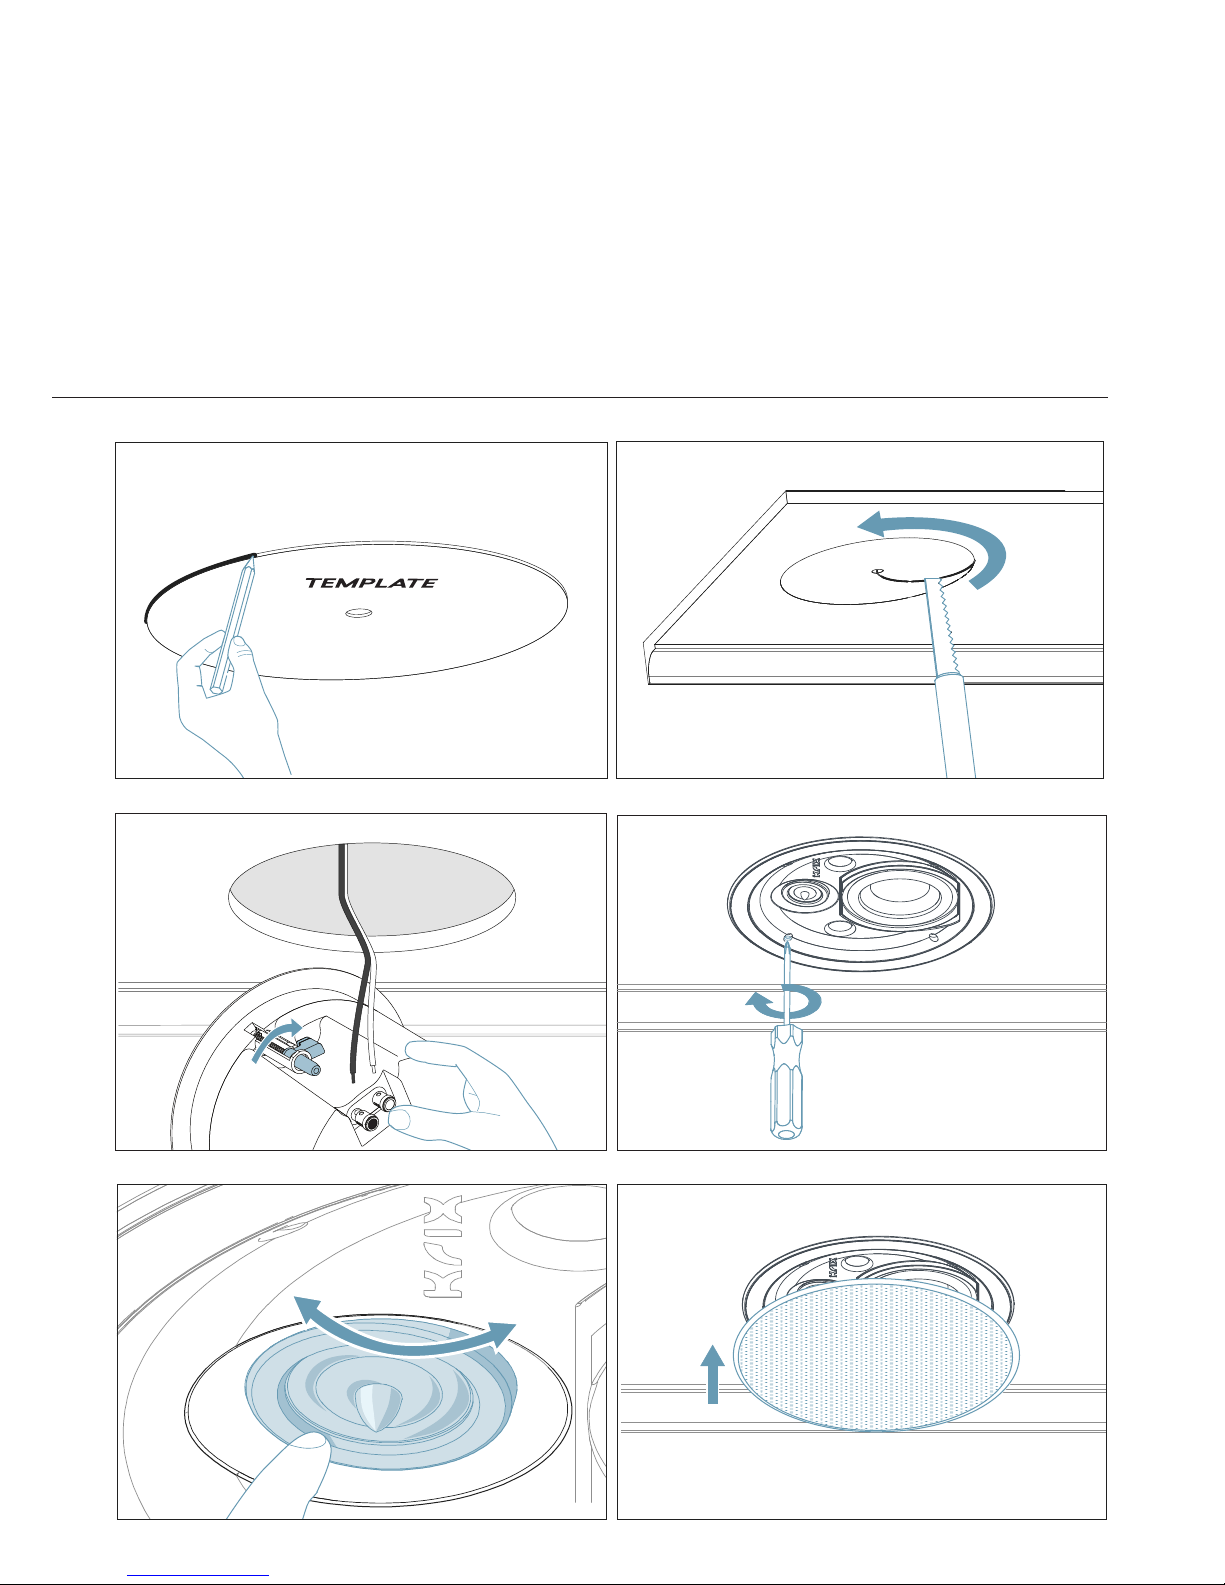
• Once the correct placement has been
determined, use the cardboard insert
marked ‘template’ (from the internal
packing) to trace the required cut-out
onto the ceiling/wall (gure 7).
• Drill a hole inside the marked cut-out.
Using a ne gyprock saw, cut around the
inside of the marked cut-out (gure 8).
• Remove the circular offcut and insert the
speaker to check the hole is the correct
size. Enlarge the cut-out if required.
Hemispherix A20 only:
Determine the correct orientation for
your speaker. It is recommended that
the Krix logo is aimed towards your
primary listening area for best results
(gure 3).
• Pull the stripped speaker cable through
the ceiling/wall opening. Push and hold
down the positive (+) red binding post on
the speaker and insert the positive (+) wire
through the hole in the post. Take care to
assign the same cable colour or trace to
the positive (+) connector on the amplier,
as the positive (+) connector on the
speaker. Repeat the connection process
with the negative (-) black binding post
and the negative (-) wire (gure 9).
• Ensure all the mounting clamps are swung
back against the speaker enclosure
(gure 9), so that the speaker can be easily
inserted into the ceiling cut-out. Once the
speaker has been located in the ceiling/
wall, use a Phillips head screwdriver to
tighten all the mounting screws. As the
screws are tightened, the mounting
clamps will automatically swing out over
the plaster board and clamp the speaker
in place. Be careful not to overtighten the
screws, as this may strip the clamp, or
crush the plaster board surface (gure 10).
• The Hemispherix AS features a pivoting
tweeter which allows the high frequency
sound to be directed as desired. Gently
press on the round outer edge of the
tweeter frame to tilt the tweeter to the
desired position. Be careful not touch the
tweeter diaphragm, as this may damage to
the tweeter (gure 11).
• Gently t the magnetic grille to the front
of the speaker housing (gure 12).
INSTALLATION
Before you begin
Please read the disclaimer on page 2 of
this manual.
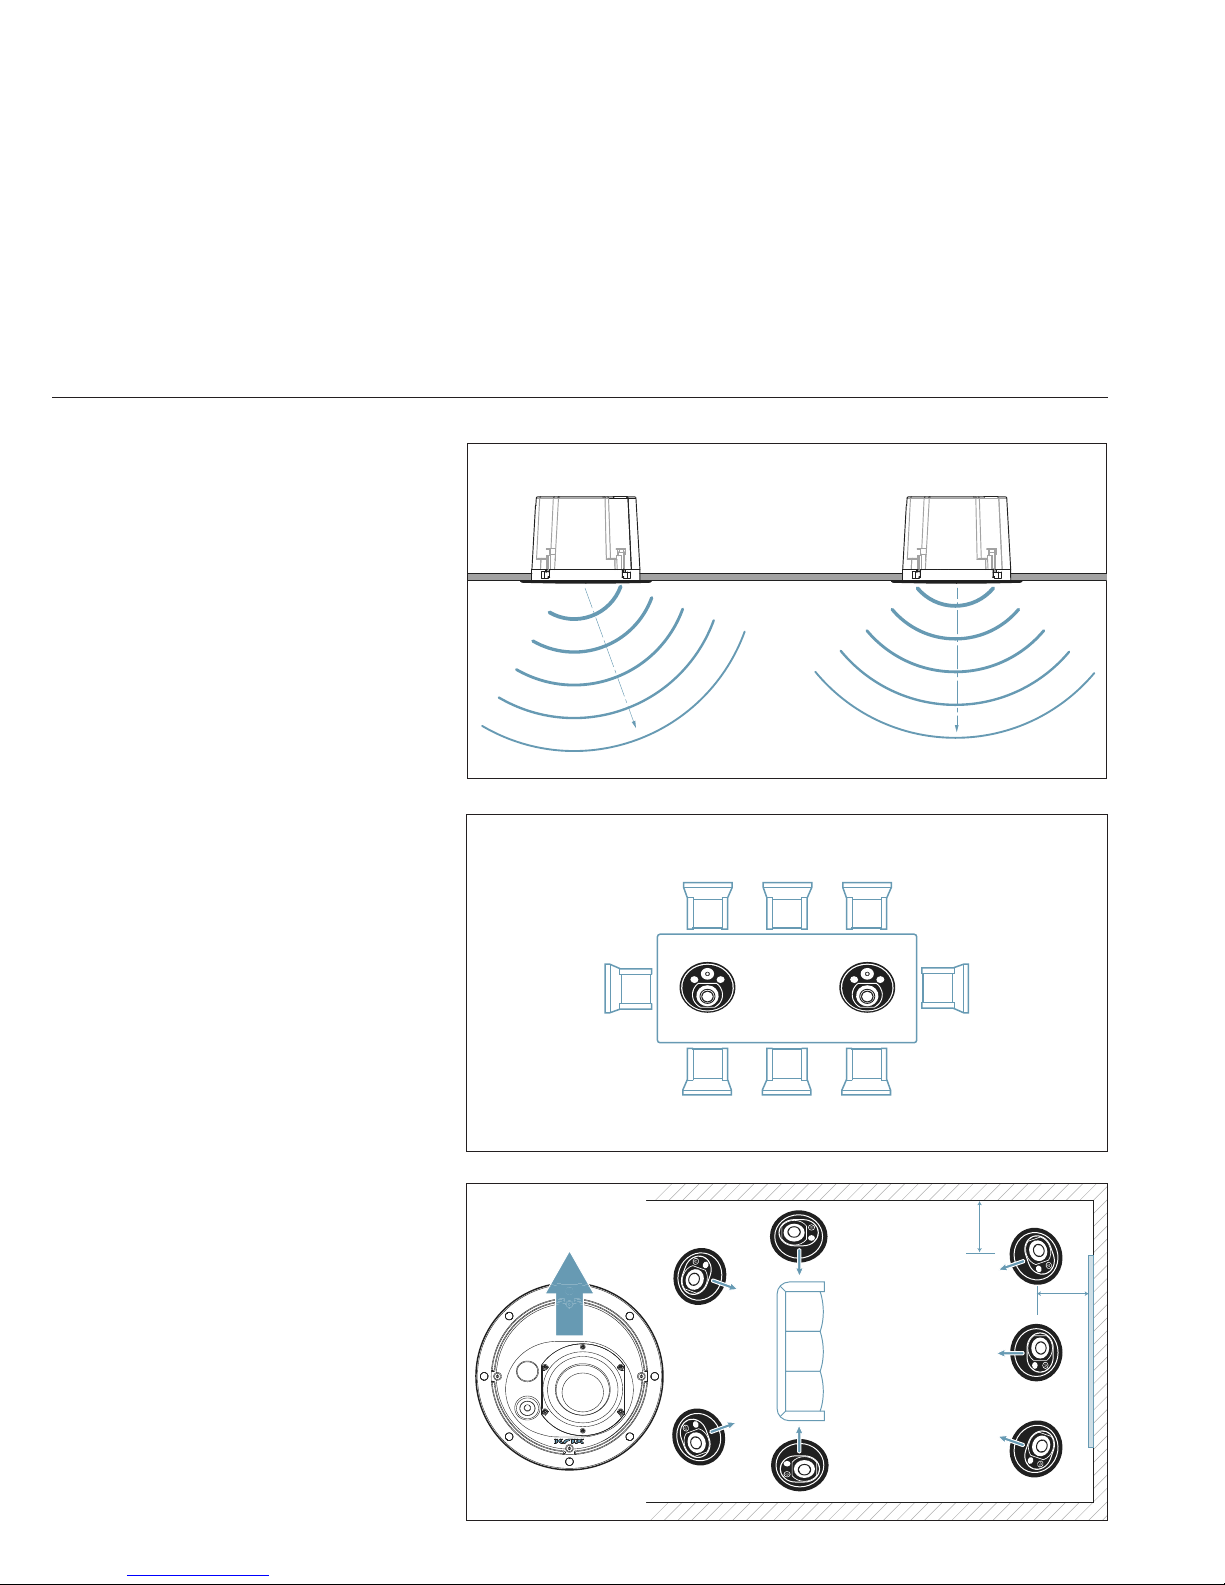
• To determine the best location for your
loudspeakers, refer to page 3 of this
manual and discuss with your local Krix
distributor, or installation consultant.
Be sure to check for any obstructions,
such as electrical wiring, plumbing, stud
work or air conditioning ducts before
commencing the installation (gure 4).
4