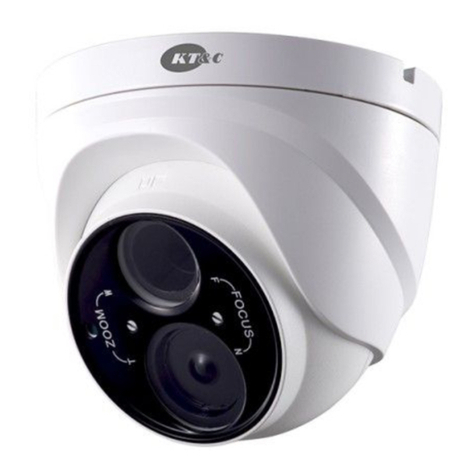
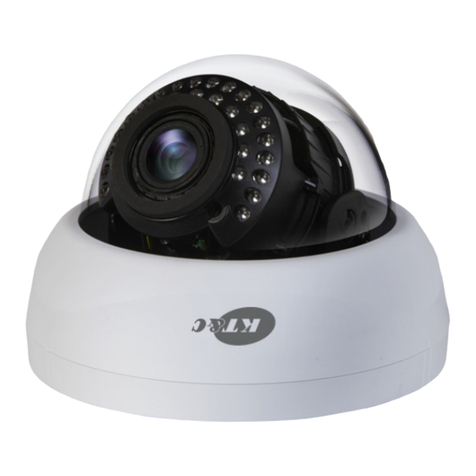
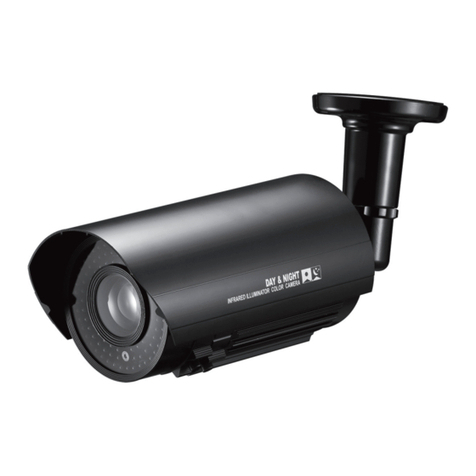
KT&C TTR522 User manual

FULL HD-TVI
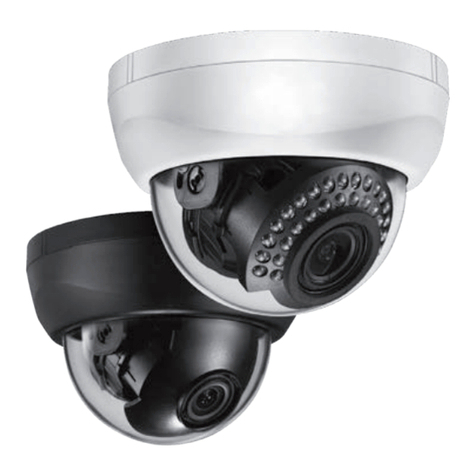
IR LED DomE CamERa
User Manual
Thank you for choosing our high quality camera.
Before attempting to connect operate this unit, please read and follow these instructions.
m236-TTR522-003

2
CONTENTS
1. NOTICES
2. FOR YOUR SAFETY
3. FEATURES
4. EQUIPMENT AND ACCESSORIES
5. OVERVIEW AND FUNCTION
6. INSTALLATION
7. CONNECTION
8. DIMENSIONS
9. SPECIFICATION
10. OSD MENU STRUCTURE
11. TVI UTC (UP THE COAX)
These servicing instructions are for use by qualied service personnel only.
To reduce the risk of electric shock do not perform any servicing other than that
contained in the operating instructions unless you are qualied to do so.
Use Class 2 Power Supply Only
CAUTION

3
1. NOTICES
This device complies with Part 15 of FCC regulations.
Operation is subject to the following two conditions:
1. This device may cause harmful interference.
2. This device may receive interference that can cause affect the operation of this
equipment.
Note
This equipment has been tested and found to comply with the limits for a Class A digital
device, pursuant to Part 15 of the FCC Rules. These limits are designed to provide
reasonable protection against harmful interference when the equipment is operated
in a commercial environment. This equipment generates, uses, and can radiate radio
frequency energy and, if not installed and used in accordance with the instruction
manual, may cause harmful interference to radio communications. Operation of this
equipment in a residential area is likely to cause harmful interference in which case the
user will be required to correct the interference problems at his or her own expense.
Caution
Alteration or modications carried out without. appropriate authorization may invalidate
the user's right to operate the equipment.
1. A regulated DC12V 500mA power supply is recommended to ensure the best picture quality and stable
operation.
An unregulated power supply may cause damage to the camera.
Using an unregulated power supply will void the product warranty.
2. It is recommended that the camera is used with a monitor that has a CCTV quality 75 video impedance
level.
If your monitor is switched to high impedance, then please adjust accordingly.
3. Do not attempt to disassemble the camera to access internal components.
Refer servicing to your dealer.
4. Never face the camera towards the sun or any bright or reective light, which may cause smear on the
picture and possible damage to the image sensor.
5. Do not remove the serial sticker for the warranty service.

4
1. NOTICES
WEEE
(Waste Electrical & Electronic Equipment)
This marking shown on the product or its remove, indicates that it should not be
disposed with other household wastes at the end of its working life. To prevent
possible harm to the environment or human health from uncontrolled waste disposal,
please separate this from other types of wastes and recycle it responsibly to promote
the sustainable reuse of material resources.
Household users should contact either the retailer where they purchased this product,
or their local government oce, for details of where and how to safely recycle the
item.
Business users should contact their supplier and check the terms and conditions of the
purchase contract.
This product should not be mixed with other commercial wastes for disposal.
This symbol is intended to alert the user to the presence of uninsulated
“dangerous voltage” within the product’s enclosure that may be of
sucient magnitude to constitute a risk of electric shock.
This symbol is intended to alert the user to the presence of important
operating and maintenance (servicing) instructions in the literature
accompanying the appliance.
CAUTION
RISK OF ELECTRIC SHOCK.
DO NOT OPEN
CAUTION: TO REDUCE THE RISK OF ELECTRIC SHOCK, DO NOT
REMOVE COVER (OR BACK). NO USER SERVICEABLE
PARTS INSIDE. REFER SERVICING TO QUALIFIED SERVICE
PERSONNEL.

5
2. FOR YOUR SAFETY
1) All warning and instruductions in this manual should be followed.
2) Save this manual for future reference.
3) Heed all warnings.
4) Follow all instructions.
5) Do not use this apparatus near water.
6) Clean only with a dry cloth.
7) Do not block any ventilation openings. Install in accordance with the manufacturer’s
instructions.
8) Do not install near any heat sources such as radiators, heat registers, stoves, or other
apparatus (including ampliers) that produce heat.
9) To help prevent from electric shock, plug the equipment and peripheral power cables
into properly polarized or grounded electrical outlets. These cables are equipped with
the wide blade or the third prong to ensure proper grounding. Do not use adapter
plug or remove the ground prong from a cable. If the provided plug does not t your
outlet, consult an electrician.
10) Ensure that nothing rests on your equipment's cable and that the cables are not
located where they can be stpped on, trapped over, or pinched.
11) Only use attachments or accessories as specied.
12) Only use the equipment with the cart, stand, tripod, bracket, or table
that is specied by the manufacturer or sold with the apparatus. When
a cart is used, use caution to prevent the cart from tipping over and to
avoid injury.
13) Do not connect or disconnect during lighting storms due to risk of electric shock.
14) If any of the following conditions occur, unplug the equipment from the electrical
outlet and replace the part or contact your trained service provider:
• The power cable, extension cable, or plug is damaged.
• An object has fallen into the equipment.
• The equipment has been exposed to water.
• The equipment has been dropped or damaged.
• The equipment does not operate correctly when you follow the operating
instructions.
6
3. FEATURES
• High resolution
SONY 1/2.8" 2.1MP Progressive Color CMOS Image Sensor, 1080p(1920x1080)@30fps
• Support various digital video output
1080p@30fps / 1080p@25fps / 720p@30fps / 720p@25fps
• HD-TVI (HD-Transport Video Interface) Output
HD-TVI is suitable for long reach transmission over single coaxial cable.
Transmission Distance: 300 m (Color)
Max. Transmission Distance: 500 m
• Service video output for convenient installation, and ease of service.
• OSD menu for setup and configuration.
• 20 long life IR illuminators for 0 Lux viewing performance and range to 20 m (66 ft.)
• Provides True Day/Night capability with motorized IR cut filter.
• Power source: 12VDC
• 3-Axis gimbal
• IP66 Waterproof construction.
• UTC (Up the coax.) via HD-TVI coaxial cable.

7
4. EQUIPMENT AND ACCESSORIES
Camera Manual
Template Screws, Set Screw / L-Wrench / Plastic Anchors
Screws
L-Wrench
Plastic Anchors
Set Screw

8
5. CAMERA COMPONENT DESCRIPTIONS
IR LED
Housing Ball
Housing Ball
Bracket
Housing Bottom
Housing Top
Photo Cell

9
6. INSTALLATION
Plastic Anchors
(4ea)
Tapping Screws-4x25L
(4ea)
Template
L-Wrench
Set Screw-M2.5x3L
(1ea)
Open Close
140° 70°
70°

10
7. CONNECTION
When you install the camera, please glue up the end of cable to
keep it stable in order to protect the camera from the humidity problems.
• MONITOR CONNECTION
BNC FEMALE
CVBS
12VDC POWER SUPPLY
12VDC IN
BNC FEMALE HD-TVI

11
8. DIMENSIONS
Unit(mm)
63
77
(The maximum rotation)
20-IR LED
Ø 93
4-Ø4.5
Ø68.5
Ø 69

12
9. SPECIFICATION
Image Device 1/2.8" Progressive Scan CMOS
Effective Pixels 1984 (H) x 1105 (V)
Unit Cell Size(um) 2.8 (H) x 2.8 (V)
Video Output Mode HD-TVI: 1080P 30fps(25fps) / 720P 30fps(25fps)
TV Out: CVBS NTSC/PAL
Transmission Distance HD-TVI: Color 300m@RG59, BW 500m@RG59
Minimum Illumination 0 Lux (wih IR LED On)
Shutter Speed
Auto / Manual selectable
1/30(25), 1/60(50), 1/120(100), 1/250, 1/700,
1/1000, 1/1600, 1/2500, 1/5000, 1/7000, 1/10000, 1/30000
OSD Built in
WDR/BLC Off / WDR / BLC Selectable
AGC 0 - 42 dB
3DNR Off / Low / Middle / High / Auto
Digital Zoom Ratio 1x - 8x
Digital Slow Shutter Off - 16x
White Balance Auto / Push Lock / Manual
Lens Board Lens
IR LED 850nm, 20 ea, up to 20 m (65.6 ft.)
IP Rating IP66
Temperature Operation: 14°F~122°F(-10°C~+50°C)
Storage: -4°F~140°F(-20°C~+60°C)
Power Consumption 12VDC(±10%), Max. 400mA
Dimension(mm) Ø93 X 63
Weight Approx. 332 g (0.73 lbs)
*Specifications and designs are subject to change for improving the
functionality of this product without notice.

13
10. OSD MENU STRUCTURE
Main 1st Sub Menu 2nd Sub Menu 3rd Sub Menu 4th Sub Menu
EXPOSURE
BRIGHTNESS 0 - 20
SHUTTER MODE AUTO / FLICKER
/ MANUAL
SHUTTER SPEED
1/25(30), 1/50(60),
1/100(120), 1/240, 1/500,
1/1000, 1/2000, 1/4000,
1/8000, 1/16000, 1/30000
DSS OFF, X2 - X16
AGC MAX OFF, 2dB - 42 dB
INITIAL
RETURN
WHITE BALANCE
MODE AUTO / PUSH LOCK
/ MANUAL
PUSH AUTO PUSH
CHROMA 0 - 20
RED GAIN 0 - 20
BLUE GAIN 0 - 20
INITIAL
RETURN
WDR/BLC
MODE
OFF / BLC / HLC / WDR
LEVEL 0 - 10
BLC POSITION [˩]
BLC SIZE [˩]
HLC COLOR
BLACK / D.GRAY / L. GRAY
INITIAL
RETURN
DAY&NIGHT
MODE AUTO / COLOR / BW
DWELL TIME 0 - 20 s
DAY → NIGHT 1 - 10
NIGHT → DAY 1 - 10
NIGHT COLOR BW / COLOR
TVI BURST
ON / OFF
IR SMART
OFF / LOW / MID / HIGH
INITIAL
RETURN
*IR SMART Feature:
IR SMART feature only works at B/W mode.
IR Smart feature adjusts AE LEVEL to prevent a subject being too bright by the saturation of light.

14
10. OSD MENU STRUCTURE
Main 1st Sub Menu 2nd Sub Menu 3rd Sub Menu 4th Sub Menu
IMAGE
SHARPNESS 0 - 10
DZOOM 1.0X - 8.0X
GAMMA
0.45 / 0.5 / 0.55 / 0.6
/ 0.65
FLIP
OFF / H-FLIP / V-FLIP
/ HV-FLIP
DNR OFF / LOW / MID / HIGH /
AUTO
DEFOG OFF / LOW / MID / HIGH
SHADING OFF / LOW / MID / HIGH
INITIAL
RETURN
SPECIAL
CAM TITLE
TITLE : ________________
A B C D E F G H I J K L M N O P←
Q R S T U V W X Y Z [ ] ^ _ " →
■ ! # $ % & ' ( ) * + , - . / SP
0 1 2 3 4 5 6 7 8 9 : ; < = > ? BS
DISPLAY OFF / ON
POSITION [ ˩ ]
RETURN
PRIVACY
OFF
ON
ZONE NUMBER 1 - 8
MODE OFF / ON
ZONE POSITION [ ˩ ]
ZONE SIZE [ ˩ ]
ZONE COLOR
BLACK / WHITE / YELLOW
/ CYAN / GREEN /
MAGENTA / RED / BLUE
TRANSPARENCY 0 - 7
INITIAL
RETURN

15
10. OSD MENU STRUCTURE
Main 1st Sub Menu 2nd Sub Menu 3rd Sub Menu 4th Sub Menu
SPECIAL
MOTION
OFF
ON
SENSITIVITY LOW / MID / HIGH
DISPLAY MARK / AREA
INITIAL
RETURN
SYSTEM
LANGUAGE
ENGLISH / RUSSIAN / SPANISH / GERMAN / FRENCH /
PORTUGUESE / JAPANESE
DEFECT [ ˩ ]
FRAME RATE
1080p - NTSC / 1080p - PAL
/ 720p - NTSC / 720p - PAL
APPLY [ ˩ ]
RETURN
INITIAL
RETURN
FACTORY DEF.
EXIT
*Important Note:
- Any changes made to the camera settings must be saved prior to exiting the OSD menu.
Else all changes will be discarded.

16
11. TVI UTC (UP THE COAX)
The UTC function supports OSD control via HD-TVI coaxial cable.
PELCO-C Protocol is used.
* DVR setting method. (DVR maker: HIKVISION)
STEP-1
- Enter HIKVISION DVR menu.
- Select "Camera" icon.
STEP-2
- Select "PTZ" item.
- Select "PTZ setting" icon.
STEP-3
- Select "PELCO-C (Coaxitron)"
STEP-4
- Exit menu.
- Please click the right mouse button.
- Select "PTZ control"
STEP-5
- Now control the PTZ panel.
- Iris+: SET key
- Use Up/Down/Left/Right
Table of contents
Other KT&C Security Camera manuals

KT&C
KT&C KNC-VDi100HD User manual

KT&C
KT&C KPT-SPDN231NH User manual

KT&C
KT&C KPC-VDN101 User manual

KT&C
KT&C AVN82V User manual

KT&C
KT&C KPC-S801DCHB Service manual

KT&C
KT&C KNC-HMB6319-iWX User manual

KT&C
KT&C KPC-EW650U User manual

KT&C
KT&C KPC-N551NU10 User manual

KT&C
KT&C M141-HDX222-001 User manual

KT&C
KT&C KPC-N501NUB User manual

KT&C
KT&C KNC-p3BR28V12IR User guide

KT&C
KT&C KTC-ABN6302 Installation manual

KT&C
KT&C KNC-p3TR3XIR User guide

KT&C
KT&C KPC-HDB230 User manual

KT&C
KT&C KPC HDD122 User manual

KT&C
KT&C KPC-N751NUB User manual

KT&C
KT&C KPC-ND521NU User manual

KT&C
KT&C KPC-N551 User manual

KT&C
KT&C KPC-VNW101NHV15 User manual

KT&C
KT&C KNC-p3 Series User manual