3 WORK 7
–Operate the hand brake lever several times until the brake linings are lying correctly
against the brake disc.
–Remove the motorcycle from the lift stand. ( p. 6)
–Pull the front wheel brake and push down hard on the fork several times to align
the fork legs.
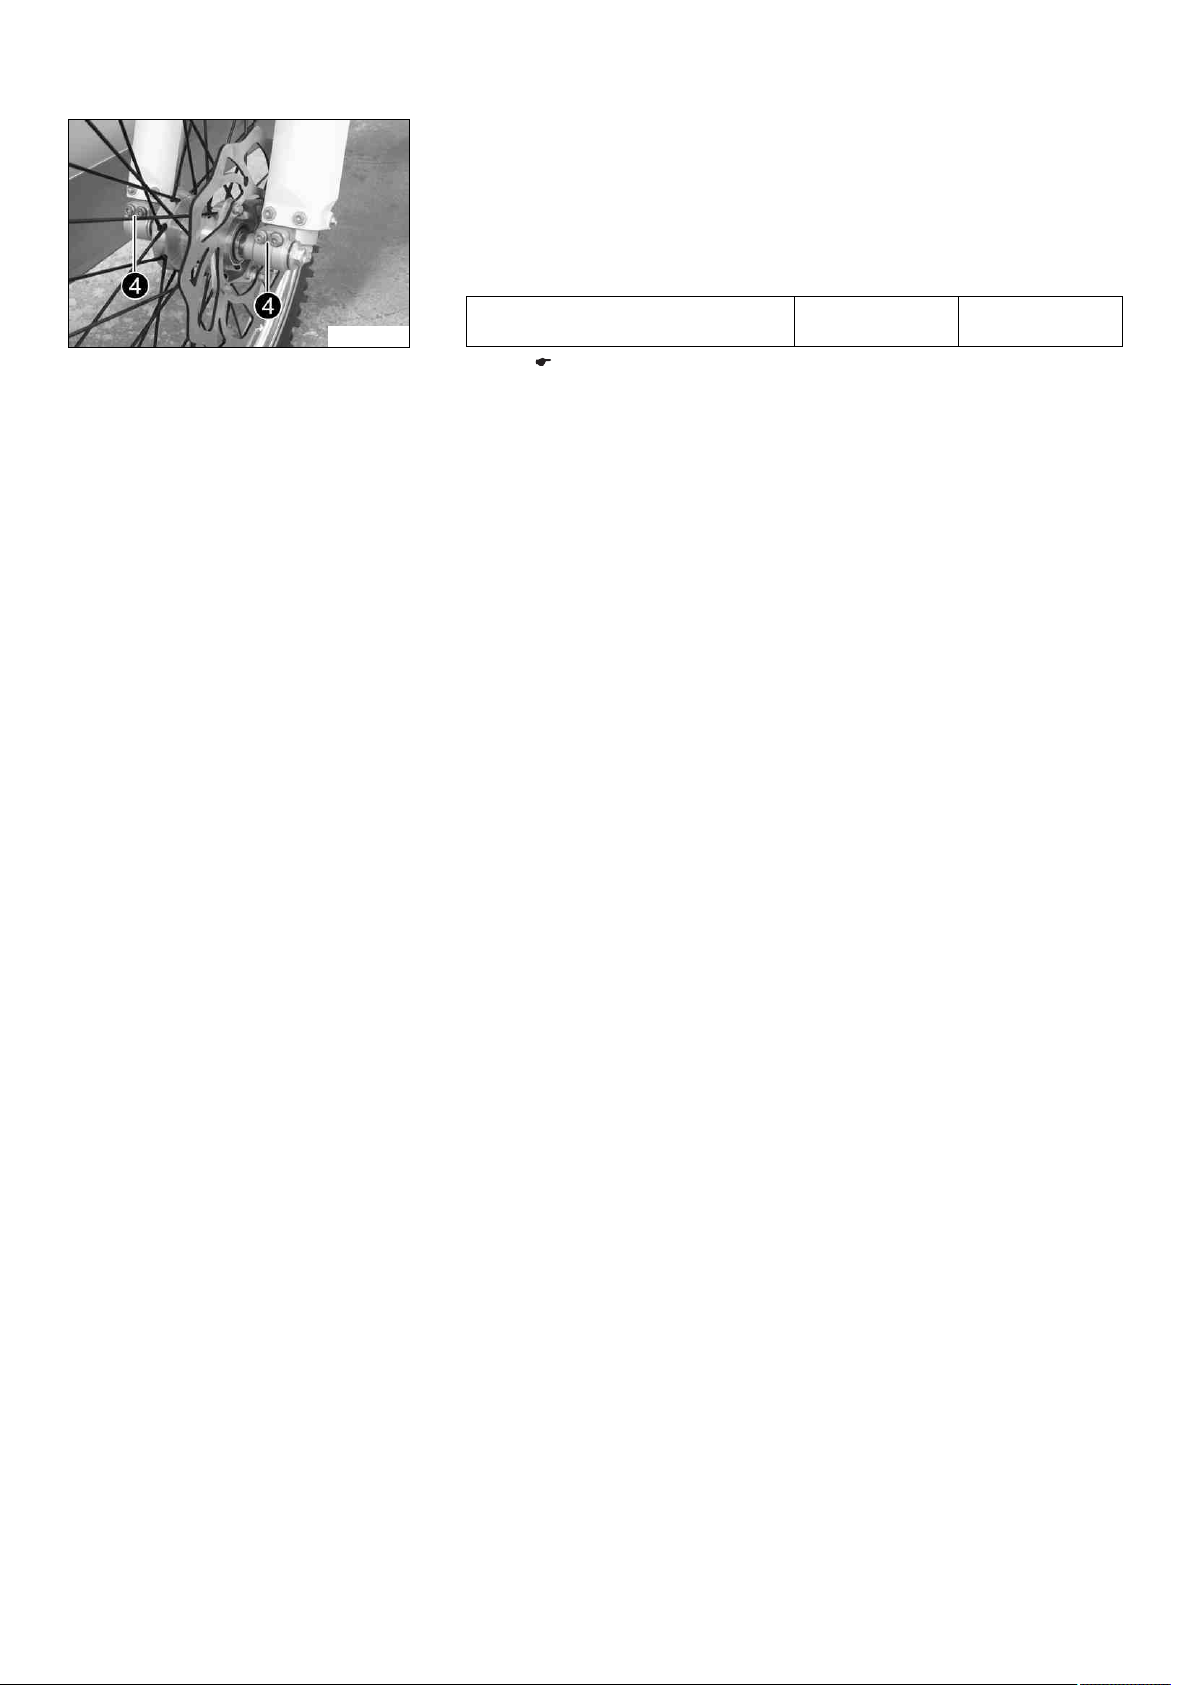
–Tighten screws 3.
Guideline
Screw, fork stub M8 15 Nm
(11.1 lbf ft)
Finishing work
–Remove the motorcycle from the lift stand. ( p. 6)
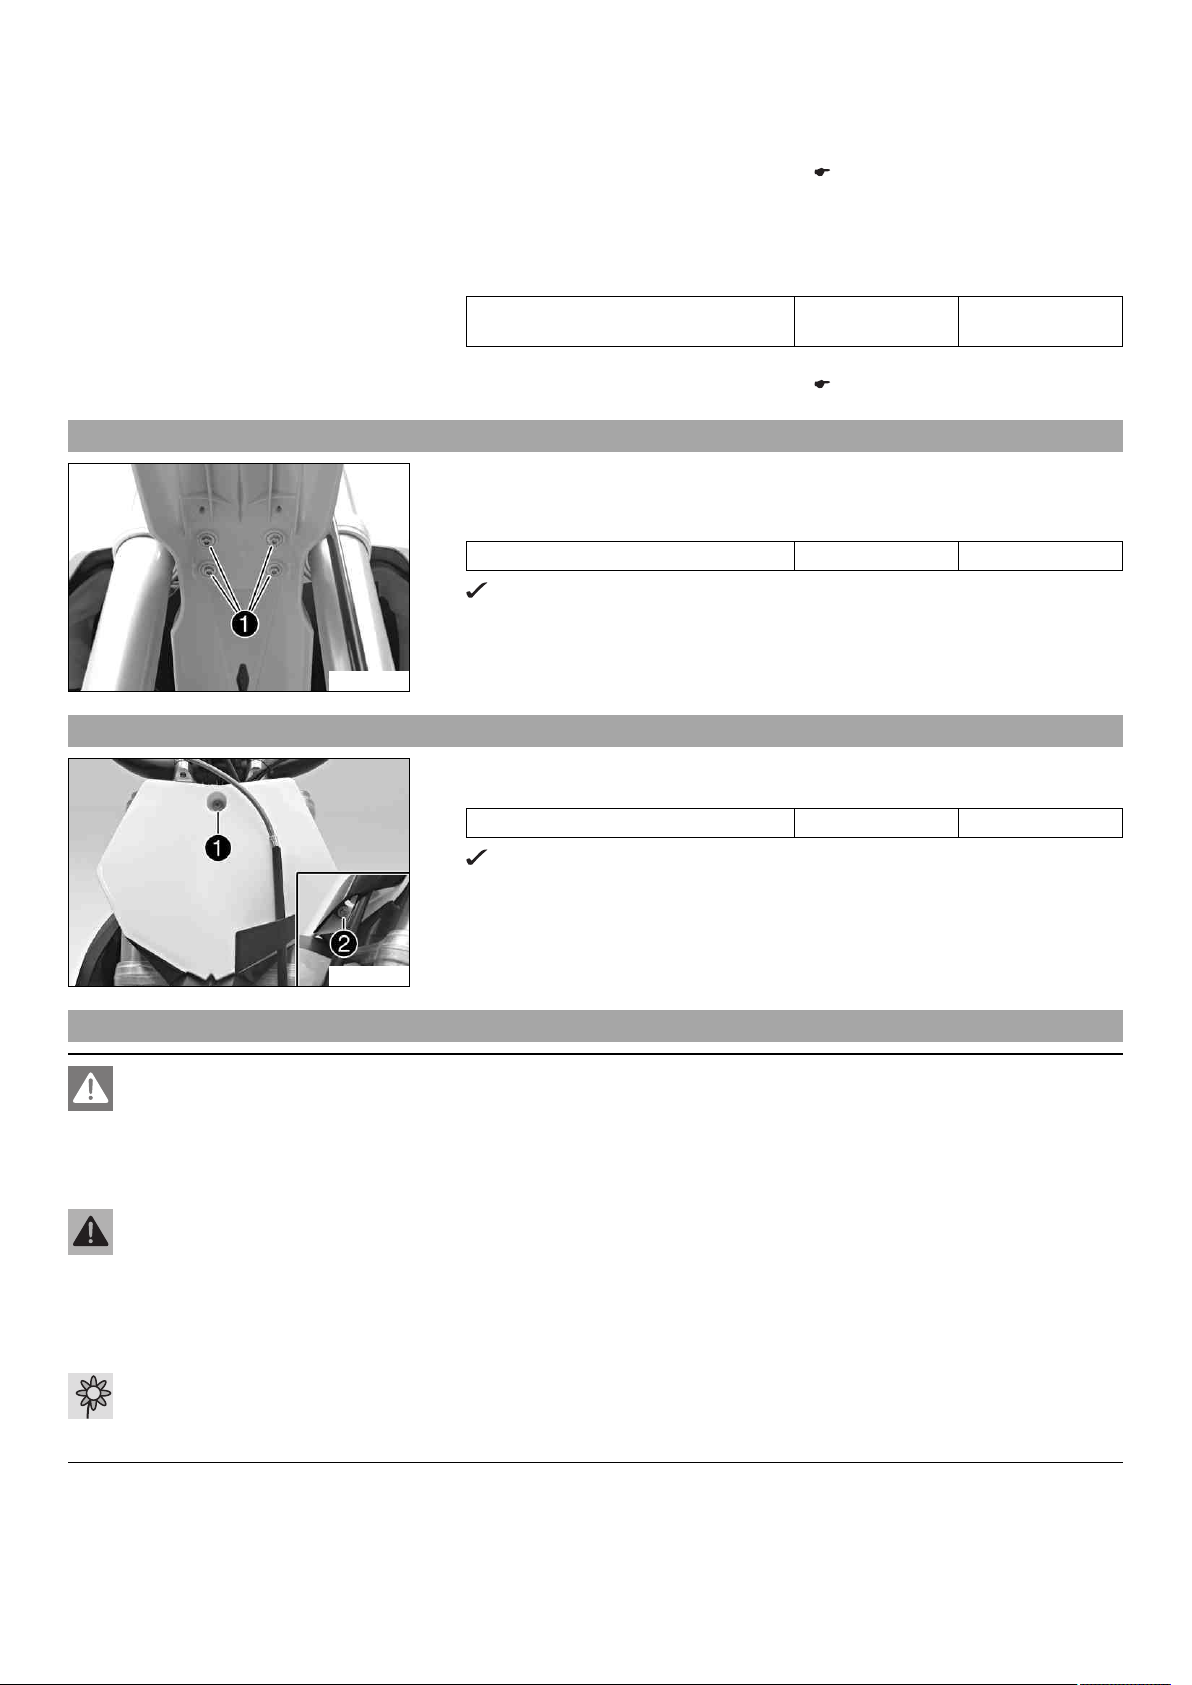
3.4 Installing the front fender
L00040-10
–Ensure that the spacers are mounted in the fender.
–Position the front fender. Mount and tighten screws 1.
Guideline
Remaining screws, chassis M6 10 Nm (7.4 lbf ft)
The holding lugs engage.
3.5 Installing the start number plate
L00049-10
–Position the start number plate. Mount and tighten screw 1.
Guideline
Remaining screws, chassis M6 10 Nm (7.4 lbf ft)
The holding lugs engage.
–Position the brake line and clamp. Mount and tighten screw 2.
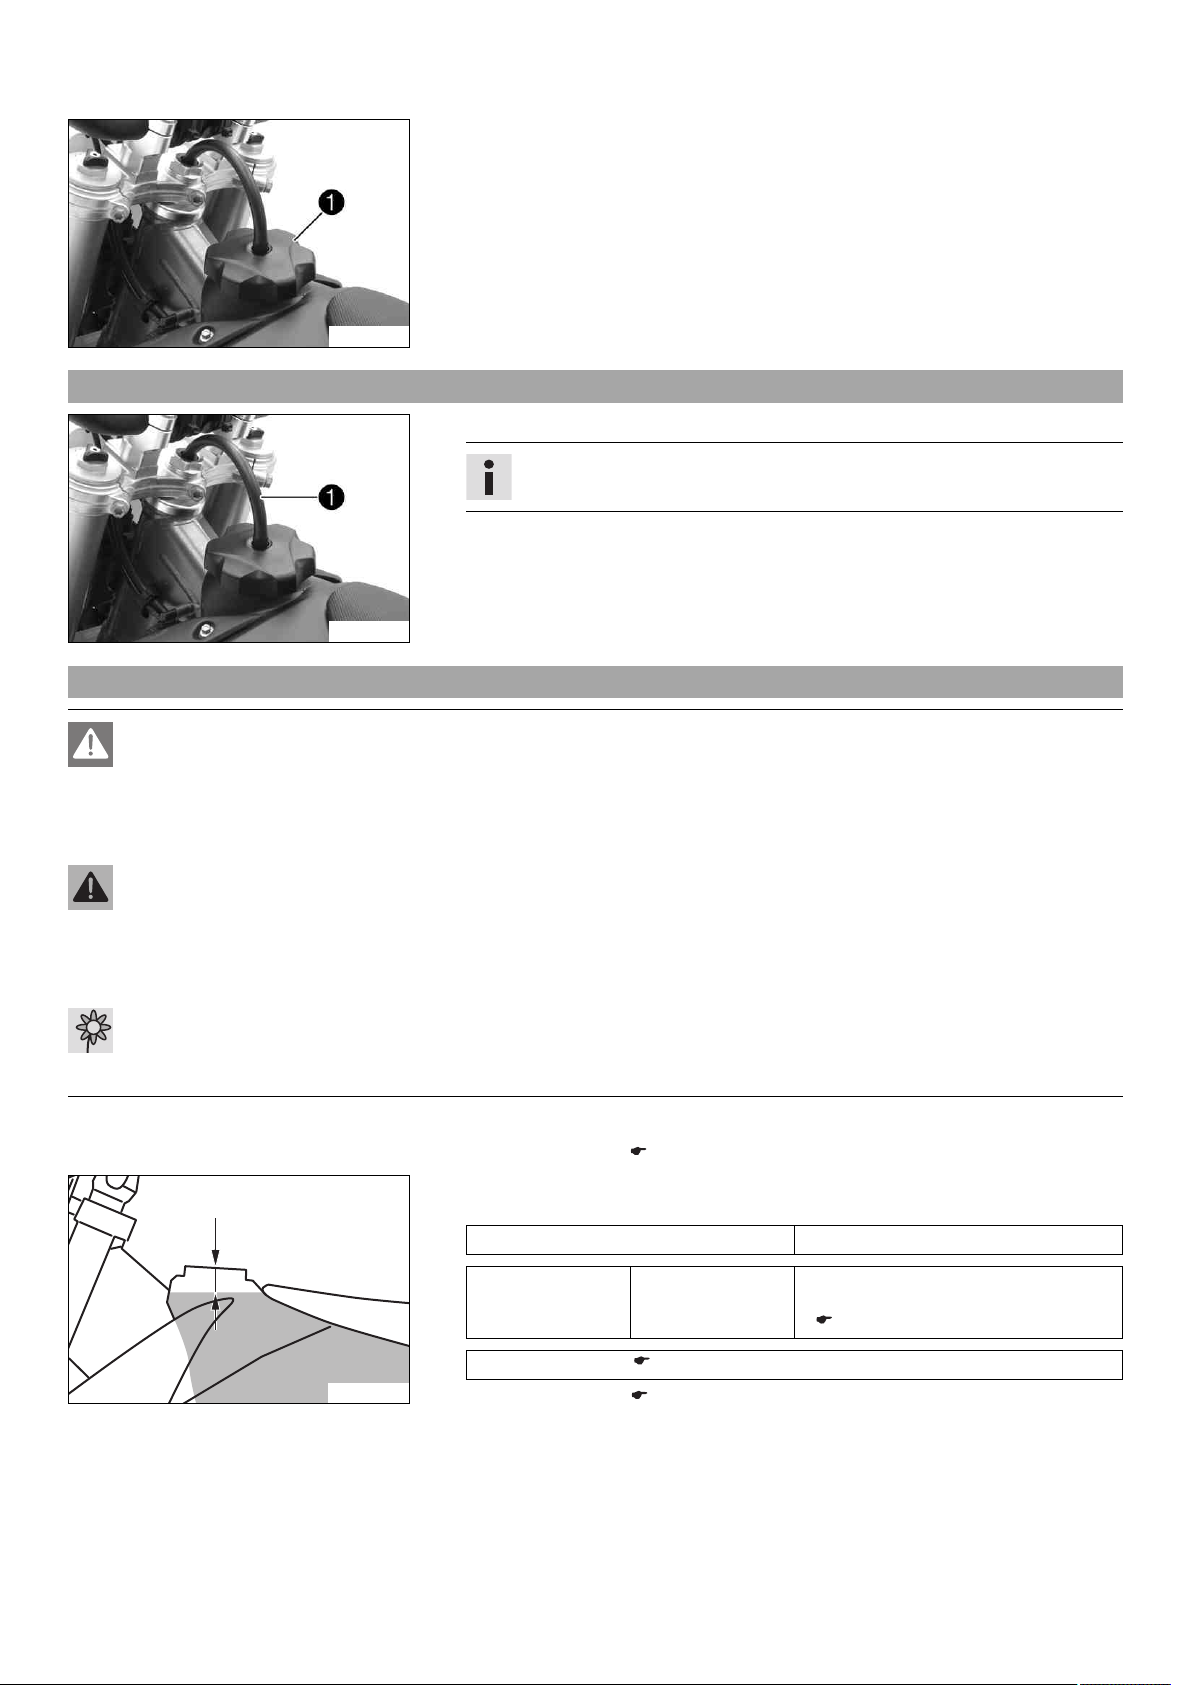
3.6 Opening the filler cap
Danger
Fire hazard Fuel is highly flammable.
–Never refuel the vehicle near open flames or burning cigarettes, and always switch off the engine first. Be careful that no
fuel is spilt, especially on hot vehicle components. Clean up spilt fuel immediately.
–The fuel in the fuel tank expands when warm and may emerge if overfilled. Follow the instructions on refueling.
Warning
Danger of poisoning Fuel is poisonous and a health hazard.
–Fuel must not come into contact with the skin, eyes, or clothing. Do not breathe in the fuel vapors. If contact occurs with
the eyes, rinse with water immediately and contact a physician. Immediately clean contaminated areas on the skin with
soap and water. If fuel is swallowed, contact a physician immediately. Change clothing that is contaminated with fuel.
Store fuel properly in a suitable canister and keep away from children.
Warning
Environmental hazard Improper handling of fuel is a danger to the environment.
–Do not allow fuel to get into the ground water, the ground, or the sewage system.


 Supplementary service manual")