6
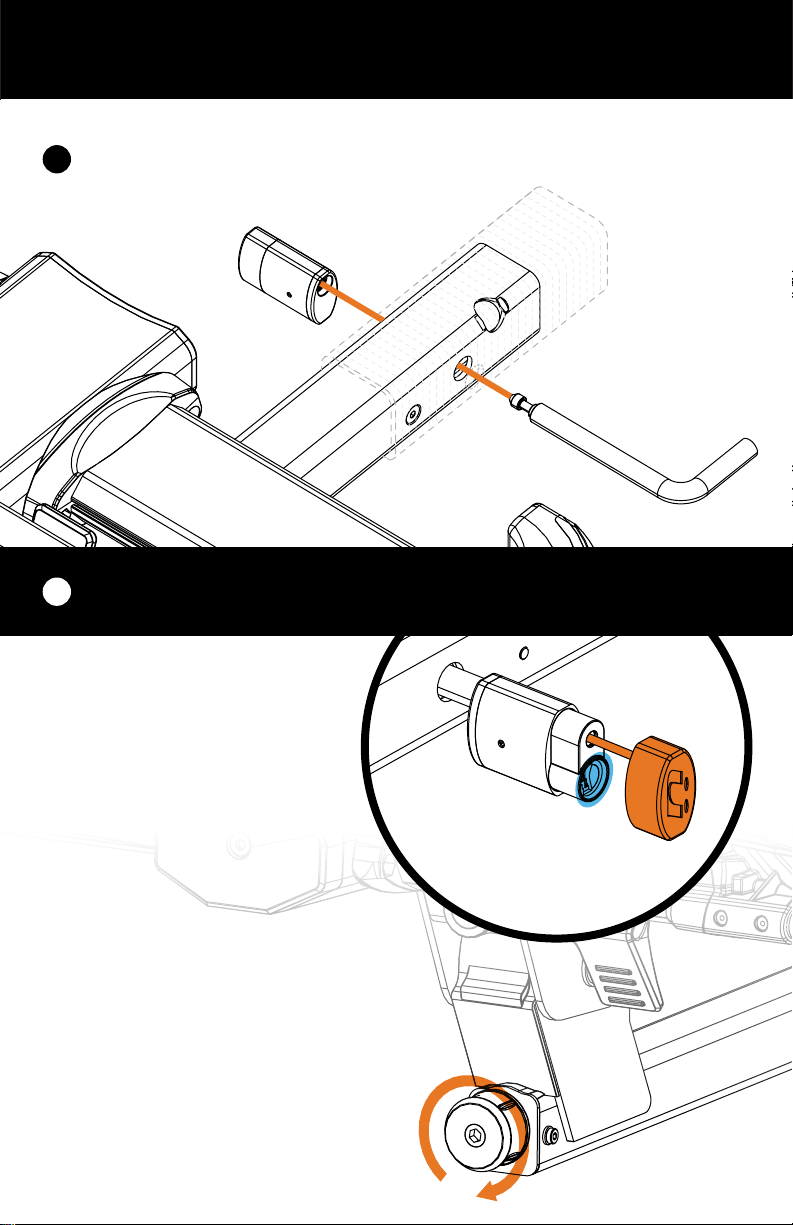
NOTE: Use the end cap plug to keep debris out
when the Trail Doc™is not installed. The tension on
the lever can be adjusted using a 3mm Allen wrench.
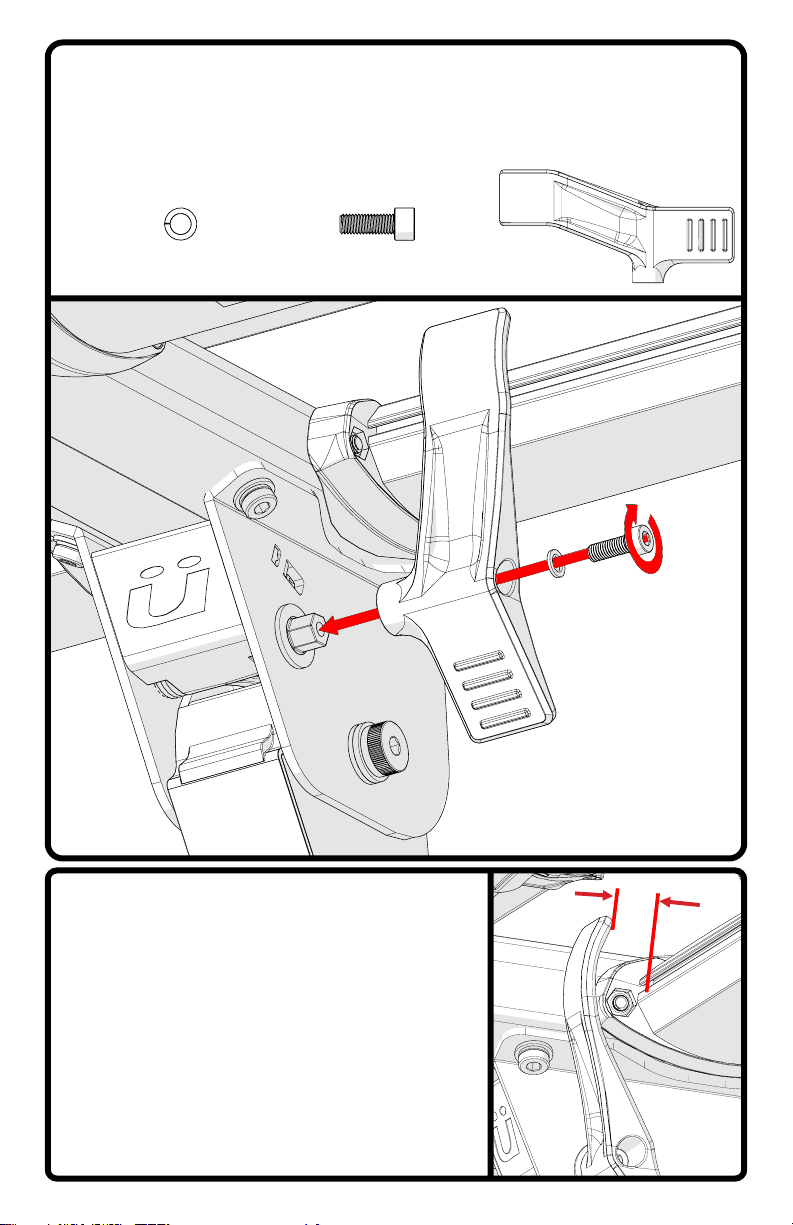
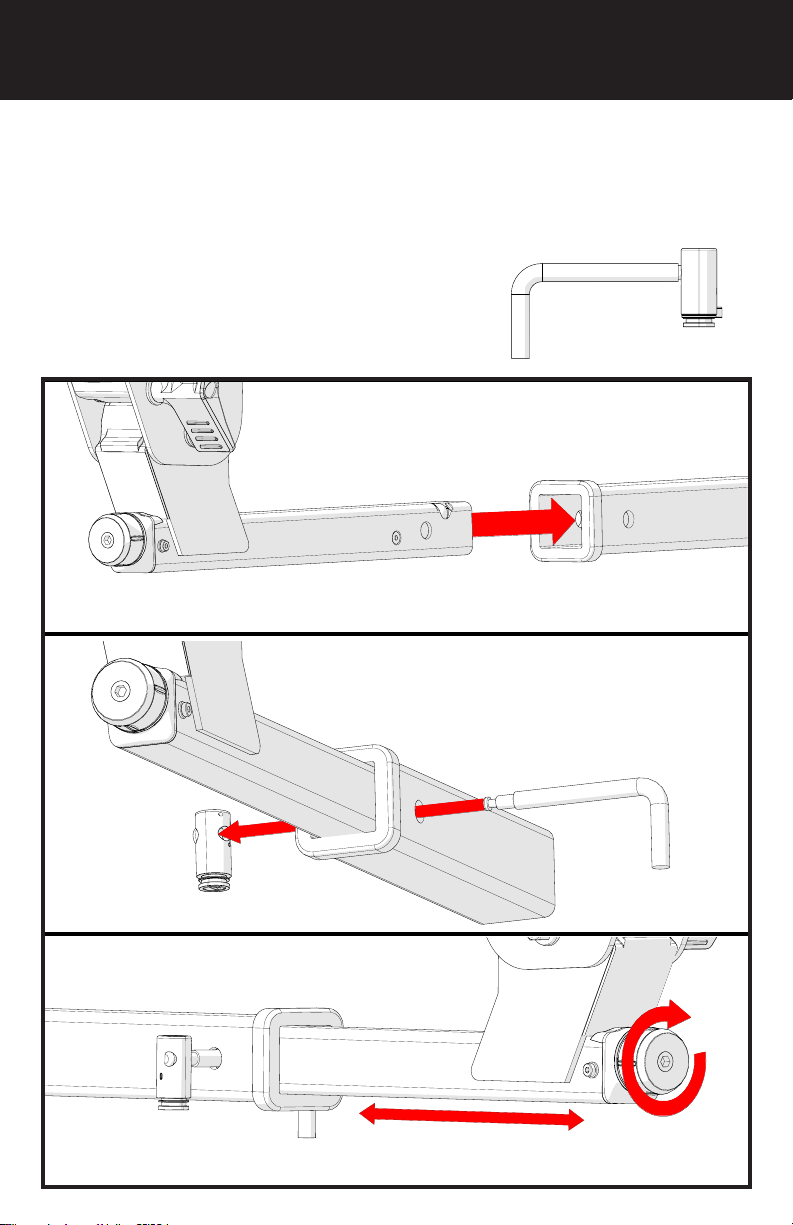
STEP 5. Thread the Trail Doc™clamp onto the
Trail Doc™post.
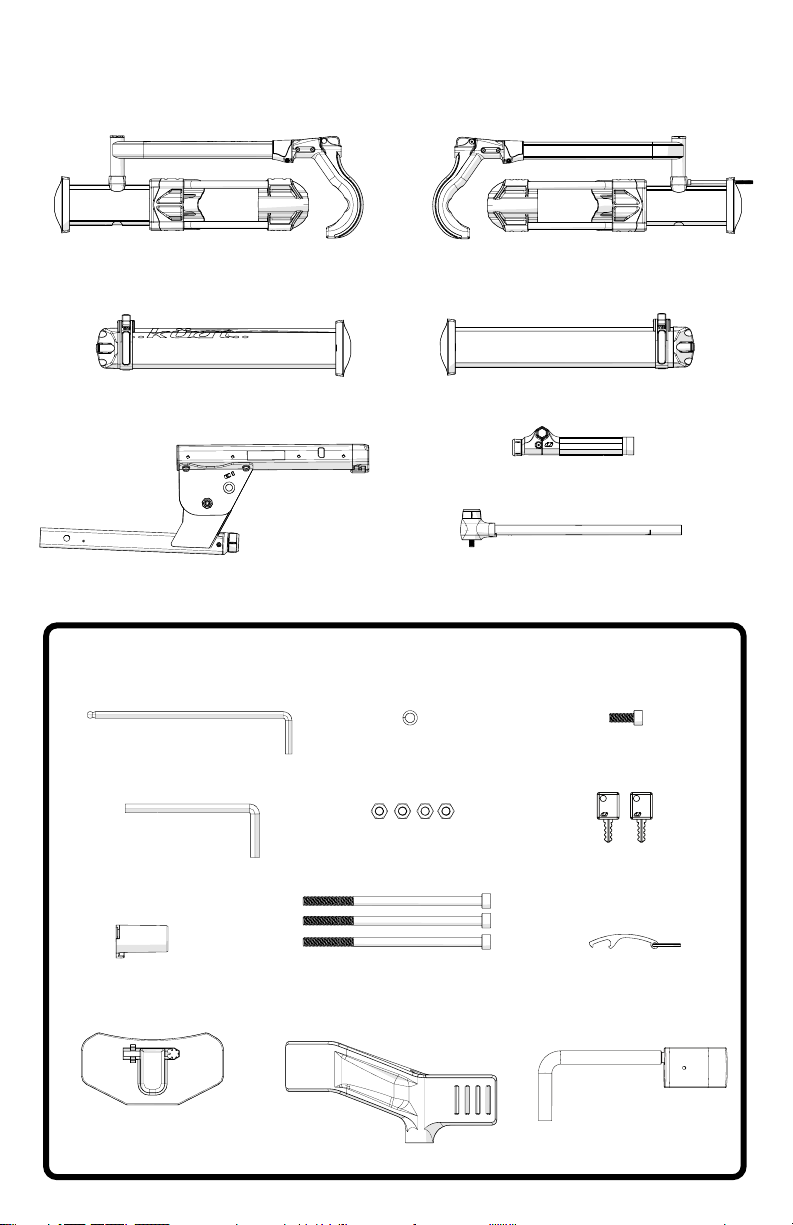
Parts Needed
Trail Doc™Clamp Trail Doc™Post
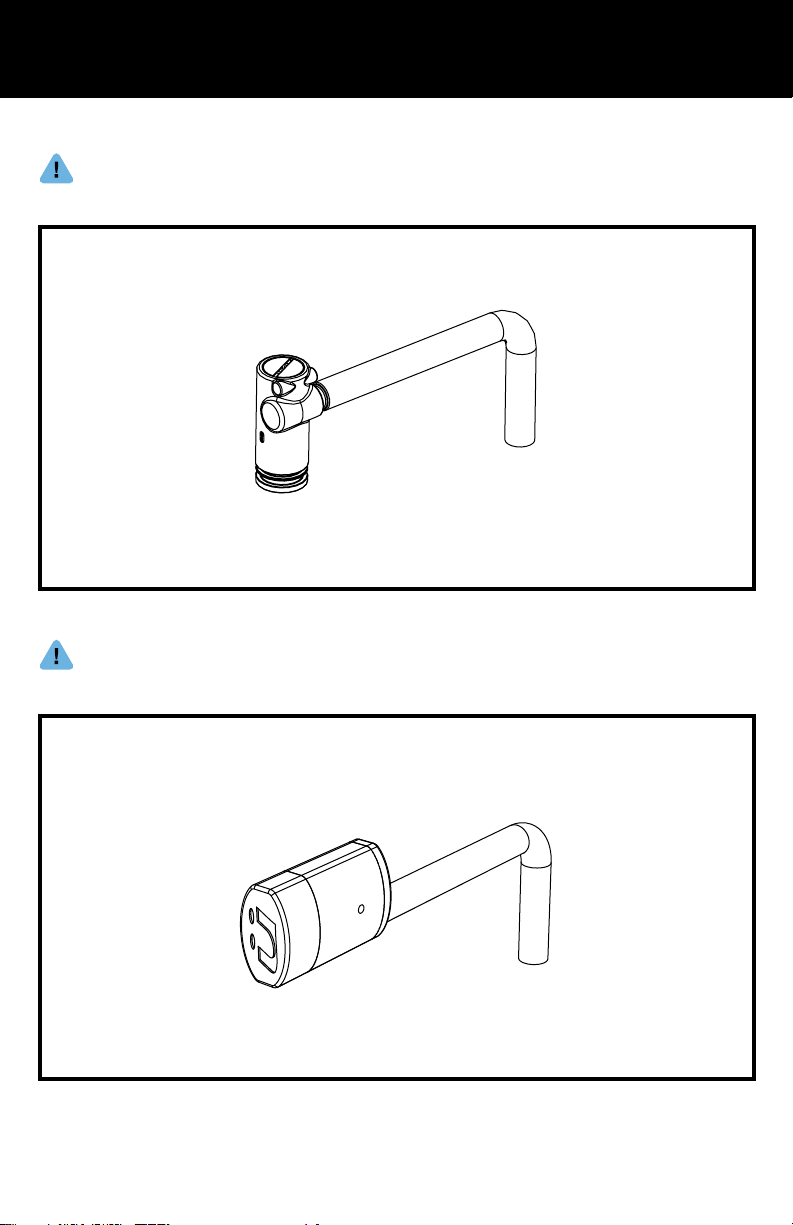
STEP 6. Open the lever on the end cap and insert
the Trail Doc™.
Using the NV Hitch Lock
Side Entry
Rear Entry
If your NV 2.0 uses the rear-entry hitch lock system,follow all
instructions labeled Section 2 to ensure proper lock usage.
If your NV 2.0 uses the side-entry hitch lock system, follow all
instructions labeled Section 1 to ensure proper lock usage.