Kulzer CARA Print Clean User manual

GB
GB Operating instructions
Print Clean

-2-
GB
cara Print Clean Operating instructions
© 2019 Kulzer GmbH
All Rights Reserved. “Kulzer” is a registered trademark of Kulzer GmbH, used under a temporary license granted
by Kulzer GmbH. Neither Kulzer GmbH, nor any of its aliates is responsible for the manufacturing of the product(s).
No parts of this work may be reproduced in any form or by any means – graphic, electronic or mechanical,
including photocopying, recording, taping or information storage and retrieval systems – without the written
permission of the publisher.
Products that are referred to in this document may be either trademarks and/or registered trademarks of the
respective owners. The publisher and the author make no claim to these trademarks.
While every precaution has been taken in the preparation of this document, the publisher and the author assume
no responsibility for errors or omissions or for damages resulting from the use of information contained in this
document or from the use of programs and source code that may accompany it. In no event shall the publisher
and the author be liable for any loss of profit or any other commercial damage caused or alleged to have been
caused directly or indirectly by this document. This document is a released Kulzer version of original & approved
B9creations operating instructions document. All add. foreign language translations made by Kulzer are based on
this document.
For reference, write the following information from the product
Information label located on the back of your new device here:
Model #________________________ Serial #__________________________

-3-
GB
Contents
1 Kulzer cara Print Clean General Information ..............................................................................5
1.1 Declaration of CE Conformity................................................................................................................ 5
2 Instructions for Safe Use ..............................................................................................................6
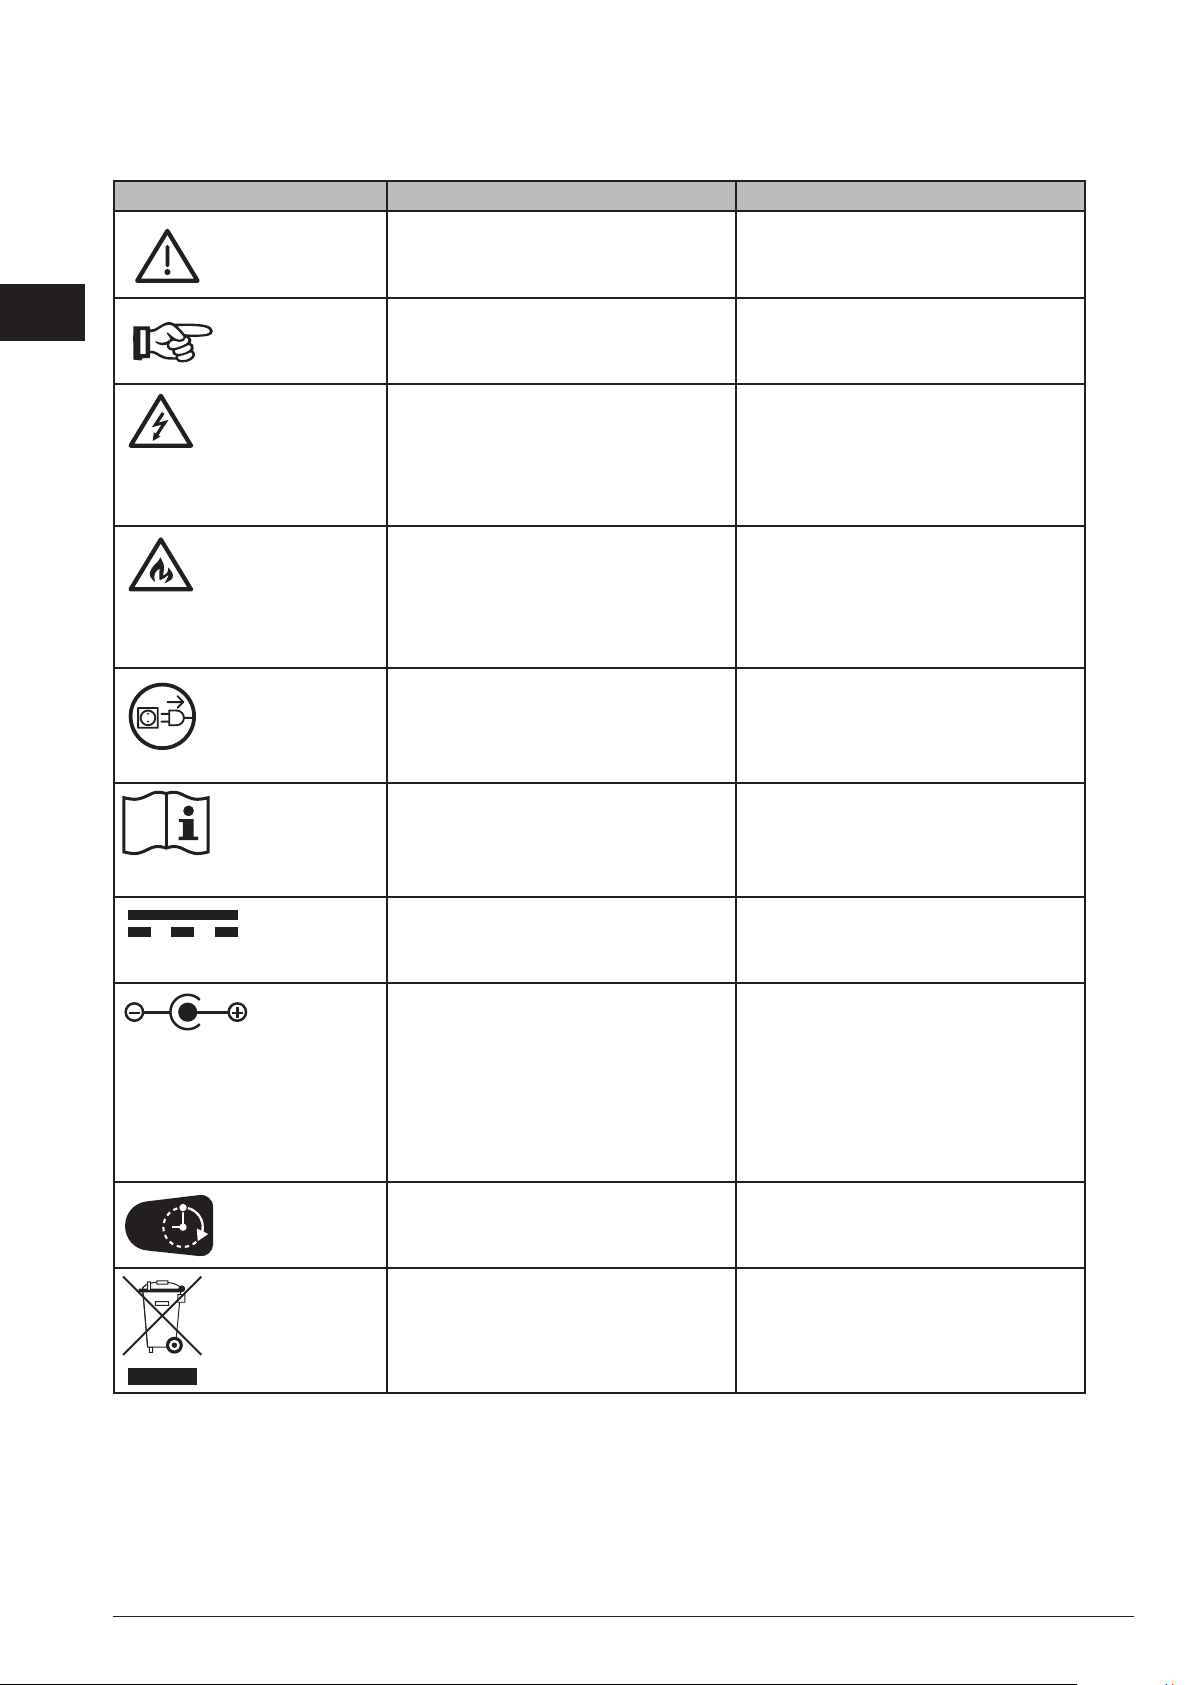
2.1 Explanation of Symbols......................................................................................................................... 6
2.2 Transport Damage ................................................................................................................................. 7
2.3 Operator’s Obligations........................................................................................................................... 7
2.4 Operations and Maintenance Log Book................................................................................................ 7
2.5 Safety Information ................................................................................................................................. 7
3 Intended Use and Proper Operation............................................................................................9
3.1 Intended Use ......................................................................................................................................... 9
3.2 Proper Operation ................................................................................................................................... 9
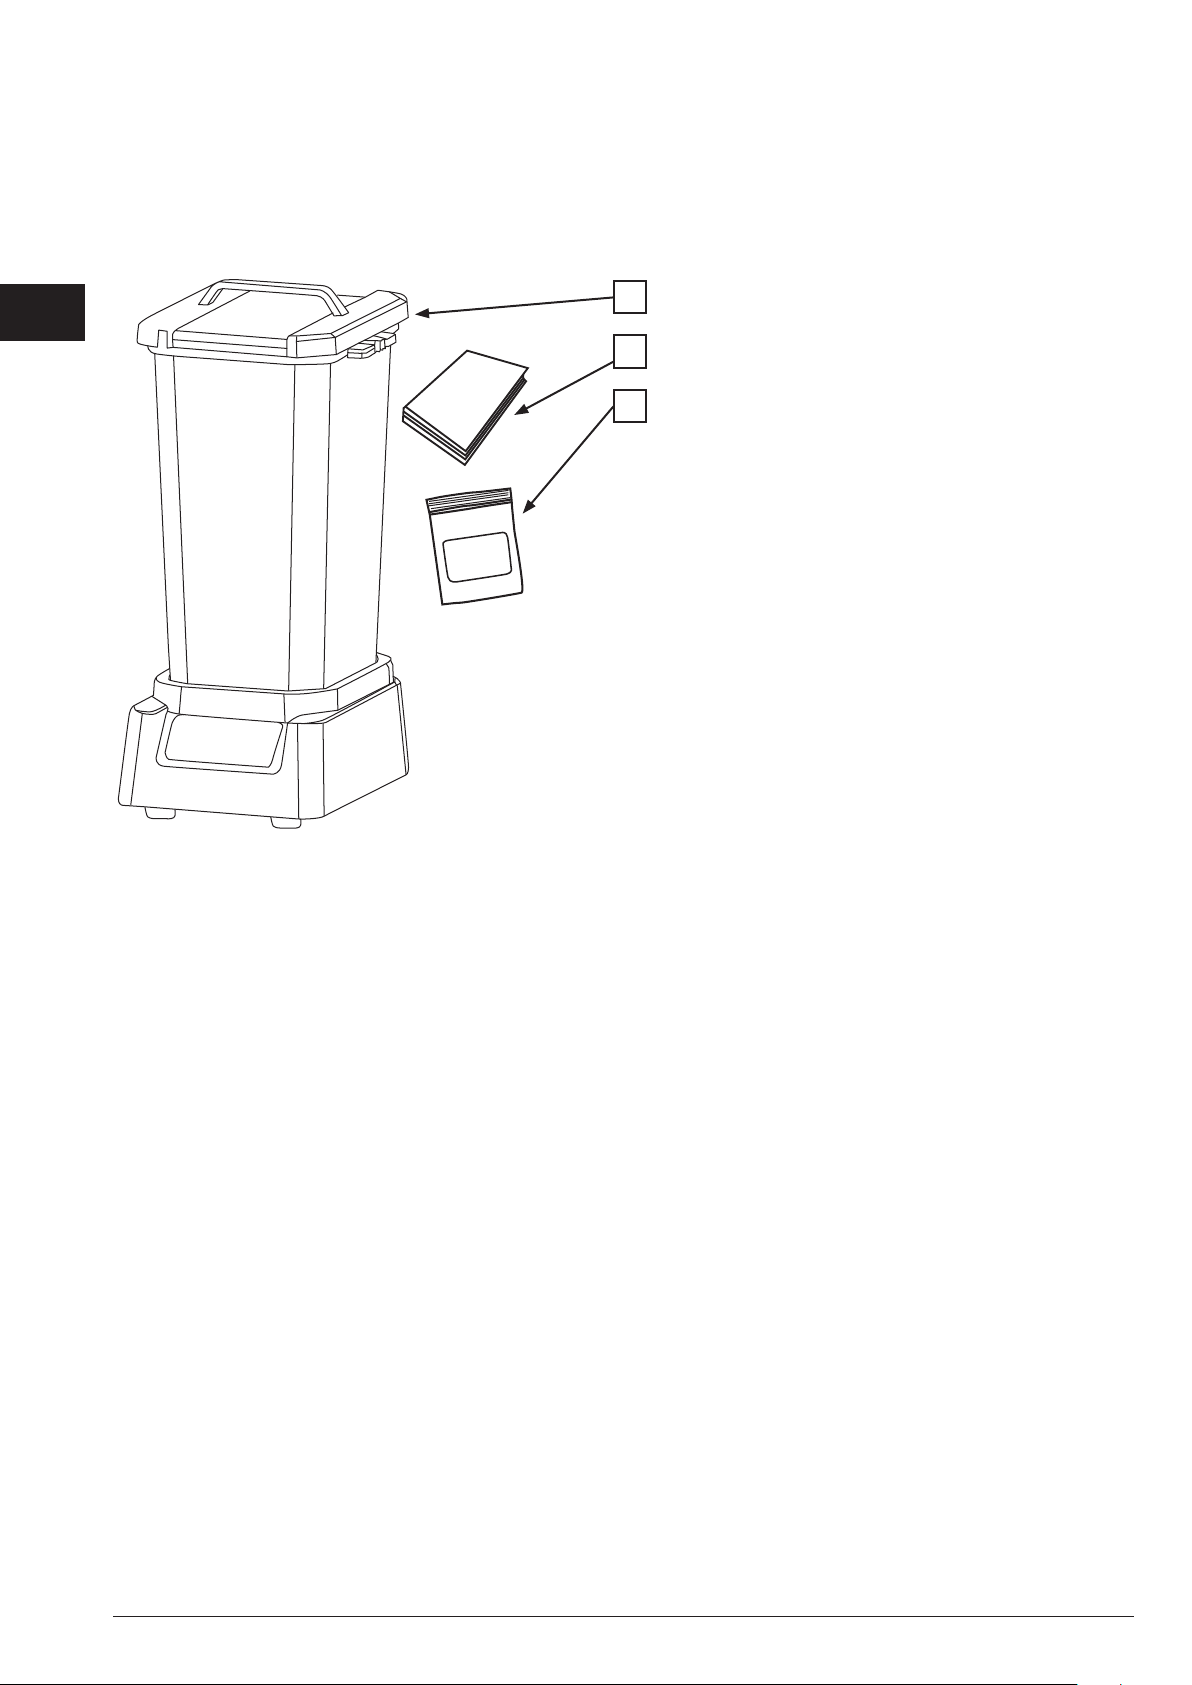
4 Scope of Delivery/Finishing Kit Components...........................................................................10
4.1 Scope of Delivery ................................................................................................................................ 10
5 Identification and Interface ........................................................................................................11
5.1 Product Identification .......................................................................................................................... 11
5.2 Control Interface.................................................................................................................................. 11
6 Transport and Installation...........................................................................................................12
6.1 Transport.............................................................................................................................................. 12
6.2 Hardware Setup................................................................................................................................... 12
7 Operation......................................................................................................................................13
7.1 Turning the unit “ON” and “OFF”......................................................................................................... 13
7.2 Filling with isopropyl alcohol ............................................................................................................... 14
7.3 Positioning the inner container drain plug ........................................................................................... 15
7.4 Placing the parts in the inner container............................................................................................... 15
7.5 Configuring the cleaning cycle settings .............................................................................................. 16
7.6 Prepairing cleaning cycle..................................................................................................................... 16
7.7 Starting the cleaning cycle .................................................................................................................. 16
7.8 cara Print Clean Cleaning Procedure...................................................................................................17
8 Safety............................................................................................................................................18
8.1 Isopropyl Alcohol Draining...................................................................................................................... 18
8.2 Isopropyl Alcohol Containment .............................................................................................................. 18
9 Maintenance, Care and Cleaning...............................................................................................18
9.1 Cleaning............................................................................................................................................... 18
9.1.1 Unit Cleaning ....................................................................................................................................... 18
9.1.2 Build Table Cleaning............................................................................................................................ 18
9.2 Isopropyl Alcohol................................................................................................................................. 18
9.2.1 Replacement ....................................................................................................................................... 18
9.2.2 Disposal............................................................................................................................................... 18
9.3 Non-Repairable Items.......................................................................................................................... 18
10 Technical Data .............................................................................................................................19
10.1 cara Print Clean Technical Specifications ........................................................................................... 19
10.2 Operating conditions ........................................................................................................................... 19
10.3 Information on Manufacturer and Electrical Specification – Product Label ........................................ 20
11 Troubleshooting Guide................................................................................................................20
12 Service..........................................................................................................................................23
12.1 WARRANTY STATEMENT ...................................................................................................................23
12.2 Electrical and Electronic Equipment Act (ElektroG) ............................................................................ 23
13 Tips ..............................................................................................................................................23
14 Document History........................................................................................................................24

-4-
GB

-5-
GB
1 cara Print Clean General Information
cara Print Clean is a 3D print cleaning system supplied by Kulzer GmbH, Leipziger Straße 2, 63450 Hanau, Germany
Manufacturer: B9Creations, 2828 Plant Street; STE 2, Rapid City, SD 57702, USA
To simplify understandability of this Operating manual, wording „isopropyl alcohol“ or „isopropanol“ is used as
synonym for all ocially approved cleaning solvents. At time of printing release of this document, Isopropanol
is the only cleaning solvent approved by Kulzer for intended use. Ocial release and application instructions -in
written form only- concerning alternative cleaning solvents is up to Kulzer GmbH only. Updated application guide
or cleaning guide will automatically become valid amendment of this Operating manual.
For proper cleaning of 3D printed articles, this unit utilizes isopropyl alcohol. Isopropyl alcohol is utilized to main-
tain part geometry, properly and suciently clean parts and remove known harmful residue on 3D printed articles.
Design considerations have been implemented to significantly reduce the possibility of spills and vapors.
In harmony with the inherent implemented design precautions, the OPERATOR MUST:
• Fully read and understand these Instructions For Safe Use
• Handle and store isopropyl alcohol with extreme care, adhering to standard laboratory and statutory stan-
dards, practices and laws
• Operate the cara Print Clean at a safe distance from all open flames, sparks and heat sources. No smoking.
Take measures against electrostatic discharges. Protect from sunlight.
• NEVER operate the cara Print Clean with the top cover removed or not properly seated
• NEVER operate the cara Print Clean in an unsafe manner
• Operate the cara Print Clean ONLY according to the intended use
These working instructions apply to:
Type of machine Description
cara Print Clean Enclosed isopropyl alcohol agitator for cleaning re-
sin-based 3D printed parts of excess uncured resin
The cara Print Clean is an easily operated, laboratory-grade 3D print cleaning unit to be used in accordance with
the manufacturer’s instructions, cleaning 3D printed parts that are cured from resin and within the supported part
size range.
The cara Print Clean has an integrated controller installed inside the base casing. The firmware required for all the
operations is pre-installed and ready for use.
The provided AC/DC power supply ((XP Power VER24US 120-JA and acceptable alternate Triad Magnetics
WSX120-2000)) has been tested and is considered part of the cleaning equipment.
1.1 Declaration of CE Conformity
cara Print Clean is a 3D print cleaning unit designed, manufactured and certified according to the following
directives, regulations and standards:
• RoHS
• FCC
• HARMONIZED STANDARD FOR LABORATORY EQUIPMENT SAFETY:
• EN61010-1
• ELECTROMAGNETIC COMPATIBILITY DIRECTIVE 2014/30/EU
• EN55014-1
• EN55014-2
We, B9Creations, herewith declare that a.m. device fulfills the basic safety requirements of mentioned standards,
regulations and directives. In any case of non-authorized modification, abnormal use or misuse of this device or
document, B9Creations is not liable for any injury that may occur.

-6-
GB
2 Instructions for Safe Use
2.1 Explanation of Symbols
Symbol Accompanying word(s) Explanation
CAUTION This symbol indicates safety-relevant
paragraphs and sections in these
working instructions.
NOTE This symbol indicates information
within the working instructions that
optimizes the use of the unit.
WARNING This symbol warns of the dangers
of electric voltage. Failure to comply
with safety guidelines and procedures
can result in electrical shock that
may lead to injury or death.
FLAMMABLE This symbol warns of the dangers
of flammable compounds. Failure to
comply with safety guidelines and
procedures can result in combustion
that may lead to injury or death.
DISCONNECT FROM MAINS This symbol indicates danger of
electric shock when unit enclosure is
opened. Unplug the unit before
opening it.
READ/REFER TO USER MANUAL This symbol directs the operator or
service agent to read the User Manual
for the equipment to find
important information.
DC POWER This symbol indicates the equipment
utilizes DC Power.
DC JACK POLARIZED This symbol indicates that the DC
power input jack for the equipment is
polarized. In particular, the DC
power input jack’s outer conductor
is the “negative” conductor and the
inner conductor is the “positive”
conductor.
START BUTTON This symbol indicates start of pro-
grammable clean cycle.
WEEE Disposal of old equipment according
to WEEE
Electrical and Electronic Equipment
Act (ElektroG).

-7-
GB
2.2 Transport Damage
Upon receipt of the equipment, check the unit for transport damage. If damage is found to either the
equipment or its shipping container, accept the unit with caution. Report the potential damages to the
shipper and Kulzer GmbH, (support@kulzer-dental.com) within 24 hours after receiving the unit.
CAUTION
Do not work with a damaged unit under any circumstances.
2.3 Operator’s Obligations
In addition to complying with the statutory regulations specified by the manufacturer, the operator must
ensure the statutory obligations are observed and implemented at the work place, i.e. the operator must
train personnel and comply with industrial safety legislation and any other regulations or laws in force.
For working at and with the unit, the operator must draw up written instructions in an understandable
form and give these to the employees in their own language. These instructions must be based on the cara Print
Clean Instruction for Use and shall be written considering the work to be performed.
The cara Print Clean is intended to be used strictly in a laboratory setting where personnel operating the
equipment are held to a high standard of process control and safety procedure.
2.4 Operations and Maintenance Log Book
Kulzer GmbH recommends the operator keeps a log book for the cara Print Clean. All tests on the equipment,
necessary or suggested compliance testing and essential works (e.g. repair work, modifications) should be
documented in this book.
2.5 Safety Information
Safety concerning the protection of persons, the environment and the material to be processed mainly depends
on the behavior of the persons operating the unit.
WARNING
No modifications of this equipment are allowed.
CAUTION
Prior to operation, read the cara Print Clean User Manual carefully. Adhere to the information provided to
avoid errors, equipment damage and injury to the operator.
In addition to the information in these work instructions, relevant national laws and guidelines must be observed
for setting up and operating this unit (technical connection requirements of the electrical supply companies, etc.).
CAUTION
The connecting power supply cable and plug must be checked for damage prior to operation. If any damage
exists, the unit must not be connected to the mains. A damaged mains power supply may only be replaced by a
mains power supply of the same type.
Failure to comply increases risk of electrical shock and serious harm of operator or third parties.

-8-
GB
FLAMMABLE
Isopropyl alcohol, the intended cleaning solvent, is highly flammable in both liquid and vapor states.
The operating environment must be free of open flame, sparks, other ignition sources or excessive heat.
Failure to comply increases risk of combustion and serious harm of operator or third parties.
CAUTION
Isopropyl alcohol, the intended cleaning solvent, can be damaging to the human body through ingestion,
inhalation and bodily contact. Read and adhere to the safety information detailed on the isopropyl
alcohol container’s label or contact the organization responsible for your local hazardous materials
regulations for more information.
Mandatory safety equipment:
• Eye protection
• Suitable gloves (see chemical protective gloves, category 3, EN 374)
• Clothing that covers exposed skin
• Fire extinguisher
• Ventilation hood (air cirulation in closed room/loop prohibited, free exhaust air into environment only)
WARNING
To avoid risk of electric shock, this equipment must only be connected to a supply mains with protective earth.
WARNING DISCONNECT FROM MAINS
Maintenance and repair of the electrical equipment of the device must only be performed by Kulzer GmbH, in
the “safe” condition (voltage cleared and device unplugged from mains). Service agents must observe the safety
instructions when performing service to the electrical equipment. Removal of protective enclosure components for
ANY purpose voids equipment warranty.
CAUTION
Proper function and safety of the device are only guaranteed if the required tests, maintenance and repair work
have been performed by Kulzer GmbH or trained and authorized service sta.
NOTE
This equipment has been tested and found to comply with the limits for a Class A digital device, pursuant to Part
15 of the FCC rules. These limits are designed to provide reasonable protection against harmful interference in a
residential installation. This equipment generates, uses and can radiate radio frequency energy and, if not installed
and used in accordance with the User Manual, may cause harmful interference to radio communications. However,
there is no guarantee that the interference will not occur in an individual installation. If this equipment does cause
harmful interference to radio or television reception, which can be determined by turning the equipment o and
on, the user is encouraged to try to correct the interference by one or more of the following measures:
• Reorient or relocate the receiving antenna.
• Increase the separation between the equipment and receiver.
• Connect the equipment into an outlet on a circuit dierent from that of the receiver.
• Consult the dealer or an experienced radio/TV technician for help.
If this equipment is receiving interference that aects the cara Print Clean, the user is encouraged to try to correct
the interference by one or more of the following measures:
• Reorient or relocate the unit or emitting equipment.
• Increase the separation between the cleaning device and emitting equipment.
• Connect the unit into an outlet on a circuit dierent from that of the emitting equipment.
• Isolate the unit and emitting equipment from each other, setting up in separate rooms if possible.

-9-
GB
3 Intended Use and Proper Operation
3.1 Intended Use
The cara Print Clean is an automated cleaning system that utilizes an agitated, contained volume of isopropyl
alcohol (isopropanol) to clean excess uncured 3D printing liquid material from 3D printed parts (“parts”).
Cleaning of parts and unit use shall be done by trained professionals in 3D printing laboratory environments.
The unit is not suitable nor intended for any purpose other than cleaning in these stated industries or recreations.
3.2 Proper Operation
CAUTION
The unit is suitable to be set up and operated in clean laboratory environments. The unit has been designed for
continuous operation.
• Only 3D printed parts made of cured resin shall be washed in the cara Print Clean. Cleaning anything that is
not a resin-based, 3D-printed part will void the warranty.
• Do not excessively clean a 3D printed part by continuing to expose it to isopropyl alcohol past the point of
removing the uncured resin. Over exposure may lead to structural degradation by weakening the part’s cured
resin.
• Ensure that the outer container, inner container, inner container plug, hanging arm, Build Table and lid are all
secured in their proper positions before starting a cleaning cycle.
NOTE
Isopropyl alcohol is the only solvent suitable to be used in the cara Print Clean. Using any other substance as the
solvent will void the warranty. Kulzer GmbH is free in qualifying and release alternative cleaning solvents beside
Isopropanol. For information about released cleaning solvents please download and observe Kulzer cara cleaning
guide (see chapter 1 too).
NOTE
Do not modify the firmware and hardware of device.

-10-
GB
4 Scope of Delivery
Check that all components are in good condition upon delivery of the unit. If items are missing or damaged,
contact your supplier.
4.1 Scope of Delivery
A. cara Print Clean Unit
B. Quick Start Guide
C. Accessory Kit (consisting of: 3 x foam rubber seal; 2 x magnet stirrer; 2 x drain plug; 1 x part tray (grid))
A
B
C

-11-
GB
5 Identification and Interface
5.1 Product Identification
Manufacturer and electrical specification information (Product Identification Label) can be found on the back of
the base. An example of this label is shown in section 10.3 of this Operating instructions.
NOTE
If requesting technical assistance, always take note concerning the model number and serial number of the unit.
5.2 Control Interface
Base Front Base Back
1. Start/Stop button 1. DC Power Inlet (Barrel Jack)
2. Cleaning duration control buttons
3. Cleaning duration indicator lights
4. Stir speed control buttons
5. Stir speed indicator lights
Product
Identification
Label
1
1
2
4
5
3
MINUTES
SPEED
Slow Medium Fast
1 2 3 4 5 6 7 8 9 10

-12-
GB
6 Transport and Installation
6.1 Transport
• Transport the unit oriented properly to prevent damage.
• Maximum stacking level of units for shipment – 3 Levels.
• Do not stack additional items or shipments on top of units.
• Keep away from rain.
• Fragile; handle with care
• Mechanical shock must be avoided.
• Storage and Transport temperature should not be less than 0°C (32°F) or more than 40°C (104°F)
• Storage and Transport relative humidity maximum shall be less than 80%.
• For dimensions and weight refer to Section 10.1.
NOTE
Keep the shipping packaging in case you need to ship the unit for technical assistance.
6.2 Hardware Setup
• The unit must be placed on a solid, rigid, level and skid-proof surface (laboratory desks, racks) so that a
horizontal, safe, vibration-free position is ensured. The unit must not be placed in direct sun-light.
• The unit shall be placed in a location that is dry and well ventilated. It shall not encounter liquid or fluid
leaks.
• The unit shall be installed in a low dust environment. When not in use, the containers shall be placed
properly in the base and the lid shall be secured.
• The room temperature should not be less than 15°C (59°F) or more than 35°C (97°F). The humidity should
be less than 80%.
• The support surface shall be stationary (no castors) and must have a load bearing capacity of at least
40 kg/88 lbs.
CAUTION
• Take care not to pinch your fingers when placing the unit on the table.
• A footprint area (w x d: 750 x 750 mm (30” x 30”)) is required.
• The unit needs to be positioned on the support table in a manner that allows access
to the mains socket for disconnection from mains if needed.
• Do not turn the unit on prior to temperature and humidity acclimatization.

-13-
GB
To properly set up the hardware, connect the cara Print Clean to an AC power socket (A) using ONLY the power
supply and cord provided with the cara Print Clean. Mains: 100-240 VAC, 50/60 Hz with protective earth.
Connect to mains with protective earth in accordance with local power supply specifications.
Insert the barrel connector of the provided power supply into the barrel jack in the cara Print Clean base (B).
NOTE
As with most electronic equipment, it is recommended that the operator supplies adequate surge protection.
CAUTION
• Do not use any type of extension cord other than a surge protection cord.
• Do not directly connect the unit to any type of emergency backup generator that is not connected to mains
power.
NOTE
If additional hardware is installed, it could cause malfunctions to the system. Do not install any other additional
hardware if not authorized by Kulzer GmbH.
7 Operation
CAUTION
Read the safety information in Section 2 before attempting to operate the cara Print Clean.
7.1 Turning the unit “ON” and “OFF”
The cara Print Clean is always on when it is plugged into a power socket. To turn the unit o, disconnect it from
mains.
B
A

-14-
GB
7.2 Filling with isopropyl alcohol
Place the outer container in the base and remove the lid and inner container.
Isopropyl alcohol is stored solely in the outer container. Do not manually fill the
inner container with isopropyl alcohol. The unit will regulate when the inner container
is filled during the cleaning cycle.
The amount of isopropyl alcohol that shall be loaded in the outer container is dependent
on the 3D printed parts to be cleaned during the next cleaning cycle. The outer container
has two fill lines that correspond to two possible volumes: 1.3 liters and 2.0 liters.
If the height of the parts to be cleaned is 70 millimeters or greater,
fill the outer container to the 2.0-liter fill line.
If the height of the parts to be cleaned is less than 70 millimeters,
fill the outer container to the 1.3-liter fill line.
CAUTION
Take care to ensure that no isopropyl alcohol spills from the outer container at any time. Stray isopropyl
alcohol may damage the cara Print Clean’s electronics or surrounding materials.
FLAMMABLE
Isopropyl alcohol is highly flammable in both liquid and vapor states.
Read the safety information in Section 2.5 before handling isopropyl alcohol.
CAUTION
Failure to load the outer container with the correct amount of isopropyl alcohol based on 3D printed part height
can result in damage to the cleaned parts.
If not enough isopropyl alcohol is loaded, the parts will not be fully submerged and the top of part will not
be cleaned.
If too much isopropyl alcohol is loaded, the inner container will not completely drain of isopropyl alcohol
when the cleaning cycle ends. The 3D printed parts may then be left to soak in the undrained isopropyl
alcohol, potentially weakening the cured resin of the parts.
NOTE
The isopropyl alcohol in the outer container can be used for multiple cleaning cycles, but the cleaning
eectiveness of a reused batch of isopropyl alcohol may decrease with each cleaning cycle it is used depending
upon material used and part geometry. Refill the isopropyl alcohol before the cleaning result is not sucient any
more. Be sure to use a second cleaning step with clean isopropyl alcohol for Medical Device objects to ensure an
appropriate final cleaning.
NOTE
Never install both drain plugs during operation.

-15-
GB
7.3 Positioning the inner container drain plug
The back of the inner container has two drain holes. The cara Print Clean’s
drain plug shall be snugly inserted into one of the two holes before starting
the cleaning cycle.
If the height of the part to be cleaned is less than 70 millimeters place
the plug in the inner container’s top hole.
If the height of the parts to be cleaned is 70 millimeters or greater,
place the plug in the inner container’s bottom hole.
Part height less than 70 millimeters (mm):
• Outer container filled to 1.3 liters – see low level indicator at container
• Inner container with drain plug in top hole
• Extended build table hanger
Part height 70 millimeters (mm) or greater:
• Outer container filled to 2.0 liters – see high volume level indicator at container
• Inner container with drain plug in bottom hole
• Normal build table hanger
7.4 Placing the parts in the inner container
3D printed parts made of cured resin may be cleaned by placing
the parts in the inner container. Parts can be cleaned while still
attached to the Build Table or while resting in the part tray.
If any parts to be cleaned are still attached to the Build Table, ensure
that the hanging arm is secured to the lid and the Build Table is snugly
tightened to the hanging arm. Use the regular hanging arm if the height
of the parts is 70 millimeters or greater. Use the extended hanging arm
if the height of the parts is less than 70 millimeters. It might be rea-
sonable to remove printed parts from the Build Table before cleaning.
Please refer to the cara Print Clean Cleaning Guide for tipps and tricks.
If any part to be cleaned is not attached to the Build Table, this
part shall rest on the part tray.
If all parts to be cleaned are still attached to the Build Table, the
part tray shall be removed.
NOTE
The hanging arm is designed to fit to the Build Table of the cara Print 4.0 printers. If cleaning parts printed in other
printers, please always remove the printed parts from the specific Build Table
CAUTION
Only 3D printed parts made of cured resin shall be washed in the cara Print Clean. Cleaning anything that
is not a resin-based, 3D printed part will void the warranty.
Drain plug
in the top
hole
Drain plug
in the
bottom hole

-16-
GB
7.5 Configuring the cleaning cycle settings
The Start/Stop button (A) starts or stops a cleaning cycle and is located on
the right side of the control interface. A cleaning cycle is characterized by
the 3D printed parts in the inner container being submerged in isopropyl
alcohol that is stirred at a specified speed for a specified duration.
The duration of the cleaning cycle is measured in minutes and controlled by
the
top set of buttons and indicator lights (B) on the left side of the control
interface.
The speed at which the isopropyl alcohol is stirred is controlled by the
bottom set of buttons and indicator lights (C) on the left side of the control
interface.
Use the buttons on either side of the duration and speed indicator lights to
configure the cleaning cycle settings as desired.
7.6 Prepairing cleaning cycle
Before starting the cleaning cycle, ensure the following conditions are met:
• The outer container, inner container, inner container plug, hanging arm,
Build Table and lid are all secured in their proper positions.
• The isopropyl alcohol fill level, inner container plug and hanging arm are
correct for the height of the 3D printed parts to be cleaned.
• The magnetic stirring bar is placed in the bottom of the inner container.
• The part tray is inside the inner container only if any one of the 3D printed
parts to be cleaned is not attached to the Build Table. The control interfa-
ce’s
indicator lights show the desired settings.
• Press the Start/Stop button to begin the cleaning cycle. The cleaning
cycle will run using the duration and spin speed set on the control inter-
face, reversing the direction of the spin every minute. Cleaning process
ti-
mer count down and stirrer operation starts after filling of internal container.
• To alter the duration or spin speed while the cleaning cycle is in progress,
change the desired settings on the control interface.
• To end the cleaning cycle immediately without waiting for the duration to
pass, press the Start/Stop button.
NOTE
Upon starting the cleaning cycle, the unit will pump isopropyl alcohol from the outer container up into the inner
container to submerge the loaded 3D printed parts.
7.7 Starting the cleaning cycle
NOTE
Isopropyl alcohol should be periodically exchanged. Resin color discoloration can discolor prints.
A
B
C
MINUTES
SPEED
Slow Medium Fast
1 2 3 4 5 6 7 8 9 10
MINUTES
SPEED
Slow Medium Fast
1 2 3 4 5 6 7 8 9 10

-17-
GB
7.7.1 After the printer has finished printing, remove the build table from the printer. If necessary
reduce/remove attached resin by appropriate measures - required process is not part of this
operating manual. Reduction of liquid resin at objecs significantly increases durability of iso-
propanol. Confirm that the cara Print Clean outer container is filled with isopropyl alcohol to the
level which corresponds to the print height requirement. If the isopropyl alcohol is discolored
from use, replace the Isopropanol alcohol.
7.7.2 Place the Build Table into the cara Print Clean Build Table Hanger and secure with the lock knob
and place the lid into the cara Print Clean chamber. See chapt. 13 for operation with grid and
separated objects.
7.7.3 Select the desired number of minutes for clean. Some prints may require more than one wash.
Do not continuously wash a part for more that 10 minutes as continuous and prolonged sub-
mersion in isopropyl can damage the print. Cleaning process parameters for each material are
available at Kulzer cleaning guide - pls. check carefully prior to operation!
7.7.4 Press the start button to begin the cleaning cycle. LED light under the indicated time remaining
will blink when unit is in operation.
7.7.5 After the cleaning cycle has finished or the operation was stopped manually, remove the cara
Print Clean lid and build table. No LED‘s will be flashing when the operation has stopped.
Separate build table incl. printed object from lid.
7.7.6 Blow dry the print directly after the wash has ended to prevent the isopropyl from drying onto
the print. Consider flammability of isopropanol vapors! Execute drying of objects under a hood
only, see chapt. 2.5. Care about personal protective measures (e.g. wearing eyewear, gloves, etc.).
7.7.7 Inspect fine details to assure all liquid resin has been removed. Run the print through another
wash cycle or use the spray bottle with isopropyl alcohol to remove any remaining liquid resin.
NOTE
Some geometries will prevent the isopropyl from reaching all the liquid resin. These geometries will hold the air
that gets trapped when the isopropyl rises to the print. To completely clean the print, remove the print from the
Build Table and place it on the part tray in the cara Print Clean and start another wash cycle.
7.7.8 Ensure the printed part is dry and free of surface resin. It is recommended to use compressed air
to dry pieces prior to Curing if necessary.
NOTE
Compressed air must be dry, oil-free and clean from any contamination like rust, corroded particles,
dust or tube abrasions! In doubt contact vendor of compressor to e.g. install appropriate maintenance
units. Any contamination may cancel out bio-compatibility of 3D printed objects!
7.8 Cleaning Procedure
7.8.1 Unplug the barrel jack from the back of the unit.
7.8.2 Remove container assembly from the base.
7.8.3 Inspect base for any resin. Clean with a cloth and isopropyl alcohol by observing personal
protective measures (see chapt. 2.5).
7.8.4 Remove Lid and Inner Assembly container and set aside.
7.8.5 Remove all Isopropanol alcohol from the container.
7.8.6 Clean the inner and outer container surfaces with a clean cloth and isopropanol alcohol.
7.8.7 Inspect inner container bottom gasket to assure it is not damaged, replace if necessary.
7.8.8 Do not discard the stir bar and the drain plugs.

-18-
GB
8 Safety
CAUTION
DO NOT USE Acetone in the cara Print Clean. Acetone will rapidly destroy acrylic material of con-
tainers and pump. Warranty is void when using Acetone only once.
8.1 Isopropyl Alcohol Draining
To ensure that the 3D printed parts loaded in the cara Print Clean do not soak in isopropyl alcohol longer than the
specified cleaning cycle duration, the unit will automatically drain the inner container of isopropyl alcohol
in the following situations.
• A cleaning cycle completes
• The Start/Stop button is pressed during a cleaning cycle
• The cara Print Clean loses power
8.2 Isopropyl Alcohol Containment
When a cleaning cycle is not in progress, all isopropyl alcohol loaded in the cara Print Clean is stored in the outer
container. The inner container creates a seal when placed inside the outer container, isolating the isopropyl alco-
hol from outside interference or contamination.
FLAMMABLE
Though the cara Print Clean’s design reduces risk by separating the isopropyl alcohol in the outer container,
isopropyl alcohol is still highly flammable in both liquid and vapor state.
Read the safety information in Section 2.5 before handling isopropyl alcohol.
9 Maintenance, Care and Cleaning
9.1 Cleaning
9.1.1 Unit Cleaning
The components of the unit that come into contact with isopropyl alcohol can be cleaned with water to remove
uncured resin residue.
NOTE
Ensure that all water completely dries before refilling container and operating the cara Print Clean.
9.1.2 Build Table Cleaning
Remove the Build Table from the hanging arm before attempting to remove a 3D printed part from the Build Table.
NOTE
Do not use metal scrapers or metal tools which can scratch the Build Table to remove a 3D printed part.
9.2 Isopropyl Alcohol
9.2.1 Replacement
The isopropyl alcohol in the outer container can be used for multiple cleaning cycles but the cleansing
eectiveness of a reused batch of isopropyl alcohol will decrease with each cleaning cycle it is used depending
upon the resin used and part geometry. In case of increased formation or settling of solid polymerisation residues
(flocculation), the cleaning medium must be changed immediately - risk of damaging the pump! It is solely at the
discretion of the operator to determine when the isopropyl alcohol is to be changed.
9.2.2 Disposal
Isopropyl alcohol is classified as a hazardous waste in many countries and may require special disposal.
Contact the organization responsible for your local hazardous materials regulations for more information.
9.3 Non-Repairable Items
There are no replaceable electronic parts or replaceable wear parts on the cara Print Clean. All parts are rated for
long life. The cara Print Clean is designed for an estimated life of 5 years. Items in need of replacement must be
replaced by Kulzer GmbH or trained and authorized service sta, unless included in the Replacement Pack avai-
lable. For purchasing accessories and spare parts pls. contact your local Kulzer facility or authorized dealer. For
service contact see chapt. 12.

-19-
GB
10 Technical Data
10.1 cara Print Clean Technical Specifications
Maximum 3D printed part size (W x D x H) 108.5 x 63.5 x 127 mm (4.25” x 2.5” x 5.125”)
Size (W x H x D) 199 x 263 x 474 mm (7.8” x 10.4“ x 18.7”)
Weight 3.7 kg (8 lbs.)
Mains Input 100-240 VAC, 50/60 Hz, 1.4-0.7A
Rated power 12VDC, 2A
Power supply units XP Power VER24US 120-JA and acceptable alternate
Triad Magnetics WSX120-2000
Mains plugs included AU, EU, UK, US
Required table area 300 mm x 300 mm
Package size (W x H x D) 300 x 365 x 570 mm (11.8” x 14.4” x 22.4”)
Package weight 5 kg (11 lbs.)
Agitation method Magnetic stirrer
Cleaning solvent volume 1.3 L (44 fl. oz.) for part height less than 70 mm
2.0 L (68 fl. oz.) for part height 70 mm or greater
10.2 Operating conditions
Use Only indoors
Temperature range 18°C to 28°C (64°F to 82°F)
Relative humidity less than 80%
Installation altitude up to 2000 m above sea level

-20-
GB
10.3 Information on Manufacturer and Electrical Specification – Product Label
See Section 2.1 for Symbol Definition
11 Troubleshooting Guide
If an error develops in the function or operability of the cara Print Clean, confirm that all possible
remedies for the error have been performed prior to contacting Kulzer GmbH support. If an error is
encountered, follow each “Possible Cause” and “Remedy” in order of listing in the table.
Error description Possible Causes Remedy
1 The indicator lights on the cont-
rol interface are not lit.
The power adapter is not
plugged into the back of the
cara Print Clean base.
Plug the power adapter that
shipped with the unit into the
back of the cara Print Clean
base and
then plug the opposite
end of the adapter into a func-
tioning mains outlet.
The power adapter is not
plugged into mains outlet.
There is no power to mains
outlet.
Inspect in-house electrical
fuses or breaker switch
The power adapter is
defective.
Contact Kulzer GmbH support
If none of the above solves the
problem, contact Kulzer GmbH
support.
Other manuals for CARA Print Clean
1
Table of contents