Kurz 454FTB User guide

Kurz Instruments, Inc. 831-646-5911
2411 Garden Road www.kurzinstruments.com
Monterey, CA 93940
360208-F 454FTB, 504FTB, 534FTB 1
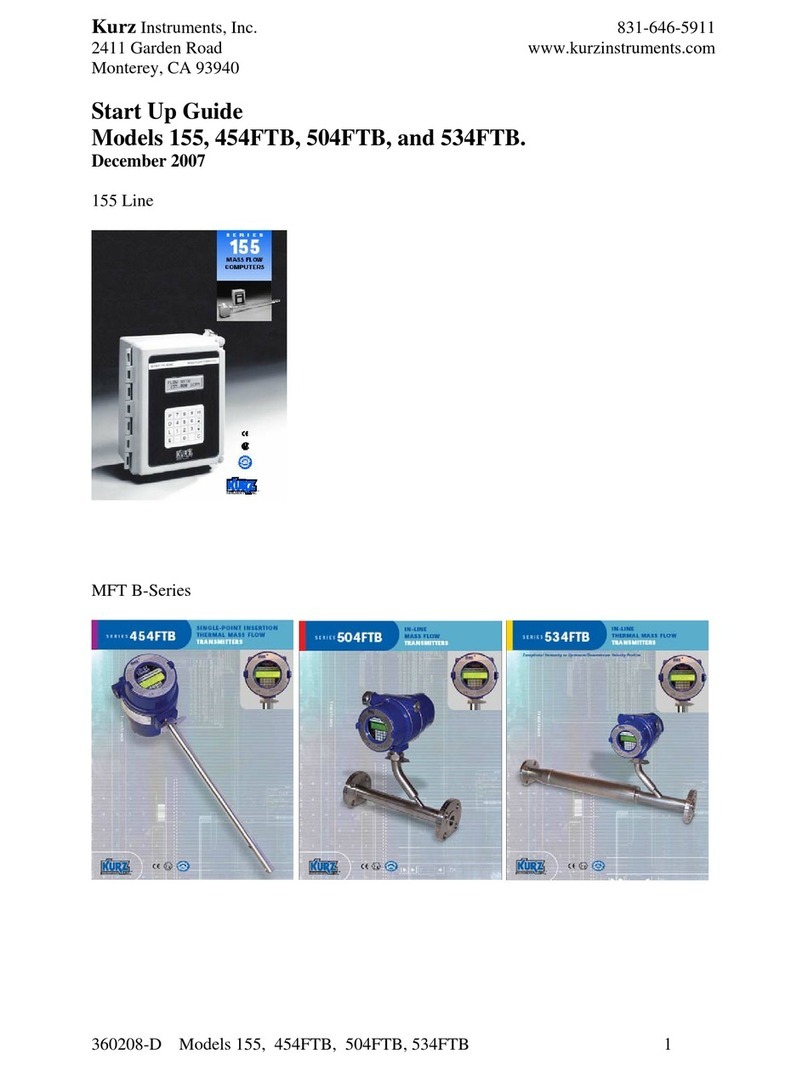
Start Up Guide
Models 454FTB, 504FTB, and 534FTB.
August 2010
For MFT B-Series Firmware 2.x

Kurz Instruments, Inc. 831-646-5911
2411 Garden Road www.kurzinstruments.com
Monterey, CA 93940
360208-F 454FTB, 504FTB, 534FTB 2
The following information is an abbreviated list of what you need to do for your flow
meter to achieve maximum possible repeatability and accuracy. Most of the steps will be
required for all products. Please read this before you start.
You will ultimately need to refer to the product manual, which is found on the attached
CD. Given the Model number of your product, you can find the manual you require.
Unpacking/Expected Content
Your flow meter has been shipped to you with the following items. Please make sure you
have them and contact us if this is incomplete.
1. Flow meter, compare the packing list against your order.
2. Calibration certificate
3. Manual on CD
4. Menu Quick Lookup Card
Mounting of the equipment (see guidelines sheet)
You will need to remove the protective shipping covers from the sensor or flow body
before installing the unit. A thermal meter must have direct contact with the process fluid
to work. The meter will need to be mounted in accordance to safe design practice
accounting for the process pressures, corrosion, temperature and any potentially
hazardous area requirements. The electronics head needs to be in an accessible area so
you can do the wiring and access the local keypad/LCD if applicable. Some models have
remote electronics heads, which must be mounted/wired too. Most units can be
programmed with a Laptop portable
computer using the USB interface and PC
driver.
Each meter has a flow arrow mounted on
the outside of the enclosure that provides
a convenient mounting reference. The
flow arrow direction points in the
direction of the flow. For best results,
please carefully look over the installation
guidelines sheet for more on the sensor
placement criteria.
Insertion Meters must be mounted with a
compression fitting to the duct/pipe or
+ Kurz Model # =

Kurz Instruments, Inc. 831-646-5911
2411 Garden Road www.kurzinstruments.com
Monterey, CA 93940
360208-F 454FTB, 504FTB, 534FTB 3
flange mounted then checked for leaks. Make sure the insertion depth is adequate to get
into the center line where the flow profiles are the most stable. The distance from profile
disruptions needs to be adhered to for the best repeatability/accuracy, see the guideline
sheet for more details. Check for process fluid leaks.
In-Line Meters have similar requirements for undisrupted straight runs except for the
534FTB line. Check for process fluid leaks.

Kurz Instruments, Inc. 831-646-5911
2411 Garden Road www.kurzinstruments.com
Monterey, CA 93940
360208-F 454FTB, 504FTB, 534FTB 4
>X
Vavg
Vs
CF(v) ?
CF(v)= Vavg/Vs
0.5 < CF(v) < 1.0
Kurz 4xx (454,etc.)
D
A ? (ft2or m2)
A = D2π/4
d
L
L ? (ft, m), d ? (in)
SBCF= A/(A+12dL)
>5 D
CF(v)
v
x
x
x
x
0.7
1.0
Vs
ε< 2%
X = 40D
X = 20D
X = 15D
Less than two line
size changes
Less than two line
size changes

Kurz Instruments, Inc. 831-646-5911
2411 Garden Road www.kurzinstruments.com
Monterey, CA 93940
360208-F 454FTB, 504FTB, 534FTB 5
Insertion Meter Installation Guidelines
1. Mount Probe so its velocity sensing element is centered in the duct/pipe. This location has the most stable flow reading. Note the flow arrow direction
points in the direction of the flow.
2. The upstream and downstream distance to flow profile disruptions from that of a straight pipe are “X” diameters upstream and 5 downstream. We have
chosen 2% maximum error from the baseline straight pipe calibration for the distance criteria. Longer straight runs will reduce this error level. Here are
four example cases in order of their disruption to the flow:
a. Valves change the flow profile as they open and close so the sensor should not be located too close. The gate valve is the worst and the metering
valves are the best at reducing their flow profile changes between open and closed.
b. Branching joints also change the profile as the percentage of flow changes between the branches.
c. Elbows or direction changes will disrupt the long-run pipe profile. As this disruption settles down, the profile can wobble or move depending on
the flow rate. Several elbows in different planes will impart a swirl that also imparts an error in the readings (flow is not straight on to the sensor)
and the upstream distance should be increased. The distance from elbows may be reduced if field calibrations are used. Double elbows in different
planes introduce swirl and need 50% more distance than a single elbow does.
d. A line size change will also disrupt the profile and can introduce instability so this should be avoided unless you have more experience on how to
use this to your advantage. The distance from a line size change may be reduced if field calibrations are used.
3. The duct or pipe inside dimensions are used to determine the flow area of the meter. An area wizard in the meter setup menu walks you through entering the
data and the meter will calculate the flow area.
4. The probe will block off some of the flow area and accelerates the velocity proportional to its area projected on to the duct/pipe cross section. This is known
as the Sensor Blockage Correction Factor (SBCF). You enter the insertion depth (L), which is measured from the end of the window to the duct inside wall,
in the meter setup menu and the meter will calculate the SBCF.
5. Field Calibration Data is the key to achieving accuracy for the insertion probe. Without this step you can have good repeatability but the absolute flow
number requires a reference flow measurement be taken at the same time you record the indicated display of the insertion meter. The correction factor
which is velocity dependent, CF(v), is defined as the ratio of True reading to Indicated reading. The basic calibration of the unit is a point velocity sensor.
To convert this to volumetric flow rate or mass flow rate requires the proper area and the average velocity, this is where the field calibration fits in. As the
field calibration method is quite long and technical, you are encouraged to do one of two things to achieve this:
a. Contract the field calibration with Kurz Instruments, Inc. or another reputable field calibration company.
b. Do it yourself if you have the experience or a test team at your disposal.
Common methods of doing reference method calibrations entail: duct traverses, tracer gas dilution method or the process Stoichiometry which requires support
from your process engineering group. Sometimes the correction factors can be entered based on an ideal duct profile model or a finite element analysis (FEA) or
computation fluid dynamics (CFD) program.
For more information on all the above, please refer to the full product manual provided on CD or at our website www.kurz-instruments.com. Also see “Flow
Measurements 2nd ed.” Edited by D. W. Spitzer, ISA Press 2001. Chapter on Insertion Flow Measurements.

Kurz Instruments, Inc. 831-646-5911
2411 Garden Road www.kurzinstruments.com
Monterey, CA 93940
360208-F 454FTB, 504FTB, 534FTB 6
>X
Kurz 5xx (504 etc.)
>5 D
Kurz 534
0 D
0 D
D
X = 40D
X = 20D
X = 15D
ε< 2%
Less than two line
size changes
Less than two line
size changes

Kurz Instruments, Inc. 831-646-5911
2411 Garden Road www.kurzinstruments.com
Monterey, CA 93940
360208-F 454FTB, 504FTB, 534FTB 7
In-Line Meter Installation Guidelines
1. Mount the Meter so its sensing element meets the upstream and downstream requirements of that model:
a. Kurz Models 504 etc. all need “X” inside pipe diameters upstream and 5 downstream of the sensing element to ensure a
repeatable and accurate reading within 2% of the initial calibration. Double elbows in different planes introduce swirl and
need 50% more distance than a single elbow does. Longer straight runs will reduce this maximum error. Any
discontinuity in the straight pipe flow profile will change the reading compared to its calibration conditions. The data were
initially calibrated using long straight runs with short close-coupled pipe flanges that minimize the line-size discontinuity.
In many applications, field calibration data can be used to reduce the upstream and downstream requirements.
b. Kurz Model 534 have a built in flow conditioner and all the straight run it needs so there is no upstream or downstream
straight run requirements to achieve the rated accuracy.
2. If the process fluid is hot or cold compared to the ambient air, then insulation around the pipe/meter upstream for about 30
diameters or more will help reduce thermal gradients in the process fluid near the sensor to avoid these errors. As the temperature
is changed, the thermal inertia of the piping will cause a lag in the thermal profile so a longer stabilization time will be required.
For more information on all the above, please refer to the full product manual provided on CD or at our website www.kurz-
instruments.com

Kurz Instruments, Inc. 831-646-5911
2411 Garden Road www.kurzinstruments.com
Monterey, CA 93940
360208-F 454FTB, 504FTB, 534FTB 8

Kurz Instruments, Inc. 831-646-5911
2411 Garden Road www.kurzinstruments.com
Monterey, CA 93940
360208-F 454FTB, 504FTB, 534FTB 9

Kurz Instruments, Inc. 831-646-5911
2411 Garden Road www.kurzinstruments.com
Monterey, CA 93940
360208-F 454FTB, 504FTB, 534FTB 10
°
°
°
°
°
°
Customer I/O
Panel
~ AC Power
2
2 or 4
4-20 mA, AO = FLOW & Temp.
24 VDC
Digital I/O
454 [ V
data
, Area, CF(v) ]
°
°
°
°
°
°
Customer I/O
Panel
~ AC Power
2
2
4-20 mA, velocity
24 VDC
454 [ Vdata, ]
4-20 mA, AO = FLOW
2
155 [ Area, CF(v) ]
•
•
•
•
Digital I/O
OR
504/534 [Fdata ]
OR
504/534 [Fdata ]
BASIC SETUP
REMOTE DISPLAY SETUP

Kurz Instruments, Inc. 831-646-5911
2411 Garden Road www.kurzinstruments.com
Monterey, CA 93940
360208-F 454FTB, 504FTB, 534FTB 11
Wiring, Sensor, Power and Signals
The thermal flow meter uses several watts of power to measure flow, so it requires more
than a simple 4-20 mA loop powered connection for operation. In general our products
are known as a “4-wire” device, power (2) and signal (2 or 4). The exact wiring diagram
for your meter can be looked up on the provided CD manual using the model number of
the meter. The two AC and DC power examples (pages 8&9) for the single 4-20 mA
output on the B-Series assume the PLC is connected to a loop powered device.
Potentially Hazardous Area Use and EMI Compliance
Please consult the full manual on the provided CD for safety and EMI related issues.
Sensor
For “Remote Electronics” you need to run five wire cable for each sensor between the
sensor J-box and Flow Computer. The wire gauge/length and conduit/shielding
requirements are found in the manual and on the field wiring diagrams. The transmitter
attached versions have no sensor wiring requirements since the sensor wiring for these
models are installed at the factory.
I/O wiring
The image below is for the 155Jr. This is used on remote display versions of the product.
155Jr I/O board photo (155A/B,155C-2/E-2 are not shown).
Analog
Outputs
RS-232
AC
Power
Sensor
Input
Cal/Operate
Switches

Kurz Instruments, Inc. 831-646-5911
2411 Garden Road www.kurzinstruments.com
Monterey, CA 93940
360208-F 454FTB, 504FTB, 534FTB 12
454FTB/504FTB/534FTB I/O connections
Power
The MFT B-Series, 454FTB, 504FTB and 534FTB have a universal input power supply,
85 to 265 VAC, 50/60 Hz or 24 VDC (18 to 30 V).
Analog Output
This is an optional feature which can be wired two ways but you still need the 24 VDC
power (or AC power option) to operate the unit as a “4-wire” connection:
1. The 4-20 mA interface can be optically isolated (also known as loop powered but
the meter still needs a 24 VDC or AC power connection). In this case your 4-20
mA input circuit is providing the excitation voltage for the meter’s AO interface.
2. You can self power the 4-20 mA circuit from the flow meter where Kurz provides
the 24 VDC excitation voltage. The output is not isolated in this case. Here your
4-20 mA input will need a differential current receiver or other method to accept
the current signal which is ground referenced at the flow transmitter.
Digital Communications (also see Protocol section near the end)
The MFT B-Series supports USB with a PC COM emulator driver (9600 baud only) to do
remote terminal or keyboard communications. See disk for USB driver installation
instructions. The MFT B-Series also supports half duplex RS-485 for Modbus
communication. Modbus communication can be configured for baud rates of 9.6, 14.4,
19.2, 38.4 and 57.6 kbits/s. The HART 4-20 mA FSK protocol is available as an option
Analog
Outputs
DC
Power
USB
RS-485
DO,
DI, AI
Sensor
AC
power

Kurz Instruments, Inc. 831-646-5911
2411 Garden Road www.kurzinstruments.com
Monterey, CA 93940
360208-F 454FTB, 504FTB, 534FTB 13
which is on Analog Output (AO) Channel 1. The HART version has only one 4-20 mA
or AO channel.
Alarms
Discrete relay contacts energized on configurable events are optionally available. These
are isolated relays or SSRs also known as digital outputs or DOs on the MFT B-Series.
The maximum current, voltage and isolation specs are on the brochure/ product manual.
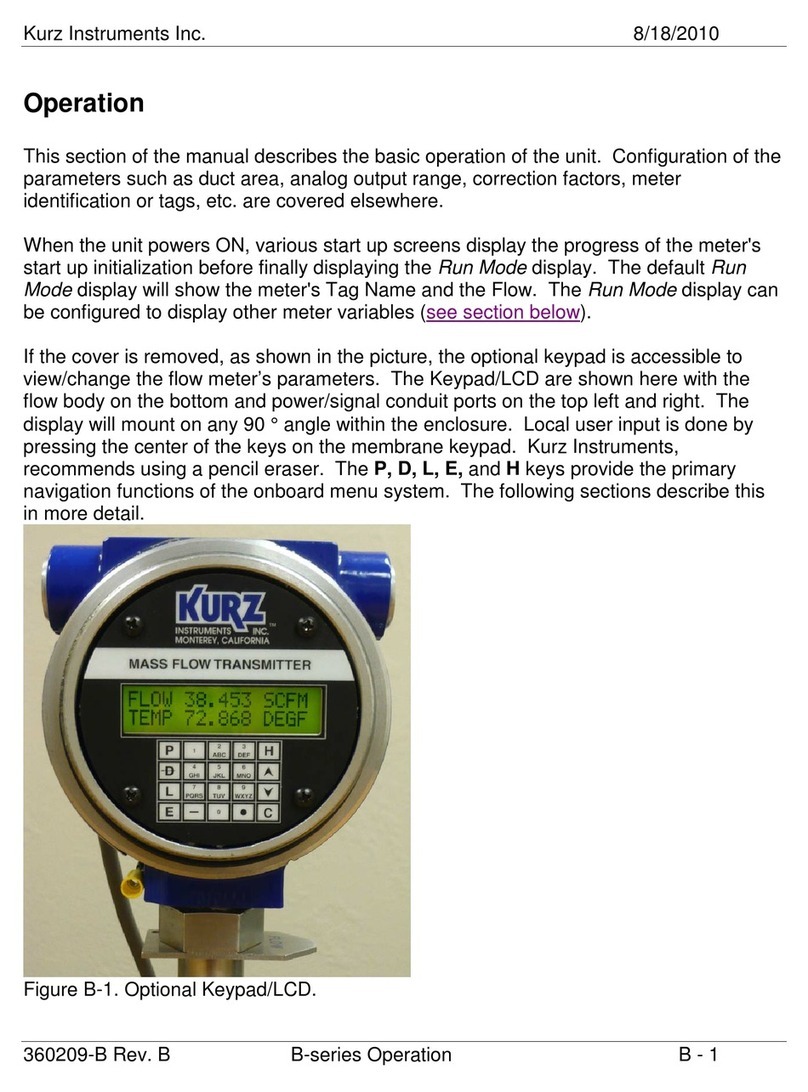
Display Orientation
The keyboard/display on the 454/504/534 may be mounted in any 90 ° orientation for
optimum viewing and keyboard access when mounted in the process. Disconnect the
power first then open the explosion proof lid. You simply unscrew the cross point screws
(2 or 4), move spacers as required then tighten back down (see photo below). The ribbon
cable for the display is long enough if not twisted up too much to rotate into any of the
four positions.
Navigating Menus
The MFT-B flow meter with 2.0 and later firmware has a new menu system that is
different than the 1.x versions of the firmware. The new menu system is intuitive and
easy to navigate. The 2.x model still uses the 2x16 LCD display and 20-key keypad as
shown below. Note, however, the keypad overlay for the 2.x model flow meters has
changed. The numeric keys are layed out similar to a telephone keypad with alphabetic
characters included with the numeric digits imprinted on the keys.
The primary keys on the keypad used
to navigate the menu system are the P,
D, L, E, and H keys. The remaining
keys are primarily used for data entry.
A PC/laptop running a terminal
emulator program such as TeraTerm
can be used instead of the onboard
keypad and LCD display. The
corresponding navigation keys on the
remote keyboard are the lowercase
(non- shifted) p, d, l, h keys and the
ENTER key functioning as the E key
on the meter keypad. The Table
below defines the functions of the
keys

Kurz Instruments, Inc. 831-646-5911
2411 Garden Road www.kurzinstruments.com
Monterey, CA 93940
360208-F 454FTB, 504FTB, 534FTB 14
Keypad
Remote
Keyboard
Function
P
p
Invoke Program Mode (requires an Access Code);
Or Skip over data with no entry, during data entry
D
d
<BACKSPACE>
Invoke Display Mode (no Access Code required);
Or delete 1 character to the left, during data entry
L
l
Invoke Log Mode (no Access Code required)
E
<ENTER>
Invoke Extended Utilities Mode (requires an Access Code);
Or accept a data entry, during data entry
C
c
Clear the displayed/entered value, during data entry;
Or acknowledge an active flow meter event
H
h
Home or back out of the menu and Return to Run Mode
For the MFT B-Series 2.0 the Quick Setup Code is 123456 and the Tech Code is 654321.
These two access codes can be changed by the user.
A Quick Look up Card for the B-Series 2.0 is provided with each meter. The Quick
Lookup Card is a handy navigational aid for the B-Series 2.0 menu system. Additional
cards are available upon request from Kurz Instruments. Or use this link to access a
printable version which can be cut and sized to fit in standard badge-sized laminating
pouches.
Meter Programming
The MFT-B Series 2.0 meter has a Quick Setup Menu that guides the user to configure
the essential parameters to get the meter operational quickly. The following parameters
are included in the Quick Setup Menu:
Meter Tag Name
Flow Units
Flow Area
Probe Depth (for INSERTION meters)
Analog Output #1 Range
Analog Output #2 Range
Setup Run Mode Display
To invoke the Quick Setup Menu, press Pand enter the Quick Setup Access Code (the
factory default code is ‘123456’). The meter displays the following screen to indicate
that the 4-20mA output signals and values will be ‘frozen’ while using the Quick Setup
Menu.

Kurz Instruments, Inc. 831-646-5911
2411 Garden Road www.kurzinstruments.com
Monterey, CA 93940
360208-F 454FTB, 504FTB, 534FTB 15
! WARNING !
OUTPUT WILL STOP
The next screen shows the type of meter. If the user is configuring an Insertion Meter the
following will be displayed:
METER TYPE IS
INSERTION FLOW
If an In-Line Meter is being configured the following will be displayed:
METER TYPE IS
IN-LINE FLOW
Press Pto advance to the next Quick Setup Menu screen which prompts for the meter
TAG NAME
TAG NAME
KURZ MFT-B
The TAG NAME is entered using the numeric keys on the keypad (0-9) similar to
entering a text message on a cellular phone. Alphabetic characters and special characters
(e.g., <,>,%, etc) are mapped to the numeric keys as follows:
Keypad Key
Character Map
0
0, <sp>, (, ), +, ,, <, >
1
1, /, #, :, $, @, %, &
2
2, A, B, C
3
3, D, E, F
4
4, G, H, I
5
5, J, K, L
6
6, M, N, O
7
7, Q, R, S
8
8, T, U, V
9
9, W, X, Y, Z
The alphabetic and special characters are entered by repeated pressing of the
corresponding numeric key. When the desired character is displayed, press the Ekey to
accept the character and advance the cursor to the right. Use the Dkey to clear one
character to the left (backspace) or the Ckey to clear the entire text entry and restart.

Kurz Instruments, Inc. 831-646-5911
2411 Garden Road www.kurzinstruments.com
Monterey, CA 93940
360208-F 454FTB, 504FTB, 534FTB 16
The TAG NAME can be up to 13 characters. When the TAG NAME entry is
completed, press Eto accept the new TAG NAME.
The meter will next prompt for the FLOW UNITS. The following is a list of units
available for selection.
Flow Rate SCFM, SCFH, NLPM, NCMH, SLPM, SCMH,
Mass Rate PPM, PPH, KGM, KGH
Use the ^or vkey to scroll through the available units and press Eto select the desired
unit.
FLOW UNITS
>SCFM ^v
Depending on the engineering units selected for the FLOW, the meter will use the
following engineering units for Velocity and Temperature.
Velocity SFPM, SMPS, NMPS
Temperature DEGF, DEGC
The duct/pipe area blocked off by the insertion of the sensor/probe, accelerates the flow
reading. This is adjusted for with the Sensor Blockage Correction Factor (SBCF).
The SBCF is automatically calculated when any of the following are changed:
1. Flow Area
2. Insertion depth (L) – measured from the end of the probe to the duct inside
wall.
3. Probe diameter (d) which is configured at the factory.
The next screens in the Quick Setup Menu are helper screens to aid in calculating the
FLOW AREA. The first screen prompts for the DUCT PROFILE. Use the ^or vkey to
scroll between ROUND and RECTANGLE and press Eto select the profile of the duct
(for odd shaped duct profiles, press Pto skip this entry and proceed to the FLOW AREA
screen).
SBCF = (A1-A2)/A1
A
1
A
2
L
d

Kurz Instruments, Inc. 831-646-5911
2411 Garden Road www.kurzinstruments.com
Monterey, CA 93940
360208-F 454FTB, 504FTB, 534FTB 17
If ROUND is selected for the DUCT PROFILE, the meter will prompt for the INSIDE
DIAMETER of the duct:
INSIDE DIAMETER
>22.625 IN
The value is entered in inches for English systems and millimeter for Metric systems.
If RECTANGLE is selected for the DUCT PROFILE, the meter will prompt for the
DUCT WIDTH followed by the DUCT HEIGHT. These dimensions are inside
dimensions of the duct.
DUCT WIDTH
>36.459 IN
DUCT HEIGHT
>40.989 IN
Use the numeric keys to enter the value in inches or millimeters depending on the flow
units specified previously. Press Eto accept the value.
The FLOW AREA will be calculated from the dimensions provided as follows:
The meter will display the FLOW AREA for the dimensions entered (if the dimension
prompts were skipped, the currently stored value of FLOW AREA is displayed). The
user can accept the FLOW AREA displayed, by pressing Eor a different value can be
entered using the numeric keys and pressing Eto accept the value entered.
FLOW AREA
>10.3779000 SQFT
D
Area = D
2
π/4
H
W
Area = HW

Kurz Instruments, Inc. 831-646-5911
2411 Garden Road www.kurzinstruments.com
Monterey, CA 93940
360208-F 454FTB, 504FTB, 534FTB 18
For Insertion Meters, the next screen will prompt for the PROBE DEPTH
PROBE DEPTH
>18.230 IN
Use the numeric keys to enter the value in inches or millimeters depending on the system
units and press Eto accept the value.
The meter next prompts for the output function for the 4-20mA output channel #1.
ANALOG OUT 1
>FLOW RATE ^v
Use the ^or vkeys to display the list of Analog Output selections. The options are
FLOW RATE/VELOCITY/TEMPERATURE/PID. Press Eto accept the AO1 function
displayed. In this example, FLOW RATE is selected for the Channel 1 AO so the
following example screens will prompt for the low and high range of the flow rate being
measured.
The next prompt is for the analog output minimum range value (the analog output value
at 4mA)
AO1 at 4mA
>0.000000 SCFM
The units depend on the FLOW UNITS configured previously. Use the numeric keys to
enter the equivalent flow value at 4mA and press Eto accept the value.
The next prompt is for the analog output maximum range value (the analog output value
at 20mA)
AO1 at 20mA
>15000.000 SCFM
Use the numeric keys to enter the equivalent flow value at 20mA and press Eto accept
the value.
If the meter is configured with two analog output channels, the meter will repeat the
analog output setup prompts for AO Channel #2.

Kurz Instruments, Inc. 831-646-5911
2411 Garden Road www.kurzinstruments.com
Monterey, CA 93940
360208-F 454FTB, 504FTB, 534FTB 19
The next screens setup the Run Mode display of the flow meter. The Run Mode screens
can be configured to display as scrolling screens displaying one process variable per
screen. Or the display can be a static screen displaying up to 2 process variables; one on
each line of the 2 line LCD display.
Use the ^or vkeys to select between STATIC and SCROLLED and press Eto accept the
selection.
RUN MODE DISPLAY
>STATIC ^v
If STATIC format is selected for the Run Mode Display, the meter will prompt for the
process variables to display
STATIC VARS
>FLOW+TEMP ^v
Use the ^or vkeys to select the desired display option and press Eto accept the
selection. The following display options are available
Display option
Sample display
FLOW ONLY
FLOW 0.0000 SCFM
FLOW+TOT
FLOW 0.0000 SCFM
FLTOT 1.838E+07
FLOW+VEL
FLOW 0.0000 SCFM
VEL 0.00000 SFPM
TAG+FLOW
TAG NAT. GAS
FLOW 0.0000 SCFM
FLOW+TEMP
FLOW 0.0000 SCFM
TEMP 82.003 DEGF
Flow displays on line 1
Line 2 is blank
Flow displays on line 1
Totalized flow displays on line 2
Flow displays on line 1
Velocity displays on line 2
Tag Name displays on line 1
Flow displays on line 2
Flow displays on line 1
Temperature displays on line 2

Kurz Instruments, Inc. 831-646-5911
2411 Garden Road www.kurzinstruments.com
Monterey, CA 93940
360208-F 454FTB, 504FTB, 534FTB 20
If SCROLLED format is selected for the Run Mode Display, the meter will prompt for
the combinations of process variables to be scrolled
SCROLLED VARS
>SCROLL ALL ^v
Use the ^and vkeys to scroll through the following combinations of process variables
and press Eto accept the selection. The SCROLLED VARS list includes the following:
SCROLL ALL, FLOW ONLY, FLOW+TOT, FLOW+VEL, TAG+FLOW,
TAG+FLOW+VEL, FLOW+TOT+VEL, FLOW+TEMP, FLOW+TEMP+VEL
For the Run Mode scrolled format, each screen will display the value of only one process
variable; the description will be on line 1 and the value with units will be on line 2.
Flow
FLOW RATE
0.0000 SCFM
Temp
TEMPERATURE
82.52 DEGF
Velocity
VELOCITY
0.0000 SFPM
Totalized
Flow
TOTAL FLOW
183545.0 SCF
Tag Name
TAG NAME
NAT. GAS24
For scrolled format, the user also defines the scroll interval. The scroll interval defines
the time interval between screen updates to scroll to the next screen/displayed variable.
This value must be at least 2 seconds, but can be up to 8 seconds. Use the numeric keys
to enter the scroll interval in seconds and press Eto accept the entry.
Other manuals for 454FTB
1
This manual suits for next models
2
Table of contents
Other Kurz Measuring Instrument manuals
Popular Measuring Instrument manuals by other brands

Keysight Technologies
Keysight Technologies N4960A user guide

LaserLiner
LaserLiner VideoScope manual

Turner Designs
Turner Designs 10-AU Replacement instructions

Signal
Signal POWER STATION 4 operating manual

Boonton
Boonton 4530 Series Service and calibration manual

RST Instruments
RST Instruments ICTS0005 System instruction manual