Kusina G7TD200G Instructions for use

INSTRUCTION AND
MAINTENANCE MANUAL
TILTING BRATT PAN
(GAS)
“Professionally with Professionals”

DESCRIPTION
The instructions in this manual contain important information on the safe mounting, usage, cleaning and maintenance of
the device. Thus, keep the manual at a place easily accessible by the person who will use the machine, and the
technician.
Mounting, conversions for different gas groups or electrical inlet, and maintenance works of the device should be
performed by a specialist authorized in this subject and in accordance with the instructions of the manufacturer
company.
Gas and electrical connections of the device should be arranged according to the tables and electrical diagram given in
this manual.
Manufacturer company accepts no responsibility for the final damages incurred in humans or properties that are caused
by any procedure not conforming to the instruction manual, or maintenance or technical interventions that are not
performed by authorized people.
MOUNTING INSTRUCTIONS
Placement
Place the device beneath a filtered exhaust hood in order to eliminate smell and fume that may be emitted during
cooking.
Place the device at a place min. 10cm away from the side or back wall to prevent excessive temperature rises.
Remove the nylon protection cover on the device. If there are any adhesive residues left on the surface, clean with a
suitable solvent.
Balance the device by adjusting its four adjustable legs on a suitable ground.fig.A
Mount the pan lifting arm.
Gas Connection
Connection to the gas installation should be made with flex pipe and ball valve. Fix the said ball valve to a place that is
away from heat and easily accessible in case of a danger.
Gas connection must be done according to national and local gas standarts .
Gas inlet is indicated by GAS label on the appliance body
After all connections are completed, check for gas leakage at joints through leakage detection device or soapy water.
Check whether the device is suitable for connected gas type. If not, see “Conversion to Different Gas Types”
ATTENTION: All adjustments and modifications to be performed on the
gas installation and connection of the device should be performed by
authorized people.
Waterconnection
Connect the water inlet to the water supply through a tap.
Mount a mechanical filter on the water inlet of the device and the dirt and metal particles that may intrude in the device
will be prevented through that filter.
Before connecting the last pipe part to the machine, clean the accumulated dirt by discharging some water and then
complete the connection.
Check whether there is any leakage at the joints.
Electrical Connection
Connect the device to a proper network according to the electrical installation standards of the relevant country.
Feed the device with suitable network voltage written on the information plate.
Connect to the electrical installation over a suitable automatic fuse. Fix the said fuse on a place that is easily accessible
in case of a danger.
The cable connecting the device to the electrical installation should be at least of H05 RNF quality and its section
should be selected to be sufficient to carry the maximum current.
It is recommended to include a leakage current fuse in the feeding installation.
Voltage tolerance should not exceed ± 10%.
If the device will be used in a commercial kitchen, apply a correct grounding system. Here, consider DIN VDE D100
Article 540.
The device must be grounded. Grounding point is marked with " ".

Conversion to different gas types
If the device will be operated with a gas other than specified on its label, perform following procedures. Required
nozzles and adhesive labels are provided in a bag with the device.
Replacement of burnernozzle (figure B)
Remove the device control panel.(4)
Disassemble nozzle “1” from nozzle connector , and replace it with new one according to gas type
Adjust the burner air
Replacement of pilot burner nozzle (figure-B)
Remove the device control panel.
Remove screw “2” and replace nozzle “3”with new one according to gas type
WARNING: If any conversion to another gas is performed for the device, you
must place the adhesive label corresponding to the utilized gas on a visible
part of the device.
OPERATION
Pan control
Positions of the thermostat control button (B) are as follows:
0 Off
500C Minimum temperature
100÷2500C Medium temperatures
3000C Maximum temperature
Positions of the gas control button are as follows:
● Off
¥ Pilot burner ignition
SS Maximum flame
Ignition of Burners (fig C)
Open the feeding valve on the gas network.
Turn the gas control button “5” to position “Pilot burner ignition”(7) and push down. At the same time, press down the
piezoelectric ignition button, as well. So, the spark needed for pilot burner flame is produced. Release gas control button
approximately after 20 seconds. Pilot burner flame will continue to burn. If does not burn, repeat ignition process again.
Ignition may be checked through “flame observation port” (10).
In order to ignite burners, turn the gas control button to position “maximum flame” (6).
Adjust thermostat control button (9) to desired cooking temperature.
It is enough to turn the valve (11) left to take water in the chamber.
ATTENTION: Pay attention to have the pan on full lateral position while using the device. Otherwise, microswitch
will cut off the gas to the main burner.
Turning off Burners
Turn thermostat control button (9) to position ''0''.
Turn gas control button(5) to position “off”.(6)
Close the valve on the gas network.
Pan lifting
Pan can be pulled up and down through its special mechanism “12”. In order to pull up the pan, lock the rotation
mechanism with its pin and turn it clockwise. In order to pull down the pan (to cooking position), turn the mechanism
anti-clockwise.
ATTENTION: Do not try to pull up the pan without removing its upper cover.

WARNINGS
Pay attention not to contact hot surfaces of the device!
Device is designed for professional use and must be used only by person who are trained for this intention.
Device is intended for cooking, do not use for another purpose.
In case of any failure, close the gas inlet valve of the device and disconnect electrical power.
Commission only authorized services for maintenance and use genuine spare parts.
Before starting to use the device, carefully clean the surfaces especially those to be in contact with foods.
ATTENTION: Do not use the device for grilling. Never operate when the cooking chamber is empty.
During first operation, device will emit fume and smell for a short period. This fume and smell is the result of the
insulation material and the substances such as oil, etc. on the metal sheet surfaces. This is not dangerous and will
disappear by itself.
Operate the device at the highest operation level for 1 hour during first operation.
Additional safety members
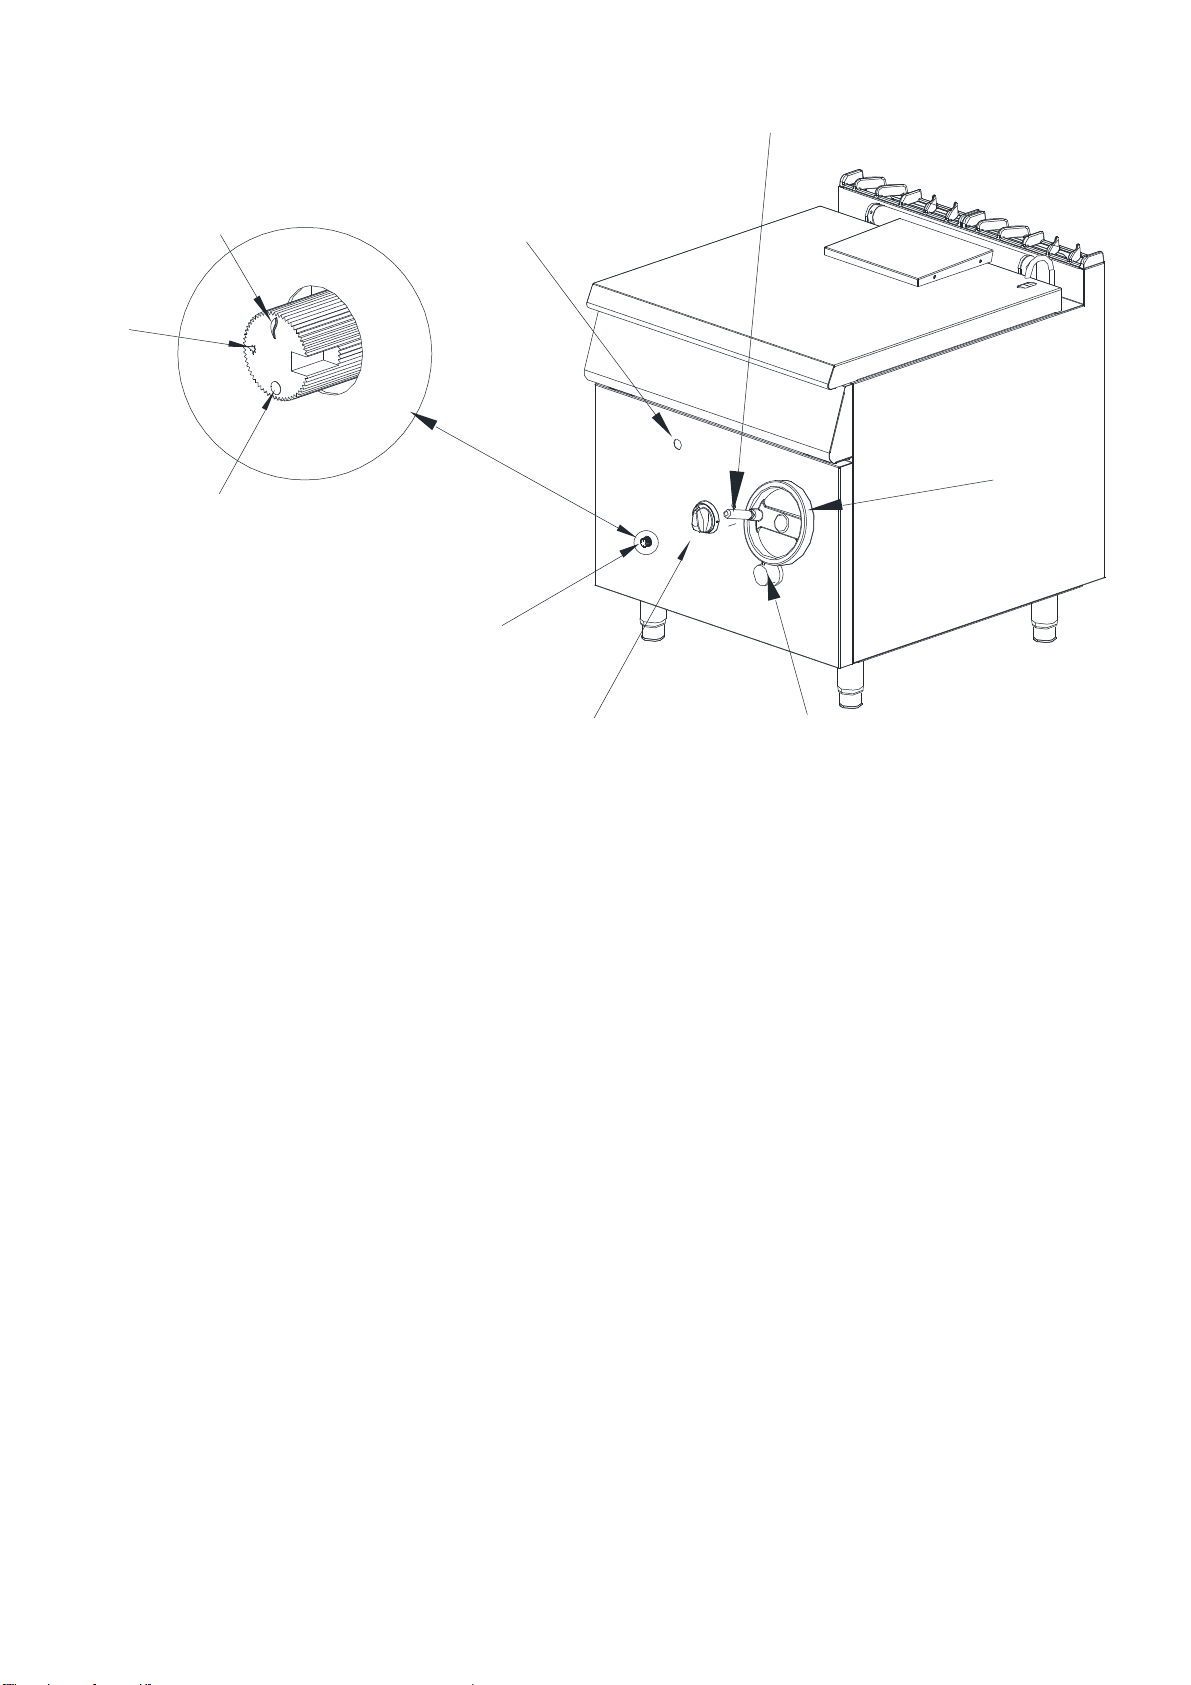
Safety thermostat cuts off the gas feeding to the burners and ceases operation in case pan temperature exceeds
maximum controlling temperature due to thermostat failure. In this case, close the gas inlet valve of the device and
notify to the authorized service.
When the pan is lifted during the operation of the device, microswitch cuts off the gas and switches off burners.
CLEANING and MAINTENANCE
Do not wash the device with high pressurized water.
You must switch off the gas and electrical connection of the device before starting to cleaning or maintenance
activities.
Before it cools down completely, wipe the device with a cloth immersed in warm soapy water at the end of each
working day.
During cleaning the device surface, do not use corrosive material which may cause scratches on the surface such as
detergents, wire brushes, etc.
Clean the surfaces, which cannot be cleaned through abovementioned methods, with chemical solvents.
If the device will not be used for a long period, coat the surfaces with a thin layer of Vaseline.
In case of any extraordinary condition with the device, notify to the authorized service. Never allow unauthorized
people to interfere in the device.
Lubricate pan lifting system with heat-resistant grease semi-annually.
POSSIBLE PROBLEMS - SOLUTIONS
Pilot burner does not ignite or ignites with difficulty.
Gas inlet pressure is insufficient.
Gas pipe or nozzle is blocked.
Gas tap is faulty.
Piezoelectric ignition system is faulty.
Safety thermostat is faulty.
Pilot burner goes out during operation.
Gas tap is faulty.
Safety thermostat is faulty or defective.
Main burner does not ignite or ignites with difficulty.
Gas pressure is insufficient.
Nozzle is blocked.
Gas tap is faulty.
Thermostat is faulty.
Pan lifting micro switch is faulty.
Temperature control cannot be performed.
Gas tap is faulty.
Thermostat is faulty.
Pan lifting micro switch is faulty.

G7TD200G G9TD200G G9TD201G
730
900
800
GAZ GİRİŞ
GAS INLET
652 464
GAZ GİRİŞ
GAS INLET
ELEKTRİK GİRİŞ
ELECTRICAL INLET
ELEKTRİK GİRİŞ
ELECTRICAL INLET
261
321
SU GİRİŞ
WATER INLET
SU GİRİŞ
WATER INLET
122
750
150
E
B
ACD
G7TD200G
G7TD200G
900
900
800
GAZ GİRİŞ
GAS INLET
646 634
GAZ GİRİŞ
GAS INLET
ELEKTRİK GİRİŞ
ELECTRICAL INLET
ELEKTRİK GİRİŞ
ELECTRICAL INLET
261
321
SU GİRİŞ
WATER INLET
SU GİRİŞ
WATER INLET
122
150
750
G9TD200G
UDFB980G
900
900
1200
523
634
GAZ GİRİŞ
GAS INLET
ELEKTRİK GİRİŞ
ELECTRICAL INLET
261
321
SU GİRİŞ
WATER INLET
523
GAZ GİRİŞ
GAS INLET
ELEKTRİK GİRİŞ
ELECTRICAL INLET
SU GİRİŞ
WATER INLET
122
150
750
G9TD201G
G9TD201G

MODEL
G7TD200G
G9TD200G
G9TD201G
WIDTH
mm
800
800
120
DEPTH
mm
730
900
900
HEIGHT
mm
900
900
900
HEAT CAPACITY
KW
18
20
30
PAN CAPACITY
Lt
60
80
120
GAS INLET
Inch
1/2"
1/2"
1/2"
ELECTRICAL INLET
V
220-230V 50-60Hz
220-230V 50-60Hz
220-230V 50-60Hz
WATER INLET
Inch
1/2"
1/2"
1/2"
GROSS WEIGHT
kg
130
145
220
Fig.A

3
1
Şekil B
Figure B
4
2
Figure B

Şekil C
Figure C
5
6
7
8
9
10
11
12
13
Fig. C
This manual suits for next models
3
Table of contents
Popular Other manuals by other brands

ReelCraft
ReelCraft TW Series operating instructions

Zone Offroad Products
Zone Offroad Products D1201 installation instructions

Compaq
Compaq 203039-B21 - Console Management Controller installation instructions

HYGIPLAS
HYGIPLAS CE399 instruction manual

IBM
IBM HS21 XM BLADECENTER - 5160 FOR SPEC CPU2000 specification

JVC
JVC KD-G401 Service manual