manuals.online logo
Brands
  1. Home
  2. •
  3. Brands
  4. •
  5. Kutai electronics
  6. •
  7. Batteries Charger
  8. •
  9. Kutai electronics CH5612 User manual

Kutai electronics CH5612 User manual

This manual suits for next models

1

Other Kutai electronics Batteries Charger manuals

Kutai electronics CH12 User manual

Kutai electronics

Kutai electronics CH12 User manual

Kutai electronics CH1812 User manual

Kutai electronics

Kutai electronics CH1812 User manual

Kutai electronics CH4612 User manual

Kutai electronics

Kutai electronics CH4612 User manual

Kutai electronics CH1112E User manual

Kutai electronics

Kutai electronics CH1112E User manual

Kutai electronics CH3612 User manual

Kutai electronics

Kutai electronics CH3612 User manual

Kutai electronics CH10 User manual

Kutai electronics

Kutai electronics CH10 User manual

Popular Batteries Charger manuals by other brands

EVBox BusinessLine manual

EVBox

EVBox BusinessLine manual

Goobay 71808 user manual

Goobay

Goobay 71808 user manual

Kogan KACRDQIS4XA user manual

Kogan

Kogan KACRDQIS4XA user manual

Sealey WCB3 quick start guide

Sealey

Sealey WCB3 quick start guide

Vanner SP00143/181 owner's manual

Vanner

Vanner SP00143/181 owner's manual

KeyOuest KO037515 quick start guide

KeyOuest

KeyOuest KO037515 quick start guide

Enplus Silk Series user manual

Enplus

Enplus Silk Series user manual

Intermec SF51 user guide

Intermec

Intermec SF51 user guide

Colorovo PowerBox 6800 user guide

Colorovo

Colorovo PowerBox 6800 user guide

Smartech WBC-250 Operator's manual

Smartech

Smartech WBC-250 Operator's manual

PIXO C-USB instruction manual

PIXO

PIXO C-USB instruction manual

Gunson G4104 quick start guide

Gunson

Gunson G4104 quick start guide

Dometic NDS SCE320 Short Operating Manual

Dometic

Dometic NDS SCE320 Short Operating Manual

ABB HT572708 Operation manual

ABB

ABB HT572708 Operation manual

EVOline Square80 manual

EVOline

EVOline Square80 manual

Redarc SBC24025 Operating instructions and owner's manual

Redarc

Redarc SBC24025 Operating instructions and owner's manual

Absaar HV04 manual

Absaar

Absaar HV04 manual

DazeTechnology Cover Dazebox Home installation manual

DazeTechnology

DazeTechnology Cover Dazebox Home installation manual

manuals.online logo
manuals.online logoBrands
  • About & Mission
  • Contact us
  • Privacy Policy
  • Terms and Conditions

Copyright 2025 Manuals.Online. All Rights Reserved.

___________________________________________________________________________________________
CH56 1
CH5612 & CH5624
Automatic Battery Charger user manual
GENERAL INFORMATION
A visual inspection of this product for damage during
shipping is recommended before installation. Please
contact your local supplier with any questions.
SECTION 1: IMPORTANT SAFETY
INSTRUCTIONS
This manual contains important safety and operating
instructions for battery charger Models CH5612 and
CH5624. Read the manual carefully and follow the
instructions before using your charger.
DANGER
High Voltage may result in a risk of fire, electric
shock, injury or death.
WARNING
Batteries may generate explosive gases during
normal operation and charging. Never smoke,
light a flame, or generate any sparks near the
battery.
1.1 This is not a power supply. Use only as a battery
charger.
1.2 Built-in AC power fuses protected input. No
external fuses are needed. Do not attempt to
replace internal fuse, if it burns out.
1.3 Do not expose the battery charger to rain, snow or
wet environments.
1.4 Do not disassemble the charger. Return to
supplier when service and repair is needed.
1.5 Be very careful not to drop any metal tool on to the
battery or charger. It may spark or short-circuit the
battery or other electrical part, which in turn may
cause an explosion.
1.6 To reduce the risk of damage to the electric plug
and cord, pull using the plug rather than the cord
when disconnecting the charger.
1.7 If battery acid or chemicals contact skin or
clothing,wash immediately with soap and water.
1.8 If battery acid or chemicals comes into contact
with your eye, immediately begin washing your
eye with cold water before taking any other action
and continue for at least 10 minutes. Get
immediate medical attention.
SECTION 2: SPECIFICATIONS
Power Input
Protection
Voltage 100 265 Vac
Reverse polarity & short circuit protections
Frequency 47 63 Hz
DC output Over/Under Voltage protections
Current 2A
DC output Over Current protection
DC Output
AC input Over Voltage protection
CH5612 Voltage 13.8 Vdc / Current 12A Max.
Temperature sensor failure protection
CH5624 Voltage 27.6 Vdc / Current 6A Max.
Environment
DC Voltage Regulation
Operation Temperature -20 to +60 ˚C
Less than +/- 1%
Storage Temperature -30 to +80 ˚C
Charge Mode
Relative Humidity Max. 90%
Float (Current limiting, constant voltage)
Vibration 5.0Gs @ 60 Hz
Efficiency
Mounting Type
More than 88% @ Full load
Panel Mount
Static Power Consumption
Dimensions
Max 3.5W @ 110 Vac
208.0 (L) x 134.0 (W) x 63.0 (H) mm
Max 4.5W @ 220 Vac
8.19” (L) x 5.28” (W) x 2.48” (H)
Fuse
Weight
Slow blow 5A 300V
0.89 Kg (1.96 Lbs) +/- 2%
Suitable Battery Type
Gel, Lead Acid & AGM
___________________________________________________________________________________________
2CH56
SECTION 3 :INSTALLATION AND
OPERATION
3.1 Check that the correct model charger is selected
for your battery
3.2 Verify your line voltage is correct.
3.3 Connect line voltage to the charger, then the
“Power” indicator should light up and display the
output voltage and current readings.
3.4 Disconnect AC power before connecting the
charger to the battery. Connect charger output
to the battery positive and negative terminals.
3.5 Turn AC power ON. The unit will automatically
charge the battery with an adjusted current
related to battery condition and cyclically show
charging voltage and current on screen.
3.6 The charger is automatic and can always stay
connected even during engine cranking and
running.
3.7 For the model CH5612 to work the minimum
battery voltage must be higher than 6 Vdc or the
charger will automatically shut-down and all the
indicators on the panel will turn off.(For model
CH5624, the minimum battery voltage is 13
Vdc).
3.8 Voltage sensing circuit automatically stops
charging when the battery is fully charged.
3.9 For AC power connection:
cable size ≧1.25mm²(AWG 16).
3.10 For DC power connection
cable size ≧2.00mm²(AWG 14).
SECTION 4: ALARM AND PROTECTIONS
If any of the following fault conditions occur, the
“Alarm”indicator will light up red and display fault
message. The charger will automatically shut-down
simultaneously. The battery charger will resume
operation automatically after the fault conditions are
cleared.
4.1 Reverse polarity & short circuit alarm
Fault message display ”Err 01”.
4.2 AC input Over Voltage alarm
Fault message display ”Err 02”indicates AC
input voltage is higher than 256 Vac.
4.3 Temperature sensor failure alarm
Fault message display ”Err 03”.
4.4 DC output Over Voltage alarm
Fault message display ”HiV”
It means DC input voltage is higher than 15 Vdc
for model CH5612; or higher than 30 Vdc
for model CH5624.
4.5 DC output Under Voltage alarm
Fault message display ”LoV”
It means DC input voltage is higher than 15 Vdc
for model CH5612; or higher than 30 Vdc for
model CH5624.
4.6 DC output Over Current alarm
Fault message display ”OC”
It means DC output current is higher than 13
Adc for model CH5612; or higher than 6.5 Adc
for model CH5624.
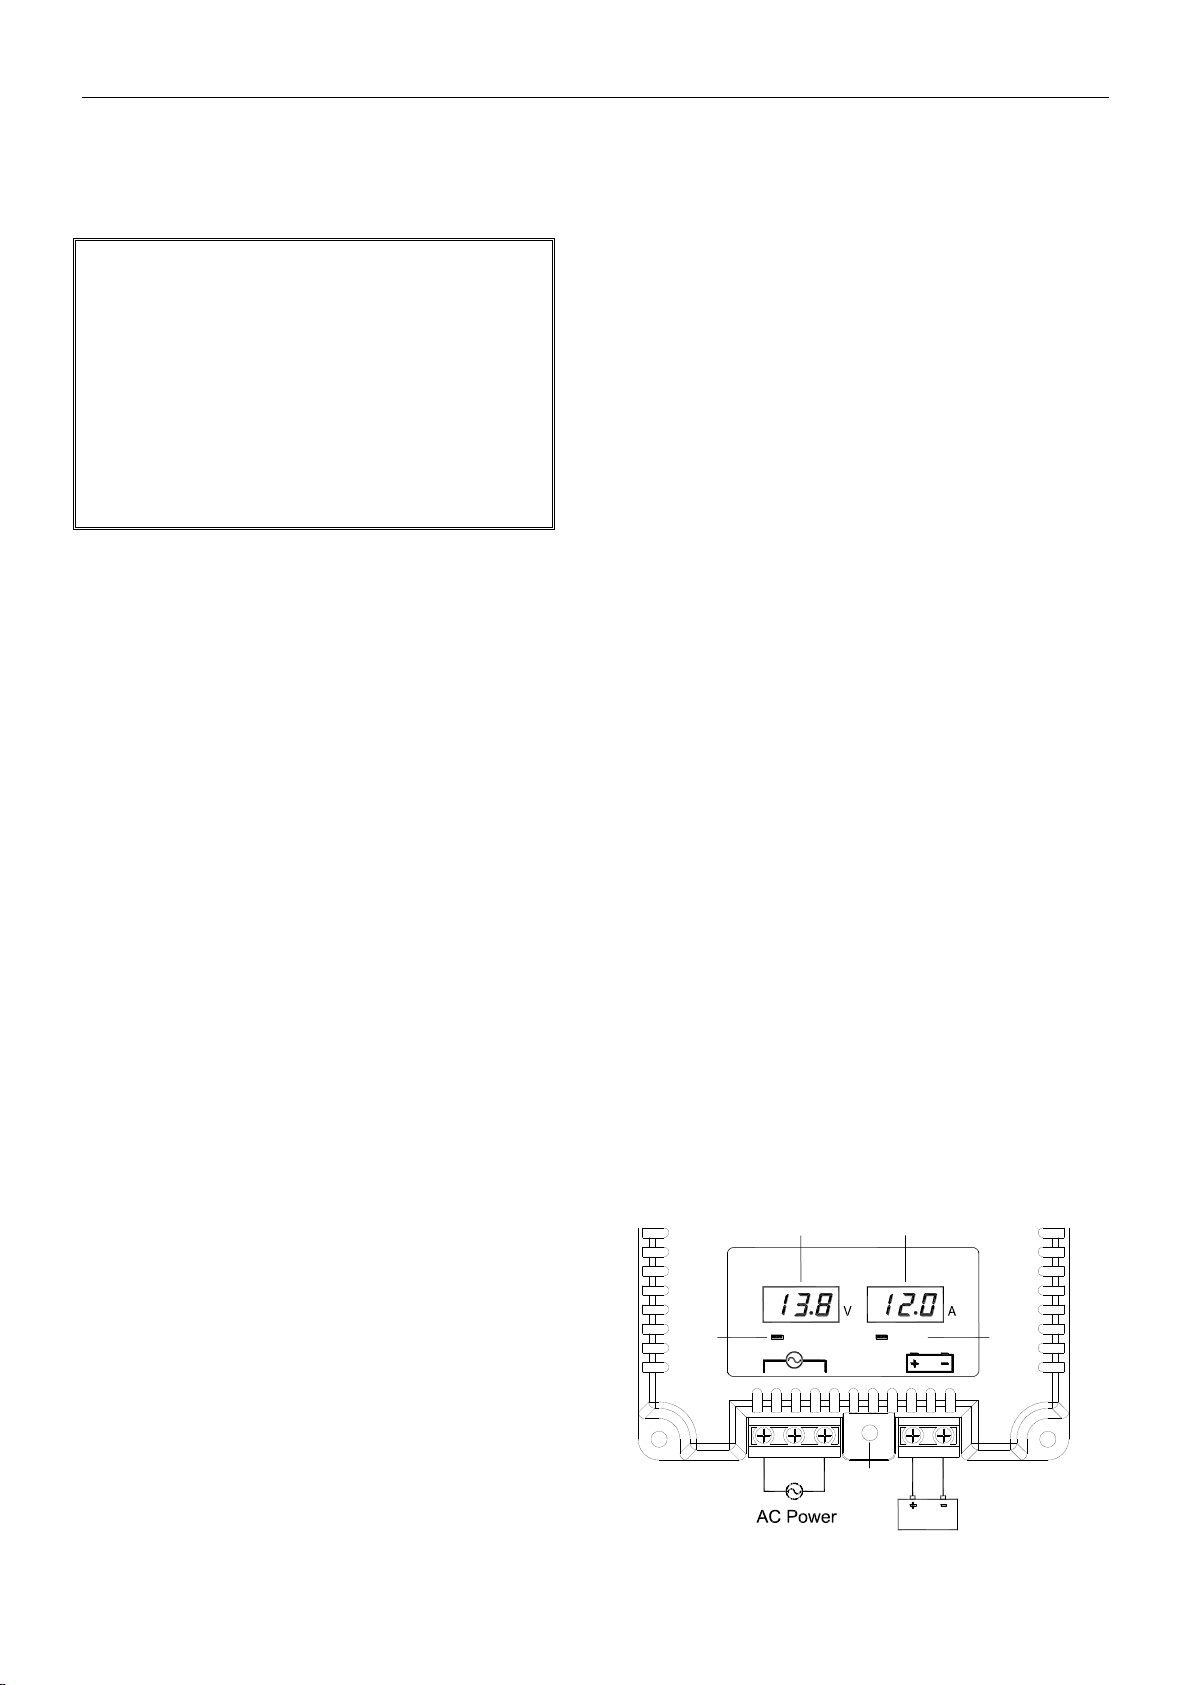
SECTION5: DISPLAY&EXTERNALWIRING
Force
Power Alarm Alarm
Power
Charge voltage Charge Current
LED LED
Batt
Button
CAUTION
●Read and follow all installation instructions
before installing the charger
●Make sure to disconnect all the electrical
power to the charger
●Crimp and property secure terminal lugs on
to power wires to avoid shorts.
●High ambient temperatures could cause
overheating. The charger will then reduce its
output proportional automatically.
●Disconnect the charger from the battery if the
AC power is off for long periods of time.
___________________________________________________________________________________________
CH56 3
SECTION 6: Manually Force Charge
If battery has not been charged or discharged for long periods of time, the residual voltage will be too low to start
charge automatically.
When this happens, use proper tool to press and hold the “Force Charge Button”to force charge battery. In the
meantime the “Alarm”indicator is continuously blinking RED.
After the battery voltage is increased, release the button. The battery charger will automatically resume to normal
charging.
SECTION 7: OUTLINE / SIZE
[7.68"]
195.0
[8.19"]
208.0
[4.76"]
121.0 [5.28"]
134.0
[inch]
Unit : mm
[0.98"]
25.0
[2.48"]
63.0
CAUTION
●All the protections will stop while the battery charger is being force charge manually.
●DO NOT force charge in the normal condition; attempts to do so may result in damage.