KVMSwitchTech VW-HDMI-4K User manual

VW-HDMI-4K
1x4 HDMI 4K Video Wall Splitter (Cascadable)
118 W. Streetsboro Street, Ste. 125 | Hudson, OH 44236 | Toll Free: (866) 865-7737

SAFETY INFORMATION
1. To ensure the best results from this product, please read this manual and all other documentation before operating your equipment.
Retain all documentation for future reference.
2. Follow all instructions printed on unit chassis for proper operation.
3.
4. Make sure power outlets conform to the power requirements listed on the back of the unit. Keep unit protected from rain, water and
excessive moisture.
5. Do not attempt to clean the unit with chemical solvents or aerosol cleaners, as this may damage the unit. Dust with a clean dry cloth.
6. Do not use the unit if the electrical power cord is frayed or broken. The power supply cords should be routed so that they are not
likely to be walked on or pinched by items placed upon or against them, paying particular attention to cords and plugs, convenience
receptacles, and the point where they exit from the appliance.
7. Do not force switched or external connections in any way. They should all connect easily, without needing to be forced.
8. Always operate the unit with the AC ground wire connected to the electrical system ground. Precautions should be taken so that the
means of grounding of a piece of equipment is not defeated.
9. AC voltage must be correct and the same as that printed on the rear of the unit. Damage caused by connection to improper AC
voltage is not covered by any warranty.
10. Turn power off and disconnect unit from AC current before making connections.
11. Never hold a power switch in the “ON” position.
12. This unit should be installed in a cool dry place, away from sources of excessive heat, vibration, dust, moisture and cold. Do not use
the unit near stoves, heat registers, radiators, or other heat producing devices.
13. Do not block fan intake or exhaust ports. Do not operate equipment on a surface or in an environment which may impede the normal
environment, the unit should be periodically “blown free” of foreign dust and matter.
14. To reduce the risk of electric shock, do not remove the cover. There are no user serviceable parts inside. Refer all servicing to
15.
other devices.
16. Do not drive the inputs with a signal level greater than that required to drive equipment to full output.
17. The equipment power cord should be unplugged from the outlet when left unused for a long period of time.
18. Save the carton and packing material even if the equipment has arrived in good condition. Should you ever need to ship the unit,
use only the original factory packing.
19.
A. The power supply cord or the plug has been damaged.
B. Objects have fallen, or liquid has been spilled into the equipment.
C. The equipment has been exposed to rain.
D. The equipment does not appear to operate normally, or exhibits a marked change in performance.
E. The equipment has been dropped, or the enclosure damaged.
THIS SAFETY INFORMATION IS OF A GENERAL NATURE AND MAY BE SUPERSEDED BY INSTRUCTIONS CONTAINED WITHIN THIS MANUAL.

TABLE OF CONTENTS
1
CONTENTS
CONTENTS ...................................................................................1
FEATURES & SPECIFICATIONS ................................................ 2
FRONT & BACK PANELS ..............................................................3
RS-232 & TELNET COMMANDS...................................................4
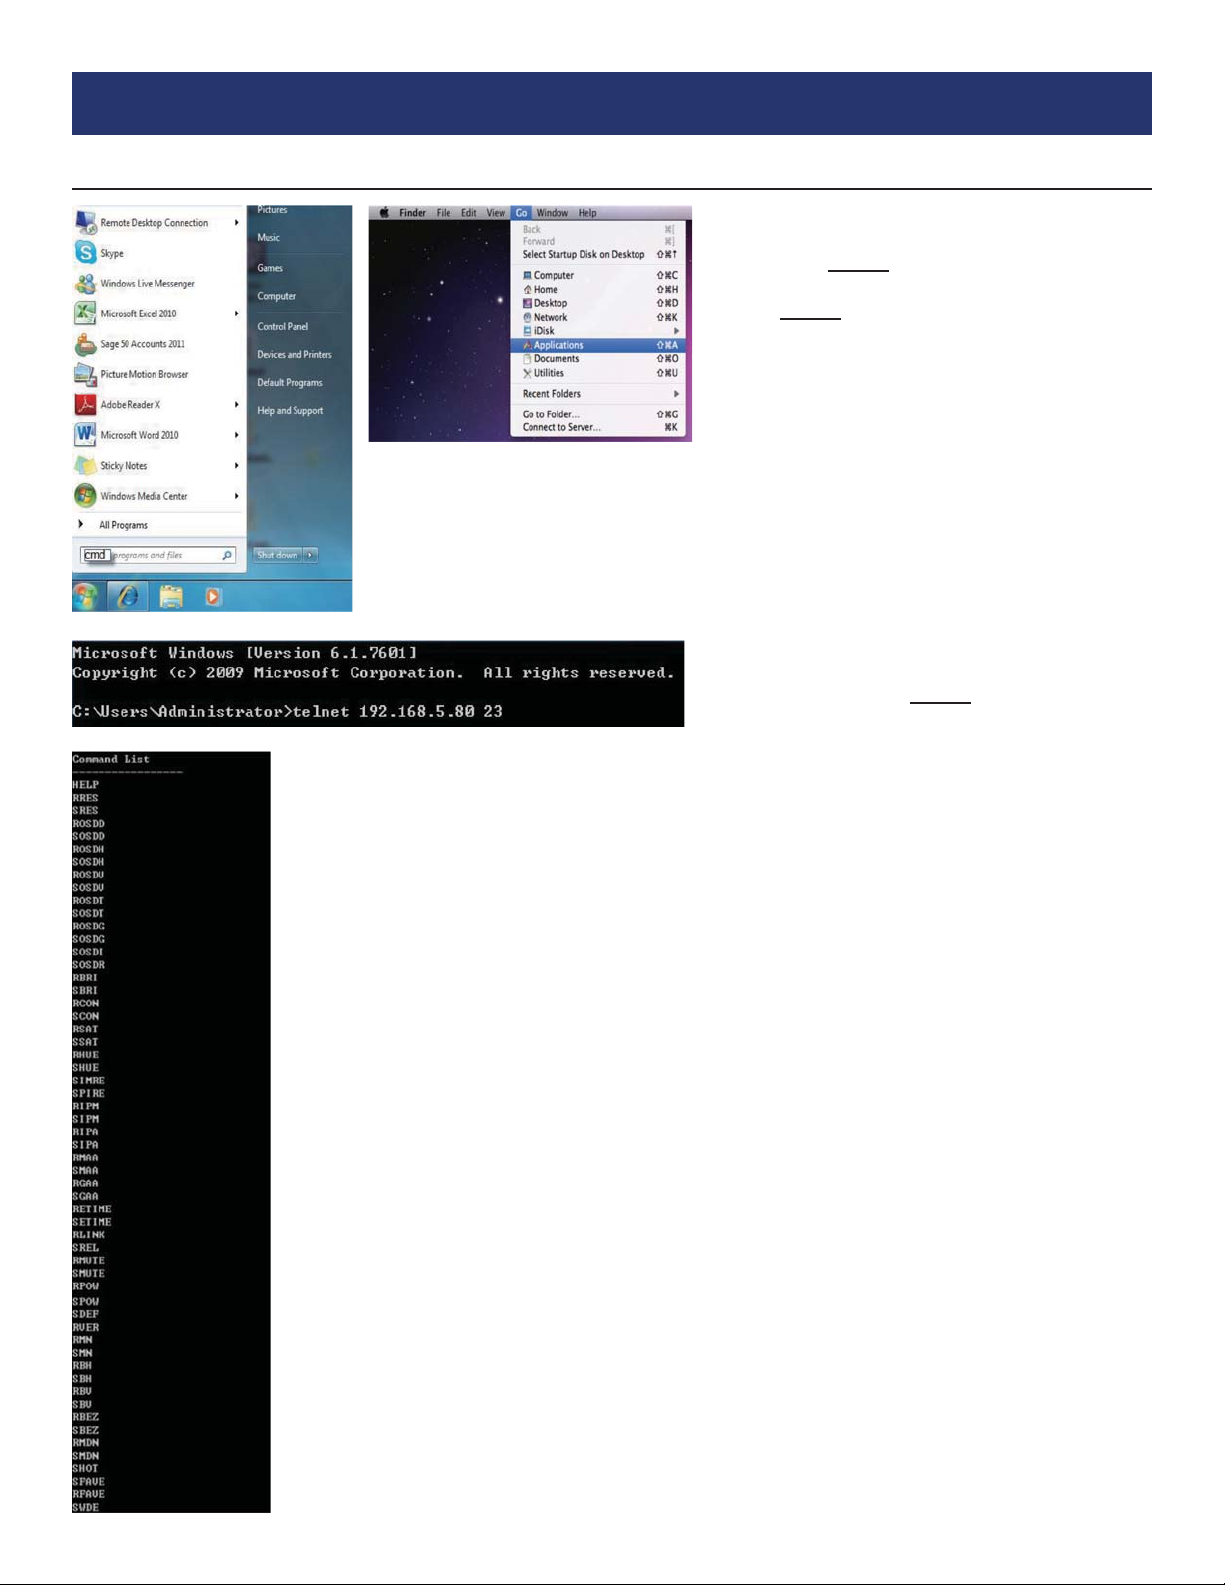
TELNET CONTROL ......................................................................7
PC APPLICATION CONTROL .......................................................8
SUPPORTED RESOLUTIONS....................................................12
CONNECTION & INSTALLATION ................................................16
Dear Customer
Thank you for purchasing this product. For optimum performance
and safety, please read these instructions carefully before
connecting, operating or adjusting this product. Please keep this
manual for future reference.
INTRODUCTION
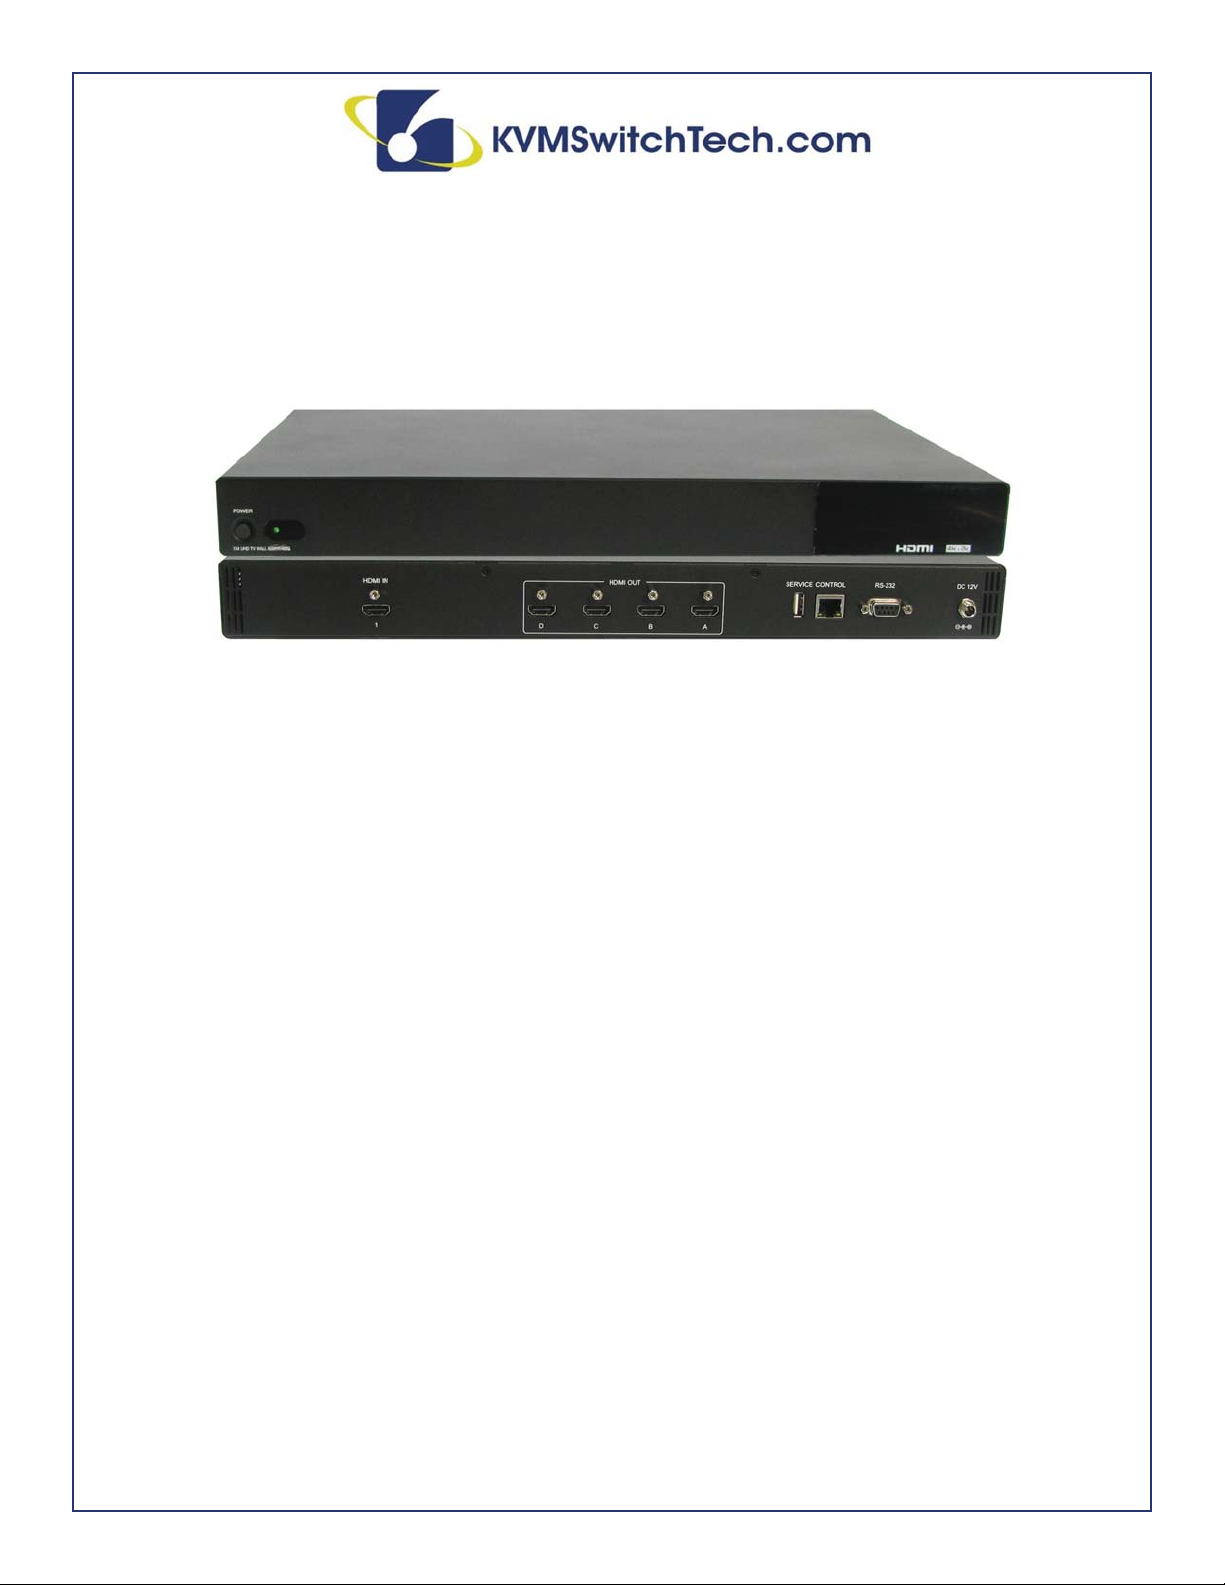
The VW-HDMI-4K 1x4 UHD TV Wall allows a HDMI 4K2K input
source to be freely arranged on (4) displays (TVs or monitors) with
a bezel correction function. The friendly control application for the
TV Wall system has never been easier. This application leads the
user through single or total device control. The device supports
video output timings up to WUXGA@60RB and 1080p@60Hz,
audio formats up to 7.1CH LPCM at 192KHz sampling rate based
on the input source EDID. All the operation and control can be done
through Telnet and RS-232. This product has a 3 year warranty.
PACKAGE CONTENTS
Before attempting to use this unit, please check the packaging and
make sure the following items are contained in the shipping carton:
VW-HDMI-4K 1x4 HDMI 4K UHD TV Wall Splitter
12V 3A DC Power Adaptor
Users Guide
SYSTEM REQUIREMENTS
Input source equipment such as DVD/Blu-ray players or any
HDMI signal and output HDTV displays
APPLICATIONS
Hypermarket display
Public advertisement
Digital Presentations
Stock Market
SAFETY PRECAUTIONS
Please read all instructions before attempting to unpack, install or
operate this equipment and before connecting the power supply.
Please keep the following in mind as you unpack and install this
equipment:
electrical shock and injury to persons.
moisture or install this product near water.
openings or empty slots in the unit, as you may damage parts
inside the unit.
PSU if it is damaged.
weight to be placed upon it or any person walk on it.
openings in the unit housing that provide ventilation and allow for
DISCLAIMERS
The information in this manual has been carefully checked and
is believed to be accurate. We assume no responsibility for any
infringements of patents or other rights of third parties which may
result from its use.
We assume no responsibility for any inaccuracies that may be
contained in this document. We make no commitment to update or
to keep current the information contained in this document.
We reserve the right to make improvements to this document and/
or product at any time and without notice.
COPYRIGHT NOTICE
No part of this document may be reproduced, transmitted,
transcribed, stored in a retrieval system, or any of its part translated
— electronic, mechanical, magnetic, optical, chemical, manual, or
otherwise — without the express written permission and consent.
© Copyright 2016. All Rights Reserved.
Version 1.1 AUG 2016
TRADEMARK ACKNOWLEDGMENTS
All products or service names mentioned in this document may be
trademarks of the companies with which they are associated.

2
FEATURES & SPECIFICATIONS
FEATURES
HDMI with 4K2K supported, HDCP and DVI compliant
Output source signal to (4) displays as a full image with adjustable Bezel correction
Supports Input PC resolutions from VGA~WUXGA and HDTV from 480i~1080p and 4K2K@24/25/30Hz
Supports different input and output resolutions selectable from the TV wall application
Supports AC3/DTS/Dolby Digital Plus/Dolby TrueHD/Dolby Atmos and DTS-HD Master Audio
Supports RS-232 and Telnet controls
SPECIFICATIONS
Video Bandwidth: 300MHz/9GBps
Input Ports: (1) HDMI (Female type), (1) Control (RJ45), (1) RS-232 (D-sub 9-pin), (1) USB (Service only)
Output Ports: (4) HDMI (Female type)
HDMI Cable Distance: 8bit 1080p ~32 ft/10M, 4K2K ~16 ft/5M
IR Frequency: 30~50KHz
Baud Rate: 115200Bps
ESD Protection Human Body Model:
± 8KV (air-gap discharge)
± 4KV (contact discharge)
Power Supply:
Dimensions (WxDxH): 17 x 10.5 x 1.75 in
Weight: 6.4 lb (Unit only) / 9.7 lb (Net)
Chassis Material: Metal
Color: Black
Operating Temperature:
Storage Temperature:
Relative Humidity: 20~90% RH (non-condensing)
Power Consumption: 12.98W

3
FRONT & REAR PANELS
FRONT PANEL
.POWER: Press the POWER button to power on the unit or set to standby mode. When power is disconnected, press this button again
while connected to the power to reset the system back to default factory settings. When the power is on, press and hold this button for (3)
seconds, the output monitor will show “USB Host Update MCU Firmware Start…”, then plug the USB (with the Firmware upgrade bin
“Mass Storage Host Upgrade Running”, it means that the upgrade is proceeding, after
Note: If monitor did not show “Mass Storage Host Upgrade Running”
power off the unit and try again.
REAR PANEL
.HDMI IN: Connects with HDMI source equipment such as a DVD/
Blueray player and/or PC/Laptop devices.
3HDMI OUT A~D: Connects with HDMI TV/displays for output
image display. It is suggested that the connection sequence should
be placed as the diagrams shows for TV wall set up.
$SERVICE:Works with
the power button.
/CONTROL: Connects to an active network for Telnet control.
Controlled with the “VW-HDMI-4K” application for multi-device control.
1RS-232: Connects from a PC/Laptop with D-Sub 9pin cables for
RS-232 command control over the device.
Note: RS-232 control system is limited to a single Video Wall unit.
Whereas Telnet can control multi-video Wall units.
4DC 12V: Plug for the 12V DC power supply, which is included in
the package, to the unit, then connect the adaptor to an AC outlet.

4
RS-232 & Telnet Commands
RS-232 Protocols
INPUT TIMING SUPPORTED REMOTE CONTROLLER (PC)
PIN PIN
1NC 1NC
2 TxD 2 RxD
3 RxD 3 TxD
4NC 4NC
5 GND 5 GND
6NC 6NC
7NC 7NC
8NC 8NC
9NC 9NC
RS-232 & Telnet Commands
COMMAND DESCRIPTION PARAMETER
HELP(?) Shows Command List NONE
HELP(?) N Shows Command Description N=Command name
RRES Requests Current Output Resolution NONE
SRES N1 Sets Output Resolution to N1
N1=0 (640x480@60)
1 (480p60)
2 (576p50)
3 (800x600@60)
4 (848x480@60)
5 (1024x768@60)
6 (720p50)
7 (720p60)
8 (1280x768@60)
9 (1280x800@60)
10 (1280x960@60)
11 (1280x1024@60)
12 (1360x768@60)
13 (1366x768@60)
14 (1400x1050@60)
15 (1440x900@60)
16 (1600x900RB@60)
17 (1600x1200@60)
18 (1680x1050@60)
19 (1080p50)
20 (1080p60)
21 (1920x1200RB@60)
22 (2048x1152RB@60)
23 (1080i50)
24 (1080i60)
25 (1080p24)
26 (1080p25)
27 (1080p30)
28 (Native)
RINS Gets Input Resolution
0 (VGA60)
1 (VGA72)
2 (VGA75)
3 (VGA85)
4 (WXGA60)
5 (WXGA75)
6 (XGA60)
7 (XGA70)
8 (XGA75)
9 (XGA85)
10 (SXGA60)
11 (SXGA75)
12 (SVGA56)
13 (SVGA60)
14 (SVGA72)
15 (SVGA75)16
(SVGA85)
17 (DTV_480p60)
18 (DTV_576p50)
19 (DTV_480i60)
20 (DTV_576i50)
21 (HDTV_720p50)
22 (HDTV_720p60)
23 (HDTV_1080i50)
24 (HDTV_1080i60)
25 (HDTV_1080p24)
26 (HDTV_1080p50)
27 (HDTV_1080p60)
28 (V848_480_60)
29 (V852_480_60)
30 (V854_480_60)
31 (V1024_852_60)
32 (V1024_1024_60)
33 (V1280_800_60)
34 (V1280_960_60)
35 (V1360_768_60)
36 (V1366_768_60)
37 (V1440_900_60)
38 (V1400_1050_60)
39 (V1360_1024_60)
40 (V1600_900_60)
41 (V1600_1200_60)
42 (V1680_1050_60)
43 (V1920_1200_60)
44 (V2048_1080_24_1)
45 (V2048_1080_24_2)
46 (V2048_1080_60)
47 (V2048_1152_1)
48 (V2048_1152_2)
49 (V2048_1152_3)
50 (V3840_2160_24)
51 (V3840_2160_25)
52 (V3840_2160_30)
53 (V4096_2160_24)
54 (K_NO_SIGNAL)
55 (K_NO_SUPPORT)
Baud Rate: 115200bps
Data Bit: 8 bits
Parity: None
Flow Control: None
Stop Bit: 1

5
RS-232 & TELNET COMMANDS
RS-232 & Telnet Commands
COMMAND DESCRIPTION PARAMETER
ROSDD Requests Current OSD Display State NONE
SOSDD N1 Sets OSD Display to Enable/Disable N1=0 (OFF), 1 (ON)
ROSDH Requests Current OSD Horizontal Position NONE
SOSDH N1 Sets OSD Horizontal Position to N1 N1=0~20 (5)
ROSDV Requests Current OSD Vertical Position NONE
SOSDV N1 Sets OSD Vertical Position to N1 N1=0~20 (5)
ROSDT Requests OSD Display Current Timeout Setting NONE
SOSDT N1 Sets OSD Display Timeout Setting N1=0 (Off), 5~50 (50)
ROSDG Requests OSD Gain Correction NONE
SOSDG N1 Sets OSD Gain Value N1=0~10 (2)
SOSDI Shows OSD Information On/Off NONE
SOSDR Resets All OSD Settings NONE
RBRI N1 Requests Channel N1 Brightness Value N1= 1~4
SBRI N1 N2 Sets Channel N1 Brightness Value to N2 N1= 1~4, N2=0~100 (50)
RCON N1 Requests Chanel N1 Contrast Value N1=1~4
SCON N1 N2 Sets Channel N1 Contrast Value to N2 N1= 1~4, N2=0~100 (50)
RSAT Requests Current Saturation Value NONE
RSAT N1 Request Channel N1 Current Saturation Value N1=1~4
SSAT N1 N2 Set Channel N1 Saturation Value to N2 N1= 1~4, N2=0~100 (50)
RHUE N1 Requests Channel N1 Current Hue Value N1=1~4
SHUE N1 N2 Sets Channel N1 Hue Value to N2 N1= 1~4, N2=0~100 (50)
SIMRE N1 Resets Brightness/Contrast/Saturation/Hue Value
to Default N1=1 (Brightness), 2 (Contrast), 3 (Saturation), 4 (Hue)
SPIRE Resets all Channels Brightness, Contrast,
Saturation, Hue Value to Default NONE
RIPM Requests Current IP Mode NONE
SIPM N1 Sets IP Mode to DHCP or Static N1=0 (Static), 1(DHCP) (192.168.1.50)
RIPA Requests Current Static IP Address to Screen NONE
SIPA X.X.X.X Sets Static IP Address X=0~255 (192.168.1.50)
RMAA Requests Current Static Subnet Address NONE
SMAA X.X.X.X Sets Static Subnet Address X=0~255 (255.255.255.0)
RGAA Requests Current Static Gateway Address NONE
SGAA X.X.X.X Sets Static Gateway Address X=0~255 (192.168.1.50)
RETIME Requests Current Ethernet Timeout NONE
SETIME N1 Sets Ethernet Timeout N1=0 (OFF), 1 (10 Minutes), 2 (20 Minutes), 3 (30 Minutes), 4 (40 Minutes),
5 (50 Minutes), 6 (60 Minutes)
RLINK Requests Ethernet Address NONE

6
RS-232 & TELNET COMMANDS
RS-232 & Telnet Commands
COMMAND DESCRIPTION PARAMETER
RMUTE Requests Current Mute NONE
SMUTE N1 Sets Mute Audio N1=0 (Unmute), 1 (Mute)
RPOW Requests Current Power State NONE
SPOW N1 Sets the Unit Power On/Off N1=0 (Off), 1 (On)
RVER Requests Version NONE
SREL Relinks the Unit in 2 Seconds NONE
SDEF Resets the Unit to Factory Defaults NONE
RMN Requests Current TV Wall Format NONE
SMN N1 N2 Sets TV Wall N1 Row and N2 Column N1=1~15 (Row), N2=1~15 (Column)
RBH Requests TV Wall Horizontal Bezel Correction NONE
SBH N1 Sets TV Wall Horizontal Bezel Correction N1=0~255
RBV Requests TV Wall Vertical Bezel Correction NONE
SBV N1 Sets TV Wall Vertical Bezel Correction N1=0~255
RBEZ Requests Current Bezel Correction State NONE
SBEZ N1 Sets Bezel Correction Enable/Disable N1=0 (Off), 1 (On)
RMDN Requests Unit ID Number NONE
SMDN N1 Sets Unit ID Number to N1 N1=0~255
SWDE Resets All TV Wall Settings NONE
SHOT N1 Fast Setting TV Wall Format from Hotkey N1
N1=0 (1x1)
1 (2x2)
2 (3x3)
3 (4x4)
4 (5x5)
5 (6x6)
6 (2x3)
7 (3x2)
8 (3x4)
9 (4x2)
10 (4x3)
11 (4x5)
12 (1x2)
13 (2x1)
14 (1x3)
15 (3x1)
16 (1x4)
17 (4x1)
18 (2x4)
19 (3x5)
20 (5x4)
21 (5x3)
22 (6x2)
23 (6x3)
SFAVE N1 Saves Current TV Wall Settings to N1 N1=1~5
RFAVE N1 Recalls TV Wall Settings from N1 N1=1~5
Note:
1. All the RS-232 commands will not be executed unless followed with a carriage return. All commands are case sensitive.
2. RS-232 control is set to a single device only, not for use with Cascade/Bypass output connection devices.
3. Bold values are the default settings.

Telnet Control
Telnet Control
To access the Telnet control in Windows 7, click on
the ‘Start’ menu and type “cmd”
then press ENTER. Under Windows XP go to the
‘Start’ menu and click on “Run”, type “cmd” then
press ENTER.
With Mac OS X, go to
. See reference.
Once in the command line interface (CLI) type
‘telnet’, then the IP address of the unit (default is
192.168.1.50) and hit ENTER. If the Telnet port (the
unit’s port) is not set to the default of “23” then the
correct port number will need to be entered after the
IP address as shown.
This will bring us to the unit which we wish to control. Type ‘HELP’ to list the available commands.
Note:
1. All the commands will be not executed unless followed by a carriage return. Commands are case sensitive.
2. If the IP is changed then the IP Address required for Telnet access will also change accordingly.
7

8
PC Application Control
Visit A-NeuVideo.com to download the software application for the VW-HDMI-4K and execute it to control the Video Wall system.
Note: Before installing, remove any former versions that are existing. Once the application is installed successfully, click and open the
“Video Wall Set”.
.SEARCH MAC: Click on “Search MAC”
how many TV Wall unit(s) are within the network
system, then select the unit you wish to control.
Note: This action should be executed every time when
the unit is Powered On or reset or re-run the “VW-
HDMI-4K” application.
Select the unit that is to be adjusted then press
“Connect” to connect the unit.
Every time the unit is connected successfully, a dialog
will appear showing “refresh completed” based
on the selected MAC, the application will display the
current unit’s status. However, image display will not
be refreshed automatically and can only be refreshed
manually.
When using more than (1) unit for a TV Wall setting,
setting up the unit’s ID number is required to ensure
the correct display of each single TV wall image.
System Settings
.POWER: Click on “Power” to power on/off the
controlled unit. To control all connected units, click
on “ALL IP” then click “Power”. From Power ON to
Power OFF, the application will disconnect the link, to
Power ON again, please re-connect.
3FACTORY RESET: Click on “Factory Reset” to set
device settings to default, to switch all devices back to
the default setting, click “ALL IP” and then “Factory
Reset”.
$REFRESH: Click on “Refresh” to read the devices
current settings, the status of all the TV Wall Sets will
follow the current choosen device.
Note: Image Adjust will not refresh, users have to click
on “Image Adjust” to manually refresh to read the
Image Adjust current status.
/SEARCH MAC: Click on “Search MAC”
the on-line TV Wall units.

9
PC Application Control
Connect Interface
.CONNECT: Click “Connect” to link the unit.
3DISCONNECT: Click “Disconnect” to terminate
the link.
$MAC: Click on “MAC” with the arrow down button
to show all the TV Wall units and select the nominated
unit/MAC for connection.
/ID NO: When more than one TV Wall unit is in use,
it is important that the ID No. is set correctly in order to
split and arrange the images correctly.
Note: All on-line units will show running after “Search
MAC”.
Network Configuration
.GET IP: Click “Get IP” to show current linking status.
3SET IP: Click “Set IP” to adjust IP settings such as
IP Type, IP Address…etc.
$RE-LINK: Click “Re-Link”
/ADDRESS TYPE: Click on this drop-down menu to
change the address type to DHCP/Static mode.

10
PC Application Control
TV Wall Setup (1)
.FAST TV WALL SETTING: TV Wall’s fast setting.
Click on hot keys to preset the TV Wall setup.
TV Wall Setup (2)
.MANUAL SETUP: Manually setup the TV wall’s
settings by rows and columns from 1~15 and click
“Send”
3BEZEL CORRECTION HORIZON & VERTICAL:
MAC/ID No. The correction will be made on all outputs
of the selected units at once.
$BEZEL CORRECTION (ON/OFF): When the above
action is taken, the Bezel Correction will switch to ON
automatically, to switch it off click on “OFF” to terminate
the function. To execute Bezel Correction on all units,
click on “ALL IP”. It is suggested that when displaying
moving content on the TV Wall, the Bezel Correction
should be set ON and when displaying static content,
the Bezel correction can be set to OFF.
TV Wall Setup (3)
.SAVE TV WALL SETTINGS: Save current settings
to Favorites. Up to (5) settings.
3RECALL TV WALL SETTINGS: Recall restored TV
Wall settings up to (5) settings.

PC Application Control
I/O Setup
.OUTPUT RESOLUTION & OSD MENU ADJUSTMENT:
All settings under I/O Setup can be done with a single
TV Wall unit or units with a single click on “ALL IP”.
Parameters and default values are as stated in the RS-
232 description parameters.
3MUTE: Set Audio Mute to ON/OFF.
$OSD INFO: Show/Close OSD information.
/REFRESH: Refresh current page.
1RESET: Reset current page.
Image Adjust
.BRIGHTNESS, CONTRAST, SATURATION AND
HUE ADJUSTMENT: Again all settings under Image
Adjust can be done with a single TV Wall device or
multiple TV Wall devices with a single click on “ALL
IP”. Parameters and default values are as stated in the
RS-232 description.
3PICTURE RESET: Picture Reset button is to reset
all settings of Image Adjust back to factory default
values.
$REFRESH: Refresh button is to refresh Image
Adjust page only.
Note:
1. When the Input signal is above 4K2K, the device
only supports Color space RGB, YUV is not supported.
2. When on TV Wall split mode, different input/output
resolutions, signal is limited (please refer to the Timing
Limitations).
11

SUPPORTED RESOLUTIONS
Supported Resolutions
INPUT RESOLUTION
640x480@60/72/75/85
1280x768@60/75
1024x768@60/70/75/85
1280x1024@60/75
800x600@56/60/72/75/85
480p@60
576p@50
480i@60
576i@50
720p@50/60
1080i@50/60
1080p@24/50/60
848x480@60
852x480@60
854x480@60
1024x852@60
1024x1024@60
1280x800@60
1280x960@60
1360x768@60
1366x768@60
1440x900@60
1400x1050@60
1360x1024@60
1600x900@60
1600x1200@60
1680x1050@60
1920x1200@60
2048x1080@24
2048x1152@60
3840x2160@24/25/30
4096x2160@24
12
OUTPUT RESOLUTION
640x480
480p@60 (720x480)
576p@50 (720x576)
800x600
848x480
1024x768
720p@50 (1280x720)
720p@60 (1280x720)
1280x768
1280x800
1280x960
1280x1024
1360x768
1366x768
1400x1050
1440x900
1600x900 (RB)
1600x1200
1680x1050
1080p@50/60
1920x1200 (RB)
2048x1152 (RB)
1080i@50/60
1080p@24/25/30

SUPPORTED RESOLUTIONS
Supported Resolutions
Input Resolution 3840x2160
VIDEO WALL 1x1 2x2 3x3 4x4 5x5 6x6 7x7 8x8 9x9 10x10 15x15
640x480 998 8 8999999
480p@60 (720x480) 998 8 8999999
576p@50 (720x576) 998 8 8999999
800x600 998 89999999
848x480 998 89999999
1024x768 99899999999
720p50 (1280x720) 99999999999
720p60 (1280x720) 99999999999
1280x768 99999999999
1280x800 99999999999
1280x960 99999999999
1280x1024 99999999999
1360x768 99999999999
1366x768 99999999999
1400x1050 99999999999
1440x900 99999999999
1600x900 (RB) 99999999999
1600x1200 99999999999
1680x1050 99999999999
1080p@50 99999999999
1080p@60 99999999999
1920x1200 (RB) 99999999999
2048x1152 (RB) 99999999999
1080i@50 99999999999
1080i@60 99999999999
1080p@24 99999999999
1080p@25 99999999999
1080p@30 99999999999
Native 99999999999
13

SUPPORTED RESOLUTIONS
Supported Resolutions
Input Resolution 4096x2160
VIDEO WALL 1x1 2x2 3x3 4x4 5x5 6x6 7x7 8x8 9x9 10x10 15x15
640x480 99888899999
480p@60 (720x480) 998 8 8999999
576p@50 (720x576) 998 8 8999999
800x600 998 8 8999999
848x480 998 89999999
1024x768 99899999999
720p50 (1280x720) 998 99999999
720p60 (1280x720) 998 99999999
1280x768 99899999999
1280x800 99899999999
1280x960 99899999999
1280x1024 99899999999
1360x768 99999999999
1366x768 99999999999
1400x1050 99999999999
1440x900 99999999999
1600x900 (RB) 99999999999
1600x1200 99999999999
1680x1050 99999999999
1080p@50 99999999999
1080p@60 99999999999
1920x1200 (RB) 99999999999
2048x1152 (RB) 99999999999
1080i@50 99999999999
1080i@60 99999999999
1080p@24 99999999999
1080p@25 99999999999
1080p@30 99999999999
Native 99999999999
14

SUPPORTED RESOLUTIONS
Supported Resolutions
Input Resolution 2048x1080/2048x1152
VIDEO WALL 1x1 2x2 3x3 4x4 5x5 6x6 7x7 8x8 9x9 10x10 15x15
640x480 99899999999
480p@60 (720x480) 99999999999
576p@50 (720x576) 99999999999
800x600 99999999999
848x480 99999999999
1024x768 99999999999
720p50 (1280x720) 99999999999
720p60 (1280x720) 99999999999
1280x768 99999999999
1280x800 99999999999
1280x960 99999999999
1280x1024 99999999999
1360x768 99999999999
1366x768 99999999999
1400x1050 99999999999
1440x900 99999999999
1600x900 (RB) 99999999999
1600x1200 99999999999
1680x1050 99999999999
1080p@50 99999999999
1080p@60 99999999999
1920x1200 (RB) 99999999999
2048x1152 (RB) 99999999999
1080i@50 99999999999
1080i@60 99999999999
1080p@24 99999999999
1080p@25 99999999999
1080p@30 99999999999
Native 99999999999
15

CONNECTION & INSTALLATION
16

THIS PAGE IS INTENTIONALLY LEFT BLANK.

END OF DOCUMENT
18
TERMS AND CONDITIONS OF USE
PLEASE READ THE FOLLOWING TERMS AND CONDITIONS CAREFULLY BEFORE USING THIS HARDWARE, COMPONENTS AND SOFTWARE PROVIDED
BY, THROUGH OR UNDER KVM Switch Tech, INC (COLLECTIVELY, THE “PRODUCT”). By using installing or using the Product, you unconditionally signify your
agreement to these Terms and Conditions. If you do not agree to these Terms and Conditions, do not use the Product and return the Product to KVM Switch Tech,
Inc. at the return address set forth on the Product’s packing label at your expense. KVM Switch Tech, Inc. may modify these Terms and Conditions at anytime,
without notice to you.
RESTRICTIONS ON USE OF THE PRODUCT
It is your responsibility to read and understand the installation and operation instructions, both verbal and in writing, provided to you with respect to the Product.
You are authorized to use the Product solely in connection with such instructions. Any use of the Product not in accordance with such instructions shall void any
warranty pertaining to the Product. Any and all damages that may occur in the use of the Product that is not strictly in accordance with such instructions shall be
borne by you and you agree to indemnify and hold harmless KVM Switch Tech, Inc. from and against any such damage.
The Product is protected by certain intellectual property rights owned by or licensed to KVM Switch Tech. Any intellectual property rights pertaining to the Product
!"#$%&
your personal use only, provided that you do not change or delete any proprietary notices that may be provided with respect to the Product.
The Product is sold to you and any use of any associated intellectual property is deemed to be licensed to you by KVM Switch Tech for your personal use only. KVM
Switch Tech does not transfer either the title or the intellectual property rights to the Product and KVM Switch Tech retains full and complete title to the intellectual
property rights therein. All trademarks and logos are owned by KVM Switch Tech or its licensors and providers of the Product, and you may not copy or use them
in any manner without the prior written consent of KVM Switch Tech, which consent may be withheld at the sole discretion of KVM Switch Tech.
!'*+
Tech makes no representation that materials pertaining to the Product are appropriate or available for use in other locations other than the shipping address you
provided with respect thereto. You are advised that the Product may be subject to U.S. export controls.
Disclaimers and Limitation of Liability
KVM Switch Tech may change or modify the Product at any time, from time to time.
THE PRODUCT IS PROVIDED “AS IS” AND WITHOUT WARRANTIES OF ANY KIND EITHER EXPRESS OR IMPLIED. KVM Switch Tech DOES NOT
WARRANT OR MAKE ANY REPRESENTATIONS REGARDING THE USE OR THE RESULTS OF THE USE OF THE PRODUCT’S CORRECTNESS, ACCURACY,
RELIABILITY, OR OTHERWISE.
KVM Switch Tech has no duty or policy to update any information or statements pertaining to the Product and, therefore, such information or statements should
not be relied upon as being current as of the date you use the Product. Moreover, any portion of the materials pertaining to the Product may include technical
inaccuracies or typographical errors. Changes may be made from time to time without notice with respect to the Product.
TO THE FULLEST EXTENT PERMISSIBLE PURSUANT TO APPLICABLE LAW, KVM SWITCH TECH DISCLAIMS ALL WARRANTIES, EXPRESS OR IMPLIED,
INCLUDING, BUT NOT LIMITED TO IMPLIED WARRANTIES OF MERCHANTABILITY, FITNESS FOR A PARTICULAR PURPOSE AND NON-INFRINGEMENT.
KVM SWITCH TECH DOES NOT WARRANT THE ACCURACY, COMPLETENESS OR USEFULNESS OF ANY INFORMATION WITH RESPECT TO THE
PRODUCT. KVM SWITCH TECH DOES NOT WARRANT THAT THE FUNCTIONS PERTAINING TO THE PRODUCT WILL BE ERROR-FREE, THAT DEFECTS
WITH RESPECT TO THE PRODUCT WILL BE CORRECTED, OR THAT THE MATERIALS PERTAINING THERETO ARE FREE OF DEFECTS OR OTHER
HARMFUL COMPONENTS. KVM SWITCH TECH WILL USE ITS REASONABLE EFFORTS TO CORRECT ANY DEFECTS IN THE PRODUCT UPON TIMELY
WRITTEN NOTICE FROM YOU NOT TO EXCEED 10 BUSINESS DAYS AFTER RECEIPT BY YOU OF THE PRODUCT, BUT YOU (AND NOT KVM SWITCH
TECH) ASSUME THE ENTIRE COST OF ALL NECESSARY SERVICING, REPAIR AND CORRECTION THAT WAS CAUSED BY YOU UNLESS OTHERWISE
AGREED TO IN A SEPARATE WRITING BY KVM SWITCH TECH.
UNDER NO CIRCUMSTANCES, INCLUDING, BUT NOT LIMITED TO, NEGLIGENCE, SHALL KVM SWITCH TECH BE LIABLE FOR ANY SPECIAL OR
CONSEQUENTIAL DAMAGES THAT RESULT FROM THE USE OF, OR THE INABILITY TO USE THE PRODUCT INACCORDANCE WITH ITS SPECIFICATIONS,
EVEN IF KVM SWITCH TECH OR ITS REPRESENTATIVES HAVE BEEN ADVISED OF THE POSSIBILITY OF SUCH DAMAGES. IN NO EVENT SHALL KVM
SWITCH’S TOTAL LIABILITY TO YOU FROM ALL DAMAGES, LOSSES, AND CAUSES OF ACTION (WHETHER IN CONTRACT, OR OTHERWISE) EXCEED
THE AMOUNT YOU PAID TO KVM SWITCH TECH, IF ANY, FOR THE PRODUCT.
Table of contents