manuals.online logo
Brands
  1. Home
  2. •
  3. Brands
  4. •
  5. KWC
  6. •
  7. Plumbing Product
  8. •
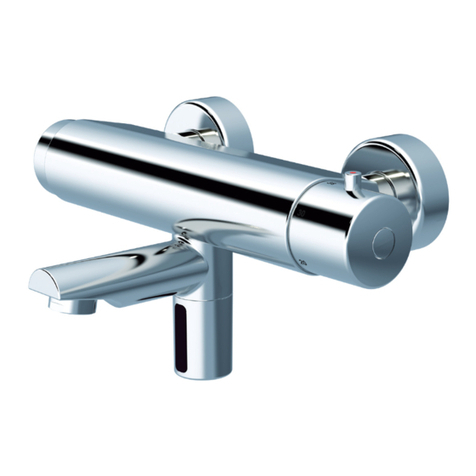
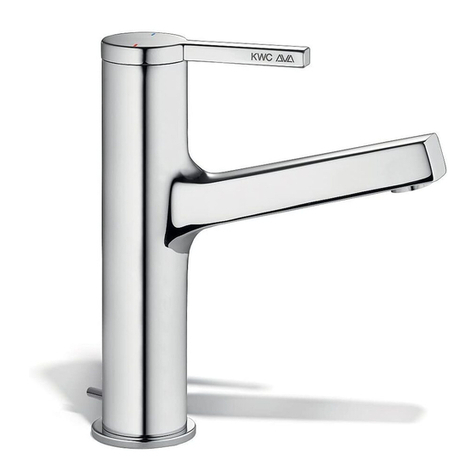
  9. KWC AVA 11.192.034.000 Quick guide

KWC AVA 11.192.034.000 Quick guide

802374 07/15
Franke Water Systems AG
KWC | Hauptstrasse 57 | P.O. Box 179 | CH-5726 Unterkulm | Phone +41 62 768 68 68 | www.kwc.com
802374
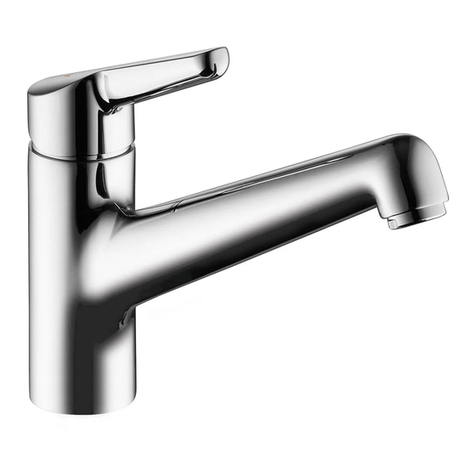
KWC AVA
Waschtischarmatur
Robinetterie pour lavabos
Miscelatore per lavandino
Mezclador para lavabo
Washbasin faucet
11.192.033.000 A 175 6 7/8"
11.192.034.000 A 225 9 7/8"
39.193.400.931
Montage- und Serviceanleitung
Instructions de montage et d’entretien
Istruzioni di montaggio e di assistenza
Instrucciones de montaje y servicio
Installation and service instructions
2
802374 07/15
Achtung:
Vor Montage die Leitungen gründlich
durchspülen!
Idealer Betriebsdruck : 3 bar
Max. Betriebsdruck : 5 bar
Min. Betriebsdruck : 1 bar
Druckgleichheit empfehlenswert.
Ideale Wassertemperatur : 60°C
Max. Wassertemperatur : 80°C
Weitere Informationen finden Sie in unseren
detaillierten Verkaufsunterlagen.
Attenzione:
Risciacquare bene le tubazioni
prima del montaggio!
Pressione di servizio ideale : 3 bar
Pressione di servizio mass. : 5 bar
Pressione di servizio min. : 1 bar
Si raccomanda pressioni uguali.
Temperatura acqua calda ideale : 60°C
Temperatura acqua calda mass. : 80°C
Ulteriori informazioni le troverete nelle nostre
dettagliate documentazioni.
Atención:
¡Enjuagar escrupulosamente las tuberías
antes del montaje!
Presión ideal de servicio : 3 bar
Presión máxima de servicio : 5 bar
Presión mínima de servicio : 1 bar
Se recomienda la igualdad de las presiones.
Temperatura ideal del agua : 60°C
Temperatura máxima del agua : 80°C
Información más detallada en nuestra
documentación de ventas.
Attention:
Rincer à fond la tuyauterie avant le
montage!
Pression de service idéale : 3 bar
Pression de service max. : 5 bar
Pression de service min. : 1 bar
Egalité de pression recommandée.
Température idéale de l’eau : 60°C
Température max. de l’eau : 80°C
Pour informations supplémentaires voir nos
documentations de vente détaillées.
Attention:
Flush pipes thoroughly before
installation!
Ideal operating pressure : 3 bar / 45 PSI / 300 kPa
Max. operating pressure : 5 bar / 70 PSI / 500 kPa
Min. operating pressure : 1 bar / 14.5 PSI / 100 kPa
Equal pressures are recommended.
Ideal water temperature : 60°C (140°F)
Max. water temperature : 80°C (180°F)
For further information refer to our detailed sales
literature.
O.B.S.
Spola rören ordentligt innan
blandare installeras!
Driftstryck : 3 bar / 300 kPa
Max. tryck : 5 bar / 500 kPa
Min. tryck : 1 bar / 100 kPa
Lika tryck på kall- och varmvatten rekommenderas.
Driftstemperatur : 60°C
Max temperatur : 80°C
För ytteligare information se produktblad.
KWC VG
KWC Deutschland GmbH
Junghansring 70
DE-72108 Rottenburg
+49 (0) 7457 948 56 0
+49 (0) 7457 948 56 30
KWC VG
KWC AMERICA
1770 Corporate Drive #580
Norcross, GA 30093 USA
+1 678 334 21 21
+1 678 334 21 28
KWC VG
KWC Italia S.r.l.
Via Vecchia Ferriera 59/B
IT-36100 Vicenza
+39 (0) 444 566 618
+39 (0) 444 961 519
Franke KS
Franke GmbH
Mumpferfährstrasse 70
DE-79713 Bad Säckingen
+49 (0) 7761 52 0
+49 (0) 7761 52 294
Franke WS
Franke GmbH
Oberer Achdamm 52
AT-6971 Hard
+43 (0) 557 467 350
+43 (0) 557 462 411
Franke WS
Franke Washroom Systems
Ring-Oost 10
BE-9400 Ninove
+32 (0) 54 31 01 30
+32 (0) 54 31 01 35
Franke KS
Franke NV
Ring 10
BE-9400 Ninove
+32 (0) 54 31 01 11
+32 (0) 54 32 36 88
Franke KS
Franke Nederland B.V.
Lagedijk 13
NL-5705 Bx Helmond
+31 492 585 111
+31 492 585 200
Franke KS
Franke France S.A.S.
Avenue Aristide Briand BP 13
FR-60230 Chambly
+331 30 28 94 00
+331 30 28 94 30
Franke WS/KS
Franke L.L.C.
RAK Industrial Zone, P.O. Box 14511
AE-Ras Al Khaimah, UAE
+971 7 203 47 00
+971 7 203 47 60
Franke KS
Franke UK Limited
West Park, MIOC, Styal Road
GB-Manchester M22 5WB
+44 161 436 62 80
+44 161 437 13 79
Betriebsdaten
Caractéristiques de fonctionnement
Caratteristiche di funzionamento
Datos de servicio
Operating data
3
802374 07/15
Umgebungsbedingungen
In unmittelbarer Nähe von
Armaturen und Anschlussschläu-
chen dürfen keine Reinigungs-
mittel und Chemikalien gelagert
werden.
Austretende Dämpfe können
die Armatur und die Anschluss-
schläuche beschädigen.
Condiciones del entorno
Cerca de las griferías y cone-
ZKQPGUFGVWDQUƃGZKDNGUPQUG
deben almacenar productos
químicos ni de limpieza.
Los eventuales vapores podrían
dañar la grifería y las conexiones
FGVWDQUƃGZKDNGU
Conditions d‘environnement
Aucun produit de nettoyage ni
détergent chimique ne doit être
stocké à proximité immédiate des
robinetteries et des raccordements
ƃGZKDNGU
Les vapeurs qui s‘en échappent
risqueraient d‘endommager les
robinetteries et les raccordements
ƃGZKDNGU
Environmental conditions
No cleaning agents or chemicals
should be stored in the immediate
vicinity of faucets and connection
hoses.
Any vapour emitted may damage
the faucet and connection hoses.
Ambiente circostante
Non conservare detergenti o so-
stanze chimiche nelle immediate
vicinanze della rubinetteria e dei
VWDKƃGUUKDKNKFKEQNNGICOGPVQ
L’esalazione di vapori potrebbe
danneggiare la rubinetteria e i
VWDKƃGUUKDKNK
Periodische Kontrolle
Die Anschluss- und
Brausenschläuche
müssen aus Sicherheits-
gründen periodisch
auf folgende Punkte
kontrolliert werden:
Dichtheit
Feuchte oder tropfende
Schläuche müssen
ersetzt werden.
Korrosionsschäden
Schläuche mit rostiger
oder oxidierter Ober-
ƃÀEJGOØUUGPGTUGV\V
werden.
Mechanische Beschä-
digung
Schläuche, welche eine
mechanische Beschä-
digung aufweisen,
müssen ersetzt werden.
Contrôle périodique
Pour des raisons de
UÅEWTKVÅNGUƃGZKDNGUFG
douche et de raccorde-
ment doivent être con-
trôlés périodiquement
RQWTXÅTKƂGTNGURQKPVU
suivants:
Etanchéité
.GUƃGZKDNGUJWOKFGU
ou qui gouttent doivent
être remplacés.
Dommages dus à la
corrosion
.GUƃGZKDNGUQZ[FÅUGP
surface doivent être
remplacés.
Dommages mécani-
ques
.GUƃGZKDNGUSWKRTÅ-
sentent des dommages
mécaniques doivent être
remplacés.
Controlli periodici
Per ragioni di sicurezza,
è necessario sottoporre
a controlli periodici i
VWDKƃGUUKDKNKFKEQNNG-
gamento e delle docce
in merito ai seguenti
aspetti.
Tenuta
I tubi umidi o non a
tenuta devono essere
sostituiti.
Danni da corrosione
I tubi che presentano
WPCUWRGTƂEKGCTTWI-
ginita oppure ossidata
devono essere sostituiti.
Danni meccanici
I tubi che presentano
danni meccanici devono
essere sostituiti.
Control periódico
Por razones de segu-
ridad, las conexiones
FGVWDQUƃGZKDNGU[
NQUƃGZQUFGFWEJCUG
deben controlar periódi-
camente respecto a los
siguientes puntos:
Estanqueidad
Se deben sustituir los
VWDQUƃGZKDNGUJÖOGFQU
o que gotean.
Daños por corrosión
Se deben sustituir los
VWDQUƃGZKDNGUEQP
óxido o herrumbre en la
UWRGTƂEKG
Daños mecánicos
Se deben sustituir
NQUVWDQUƃGZKDNGU
que presentan daños
mecánicos.
Periodic checks
For safety reasons, the
connection and shower
hoses must be checked
periodically for the
following:
Watertightness
Damp or dripping hoses
must be replaced.
Corrosion
Hoses with rusty or
oxidized surfaces must
be replaced.
Mechanical damage
Hoses that show signs
of mechanical damage
must be replaced.
4
802374 07/15
Einbaumasse
Dimensions d’encastrement
Dimensioni d’ingombro
Dimensiones de instalación
Installation dimension
Montage
Montage
Montagio
Montajo
Installation
47–72 mm
32–57 mm
FTP 1/2“
G 1/2“ D spülen
F rincer
I sciacquate
Sp enjuagar
E flush
1
2
3
4
5
G 1/2“
ø30 ø55
5
802374 07/15
Montage
Montage
Montagio
Montajo
Installation
Achtung! Bei Frostgefahr Patrone und Anlage entleeren.
Attention ! En case de ganger de gel, enlever la cartouche et purger l’installation .
Attenzione! Con pericolo di gelo togliere la cartuccia e vuotare l’impianto.
¡Atención! En caso de peligro de hielo, sacar el cartucho y vaciar la instalación.
Attention! In case of danger of frost, remove cartidage drain unit.
x = 5 mm
x > 5 mm
17 – 18 mm
24 – 25 mm
Inbus /Allen 2 mm
Inbus /Allen 2.5 mm
Inbus /Allen 2.5 mm
1
2
3
4
6
802374 07/15
Inbetriebsetzung
Mise en service
Messa in funzione
Puesta en servicion
Initial operation
1
D spülen
F rincer
I sciacquate
Sp enjuagar
E flush
D spülen
F rincer
I sciacquate
Sp enjuagar
E flush
4
4
3
3
2
2
DKULWUSWn¼ƂPQJCUVCWPVKN
– 06/2014
06/2014 –
7
802374 07/15
Ersatzteile
Pièces de rechange
Pezzi di ricambio
Repuestos
Spare parts
Z.536.235.000 A 225
Z.536.234.000 A 175
Z.536.237.000
Z.536.548.000
Z.536.597.000
–2011
2012– 06.14
Z.636.255
M18,5x1
Z.634.953
M18,5x1
Z.635.632
Z.635.700
Z.536.235.000 A 225
Z.536.234.000 A 175
Z.536.237.000
Z.536.548.000
Z.536.597.000
Z.635.632
Z.635.700
Z.537.122.000
M20x1
Z.536.032
Z.635.924.000
8 Nm +/- 1 Nm
Z.536.032
Z.635.924.000
8 Nm +/- 1 Nm
Z.536.333
20mm
(optional)
M16.5x1
Z.636.254
Z.536.828
(optional)
Zubehör
Accessoires
Accessori
Accesorios
Accessories
Es dürfen ausschliesslich original Ersatzteile verwendet werden!
Utiliser seulement des pièces de rechange originaux!
Usare soltanto i pezzi di ricambio originali!
¡Utilizar solamente los repuestos originales!
Only the original spare parts may be used!
DKULWUSWn¼ƂPQJCUVCWPVKN
– 06/2014
06/2014 –
8
802374 07/15
Grundsätzliche Reinigungshinweise:
- Beim Reinigen muss die Oberfläche der Armatur kalt sein (Wärme
beschleunigt die Zerstörung der Oberfläche)!
- Reinigungshinweise der Reinigungsmittelhersteller beachten!
Die Pflege:
- Armatur täglich mit weichem Lappen trocken reiben!
- Scheuernde Reinigungsmittel und Putzschwämme unbedingt vermeiden!
Die Reinigung:
- Schmutz- oder Kalkflecken auf der Armaturenoberfläche nur mit
mildem Reinigungsmittel entfernen!
- Sofort nach dem Reinigen alle Reinigungsmittelrückstände mit
kaltem Wasser wegspülen!
- Mit weichem Lappen trocken reiben.
Instructions principales pour le nettoyage:
- Durant le nettoyage, la surface du robinet doit être froide
(la chaleur accélère l’usure de la surface)!
- Nous vous prions de faire attention aux indications mentionnées
sur les nettoyages!
- Assurez vous que les produits ne contiennent pas d’acides ou des
substances corrosives.
L’entretien:
- Le robinet doit être nettoyé chaque jour avec un chiffon mou.
- Evitez absolument l’usage des brillants pour métaux, éponges
abrasives ou produits similaires!
Le nettoyage:
- Enlevez salissures et dépôts calcaires de la surface du robinet
seulement avec des produits qui ne sont pas agressifs!
- Immédiatement après le nettoyage, rincer bien les résidus des
détergents avec de l’eau froid!
- Sécher avec un chiffon mou.
Principali istruzioni per la pulizia:
- Durante la pulizia, la superficie del rubinetto deve essere fredda
(il calore accelera il logorio della superficie)!
- Fare attenzione alle indicazioni riporte sui prodotti per la pulizia!
- Accertarsi che non contengano acidi o sostanze corrosive.
La manutenzione:
- Il rubinetto deve essere asciugato quotidianamente con un panno
morbido.
- Evitare assolutamente paglietta, spugne abrasive o similari!
La pulizia:
- Togliere sporco e calcare dalla superficie del rubinetto solo con
detergenti non aggresivi!
- Subito dopo la pulizia, sciacquare bene i residui di detergente con
acqua fredda!
- Asciugare con un panno morbido.
Avisos básicos de limpieza:
-
Cuando se procede a limpiar la griferia, su superficie debe estar
fria
(el calor acelera la destrucción de la superficie)!
- Respetar los avisos de limpieza del fabricante del detergente!
Cuidado:
- Secar la griferia frotando diariamente con un paño blando!
- Evite, imprescindiblemente, detergentes y esponjas de
limpieza raspantes!
Limpieza:
- Quitar las manchas de suciedad o cal en la superficie
de la griferia sólo con un detergente poco agresivo!
- Inmediatamente después de la limpieza eliminar,
enjuagando con agua fria, todos los residuos del detergente!
- Secar frotando con un paño blando.
General Cleaning Instructions:
- Faucet surface must be of room temperature before
cleaning (elevated temperature increases damage of the surface).
-
Cleaning instructions of the detergent manufacturer must be
followed
.
Maintenance:
- Rub the faucet daily dry with a soft cloth.
- Never use corrosive cleaners or cleaning pads.
Cleaning:
- Dirt or calcium deposits on the faucet surface must be
removed with soft detergent or with soap water!
- Rinse well with water immediately after cleaning, until
all detergent ie removed from the surface.
- Dry with soft cloth.
Skötsel och underhåll:
- Blandaren skall vara rumstempererad innan rengöring
(högre temperatur kan vara skadlig för ytbehandlingen).
- Instruktioner från rengöringsmedeltillverkaren skall följas.
Underhåll:
- Torka av blandaren dagligen med en mjuk trasa
- Använd aldrig kalklösande, sura- eller slipande skurmedel och svampar.
Rengöring:
- Smuts eller kalkavlagringar på blandarytan tas bort med milt
rengöringsmedel eller mild tvållösning.
- Eftersköljning med rent vatten tills allt rengöringsmedel är borta.
- Torka med mjuk trasa.
D Schäden, die infolge unsachgemässer Behandlung, natürlicher Abnützung oder zu grosser
Inanspruchnahme entstanden sind, sind von unseren Garantieleistungen ausgeschlossen!
F Ces dommages survenus en raison d'un traitement inadéquat, des signes d'usure traitement
inadéquat, naturels ou du grand utilisation, sont exclus de notre garantie.
I Danni ai rubinetti, conseguenti da un trattamento non appropriato, sono esclusi dalla nostra
garanzia!
Sp Daños, debidos a un tratamiento inadecuado, son exclusos de la nuestra garantia.
E Damages on the faucet resulting from incorrect handling are excluded from the
manufacturers warranty!
S För att Garantin skall gälla skall blandaren vara monterad och använd på ett korrekt sätt.
Technische Änderungen vorbehalten
Salvo cambiamenti tecnici
Sous réserve de modifi cations techniques
Derechos reservados para efectuar modifi caciones técnicas
Subject to technical alteration
Med förbehåll för tekniska ändringar
Recyclingpapier auf 100% Altpapierbasis.
Papier de recyclage sur 100% bases de vieux papier.
Riciclaggio della carta sulla base della carta straccia di 100%.
Reciclaje del documento sobre base del papel usado del 100%.
Recycling paper on 100% waste paper basis.
Återvinning av papper 100%
2ƃGIGCPNGKVWPIHØT#TOCVWTGPWPF<WDGJÒT
Instruction pour la maintenance des robinets et des accessoires
Istruzioni per la manutenzione di rubinetti e accessori
Instruciones para el cuidado de griferias y accesorios
Maintenance / Cleaning instructions for faucets and accessories
802016 11/13
802016
Z.536.828
Montageanleitung Schiene 2-Loch Wand
Notice de montage rail paroi à 2 trous
Istruzioni di montaggio guida, 2 fori per parete
Installation instructions, 2-hole rail to wall
+PUVTWEEKQPGUFGOQPVCLGRNGVKPCQTKƂEKQUCRCTGF
Passend zu:
A combiner avec:
Adatto a:
Adecuado para:
Suitable for:
KWC AVA 39.193.400.931
KWC ONO 39.151.400.931
KWC ADRENA 39.321.400.931
2x 1x 4x
Montage- und Serviceanleitung
Instructions de montage et d‘entretien
Istruzioni di montaggio e di assistenza
Instrucciones de montaje y servicio
Installation and service instructions
KWC AG | Hauptstrasse 57 | CH-5726 Unterkulm | Phone +41 62 768 68 68 | www.kwc.com
2
802016 11/13
UP-Einheit auf Schiene befestigen.
(Montage bauseits)
Fixer l‘unité encastrable sur le rail.
(
Montage
à procurer sur les lieux
Fissare l‘unità sotto muro sulla guida.
(
Montagio
sul cantiere)
Fixer l‘unité encastrable sur le rail.
(
Montajo
en la obra)
Fijar la unidad de empotrar a la pletina.
(
Installation
on the site)
4x M5 Schrauben montieren auf Position (A) oder (B).
Monter 4x vis M5 en position (A) ou (B).
Montare 4 viti M5 su posizione (A) o (B).
Montar 4 tornillos M5 a posición (A) o (B).
Install 4 M5 screws to position (A) or (B).
Montage / Montage / Montagio / Montaje / Installation
Schienen an Untergrund befestigen.
(Montagevarianten: seitlich / oben / unten)
Fixer les rails sur le support.
(variantes de montage: côté / haut / bas).
Fissare le guide alla base.
(varianti di montaggio: laterale / sopra / sotto)
Fijar las pletinas a la base.
(variantes: lateral / arriba / abajo)
Attach rails to base.
(Installation variants: side/top/bottom)
4x Muttern (Messing) in Schienenschlitz einhängen.
Encastrer 4x écrous (laiton) dans la rainure du rail.
Inserire 4 dadi (ottone) nella fessura della guida.
Introducir las 4 tuercas (latón) en las ranuras de la pletina.
Insert 4 nuts (brass) into the rail slot.
1
3
4
4x
2AB
3
802016 11/13
Montage / Montage / Montagio / Montaje / Installation
Zum einstellen der Einbautiefe an den 4 Messingmuttern drehen.
Pour régler la profondeur de montage, agir sur les 4 écrous en
laiton.
Regolare la profondità di montaggio ruotando i 4 dadi in ottone.
Regular la profundidad de montaje girando las 4 tuercas de latón.
Turn the 4 brass nuts to adjust the installation depth.
Achtung: Einbautiefe bachten
(Gelber Kleber min. – max.)
Kontrolle: Transparente Bauschutzkappe satt aufstecken.
Attention: veiller à la profondeur de montage.
(autocollant jaune min. – max.)
Contrôle: le couvercle transparent doit être bien mis en place.
Importante: rispettare la profondità di montaggio
(adesivo giallo min.-max.)
%QPVTQNNQECNQVVCRTQVGVVKXCVTCURCTGPVGKPUGTKVCCƂNQ
Atención: comprobar la profundidad de montaje
(Pegatina amarilla: mín. - máx.)
Control: introducir el capuchón protector transparente hasta el tope.
Caution: Pay attention to the installation depth
(yellow sticker indicates min./max.).
6QEJGEMƂVVJGVTCPURCTGPVEQXGTUNGGXGQPHWNN[
½“ Rohr (Länge: min. 200 mm bauseits) in den Anschluss des Auslaufes
eindrehen.
Visser le tuyau ½“ (longueur: min. 200 mm à procurer sur les lieux)
dans l‘évacuation.
Inserire nella bocca il tubo da ½“ (lunghezza min. 200 mm sul cantiere).
Atornillar el tubo de ½“ (long.: mín. 200 mm en la obra ) en la salida
del caño.
Screw the ½“ pipe (length: at least 200 mm on the site) into the outlet
for the spout.
6
8
9
Montageschiene mit UP-Einheit A+B verschrauben.
Fixer par vis le rail de montage avec A+B l‘unité encastrable en bas.
Avvitare la guida di montaggio A+B all’unità sotto muro nella
parte inferiore.
Atornillar la pletina de montaje A+B por la parte de abajo a la
unidad de empotrar.
Screw the mounting rail to the concealed A+B unit at the bottom.
5
A
B
0-13 mm
47-72 mm
32-57 mm
7
200 mm
4
802016 11/13
Schwarzer Kunststoffring (A) auf ½“ Rohr aufbringen.
Transparente Bauschutzkappe (B) entfernen.
Adapter l‘anneau de plastique noir (A) sur le tuyau ½“.
Enlever le couvercle transparent.
Applicare l’anello nero in plastica (A) alla base del tubo da ½“.
Rimuovere la calotta protettiva trasparente (B).
Colocar el anillo de plástico negro (A) en el tubo de ½“.
Retirar el capuchón protector transparente (B).
Fit the black plastic ring (A) to the ½“ pipe.
Remove the transparent cover sleeve (B).
Montage / Montage / Montagio / Montaje / Installation
Ausrichtung UP-Einheit:
Zur Kontrolle Wasserwaage über den schwarzen
Kunststoffring und verchromter Hülse legen. Zum
nivilieren an den Messingmuttern drehen, oder die
Montageschiene neu ausrichten.
Ajustage de l‘unité encastrable:
2QWTXÅTKƂGTRNCEGTNGPKXGCW¼DWNNGRCTFGUUWU
l‘anneau de plastique noir et la douille chromée.
Pour la mise à niveau, agir sur les écrous de laiton
ou réajuster le rail de montage.
8GTKƂEC allineamento unità sotto muro:
posizionare la livella ad acqua sull’anello nero in
plastica e sul manicotto cromato.Per livellare, ruotare
i dadi in ottone oppure riposizionare la guida di
montaggio.
Enderezar la unidad de empotrar:
Comprobar colocando el nivel de burbuja sobre el
anillo de plástico y la funda cromada. Para nivelar,
girar las tuercas de latón, o volver a colocar la pletina
de montage.
Alignment of the concealed unit: To check, place a
spirit level over the black plastic ring and chrome pla-
ted sleeve. To level up, turn the brass nuts or re-align
the mounting rail.
Ausrichtung Auslauf:
Zur Kontrolle Wasserwaage auf ½“ Rohr legen.
Zum Ausrichten an den Messingmuttern drehen.
Ajustage de le bec:
2QWTXÅTKƂGTRNCEGTNGPKXGCW¼DWNNGUWTNGVW[CWp
Pour ajuster, agir sur les écrous de laiton.
8GTKƂEC allineamento bocca:
posizionare la livella ad acqua sul tubo da ½“.
Per allineare, ruotare i dadi in ottone.
Enderezar el caño de salida:
Para comprobar, colocar el nivel de burbuja sobre
el tubo de ½“.
Girar las tuercas de latón para enderezar.
Alignment of the spout:
To check, place a spirit level on the ½“ pipe.
To adjust the alignment, turn the brass nuts.
Für die Druckprüfung ist der weisse Kunststoffzapfen zu montieren und nach den
nationalen/lokalen Installationsvorschriften zu prüfen.
2QWTXÅTKƂGTNCRTGUUKQPKNEQPXKGPVFGOQPVGTNCEJGXKNNGFGRNCUVKSWGDNCPEJGGVFGVGPKTEQORVGFGU
prescriptions d‘installation nationales/locales.
Eseguire la prova in pressione montando il perno bianco in plastica e attenendosi alle prescrizioni
d‘installazione nazionali o locali.
Para la prueba de presión, montar el tapón de plástico blanco y comprobar según las normas de instalación
nacionales/locales.
6QEJGEMVJGRTGUUWTGƂVVJGYJKVGRNCUVKEURKIQVCPFEJGEMCEEQTFKPIVQPCVKQPCNQTNQECNKPUVCNNCVKQP
regulations.les.
10
11 12
AB

Other manuals for AVA 11.192.034.000

1

This manual suits for next models

2

Other KWC Plumbing Product manuals

KWC A 140 Manual

KWC

KWC A 140 Manual

KWC STAR Quick guide

KWC

KWC STAR Quick guide

KWC SUPRIMO 10.271.033.700 User manual

KWC

KWC SUPRIMO 10.271.033.700 User manual

KWC Designo K.12.H1.11.000 User manual

KWC

KWC Designo K.12.H1.11.000 User manual

KWC K.38.P4.04.931.23 Owner's manual

KWC

KWC K.38.P4.04.931.23 Owner's manual

KWC DOMO 10.061.991.000 User manual

KWC

KWC DOMO 10.061.991.000 User manual

KWC DOMO 10.061.013 User manual

KWC

KWC DOMO 10.061.013 User manual

KWC Systema 10.501.012 User manual

KWC

KWC Systema 10.501.012 User manual

KWC ONO touch light PRO 20.657.120.000 Quick guide

KWC

KWC ONO touch light PRO 20.657.120.000 Quick guide

KWC A 125 Quick guide

KWC

KWC A 125 Quick guide

KWC AQUAJET-COMFORT SHAC0008 User manual

KWC

KWC AQUAJET-COMFORT SHAC0008 User manual

KWC HDTX805L User manual

KWC

KWC HDTX805L User manual

KWC PUREJET K.18.P1.03 User manual

KWC

KWC PUREJET K.18.P1.03 User manual

KWC SIN 10.261.012.000 Quick guide

KWC

KWC SIN 10.261.012.000 Quick guide

KWC F4LT1005 User manual

KWC

KWC F4LT1005 User manual

KWC PROTRONIC-S AQUA131 2000067774 User manual

KWC

KWC PROTRONIC-S AQUA131 2000067774 User manual

KWC KONOS K.10.K1.12 User manual

KWC

KWC KONOS K.10.K1.12 User manual

KWC DESIGNO Series Quick guide

KWC

KWC DESIGNO Series Quick guide

KWC Basel S.10.J1.01 User manual

KWC

KWC Basel S.10.J1.01 User manual

KWC DESIGNO K.28.H3.60.000.38 User manual

KWC

KWC DESIGNO K.28.H3.60.000.38 User manual

KWC LIVELLO 10.231.013.000FL Quick guide

KWC

KWC LIVELLO 10.231.013.000FL Quick guide

KWC PUREJET Z.505.888 User manual

KWC

KWC PUREJET Z.505.888 User manual

KWC ONO 10.151.991.000 User manual

KWC

KWC ONO 10.151.991.000 User manual

KWC Designo K.28.H3.40.000.99 User manual

KWC

KWC Designo K.28.H3.40.000.99 User manual

Popular Plumbing Product manuals by other brands

Sensea STUDIO Assembly, Use, Maintenance Manual

Sensea

Sensea STUDIO Assembly, Use, Maintenance Manual

Hans Grohe Metropol 32530000 Instructions for use

Hans Grohe

Hans Grohe Metropol 32530000 Instructions for use

Spectrum Brands Pfister Selia LF-042-SL Quick installation guide

Spectrum Brands

Spectrum Brands Pfister Selia LF-042-SL Quick installation guide

Tres Project-Tres 21110302 instructions
Tres

Tres Project-Tres 21110302 instructions

JACLO Aquavolo Duetto installation instructions

JACLO

JACLO Aquavolo Duetto installation instructions

Hans Grohe Metris 31480000 Instructions for use/assembly instructions

Hans Grohe

Hans Grohe Metris 31480000 Instructions for use/assembly instructions

Helvex Squadra E-929 installation guide

Helvex

Helvex Squadra E-929 installation guide

Grohe GROHTHERM 3000 COSMOPOLITAN 19 568 manual

Grohe

Grohe GROHTHERM 3000 COSMOPOLITAN 19 568 manual

Thetford C500 Demounting instruction

Thetford

Thetford C500 Demounting instruction

VIGO VG07705 Assembly instructions

VIGO

VIGO VG07705 Assembly instructions

SmartBidet SB-100R user manual

SmartBidet

SmartBidet SB-100R user manual

Kohler Memoris 10435T installation instructions

Kohler

Kohler Memoris 10435T installation instructions

Sanela SLWN 08P Mounting instructions

Sanela

Sanela SLWN 08P Mounting instructions

Hans Grohe Axor Montreux 16570 Series Assembly instructions

Hans Grohe

Hans Grohe Axor Montreux 16570 Series Assembly instructions

American Standard Ceramix 2021.831 installation instructions

American Standard

American Standard Ceramix 2021.831 installation instructions

Sanela SLUN 71E Instructions for use

Sanela

Sanela SLUN 71E Instructions for use

noken CURVE 100237653-N199998998 manual

noken

noken CURVE 100237653-N199998998 manual

Hans Grohe Metris M71 220 2jet 73800000 Instructions for use/assembly instructions

Hans Grohe

Hans Grohe Metris M71 220 2jet 73800000 Instructions for use/assembly instructions

manuals.online logo
manuals.online logoBrands
  • About & Mission
  • Contact us
  • Privacy Policy
  • Terms and Conditions

Copyright 2025 Manuals.Online. All Rights Reserved.