Using the "Online Manual" (Japanese)
For detailed descriptions on various functions, refer to the "Online Manual"
(Japanese) either from the scannable QR code below or on the product as follows:
Home screen→[ツール(tools)]→[取扱説明書(Online
Manual)]
You can also check the "Online Manual" (Japanese) on the au homepage.
(
https://www.au.com/online-manual/kyt34/
)
(Japanese)
List of Packaged Items
Before your start using the product, make sure that you have all the following packaged
with the product.
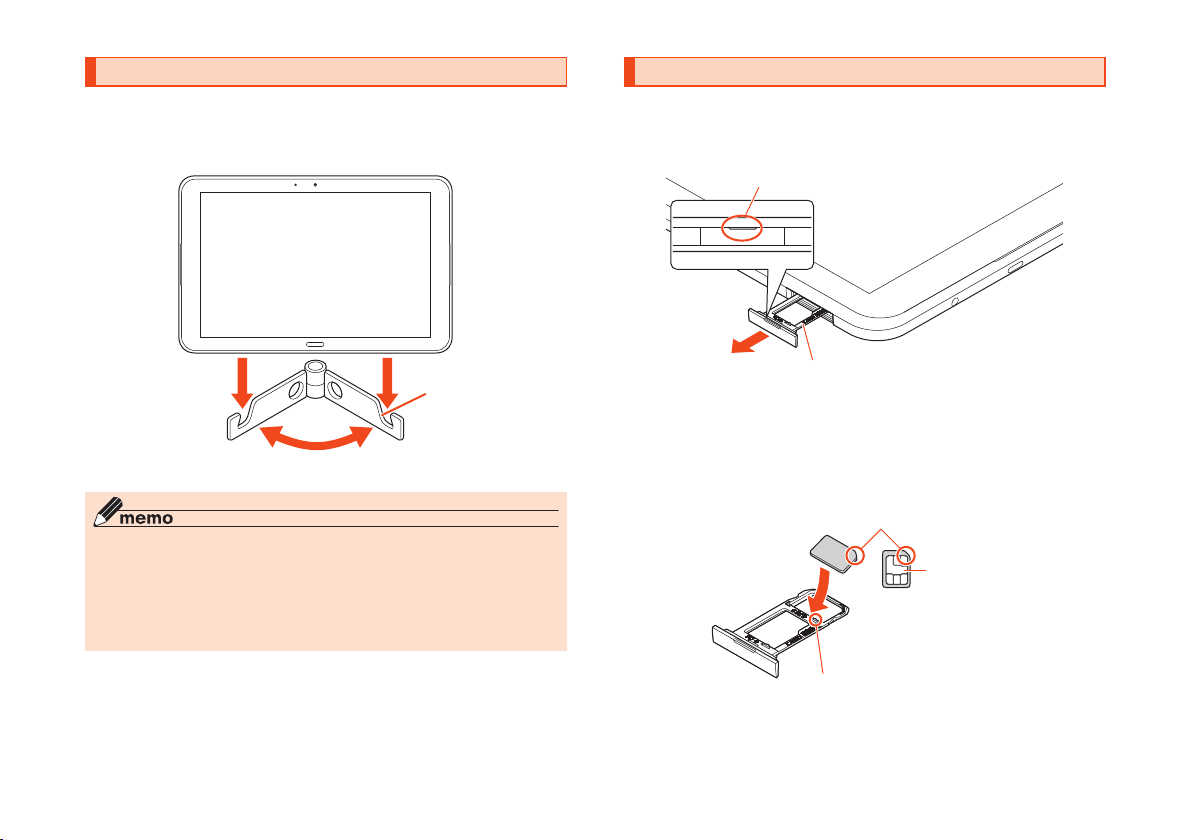
•Main unit
•Tablet Stand (Sample)
•
(Quick Start Guide)(Japanese)
•
(Notes on Usage)(Japanese)
The following items are not included in the package.
•AC adapter
•USB Type-C™ cable
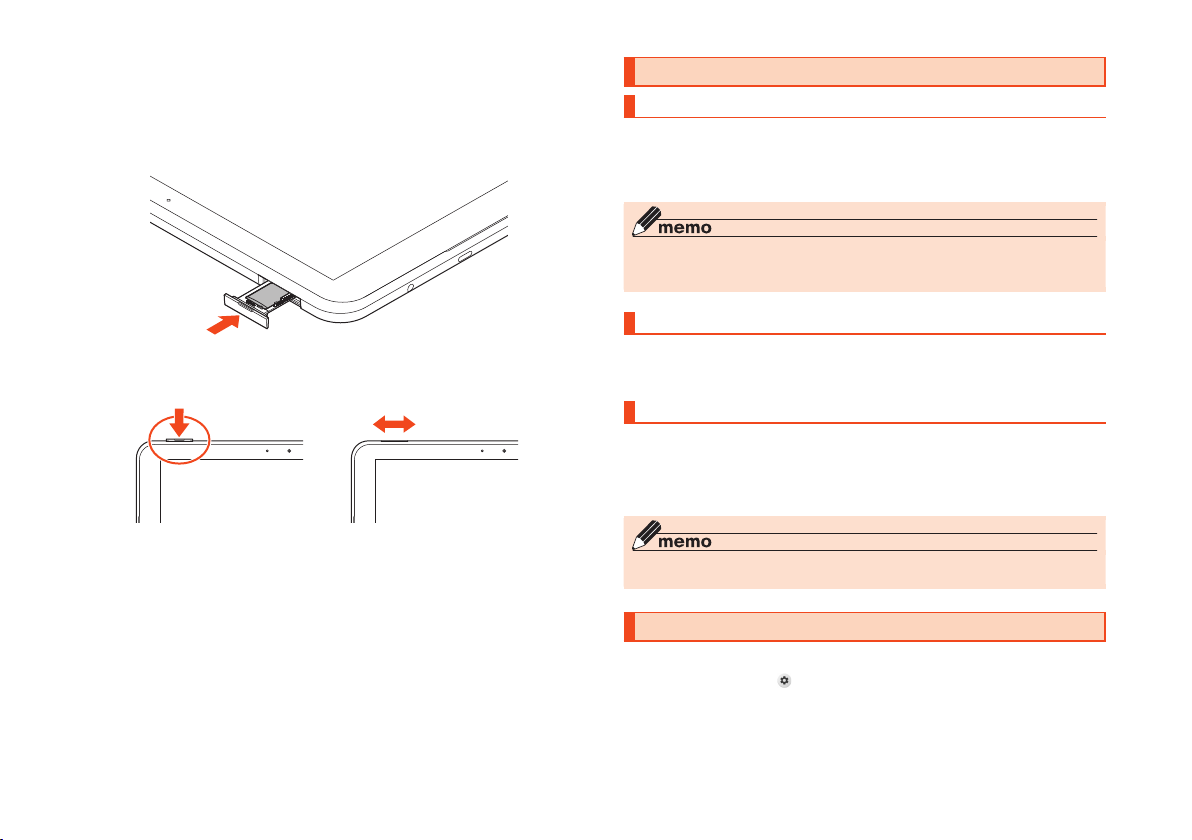
•microSD memory card
•Earphones
◎Purchase a specified charger (sold separately).
◎The battery is built into the product.
◎The illustrations in this manual are only for reference. They may look different from the
actual product.
February 2021, 1st Edition
Sales: KDDI CORPORATION•OKINAWA CELLULAR TELEPHONE COMPANY
Manufactured by: KYOCERA Corporation
Cell phone and PHS operators collect and recycle unused telephones,
batteries and battery chargers at stores bearing the logo regardless of
brand and manufacturer to protect the environment and reuse valuable
resources.
For inquiries, call:
Customer Center
For general information (toll free)
Business hours 9:00 to 20:00 (7 days a week)
157
Fromau mobile phones:
area code not required
From non-au mobile phones /
general subscriber phones:
In case above numbers are not available (for free),
(except Okinawa)
(Okinawa)
For the, loss, or malfunction (toll free)
113
From au mobile phones:
area code not required
From non-au mobile phones /
general subscriber phones:
In case above numbers are not available (for free),
Business hours 24-hour (7 days a week)
0077-7-113
0120-925-314
Business hours 9:00 to 20:00 (7 days a week)
Repair and Delivery Suppo Center
For the, loss, or malfunction (toll free)
From au mobile phones / non-au mobile phones /
general subscriber phones:
0120-925-919
Business hours 9:00 to 18:00 (7 days a week)
Corporate Customer Center
(For corporate contractors)
For general information (toll free)
*Except during the year change period
From au mobile phones:
From non-au mobile phones /
general subscriber phones:
0077-7041 0120-925-041
0077-7-111
0120-977-699
0120-977-033
•Descriptions in this manual are based on Android™ 10.
•For the latest edition, refer to the "Online Manual" (Japanese) or
"() (Full instruction manual)" (Japanese)
available on the au homepage.
(
https://www.au.com/support/service/mobile/guide/manual/
)
(Japanese)