KYOKUTOH TMN-01 User manual

Tip Monitor (TMN-01)
Instruction Manual
Please read this instruction manual carefully,
before using the device.
First Edition 2013.04.23
Revised Edition 2021.01.08
V3.02

ATTENTION TO SAFETY
※Please be sure to read ATTENTION TO SAFETY before using the tip monitor.
※After reading the manual, please keep it to the place where it can be checked easily.
Please DO NOT disassemble or reconfigure this machine or its parts.
If the stickers on the back of the monitor has been removed, no warranty or repair service may be recieved.
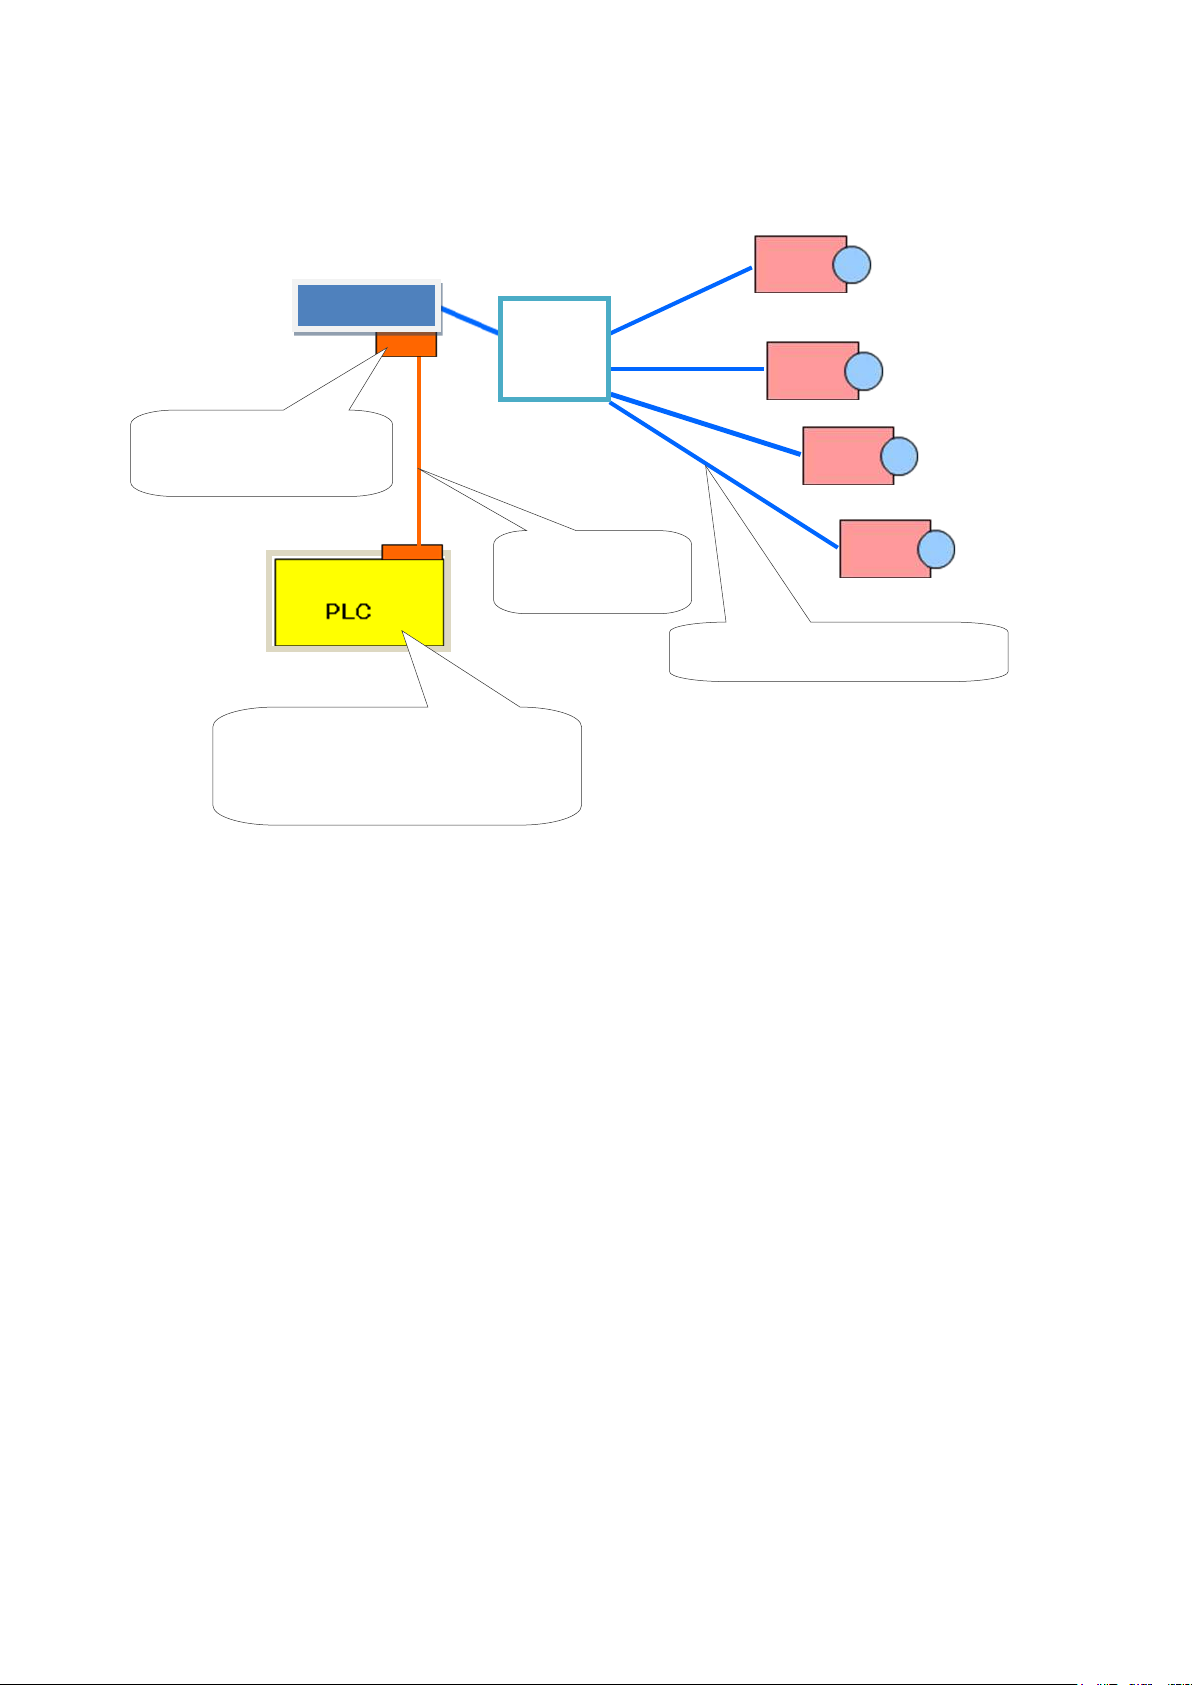
When working in the assembly line, please make sure the welding gun is OFF, and the safety from other machines.
Please turn OFF the power, when replacing the parts or maintenancing.
When the monitor is not set in a proper way, the monitor may not collect enough information to maintain good
condition in the welding process.
When using the monitor, please be sure to turn OFF the welding current.
This product is not to be used in any
manner other than that which is specified
within. We will not be held responsible for
damage or injury caused as a result of this
product.
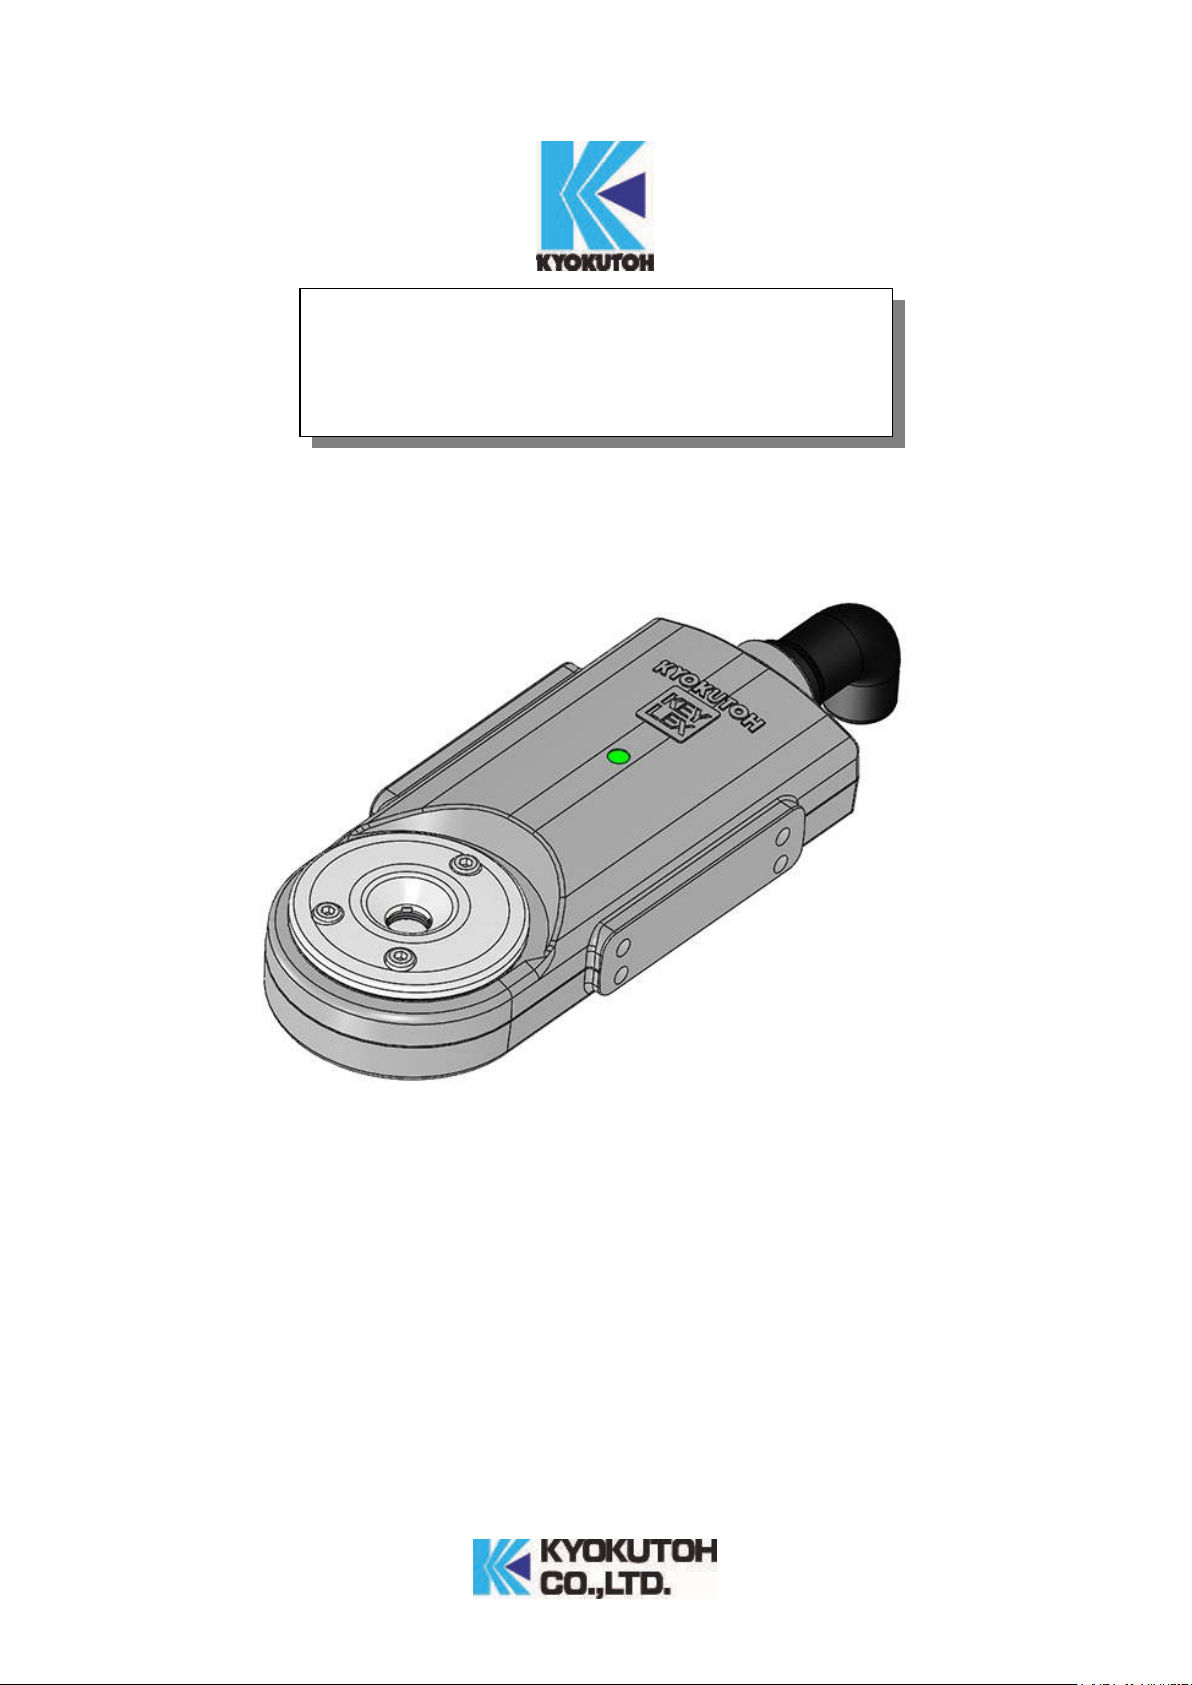
The purpose of the tip monitor is to judge whether the cap tip passes the criteria set in advance to enable automatic
manufacturing environment.
The tip monitor must be used with the tip dresser of KYOKUTOH.
Please DO NOT use the tip monitor other than that which is specified within. We will not be responsible for any
trouble, repair, accidents caused when used in a way other than that which is specified within.

INDEX
1. Product Description
1.1
Specifications
1.2
Function Explanation
1.3
Tip Monitor Model
1.4
System Outline
1.5
Things to be prepared by the client
2. How to Install
3. System Setting
3.1
Prior Confirmations
3.2
PC Setting
3.3
Control Interface Setting
3.4
Timing Chart
4.
Software Setting
4.1
System Software Structure
4.2
Installation of the Software
4.3 Setting the IP Address of Tip Monitor
4.4
Setting the System Setting Tool
4.5
Setting the Camera Setting Tool
4.6
Judge-Record Software Validation
4.7
Explanation of
“
Judge-Record Software
”
5. Maintenance
6. List of consumption parts
7. Troubleshooting
8
.
Warranty
1
1
4
6
8
12
16
18
19
20
22
26
41
42
37
39
1
3
10
35
45

1
1. Product Description
1.1 Specifications
Power [Volt DC] 48V(Supplied from PoE HUB)
Electricity Consumption
Under 120
m
A
Environmental
Resistance
Dust Resistance
Please keep away from dust.
Water Resistance
Please keep away the device from water.
Temp. of the set place
-0
~
+40
℃
(No freezing)
Humidity of the set place Below 90% (No Condensation)
Judging Spec.
Time
About 1 sec.
(
Depends on the spec of PC
)
Diameter Detection
±0.3mm
(
When clumped vertically with a C-Gun
)
Dia. REM Detection
Within 5%
(
When clumped vertically with a C-Gun
)
This product is a precision device. Please refer the environmental resistance above and set the device away from
water, dust, etc.
1.2 Function Explanation
・Tip monitor automatically judges the condition of the cap tip. (OK/NG)
・Take a photo of the upper/lower cap tip and from the photo, the system judges the cap tip from its diameter
and the % of spots that are not properly dressed.
・When using the tip monitor, the pressure must be under 3000N.
・The threshold value may be set by the purchaser.
・Tip monitor requires a periodical maintenance.
1.3 Tip Monitor Model
EX:TMN-01 - N - -
*Pressure Plate Type
A:Standard Tip Dia.(φ13・φ16・19)Top Dia.(φ5~8)/8R OK
Tip Dia.(φ13・16)/OK with flat tip
B:For φ13 DR Tip Dia.(φ13)Top Dia.(φ5~8)/6.5R OK
C:CF 120°Tip Dia.(φ13・16・19)Top Dia.(φ5~8)120° OK
T:Special Types of tips other than A,B,C.
A
Upper Pressure
Plate
Lower Pressure
Plate
B
C
A
B
C
T
T

2
About Pressure Plate of the Monitor
■Pressure Plate
No.
TYPE
SHAPE IMAGE
A
Standard
(
φ13-8R
・
φ16-8R
φ19-9.5R
/F)
TM01-KP-00A
B
Standard
(
φ13-6.5R
)
TM01-KP-00B
C
For
CF
(CF
120°
)
TM01-KP-00C
■Plate correspondence to the tip
TIP DIA.
TOP DIA.
SHAPE
CORRESPONDANCE
φ13
φ5~φ8
8R
A
φ16
φ19
9.5R
φ13
φ5
~
φ8
6.5R
B
φ13
φ5~φ8
CF120°
C
φ16
φ19
φ13
-
R20
A
φ16
φ13
-
F
A
φ16
If there is a usage of cap tips other than the listed above (A, B, C), please contact our sales department.

3
1.4 System Outline (Example of CC-Link Connection )
System Configuration is as shown above.
Up to 15 cameras can be connected to each computer.
There must be a power supply from the PoE HUB to the tip monitor.
Power:Supplied from PoE HUB
CC-Link
Connection
Set PLC as the master.
It is required for the PLC to recognize
the PC as the intelligent device.
Attach CC-Link board to
the PC
PoE
HUB
PC

4
1.5 Things to be prepared by the client
■When using CC-Link
Items
Numbers
Model・Spec
NOTE
PC to control the device 1
・
OS
Windows 10 Professional 64bit
・Windows 7 Professional 32bit・64bit
・Windows XP Professional(SP3)32bit
・FrameWorkV2 (Microsoft .NET FrameWork)
Above must be installed
・With Full Height PCI Slot or
Full Height PCI Express Slot
(Able to attach the PC interface board)
・Screen Resolution More than 1024*768
【
Recommend
】
DELL Optiplex7050 Minitower
CC-Link Board
(Attach to PC)
1
Mitsubishi Electric Q80BD-J61BT11N (PCI)
Mitsubishi Electric Q81BD-J61BT11 (PCI Express)
PoE HUB
-
・
Compatible with Type A
、
Type B
【Recommend】EHB-UG2B08-PL2(ELECOM)
【Recommend】LAN-SW08ES4/MA(Logitec)
※
Prepare the amount of PoE
to supply power for the
entire tip monitor.
※Using a slow speed of
PoE hub, may not be able to
communicate properly.
Recommended speed
1,000Mbps.
Please choose the PoE hub
with the recommended
speed.
LAN Cable
-
・
Twisted pair cable, Straight Through LAN Cable
、
Gauge EIA/TIA-568A,568B
・At least Category 5(100BASE-TX)
・No shield(UTP)
・The connecter width must be under 12mm.
On 14mm cables, the connecter cover (
rubber cover
attached) will not be able to fit.
※
Please DO NOT use the
handmade cables.
PLC
(
CC-Link
)
1
・
Set the PLC as the master
・Able to recognize the PC as the Intelligent Device
【
Recommend
】
Mitsubishi Electric Q Series
CC-LinkCable
-
Power
-
For PC/For Display/For PoE HUB

5
■When using DeviceNet
Items
Number
Model・Spec
NOTE
PC to control the device 1
・Windows XP Professional(SP3)32bit
・FrameWork V2 (Microsoft .NET FrameWork)
Above must be installed
・With Full height PCI slot
(Able to attach the PC interface board)
・Screen Resolution More than 1024*768
DeviceNet Board
(Attach to PC)
1
Omron
3G8F7-DRM21
PoE HUB
-
・
Compatible with TypeA
、
TypeB
【Recommend】EHB-UG2B08-PL2(ELECOM)
【Recommend】LAN-SW08ES4/MA(Logitec)
※
Prepare the amount of PoE
to supply power for the
entire tip monitor.
※Using a slow speed of
PoE hub, may not be able to
communicaste properly.
Recommended speed
1,000Mbps.
Please choose the PoE hub
with the recommended speed.
LAN Cable
-
・
Twisted pair cable, Straight Through LAN Cable
、
Gauge:EIA/TIA-568A,568B
・At least Category 5(100BASE-TX)
・without shield(UTP)
・The connecter width must be under 12mm.
On 14mm cables, the connecter cover (rubber cover
attached) will not be able to fit.
※
Please DO NOT use the
handmade cables.
PLC
(
DeviceNet
)
1 ・
Set PLC as the master
・
Able to recognize PC as the slave
DeviceNetCable
-
Power
-
For PC/For Display/For PoE HUB

6
2. How to Install
The tip montitor MUST NOT BE used with a Tip Dresser made by companies other than KYOKUTOH.
A cap tip dressed by dressers from another company may not be discriminated properly by the monitor.
Please check the manual of the dresser before installing.
When installing the tip monitor to the dresser, please be sure it is being done in a proper way.
Also, to protect the tip monitor from the shock caused during gun pressure, we recommend the usage of
EQUALIZINGS.
Please DO NOT place the monitor in which it can be interfered by cables, hoses, welding robots, etc.
Please make sure the welding gun DOES NOT interfere with the monitor’s LAN cable.
It can be a cause of cable damage.
*Place to install the monitor
Please set the monitor to places where there is no contact with water.
Please set the monitor to places where there is no contact with the cooling water during the replacement of
the tip.
If possible, please set the monitor to place far from the spatter.
Please protect the LAN cable by things such as flexible conduit tubes, etc.

7
■Main body of the monitor Drawing
①Refer to the picture above and fix it using 2-M6(2-φ5h7 Pin).
To protect the sensor from a shock, the usage of an equlizer is recommended.
②When purchased with the bracket.
Attach the monitor to the dresser like the picture below.
Refer to bracket model・・・BR-K-EZ-P-001

8
3. System Setting
3.1 Prior Confirmations
When setting up the system, the data entry of the following items is required.
Please be sure to check the following items listed below.
The number of cameras
Name of the robot
Shape of the cap tip, Diameter of the cap tip
Way to connect with the PLC, Setting Parameters
Serial numbers
It is recommended to write the information to the TIP MONITOR SYSTEM INFORMATION CHART
on the next page.

9
TIP MONITOR SYSTEM INFORMATION CHART
Label 1
Label 2
NO.
Robot Name
Shape
Upper Tip
Shape
Lower Tip
IP Address
SN
1
2
3
4
5
6
7
8
9
10
11
12
13
14
15
Connection setting with the PLC
Device
Set No.
Etc.
<SUMMARY>
Label 1 :Shown on the software screen(Label 1)
Label 2 :Shown on the software screen(Label 2)
No. :Number used to connect with the PLC
Robot Name :Name used in the software
※1 Number of letters must be more than 4, less than 8.
※2 Special Characters may not be used. (Hyphen is OK)
Shape of tip :Set the parameter according to the shape
IP Address :Setting of camera and the connection with PC(101~115)
※Duplicate IP Address is usable.
SN :Write down the Serial No written on the back of the monitor.
Indication
1
Indication
2
Robot Name

10
3.2 Computer Setting
The system conducts Ethernet communication between the camera and the PC.
Therefore, there is a need of setting up the PC’s network adaptor.
Please set as written below.
IP Address:192.168.0.1
Subnet Mask : 255.255.255.0
【With Windows XP】
Control Panel →Network and Internet Connections →Network Connections →
Local Area Connection →Internet Protocol (ICP/IP) Properties
【With Windows7】
Control Panel (View by Small icons) →Network and Sharing Center →
→Change adapter setting→Right Click Local Area Connections→Select Properties
→Internet Protocol Version 4 (TCP/IPv4) Properties
【With Windows10】
Right Click (The lower left of a screen)→Control Panel →View network status tasks
→Change adapter setting→Right Click Local Area Connections→Select Properties
→Internet Protocol Version 4 (TCP/IPv4) Properties

11
When using Windows 7 or 10, you will need to turn off the power saving setting.
(This is to avoid the device to turn OFF automatically with PC)
【With Windows7】
My Computer →Right Click →Property →Device Manager→Network adaptors →Click
→Click the name→Unselect “Allow the computer to turn off this device to save power”
【With Windows10】
Right Click (The lower left of a screen)→Device Manager→Network adaptors →Click
→Click the name→Unselect “Allow the computer to turn off this device to save power”
DO NOT set the PC to activate background software.
*If things such as security software and Windows Update activate, the system may not work properly.
Please try not to install other software to the using PC.
There are cases when the system did not work properly from interference by other software.
(EX: AutoCAD activated in the background and the system did not work properly)

12
3.3 Control Interface Setting
The system requires control interfaces such as CC-Link, DeviceNet.
Please follow the manual to set up as shown below.
Installation of attached software.
Attaching interface board, installation of drive.
Connection setting of the attached software and the PLC.(Confirm the setting which will be used for the
PLC)
【CC-Link Set Up】(Mitsubishi Electric Q80BD-J61BT11N)
①Set the allotment of Station No. /Type.
②Set the Occupied Sta. as “Occupied 4 stations”
③Set the Transmission Rate the same as the PLC.
④Click the “Online Operation”tab.
⑤Click “Write”.
※When setting up the PLC, please set the I/F Board as the intelligent device.
For more information, please refer to the manual of Mitsubishi Electric.
②
①
③
④
⑤

13

14
【DeviceNet Set Up】(Omron 3G8F7-DRM21)
By using devNetSetting_slave.exe, set up the DeviceNet slaves.
To connect the PCI and I/F board, the setting of ①~③ is required.
The Byte rate of I/O depends on the amount of using monitors.
※The software acts ①~③ when starting up the system.

15

16
3.4 Timing Chart
①Pressurize right after dressing the tip.(Recommended Pressure:1500N Maximum:3000N)
②When the PC is ON and the data strobe is OFF, turn ON the shoot command. (Keep the shoot command)
③By receiving the command, the software takes a photo, process the photo, and send back the judgement
result back to the PLC.
④The PLC processes the result and turn OFF the shoot command.
⑤The judge software recieves the signal of the command turning OFF and turns OFF the result.
⑥Release the pressure.
When OK judge was made
When NG judge was made
Dia. Judge NG →Signal Dia. Judge is OFF
REM. Judge NG →Signal REM. Judge is OFF
The camera signal will turn ON/OFF at the same time as data strobe signal if the system is properly working.
Amount of time it takes from receiving the command to turning OFF the result output is approx. 1 sec.(But, it
may depends on the spec of PC and LAN)
When the shooting is done in plural cameras, the total time to process will be cumulative.
(EX: When using 3 cameras, total time will be about 3sec.)
Release the gun after the data strobe turns ON (after shooting is done).

17
EXAMPLES
*Robot of YASKAWA
SVGUNCL GUN#(1) PRESSCL#(4) ON Start pressurizing
WAIT IN #(**)=ON Wait for the signal input
SVGUNCL GUN#(1) PRESSCL#(4) OFF Stop pressurizing
The data strobe signal that written as “XOE1” in the below ladder diagram will fit in the ** above.
This manual suits for next models
3
Table of contents
Other KYOKUTOH Industrial Equipment manuals