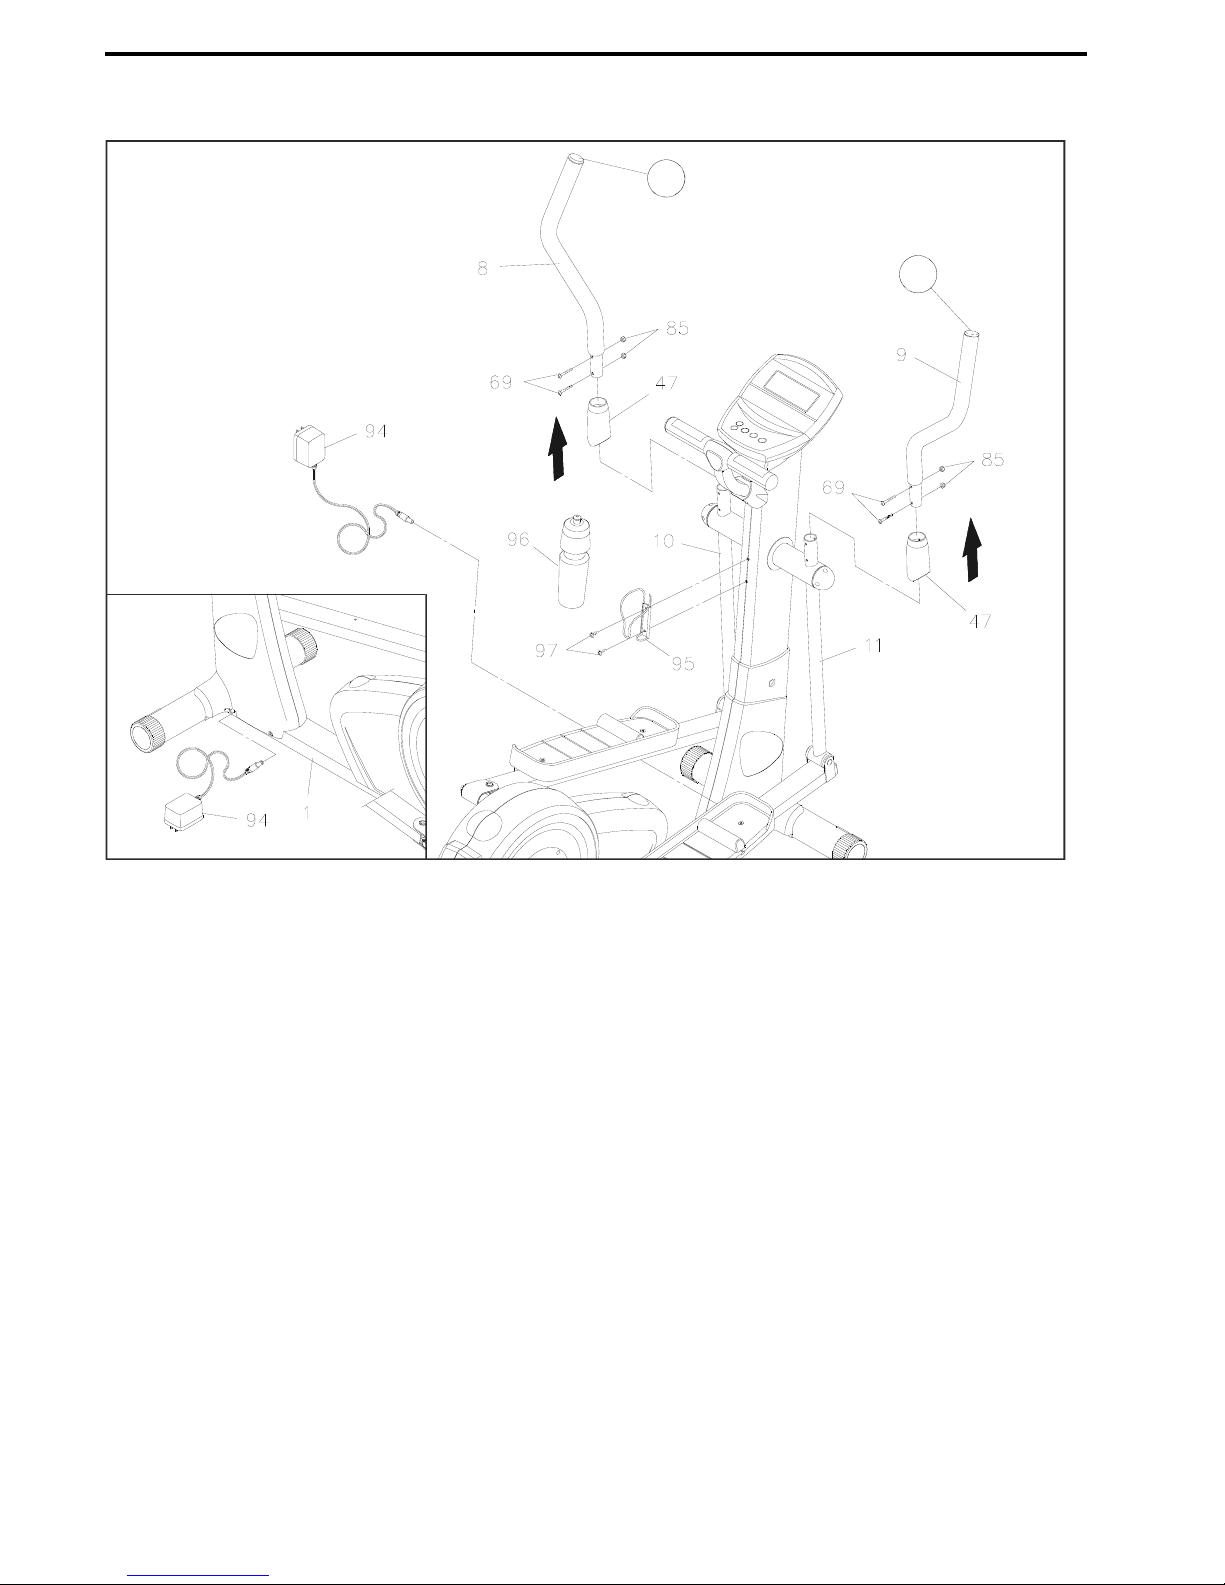
9
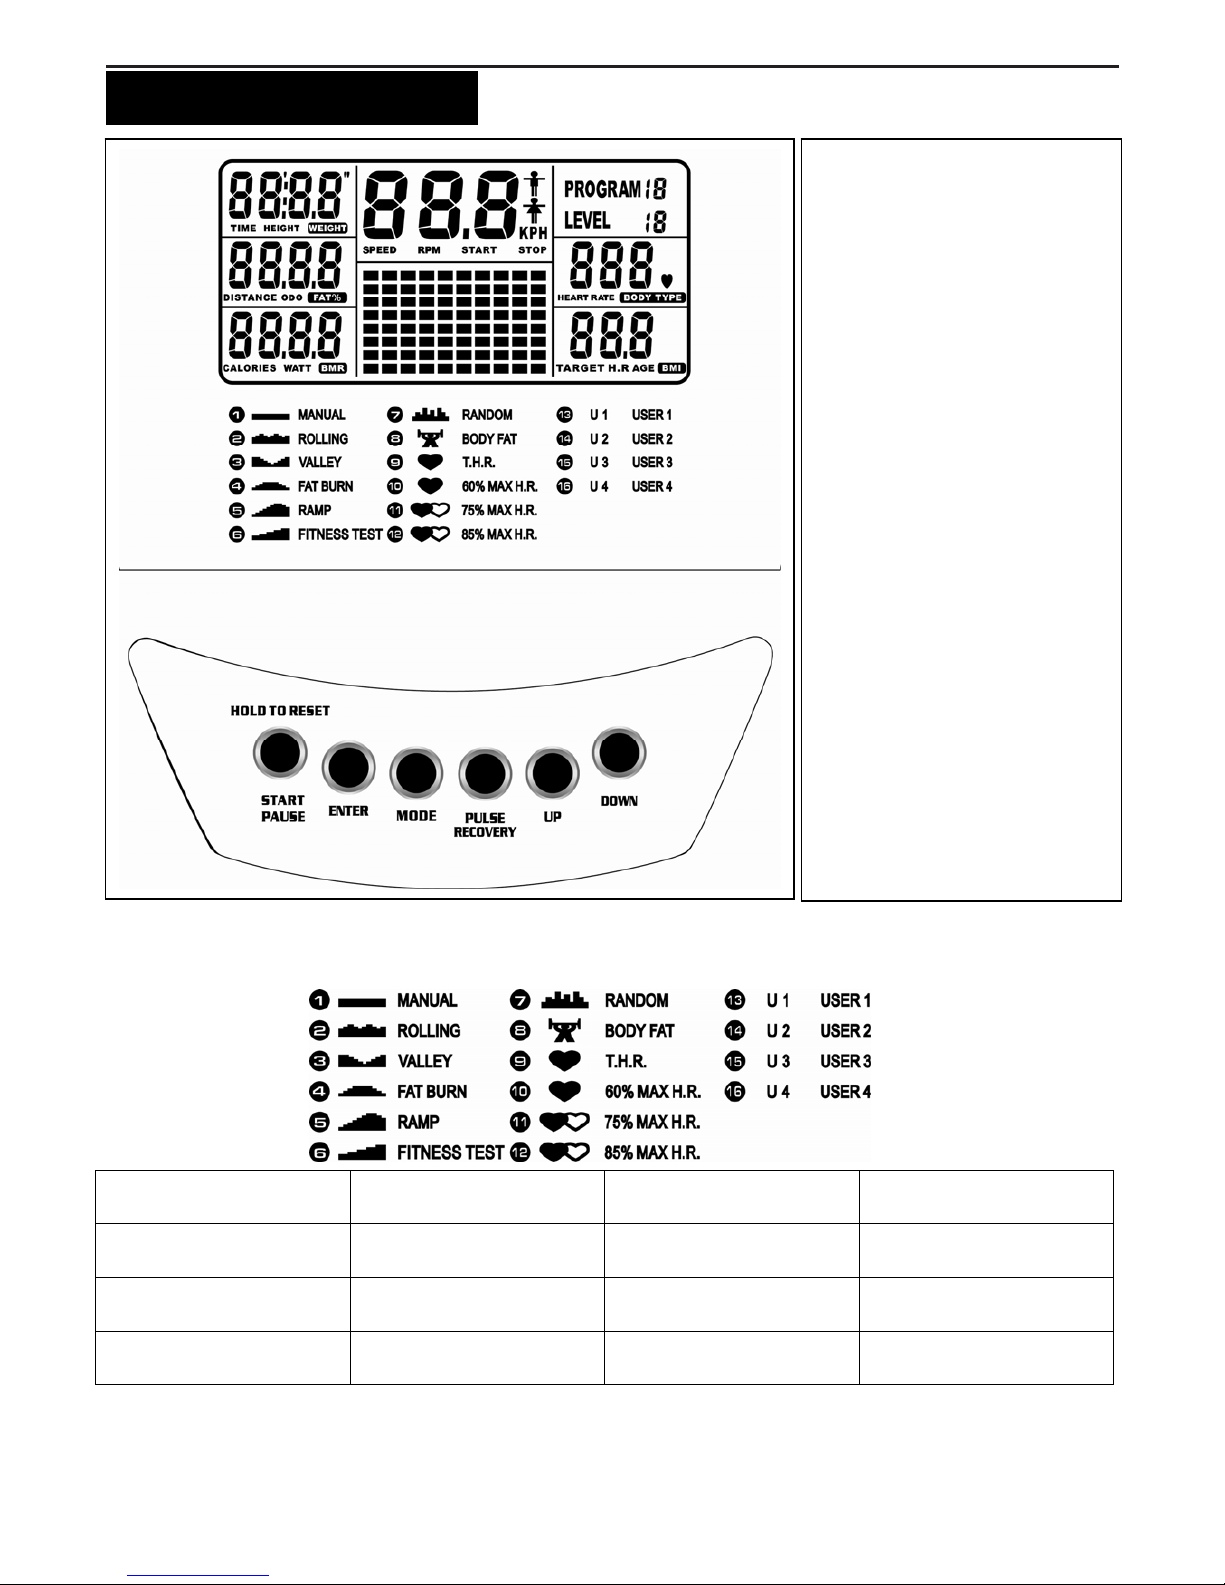
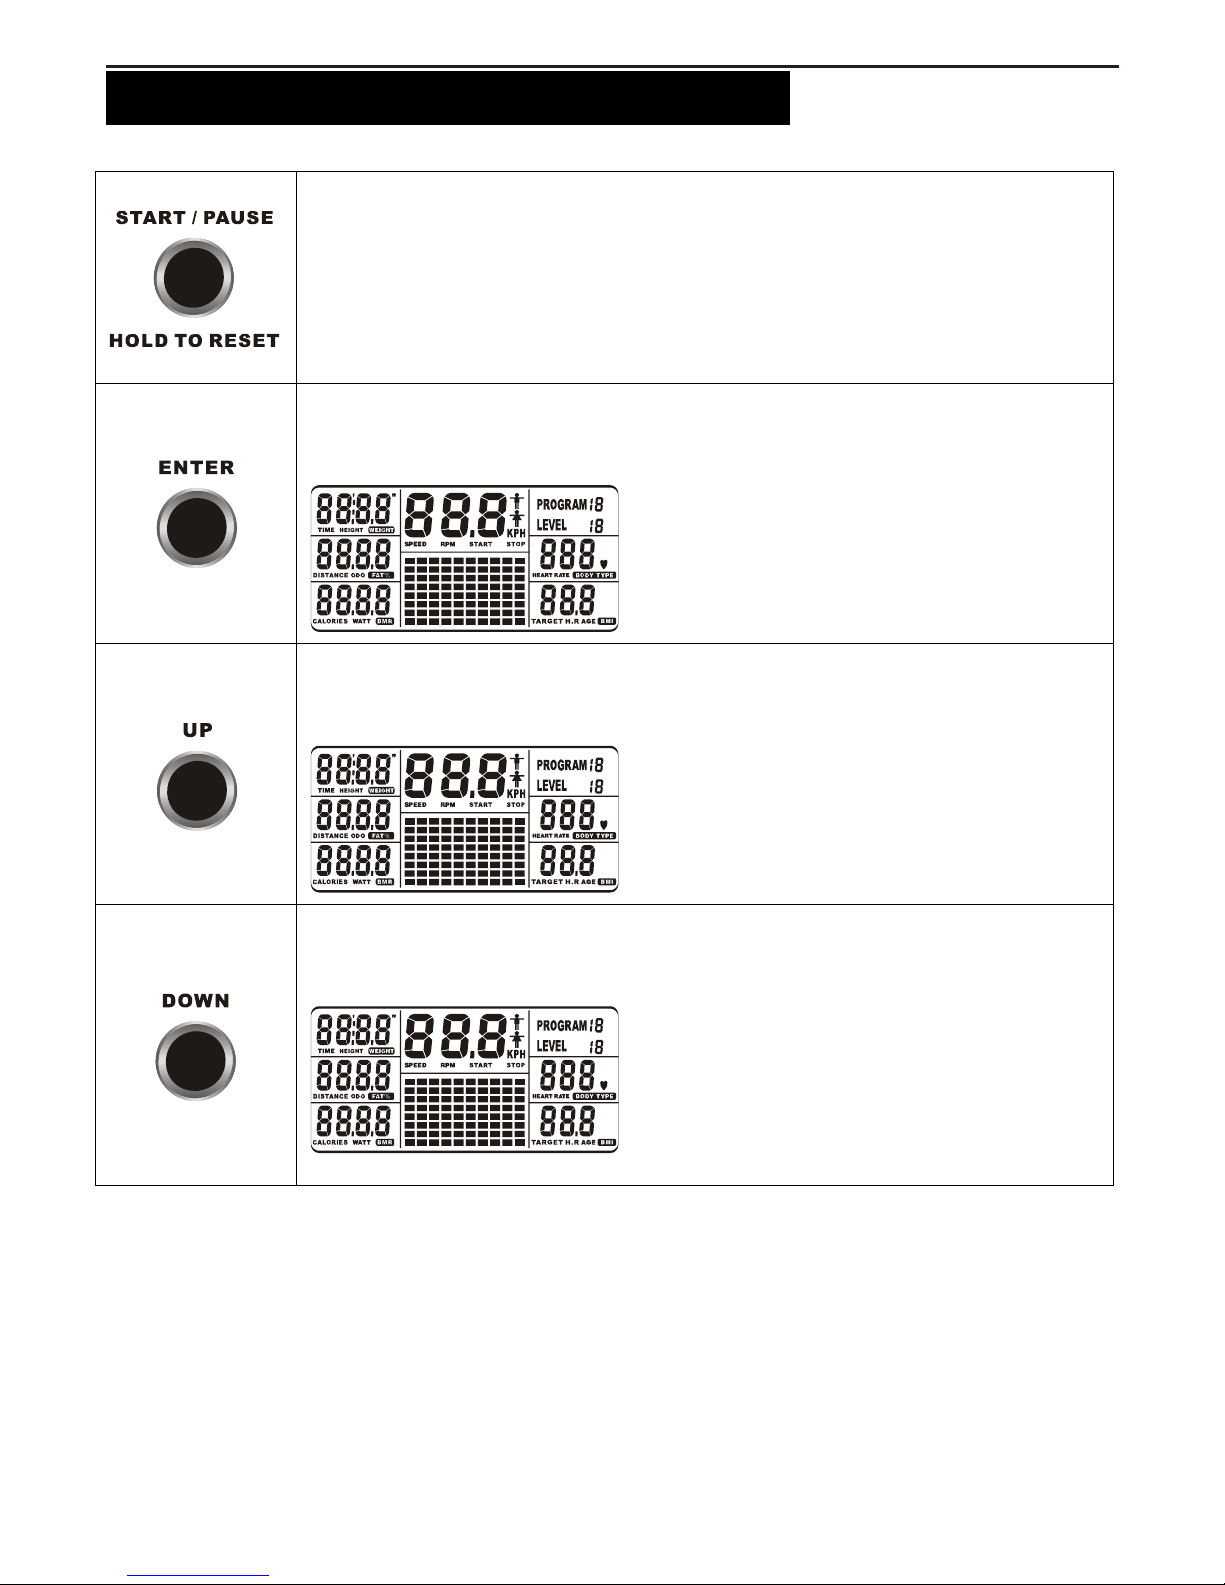
“CONSOLE INSTRUCTIONS – CONSOLE BUTTONS ”
During workout (after pressing START/PAUSE), the user could press MODE to select SPEED,
DISTANCE and CALORIES, or RPM, ODO (Odometer) and WATT
RPM, ODO, WATT will show at the same time SPEED, DISTANCE, CAL. will show at the same time
DISTANCE and ODO (ODOMETER) information:
DISTANCE:
a. This measures the total distance from 0 to 999 km/Mile.
b. After pressing
START/PAUSE, DISTANCE will count up. Press START/PAUSE again to
pause all functions and DISTANCE value during your exercise program.
c. Press START/PAUSE again to resume the program and DISTANCE value will continue
counting up until the program finish
d. The console would automatically shut off after 4 minutes of inactivity. The DISTANCE
value’s counting will restart from zero after pedaling or pressing any keys to active the
console again
ODO (ODOMETER): The function of ODO and DISTANCE are similar will accumulate the total
distance traveled by the item during workout. If there is any necessary
to reset ODO’s distance value, press UP,MODE,DOWN and ENTER
at the same time to let the motor automatically calibrate to reset ODO
value to zero
a. PULSE RECOVERY button measures how quickly you return
to a resting hear rate after exercising. You could use this
button to measure improvement as you get into shape
b. The console will monitor your pulse for 60 seconds and
calculate a HEART RATE RECOVERY value from F1.0 to
F6.0. F1.0 is best; F6.0 is worst (For Reference Only)
c. The readout should only be used as a comparison between workouts. It’s recommended to use
right after any aerobic exercise. Stop exercising before starting the function.
d. Your pulse will be displayed approximately few seconds after the heart symbol “ ” is displayed
NOTE:
If you don’t hold the HEART RATE SENSORS on the handrails
with both hands properly, the console’s HEART RATE value
would show “0” and the main screen would show “F6.0” after the
console counts down to zero, which means the HEART RATE
SENSORS won’t be able to pick up the signals. Press any keys to
stop the long beep sound, then press PULSE RECOVERY button
again and make sure to hold the HEART RATE SENSORS on the handrails with both hands properly
this time.