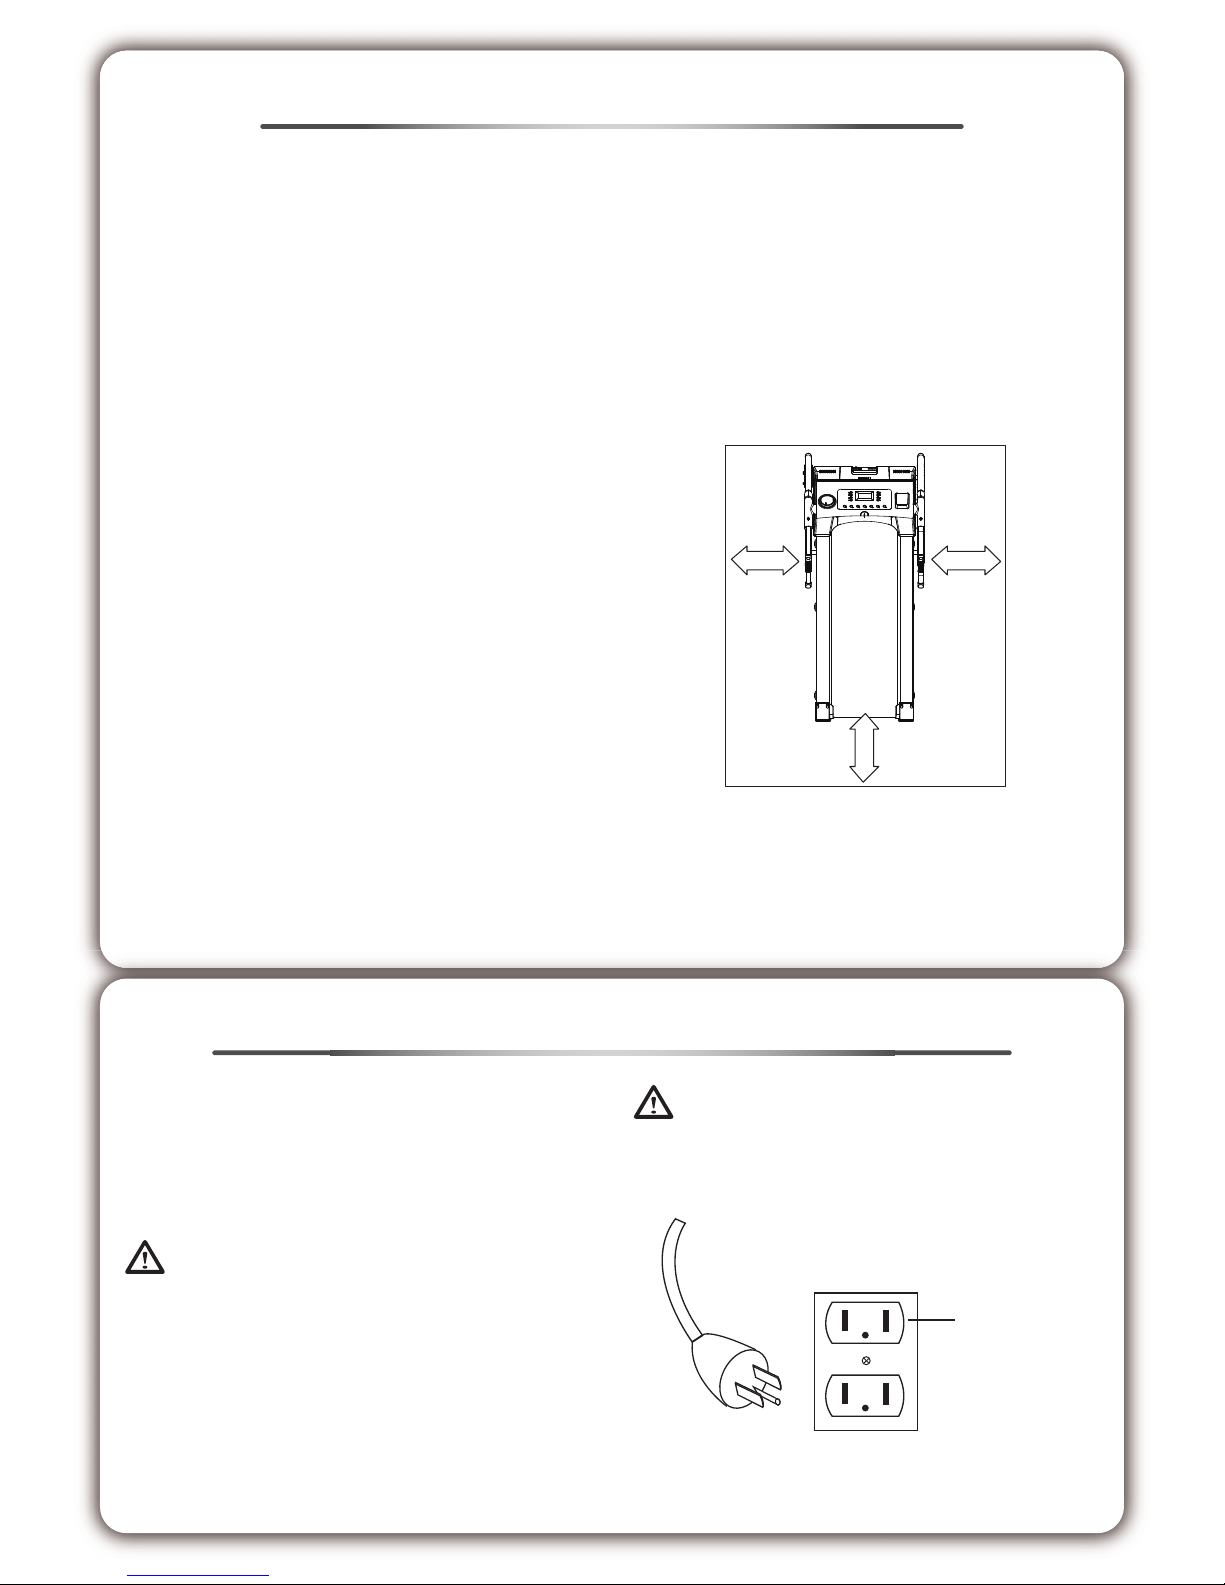
LA Fitness LOHAS T2 User manual

Congratulations on the purchase of your of a new motorized treadmill. To help to ensure the enjoyable
and trouble-free operation of your new treadmill, we strongly suggest you read this manual carefully
and follow its recommendations.
Table Of Contents
LOHAS T2
LOHAS T3
Important Safety Instruction ...........1
Assembly Instruction
LOHAS T2 ......................................2
LOHAS T3 ......................................4
Console Operation..........................6
Preset Program ............................11
Utiliztion ........................................13
Maintenance .................................14

FRONT
TOP
VIEW
2000mm
4 FEET MIN
RIGHT
SIDE
LEFT
SIDE
1000mm
2 FEET MIN
1000mm
2 FEET MIN
DANGER
– To reduce the risk of electrical shock, always
unplug this appliance from the electrical outlet immediately after using
and before cleaning.
♦
Use this appliance only for its intended use as described in this manual.
♦
Do not use attachments not recommended by the manufacturer.
♦
To disconnect, turn all the controls to the off position, then remove the
plug from the outlet.
♦
Connect this appliance to a proper grounded outlet only.
See Grounding Instructions.
♦
This appliance is intended for household use.
♦
When you are not going to use your treadmill, or when finished, please
remove the safety key from the console. Then always place the safety
key where children can not reach.
♦
Do not use outdoors.
♦
Always unplug the treadmill from the outlet immediately after using,
before cleaning, assembling or servicing.
♦
Never leave treadmill unattended when plugged in. disconnect by
turning off the master power switch and unplug from the outlet.
♦
Never operate this treadmill if it has any damage to the lead or plug.
Also if it is not operating correctly, has been dropped, damaged or if it
has been exposed to water.
♦
Do not operate where aerosol products are being used or where
oxygen is being administered.
♦
Don’t pull the treadmill by its power cord or use the cord as a handle.
♦
Keep close supervision if the treadmill is being used by on near
children, persons with disabilities or pets.
♦
Keep dry. Do not operate this treadmill in wet or moist conditions.
♦
Never insert any objects into any openings.
♦
To prevent injuries, always warm up your muscles before using the
treadmill.
♦
Always attach the clip of the safety key to your body before inserting
safety key. Please always wear safety key in case of an accident.
♦
MAX user weight: Please refer to the maximum user weight
information on the treadmill before using.
♦
Keep unplugged and have the safety key out of reach of children, when
not in use to prevent accidents.
♦
Keep electrical cord away from heated surfaces.
♦
Keep hands clear of all moving parts. Never place hands or feet under
the treadmill.
♦
Each time you use the treadmill, check that the running belt is aligned
and centered on the treadmill base and all visible fasteners on the
treadmill are sufficiently tightened and secured.
♦
Be sure that the area around the treadmill remains clear during use and
has adequate clearance. Keep the treadmill on a solid, level surface.
At least 1000 mm/2 feet from any wall on either side.
NOTE:
Failure to follow this instruction may lead to personal injury or injury to
others. It could also cause damage to the treadmill. To reduce the risk of
burns, fire or electric shock, please follow these instructions.
IMPORTANT SAFETY INSTRUCTIONS
This product must be grounded. If it is malfunctioning or it breaks down,
grounding provides the path of least resistance for the electrical current
to reduce the risk of electrical shock. This treadmill is equipped with a
cord having equipment grounding connector and a grounding plug. The
plug must be plugged into an appropriate outlet that is properly installed
and grounded in accordance with all local codes and ordinances.
DANGER
Improper connection of the treadmill grounding connector can result in
the risk of electrical shock. Check with a qualified electrician, if you are in
doubt as to whether the product is properly grounded. Don’t modify the
plug provided with the treadmill. If it won’t fit your outlet, have a properly
grounded outlet installed by a qualified electrician.
Please pay attention, the power cable needs strictly an individual power
source. It can not use the same power supply with any other equipment.
WARNING
Never use extension cords between the treadmill and the wall outlet.
If there is any damage to the cables, please contact the service center.
Parts should be replaced by an authorized technician.
ELECTRICAL GROUNDING INSTRUCTIONS
GROUNDING
PIN
GROUNDED
OUTLET
Figure
Grounding methods
1

1: Frame
2: Base frame
3: Support post (Left)
4: Support post (Right)
5: Screws
6: Nuts
7A: Power plug
7B: Power wire
8: Handlebar (Left)
9: Handlebar (Right)
10: Console
11: Bottle holder
12: Safety key
13: Support post housing
(Upper left)
14: Support post housing
(Lower left)
15: Screws
16: Support postr housing
(Upper right)
17: Support post housing
(Lower right)
18: Screws
19: Base frame cover (Left)
20: Base frame cover (Right)
21: Screws
22: Screws
23: Washers
24: Book holder
25: Book holder bracket
26: Screws
27: Screws
28: Screws
LOHAS T2 ASSEMBLY INSTRUCTION
Parts
Hardware
Screws already in place on the treadmill:
Screws in the plastic bag:
Tools:
WARNING
After unpacking the fitness equipment, examine it carefully for possible damage. If there is any damage or there are missing parts, please contact
your retailer or an authorized repair facility for assistance.
1. Since your treadmill is a heavy piece of equipment, we recommend the after taking off the top portion of the box; you slit the corners of the
lower carton and fold down the sides. This will eliminate the need to pick up the treadmill over the sides of the box.
2. Prior to starting the assembly process take all the parts out of the box, remove all plastic bags, and then lay them out on the floor to become
familiar with the components. Make sure that you remove all parts packaged underneath the treadmill. You may need to slightly pick up the
back of the treadmill to get better access to the parts on the bottom. You will notice that the treadmill is completely assembled except for the
handle bars and the display window.
5: Screw
M10 X 60L (2pcs)
28: Screw
M8 X 70L (2pcs)
Wrench-6mm Wrench-5mm Wrench
6: Nylon nut
M10 X 10t (2pcs)
15: Screw
#8 X 5/8”L (2pcs)
22: Screw
M8 X 15L (4pcs)
21: Screw
M4 X 10L (2pcs)
26: Screw
M5 X 10L (4pcs)
27: Screw
M4 X 8L (4pcs)
23: Washer
M8 (4pcs)
24
27 25
26
6
5
6
15
17
5
15
14
3
13
18
28
11
16 18
9
10
8
4
2
1
7B
7A
19
21
20
21
12
28
Screwdriver
18: Screw
#8 X 3/4”L (2pcs)
2

LOHAS T2 ASSEMBLY INSTRUCTION
1. Place book holder bracket (25) onto the rear of the console (2 holes on the
bracket). Use 4 screws (26) to secure.
2. Slide book holder (24) down onto the brackets (25). Use 4 screws (27) to secure.
(3 holes on the bracket)
1. Remove the screw (5) , and nut (6) from
both left and right sides of base frame.
2. Raise the support post (3) and (4).
(FIG.1)
3. Refit the screw (5) and nut (6) to both the
left and right sides of base frame and
tighten.
4. Place base frame cover (19) onto base
frame then use screw (21) to secure.
Repeat step on the other side. (FIG.2)
1. Connect the power wires (7A) , (7B).
Note: Insert excess wiring into right side of console tube.
2. Place handlebars onto the support post, tighten the screws (28) to both the left and
right sides.
3. Connect the bottle holder (11) on the bottle rack of console. (FIG.3)
1. If necessary, rotate console tube to get correct position for console racks on
handlebars.
2. Tighten 4 screws (22) and washers (23) under both sides of console tube. (FIG.4)
STEP 1: Support post assembly
STEP 2: Handlebar assembly
STEP 3: Console rack assembly
STEP 5: Book holder assembly
FIG.2
4
65
5
6
3
19
21
20
21
FIG.1
4
9
8
3
FIG.3
3
28
11
9
10
8
4
7B
7A
28
FIG.5
18
13
18
16
15
17
15
14
FIG.4
22
23
22
23
Back of console
FIG.7 24
27
25
26
1. Place the left upper housing (13) into position.
(FIG.5)
2. Place the lower housing (14) into position
ensuring that:
a) That the interlocking pins (B of FIG.6) slide
into position.
b) And also the front plastic pin on the lower
housing (A of FIG.6) fit into the handlebar
socket hole.
3. Using the screw (15) tighten the lower housing
first and then followed by the screw (18) for the
upper housing. (FIG.5)
4. Repeat steps 1, 2 & 3 on the right side using
parts upper housing (16) and lower (17).
STEP 4: Support post housing assembly
FIG.6
A
B
14
3

LOHAS T3 ASSEMBLY INSTRUCTION
WARNING
After unpacking the fitness equipment, examine it carefully for possible damage. If there is any damage or there are missing parts, please contact
your retailer or an authorized repair facility for assistance.
1. Since your treadmill is a heavy piece of equipment, we recommend the after taking off the top portion of the box; you slit the corners of the
lower carton and fold down the sides. This will eliminate the need to pick up the treadmill over the sides of the box.
2. Prior to starting the assembly process take all the parts out of the box, remove all plastic bags, and then lay them out on the floor to become
familiar with the components. Make sure that you remove all parts packaged underneath the treadmill. You may need to slightly pick up the
back of the treadmill to get better access to the parts on the bottom. You will notice that the treadmill is completely assembled except for the
handle bars and the display window.
Parts
Hardware
24
27 25
26
6
5
6
15
17
5
15
14
3
13
18
28
11
16 18
9
10
8
4
2
1
7B
7A
19
21
20
21
12
28
1: Frame
2: Base frame
3: Support post (Left)
4: Support post (Right)
5: Screws
6: Nuts
7A: Power plug
7B: Power wire
8: Handlebar (Left)
9: Handlebar (Right)
10: Console
11: Bottle holder
12: Safety key
13: Support post housing
(Upper left)
14: Support post housing
(Lower left)
15: Screws
16: Support postr housing
(Upper right)
17: Support post housing
(Lower right)
18: Screws
19: Base frame cover (Left)
20: Base frame cover (Right)
21: Screws
22: Screws
23: Washers
24: Book holder
25: Book holder bracket
26: Screws
27: Screws
28: Screws
Screws already in place on the treadmill:
Screws in the plastic bag:
Tools:
5: Screw
M10 X 60L (2pcs)
28: Screw
M8 X 70L (2pcs)
Wrench-6mm Wrench-5mm Wrench
6: Nylon nut
M10 X 10t (2pcs)
15: Screw
#8 X 5/8”L (2pcs)
22: Screw
M8 X 15L (4pcs)
21: Screw
M4 X 10L (2pcs)
26: Screw
M5 X 10L (4pcs)
27: Screw
M4 X 8L (4pcs)
23: Washer
M8 (4pcs)
Screwdriver
18: Screw
#8 X 3/4”L (2pcs)
4
This manual suits for next models
1
Table of contents
Other LA Fitness Treadmill manuals
Popular Treadmill manuals by other brands

Smooth Fitness
Smooth Fitness EVO 3i user manual

NordicTrack
NordicTrack NETL81810.0 user manual

Schwinn
Schwinn 830/Journey 8.0 Assembly manual / owner's manual

Keys Fitness
Keys Fitness HealthTrainer HT-740T owner's manual

Spirit
Spirit XT8 Service manual

NordicTrack
NordicTrack T 14.0 Treadmill Manuel de l'utilisateur