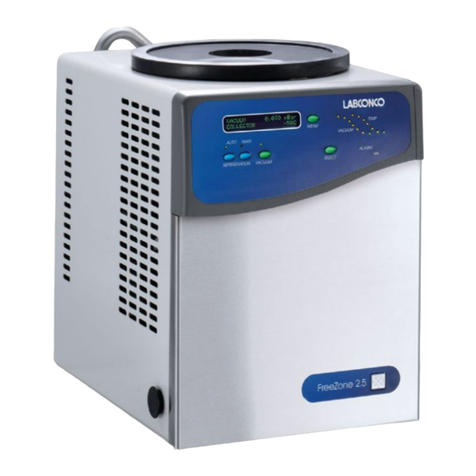
Labconco 700821500 User manual

3
Copyright © 2020 Labconco Corporation. The information contained in this manual and the accompanying products are copyrighted and all rights reserved by
Labconco Corporation. Labconco Corporation reserves the right to make periodic design changes without obligation to notify any person or entity of such change.
Warranty
Labconco Corporation provides a warranty to the original buyer for the repair or replacement of parts and reasonable labor as a result of normal and proper use of
the equipment with compatible chemicals. Broken glassware and maintenance items, such as filters, gaskets, light bulbs, finishes and lubrication are not
warranted. Excluded from warranty are products with improper installation, erratic electrical or utility supply, unauthorized repair and products used with
incompatible chemicals.
The Extraction Freeze Dryer carries a one-year warranty from date of installation or two years from date of shipment from Labconco, whichever is sooner.
Warranty is non-transferable and only applies to the owner (organization) of record.
Buyer is exclusively responsible for the set-up, installation, verification, decontamination or calibration of equipment. This limited warranty covers parts and labor,
but not transportation and insurance charges. If the failure is determined to be covered under this warranty, the dealer or Labconco Corporation will authorize
repair or replacement of all defective parts to restore the unit to operation. Repairs may be completed by 3rd party service agents approved by Labconco
Corporation. Labconco Corporation reserves the rights to limit this warranty based on a service agent’s travel, working hours, the site’s entry restrictions and
unobstructed access to serviceable components of the product.
Under no circumstances shall Labconco Corporation be liable for indirect, consequential, or special damages of any kind. This warranty is exclusive and in lieu of
all other warranties whether oral, or implied.
Returned or Damaged Goods
Do not return goods without the prior authorization from Labconco. Unauthorized returns will not be accepted. If your shipment was damaged in transit, you must
file a claim directly with the freight carrier. Labconco Corporation and its dealers are not responsible for shipping damages.
The United States Interstate Commerce Commission rules require that claims be filed with the delivery carrier within fifteen (15) days of delivery.
Limitation of Liability
The disposal and/or emission of substances used in connection with this equipment may be governed by various federal, state, or local regulations. All users of
this equipment are required to become familiar with any regulations that apply in the user’s area concerning the dumping of waste materials in or upon water, land,
or air and to comply with such regulations. Labconco Corporation is held harmless with respect to user’s compliance with such regulations.
For additional questions or support:
Labconco Customer Care +1 (816) 333-8811
Labconco Technical Support (800) 821-5525
Hours 7:30 a.m.-5:30 p.m. CST
Part #7220300 Rev. -
ECO L955

4
Table of Contents
1: INTRODUCTION 8
Intended Use 8
Freeze Dry Process 8
Freeze Dry Rates 8
Freeze Dry Capacity 9
Samples Containing Volatile Substances 9
About This Manual 10
Contents Included 10
2: BEFORE YOU INSTALL 11
Electrical Requirements 11
Location Requirements 12
Vacuum Pump Requirements 12
3: GETTING STARTED 13
Unpacking Your Freeze Dryer 13
Freeze Dryer Components 15
Setting Up Your Freeze Dryer 15
Component Identification 15
Vacuum Pump Connection 16
Tray Dryer Installation 17
Communication Cable 19
Electrical Connection 19
Ground Strap 19
Tray Dryer Controls 20
Sample Probes 20
Test System 21
Chemical Resistance of Freeze Dryer Components 21

5
Solvent Safety Precautions 22
4: LYO-WORKS™ OPERATING SYSTEM 23
Control Panel 23
Initial Power Up 24
Touch Screen Operation 24
Home Screen 24
Main Menu Icons 24
Moving Between Menu Screens 25
Indicator Bar Function 25
System Parameters Display 25
Operation Buttons 26
Programs Screen 26
Data Logging Screen 29
Settings Screen 30
Language 30
Time/Date 30
Units 31
Security 31
Alerts 31
Configure Email Settings 32
Maintenance 34
Line Voltage Offset 34
Vacuum Pump Protection 34
Calibration 35
Display 36
Network 37
Sensors Screen 38
Drying Accessory Screen 39
Help Screen 40
Diagnostics 40
User’s Manual 40
About 40
5: USING YOUR FREEZE DRYER 41
Operation Checklist 41
Vacuum Pump Ballast Setting 41

6
Pre-Freezing Samples 41
Operating the Freeze Dryer 42
Auto Start-Up 42
Manual Start-Up 42
Operating the Tray Dryer 42
Manual Mode 43
Starting Manual Mode 43
Changing the Shelf Temp Set Point Value 44
Stopping Manual Mode 44
Program Mode 44
Starting a Program 44
Stopping a Program 45
Setting the Operating Vacuum Level 45
Shut Down 46
Defrosting 46
Alerts 47
Power Fail 47
Line Voltage Range 47
Collector Temp 48
Collector Moisture 48
Service Vacuum Pump 48
Vacuum Set Point 48
Vacuum Leak 48
Status Email Messages 48
Shelf Temp Variation 49
Shelf Temp Set Point 49
Program Complete 49
Copy a Data Log File 49
Download Data Log Files via Ethernet 49
Copy a Program 50
6: MAINTAINING YOUR FREEZE DRYER 51
Service Safety Precautions 51
Routine Maintenance Schedule 51
7: TROUBLESHOOTING 53
Vacuum Pump 53

8
1: Introduction
Congratulations on the purchase of a Labconco Extraction Freeze Dry system. The
Extraction Freeze Dryer is designed to aid in the production of bubble hash following a
solventless extraction of plant material. The refrigerant used in the refrigeration system
is HCRC-free so it will not endanger the environment. The unit is easy to install and
maintain. Proper care and maintenance of this product will result in many years of
dependable service. It is the result of years of experience in manufacturing laboratory
equipment, and users like you suggested many of its features to us.
This Extraction Freeze Dryer offers many unique features. To take full advantage of
them, please acquaint yourself with this manual and keep it handy for future reference.
Intended Use
The Extraction Freeze Dryer described in this manual is intended for use to facilitate the
lyophilization process.
Freeze Dry Process
Freeze drying is a process whereby water or other solvent is removed from frozen
material by converting the frozen water directly into vapor without the intermediate
formation of liquid water. The basis for this sublimation process involves the absorption
of heat by the frozen sample in order to vaporize the ice; the use of a vacuum pump to
enhance the removal of water vapor from the surface of the sample; the transfer of
water vapor to a collector; and the removal of heat by the collector in order to condense
the water vapor. In essence, the freeze dry process is a balance between the heat
absorbed by the sample to vaporize the ice and the heat removed from the collector to
convert the water vapor into ice.
Freeze Dry Rates
The efficiency of the freeze-drying process is dependent upon the surface area and the
thickness of the sample, the collector temperature and vacuum obtained, the eutectic
point and solute concentration of the sample. It is important to remember these factors
when trying to obtain efficient utilization of your Cannabis Freeze Dryer.
Up to the point of overloading the system, the greater the surface area of the sample,
the faster the rate of freeze drying. By contrast, for a given surface area, the thicker the
sample the slower the rate of freeze drying. This is because the heat of sublimation is

9
usually absorbed on one side of the frozen sample and must travel through the frozen
layer to vaporize water at the other surface. In addition, as the sample is freeze dried,
the water vapor must travel through the layer of dried material. The thicker the sample,
the greater the chance that the dried layer may collapse which would cause an
additional decrease in the rate of freeze drying.
In order for lyophilization to occur, ice must be removed from the frozen sample via
sublimation. This is accomplished by the collector and the vacuum pump. The collector,
which should be at least 15 to 20°C colder than the eutectic temperature (melting
temperature) of the sample, traps vapor as ice. Since the vapor pressure at the collector
is lower than that of the sample, the flow of water vapor is from the sample to the
collector. Since this vapor diffusion process occurs very slowly under normal
atmospheric conditions, a good vacuum is essential to maintain an efficient rate.
The rate of freeze drying is directly proportional to the vapor pressure and the vapor
pressure is dependent upon both eutectic temperature and solute concentration of the
sample.
Freeze Dry Capacity
The volume of sample that can be freeze dried at one time is related to factors
discussed previously and the size and design of the freeze dry system. With any given
instrument, the capacity is based on the surface area of the sample; the eutectic
temperature and concentration of the sample; and the rate and amount of heat
transferred to the frozen sample. Of these factors, the eutectic temperature is the most
important factor in determining the amount of sample that can be freeze dried at one
time. This is because as the eutectic temperature decreases, the vapor pressure
decreases but the rate of heat absorption by the sample does not change. This tends to
promote melting of the sample, which leads to a marked increase in vapor pressure and
ultimately overloads the collector and vacuum pump. Samples that have eutectic
temperatures of -20°C or lower should be placed on the freeze dry system one tray at a
time so that the vacuum in the system may recover before adding another sample to the
system. If the vacuum does not recover, the capacity of the freeze dry system has been
exceeded and the sample tray should be removed.
Samples Containing Volatile Substances
In certain cases, the solvent in a sample to be freeze dried may contain volatile
components such as methanol. In addition to this substance having an effect on the
eutectic temperature, it may increase the vapor pressure at the surface of the sample.
Also, compared to water, it will require the absorption of less heat for sublimation to
occur. Hence, samples that contain volatile substances will have a greater tendency to
melt. If a sample containing a volatile substance tends to melt when placed on a freeze
dry system, dilution of the sample with more water will help keep the sample frozen.

10
About This Manual
This manual is written for the installer and user of this product. For detailed service,
certification, or technical information, please utilize the Technical Manual located on the
website labconco.com.
This manual contains important operation and safety information. When you see a
symbol, such as the INFO symbol to the left, pay close attention to the information
provided. Before installing or operating this product, you must read Section 3: Solvent
Safety Precautions.
Contents Included
The following items are packaged with the product.
User’s manual thumb drive
Vacuum Tubing
Power cord
Anti-tip bracket
The location of these items and additional details are found in Section 2: Before You
Install.

11
2: Before You Install
Before you install your Extraction Freeze Dryer, the site should be planned for
installation. Examine the location where you intend to install it. You must be certain that
the area is level and of solid construction. In addition, a dedicated source of electrical
power must be located near the installation site of the Extraction Freeze Dryer.
Refer to Appendix C: Extraction Freeze Dryer Specifications for complete electrical and
environmental conditions, specifications and requirements.
Electrical Requirements
The product models have the following electrical requirements.
Catalog Number
Electrical Circuit Requirements*
Freeze Dryer
Tray Dryer
700821500
115V, 60 Hz, 20 A
1 Phase
115V, 60 Hz, 15 A
1 Phase
700821510
230V, 60 Hz, 10 A
1 Phase
230V, 60 Hz, 8 A
1 Phase
700821515
230V, 60 Hz, 10 A
1 Phase
230V, 60 Hz, 8 A
1 Phase
700821530
230V, 50 Hz, 10 A
1 Phase
230V, 50 Hz, 8 A
1 Phase
700821540
230V, 50 Hz, 10 A
1 Phase
230V, 50 Hz, 8 A
1 Phase
700821550
230V, 50 Hz, 10 A
1 Phase
230V, 50 Hz, 8 A
1 Phase
700821570
230V, 50 Hz, 10 A
1 Phase
230V, 50 Hz, 8 A
1 Phase
*Electrical Requirements, ‘V’ = VAC (Voltage with alternating current), ‘A’ = Amperes
A dedicated outlet with an appropriate circuit breaker should be located as close as
possible to the product. Consult your local electrical codes for properly rated circuit
breakers. For safe operation the dedicated outlet must provide a protective earthing
ground connection to the product.
Do not use any detachable power cord that is not adequately rated for the
unit.
Frequency must agree with the serial tag rating. Improper frequency will
damage the compressor.
Additional appliances on the same circuit may cause the current to exceed
the rating of the circuit breaker or fuse.

12
Location Requirements
The freeze dryer should be in an area that provides an unobstructed flow of air around
the cabinet. This air cools the refrigeration system. The refrigeration system draws air
through the rear panel and exhausts it through the sides. A minimum of 3” must be
allowed between the back and both sides of the freeze dryer and adjacent wall
surfaces. Restriction of airflow during operation could adversely affect performance.
Refer to Appendix B: Freeze Dryer Dimensions for dimensional drawings of the freeze
dryer. The space for benchtop models must be large enough to accommodate the
vacuum pump, which will be used with the freeze dryer.
Vacuum Pump Requirements
A vacuum pump must be provided by the user. A vacuum pump with a displacement of
163 liters per minute and 0.007mbar ultimate pressure is adequate for most samples.
The inlet fitting on the vacuum pump must be suitable for ¾” ID vacuum hose, which is
provided. If using an oil pump, it is recommended that the vacuum pump is equipped
with an exhaust filter to minimize oil mist exhausting from the vacuum pump. The
operating level may be set on the freeze dryer. The higher the vacuum setpoint, the
more likely it is that oil mist will be exhausted.
Vacuum pumps used with 115V models should be equipped with a 115V, 15 Amp
NEMA 5-15P plug. Vacuum pumps used with 230V models should be equipped with a
reverse IEC plug (included with 230V pumps purchased from Labconco). This will allow
the vacuum pump to be plugged into the receptacle on the back panel of the freeze
dryer.

13
3: Getting Started
Now that the site for your Extraction Freeze Dryer is properly prepared, you are ready to
unpack, inspect, install and test your freeze dryer. Read this chapter to learn how to:
Unpack and move your freeze dryer
Set up your freeze dryer
Connect the electrical supply source to your freeze dryer
Properly exhaust your freeze dryer
Safely use solvents with your freeze dryer
NOTE –The Extraction Freeze Dryer weighs roughly 230 pounds, with the base
weighing 100 pounds and the tray dryer weighing 130 pounds. If you must lift the
freeze dryer manually, use at least two (2) persons and follow safe lifting
guidelines.
Unpacking Your Freeze Dryer
Carefully unpack your Extraction Freeze Dryer and inspect it for damage that may have
occurred in transit. If your freeze dryer is damaged, notify the delivery carrier
immediately and retain the entire shipment intact for inspection by the carrier.
The United States Interstate Commerce Commission rules require that claims be filed
with the delivery carrier within fifteen (15) days of delivery.
NOTE –Do not return goods without the prior authorization of Labconco.
Unauthorized returns will not be accepted.
If your freeze dryer was damaged in transit, you must file a claim directly with the
freight carrier. Labconco Corporation and its dealers are not responsible for
shipping damage.
Do not discard the carton or packing material for your freeze dryer until you have
checked all the components and installed and tested the freeze dryer.

14
BURN RISK (HIGH TEMPERATURE) –Air or components that will be very hot.
Take care not to touch these defined areas. Failure to avoid these areas may
result in moderate to severe injury.
EXTREME COLD (LOW TEMPERATURE) –Air or components that will be very
COLD. Take care not to touch these defined areas. Failure to avoid these areas
may result in moderate to severe injury.
PINCH POINT –Areas or components that can pinch or cut. Take care not to
touch these defined areas.
MOVING PARTS –Areas or components that contain moving parts. Take care
not to touch these defined areas.
RISK OF ELECTRICAL SHOCK –The specified procedure or area poses a risk
of electrical shock. ALWAYS disconnect main power cord or electrical supply
before proceeding.
FLAMMABLE / NO SOLVENTS –Do not place flammable liquids or solvents in
this product.
INFLAMMABLE / PAS DE SOLVANTS –Ne placez aucun liquid inflammable
dans cette produit.
LIFTING HAZARD –Do not lift or move this equipment without assistance.
DANGER DE LEVAGE –Ne pas soulever ou déplacer cet équipement sans
assistance.
MAGNETIC FIELD IN USE –Magnets or magnetic field present.
CHAMP MAGNETIQUE UTILISE –Présence d'aimants ou de champ
magnétique.
DO NOT TOUCH –Components or areas indicated are sensitive and will suffer
damage if touched. Take care not to touch these defined components or areas.
Failure to avoid these areas will result in damage to the product.
TOOL REQUIRED –Tool required to access specified area.

15
Freeze Dryer Components
Verify that the components listed below are present and undamaged.
Qty.
Part #
Description
Comments
1
1089005
User’s Manual
USB Flash Drive
1
7364601
Communication Cable
1
Power Cord
See parts list (Appendix A)
1
7373450
Vacuum Hose
2
1488800
Hose Clamp
1
7205304
Drain Hose
If you did not receive one or more of the components listed for your Extraction Freeze
Dryer, or if any of the components are damaged, contact Labconco Corporation
immediately for further instruction.
Setting Up Your Freeze Dryer
After you verify receipt of the proper components, move your freeze dryer to the location
where you want to install it. Then, follow the steps listed below.
Component Identification
Collector Chamber
& Coil
USB Port
Quick-Connect
drain coupling
Quick-Connect
drain fitting
On/Standby button &
LED Indicator
Touch Screen Display

16
Vacuum Pump Connection
A vacuum pump, as described in Chapter 2: Getting Started, is required to operate your
Extraction Freeze Dryer properly. The freeze dryer is equipped with a ¾”ID vacuum
hose for connecting the collector chamber to the vacuum pump.
If using an oil vacuum pump, make certain that the oil is at the proper level prior to
operation.
Ethernet
Tray Dryer
Comms Cable
Vacuum
Connection
Serial Tag &
Electrical Rating
End Point Detection
Vacuum Pump Outlet
Power Inlet
Circuit Breaker Reset

17
1. Place the vacuum pump near the freeze dryer.
2. Remove protective caps from inlet and outlet
ports.
3. Some vacuum pumps have inlet fittings that
clamp to the pump. Place the centering ring with
filter screen on the inlet fitting.
4. Place the hose barb fitting on top of the
centering ring and secure with the clamp.
5. If using an oil vacuum pump, fill the pump with
oil so the level is between the lines on the
sight gauge on the end of the pump
housing.
6. Attach one end of the vacuum hose to the
port on the back of the freeze dryer and
the other end to the inlet port of the
vacuum pump with the hose clamps
provided. If necessary, cut the hose to
proper length to allow for gentle bends
without kinks.
7. Verify the vacuum pump voltage setting agrees with the freeze dryer voltage
shown on the serial number label.
8. Connect the vacuum pump power cord to the receptacle labeled “vacuum pump”
on the back of the freeze dryer.
9. If the vacuum pump has an ON/OFF switch, turn the switch ON. The vacuum
pump will be controlled by the freeze dryer.
It is highly recommended that an oil mist exhaust filter be installed on rotary vane
vacuum pumps to minimize oil mist exiting the pump. An oil return kit can also be used
in conjunction with the exhaust filter to return trapped oil back to the vacuum pump.
Tray Dryer Installation
The tray dryer is positioned directly above the 3-inch hole in the collector chamber lid:
Inlet
Hose Barb
Clamp

18
1. Remove the shelves to reduce the
weight of the tray dryer.
2. Close and latch the door.
3. With the help from an assistant, lift
the tray dryer onto the freeze dryer.
Make sure that the gasket on the
tray dryer is resting on the top lip of
the chamber.
4. Remove the top two #10-24
screws on the freeze dryer as
shown in the drawing.
5. Attach the anti-tip bracket to the
freeze dryer as shown. The
slots in the top of the bracket
will line up with the two
threaded pins on the back of
the tray dryer. Screw the two
knobs into these threaded pins.
Tray Dryer
Vacuum
Release
Power
Switch
Freeze Dryer
Ground Strap
Tray Dryer
Threaded Pins
Anti-tip Bracket
#10-24 self
tapping screw (2)
Thumb Screw (2)
Freeze Dryer

19
Communication Cable
The freeze dryer power cord should be unplugged before connecting the
communication cable. Connect one end of the communication cable to the port on the
back panel of the tray dryer labeled “OUTPUT TO FREEZE DRYER”. Connect the other
end of the cable to the port on the freeze dryer labeled “DRYING ACCESSORY”. Plug
the freeze dryer power cord back into a suitable power receptacle.
Electrical Connection
Plug the power cord into the receptacle on the back of the tray dryer and plug the other
end into a suitable power receptacle. Plug the power cord into the receptacle on the
back of the freeze dryer and plug the other end into a suitable power outlet. It will take
approximately 90 seconds for the operating system to fully load. Make sure that the
outlets you intend to use meets the voltage and amperage requirements listed on the
serial tags of the tray dryer and freeze dryer.
Do not attempt to plug the power cord from the tray dryer into the freeze dryer.
Ground Strap
The tray dryer comes with a ground stray attached to the back panel. Remove one of
the screws from the back panel of the Extraction Freeze Dryer and attach the other end
of the ground strap.
Power Cord
Ground Strap
Attach Ground Strap to one of the
screws on the Freeze Dryer back panel
Communication Cable

20
Tray Dryer Controls
1. Power Switch –Located on left side of cabinet, this turns the unit ON or OFF.
2. Vacuum Release Valve –Located on left side of cabinet, this vents the chamber
so the chamber door can be opened.
3. Status Indicators –Power/Standby indicator shows if the tray dryer is powered
ON and ready for use. The In Process indicator shows when the tray dryer is
actively running (in Manual or Program modes).
Sample Probes
Connect the sample probes into the receptacles in the front of the shelves.
2
1
3
This manual suits for next models
6
Table of contents
Other Labconco Dryer manuals
Popular Dryer manuals by other brands

DYNAVAC
DYNAVAC NovaDryer-DHF400 Quick installation & operation guide

REVAMP Professional
REVAMP Professional PROGLOSS 3950 Instruction manual and warranty information

Siemens
Siemens WP30A2X0HK user manual

Hoover
Hoover Nextra Mega Load Instruction book

Maytag
Maytag MGDB835DC Use & care guide

Fisher & Paykel
Fisher & Paykel DE09 Service manual