Labotrix LWB-XX00 Series User manual

LWB-
LWB-
LWB-
LWB- XX
XX
XX
XX 00
00
00
00 Series
Series
Series
Series (IR)
(IR)
(IR)
(IR) Interactive
Interactive
Interactive
Interactive Electronic
Electronic
Electronic
Electronic White
White
White
White board
board
board
board
User
User
User
User 's
's
's
's Manual
Manual
Manual
Manual (V
(V
(V
(V ersion
ersion
ersion
ersion 3.0
3.0
3.0
3.0 )
)
)
)
Labotrix
Labotrix
Labotrix
Labotrix Group
Group
Group
Group Limited
Limited
Limited
Limited
Address
Address
Address
Address :Room 1908-1909, Global Logistic Service Centre, 2 nd Phase, CSC Logistics
Area, No. 1 Huanan Ave., Pinghu
St
. , Longgang D i
st
. , Shenzhen City , Guangdong
Province , CN-518111
Email
Email
Email
Email
:
support@labwe.com Website
Website
Website
Website :www.labwe.com
Tel
Tel
Tel
Tel :+86 ( 755 ) 89637177 Fax
Fax
Fax
Fax :+86 ( 755 ) 89637377

PART
PART
PART
PART ONE
ONE
ONE
ONE
HARDWARE
HARDWARE
HARDWARE
HARDWARE

3
Contents
Contents
Contents
Contents
Chapter I. Introduction to LWB- XX 00 (IR) Series Interactive Electronic Whiteboard................... …… 4
1. Brief Introduction .......................................... ……………………………………………………………………… 4
2. Minimum System Requirements ................................... ……………………………………………………… 4
3. Certifications and Quality Warranty......... … ........................... ……………………………………… 4
Chapter II. Packing List .......... ............................................... ............................... …………………………… 5
1. Standard Components ………… .... ........................................................ .. ………………………………… 5
2. Optional Accessories …… .......... .............................................. ........ ………………………………… 6
Chapter III. Installation Procedures … .................. ............................. ........ ……………………………… 6
1. Wall-mounting Installation … ........... ..................................... ............. …………………………………… 6
2. Cable Connection … ................................... ... ..... ………………………………………………………………… 8
3 . Important Notice
of
Installation ...................... .............. ............ ………………………………………… 8
Chapter
IV.
Technical Specifications …… ...................... … ...................... ……………………… ... ……………… 9
Chapter V. Maintenance and Transportation. ........................... ……… ......................... … .... …………… 9
Chapter VI. Troubleshooting … ..................................... …… ............................... ………… ...... …………… 9

4
Chapter
Chapter
Chapter
Chapter
I
I
I
I
Introduction
Introduction
Introduction
Introduction to
to
to
to LWB-
LWB-
LWB-
LWB- XX
XX
XX
XX 00
00
00
00 Series
Series
Series
Series (IR)
(IR)
(IR)
(IR)
Interactive
Interactive
Interactive
Interactive Electronic
Electronic
Electronic
Electronic Whiteboard
Whiteboard
Whiteboard
Whiteboard
1.
1.
1.
1. Brief
Brief
Brief
Brief Introduction
Introduction
Introduction
Introduction
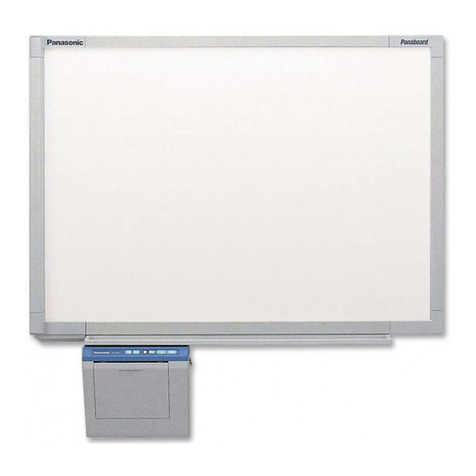
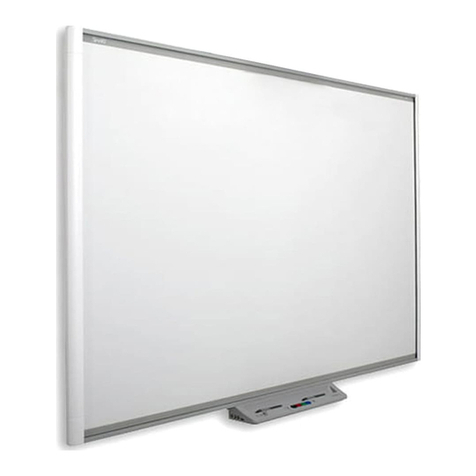
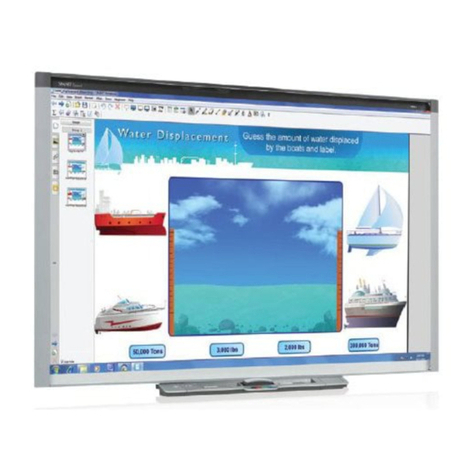
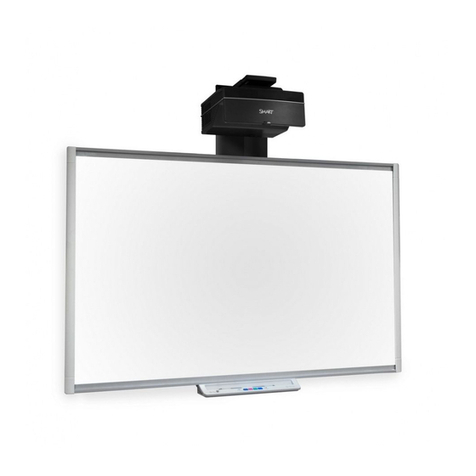
LWB-XX00 series (IR) Interactive Electronic Whiteboard , a combined system
of
interactive
whiteboard hardware and software,
is
an input device to enable Man-machine interaction. The
working mechanism
is
as follows:
1) the infrared sensors embedded around the edges
of
the frame detect and capture the
positioning and movement signals
of
a stylus or finger writing or operating on the projected
area
of
the electronic whiteboard surface;
2) the signals are transformed into coordinate data;
3) coordinate data
is
transmitted to the computer connected with the whiteboard through
USB cable. In this way, a complete interactive presentation system
is
formed.
Users
of
LWB-XX00 series (IR) interactive electronic whiteboard can use the stylus or finger
to operate on the whiteboard surface to control the computer
so
as to realize functions such as
MOVE, CLICK, DOUBLE-CLICK, DRAG and RIGHT CLICK. The utilization
of
supporting LWB-XX00
series software enables the users to write, erase, annotate, drag, zoom
in/
out, screen shade,
searchlight, capture and save screen, record and replay, input with on-screen keyboard, input
text, hyperlink to video or web-page, insert content, etc.
LWB-XX00 series (IR) interactive electronic whiteboard can be widely used for teaching and
training, conference presentation, and e-commerce, etc.
This user manual
is
designed for the installation
of
LWB- XX 00 series, including
LWB-XX00/XX 10 series interactive electronic whiteboard . Instructions for the utilization
of
the
supporting software can be found
in
the HELP file
of
the software or Part Two
of
th
is
U ser
's
Manual ——
LABWE
LABWE
LABWE
LABWE Interactive
Interactive
Interactive
Interactive Electronic
Electronic
Electronic
Electronic Whiteboard
Whiteboard
Whiteboard
Whiteboard Software
Software
Software
Software User
User
User
User Manual
Manual
Manual
Manual
.
2.
2.
2.
2. Minimum
Minimum
Minimum
Minimum System
System
System
System Requirements
Requirements
Requirements
Requirements
Operating
Operating
Operating
Operating System
System
System
System :
Windows 2000, XP, Windows 2003, Vista, Windows 7 , Linux, Mac
CPU
CPU
CPU
CPU :
X86-based Processor, Pentium III above
Memory
Memory
Memory
Memory :
256 MB RAM (512 MB RAM recommended )
Hard
Hard
Hard
Hard Disk
Disk
Disk
Disk :
1GB Spare Space
USB
USB
USB
USB Interface
Interface
Interface
Interface :
At least one spare USB slot
Software
Software
Software
Software Setting
Setting
Setting
Setting : Windows 2000 + Sp4
/
Windows XP + Sp2 (Sp3 )
/
Windows 2003 + Sp2
/
Windows Vista; Windows 7
3.
3.
3.
3. Certifications
Certifications
Certifications
Certifications and
and
and
and Quality
Quality
Quality
Quality Warranty
Warranty
Warranty
Warranty
5
LWB-XX00 series (IR) Interactive Electronic Whiteboard
is
in
conformity with FCC
FCC
FCC
FCC ,CE
CE
CE
CE and
RoHS
RoHS
RoHS
RoHS standards.
Labotrix Group Limited has been certified to conform to the Quality
Quality
Quality
Quality Management
Management
Management
Management System
System
System
System
IS09001-2000
IS09001-2000
IS09001-2000
IS09001-2000 standard ,and to the Environmental
Environmental
Environmental
Environmental Management
Management
Management
Management System
System
System
System ISO14000-2004
ISO14000-2004
ISO14000-2004
ISO14000-2004
standard.
The board structure
of
each interactive electronic whiteboard enjoys three years warranty
and other accessories are entitled to one year guarantee. Man-made damage to the board may
not fall into the warranty scope and any claim for defects
of
hardware and software shall contact
our distributor.
Chapter
Chapter
Chapter
Chapter
II
II
II
II
Packing
Packing
Packing
Packing List
List
List
List
1.
1.
1.
1. Standard
Standard
Standard
Standard Components
Components
Components
Components
Items
Items
Items
Items Quantity
Quantity
Quantity
Quantity Illustrations
Illustrations
Illustrations
Illustrations
Infrared Interactive Electronic
Whiteboard
1
Normal Pen 2
USB cable (5M, Blue )1
Installation Disk 1
User Manual 1
Wall-mounting Pieces 2
Support Pieces 2

6
Screw (T M 4* 6 mm )
4
Expansion Screws (6*29mm )8
Teaching Pointer 1
2.
2.
2.
2. Optional
Optional
Optional
Optional Accessories
Accessories
Accessories
Accessories
Name
Name
Name
Name Quantity
Quantity
Quantity
Quantity Illustrations
Illustrations
Illustrations
Illustrations
USB E xtension HUB
C
able
(5 meters )
1
Intelligent Pen Tray Holder 1 (Set)
Eraser 1
Chapter
Chapter
Chapter
Chapter
III
III
III
III
Installation
Installation
Installation
Installation Procedures
Procedures
Procedures
Procedures
1.
1.
1.
1. Wall-mounting
Wall-mounting
Wall-mounting
Wall-mounting Installation
Installation
Installation
Installation
Wall-mounting accessories are listed as follows:
Name
Name
Name
Name Quantity
Quantity
Quantity
Quantity (Unit:
Unit:
Unit:
Unit: Piece
Piece
Piece
Piece )
Wall-mounting Pieces 2
Support Pieces 2
Screw (T M 4* 6 mm )
4
Expansion Screws (6*70mm)
6

7
Installing
Installing
Installing
Installing Steps
Steps
Steps
Steps :
1) Wall-mounting Part installation: Locate the height and position
of
the electronic whiteboard
to be installed, and mark the holes position
of
the wall-mounting pieces on the wall as shown
in
the picture below. (See
Figure 3-1
)
Installing
Installing
Installing
Installing Tips:
Tips:
Tips:
Tips:
The length from the knob
of
the wall-mounting piece to the lower frame
of
the whiteboard
is
95cm. The recommended height from the ground to the lower frame
of
the interactive
electronic whiteboard shall be around 75-80 cm.
2) Drill holes
in
the four marked spots with a diameter
of
8mm drill and fix two wall -mounting
pieces
by
using 6*70 expansion screws.;
3) Fix two pieces
of
supports onto the lower frame
of
the back
of
whiteboard, as shown below;
4) Fix the Link knob into the wall -mounting pieces, see attached picture above.
5) Mark the position
of
holes
in
the Support after successfully hanging the whiteboard on the
wall, lay flat the whiteboard on the package carton, drill holes
in
the marked two spots with a
diameter
of
8mm drill and fix the support
by
using 6*70 expansion screws.
Caution:
Caution:
Caution:
Caution: Set up this product on a level floor surface with a weight bearing capacity
of
1 2 0 kg/m2
or more, and which
is
made
of
floor materials that will not deform or become depressed due to
movement
by
casters.
Figure
Figure
Figure
Figure 3-1
3-1
3-1
3-1
Figure
Figure
Figure
Figure 3-
3-
3-
3- 2
2
2
2

8
2
2
2
2
.
.
.
.
Cable
Cable
Cable
Cable Connection
Connection
Connection
Connection
A.
A.
A.
A. Connection
Connection
Connection
Connection between
between
between
between Labwe
Labwe
Labwe
Labwe Interactive
Interactive
Interactive
Interactive Whiteboard
Whiteboard
Whiteboard
Whiteboard and
and
and
and Computer
Computer
Computer
Computer
1) USB cable not only connects the interactive electronic whiteboard with the computer, but
also supplies power for the running
of
the electronic whiteboard. Find the USB slot on the
right lower corner
of
the whiteboard and insert the USB interface into the slot
(
See Figure
3- 3
).
2) Fix the USB cable on the back
of
the whiteboard with cable clip on the back
of
the
whiteboard
so
as to ensure the stable connection
of
the USB plug to the USB slot.
(
See
Figure 3- 4
);
3) Connect the other end
of
the USB plug into the spare USB slot
of
the computer.
B.
B.
B.
B. Connection
Connection
Connection
Connection between
between
between
between Computer
Computer
Computer
Computer and
and
and
and Projector
Projector
Projector
Projector
1) Connect VGA IN interface
of
the projector with VGA interface
of
the computer;
2) Power on the projector, and adjust the projector
so
that the image
is
projected to the
effective area which
is
1 CM from each edge
of
the frame; next, adjust the horizontal and
vertical positions
of
the image; and finally, apply keystone correction to the image and make
it centered and rectangular.
3
3
3
3
.
.
.
.
Important
Important
Important
Important Notice
Notice
Notice
Notice of
of
of
of Installation
Installation
Installation
Installation
1
)
Make sure that the cable connection between the interactive electronic whiteboard and the
computer
is
properly made . Shielding cable wiring
is
recommended to avoid problems
of
the
Figure
Figure
Figure
Figure 3-
3-
3-
3- 3
3
3
3
Figure
Figure
Figure
Figure 3-4
3-4
3-4
3-4

9
cable connection;
2
)
Avoid touching the cable line
in
case the connection becomes unstable;
3) Avoid installing the interactive electronic whiteboard
in
damp or smog conditions
so
as to
keep the board materials
in
shape and from aging;
4) The installed interactive electronic whiteboard should be tightly fixed.
Chapter
Chapter
Chapter
Chapter
I
I
I
I
V
V
V
V Technical
Technical
Technical
Technical Specifications
Specifications
Specifications
Specifications
Operating
Operating
Operating
Operating Principle
Principle
Principle
Principle Infrared Induction Technology
Positioning
Positioning
Positioning
Positioning Accuracy
Accuracy
Accuracy
Accuracy < 2mm
Cursor
Cursor
Cursor
Cursor Blink
Blink
Blink
Blink Rate
Rate
Rate
Rate 120 Dots/Second
Resolution
Resolution
Resolution
Resolution 4096 × 4096
Response
Response
Response
Response Time
Time
Time
Time < 8ms
in
continuous writing practice
Induction
Induction
Induction
Induction Size
Size
Size
Size > 3.0mm, Recommended Size:> 5.0mm (Diameter)
Power
Power
Power
Power Supply
Supply
Supply
Supply USB 5V 100mA
Operating
Operating
Operating
Operating Temperature
Temperature
Temperature
Temperature -10 °
C
to 45 °
C
/
14 °
F
to 113 °
F
Operating
Operating
Operating
Operating Humidity
Humidity
Humidity
Humidity 20% to 85%
Chapter
Chapter
Chapter
Chapter V
V
V
V Maintenance
Maintenance
Maintenance
Maintenance and
and
and
and Transportation
Transportation
Transportation
Transportation
Caution:
Caution:
Caution:
Caution:
D
o
not open the whiteboard frame structure or change the internal structure
of
the board. If
maintenance or replacement needed, the whiteboard shall be inspected and repaired
by
the
professional engineer from our authorized distributor. The replacement parts shall be our
specified items or those with the same specifications as the original ones.
The interactive electronic whiteboard shall be handled with care. No heavy objects shall be
put on the surface lest the whiteboard be deformed, broken or damaged. During transportation,
the whiteboard shall be protected from excessive shock
of
impact, moisture, dust, smoke, steam,
pressure or kept from working near a high-voltage line or power source, as well as water. Failure
to comply may result
in
malfunction or/ and deformation
of
or damage to this product.
Chapter
Chapter
Chapter
Chapter VI
VI
VI
VI Troubleshooting
Troubleshooting
Troubleshooting
Troubleshooting
Before assuming the product
is
broken, be sure to check adjustments, proper handling
procedures, the possibility
of
faulty cable connections, etc.

10
1
1
1
1
.
.
.
.
The
The
The
The pen
pen
pen
pen tip
tip
tip
tip deviates
deviates
deviates
deviates from
from
from
from the
the
the
the cursor.
cursor.
cursor.
cursor.
1
)
Calibration should be performed. Right click on the Whiteboard Server on the right bottom
corner
of
the screen, and choose Calibration. Calibration must be performed when the
interactive electronic whiteboard
is
used for the first time. (For further information on
calibration, please refer to 4.1
4.1
4.1
4.1 Interactive
Interactive
Interactive
Interactive Electronic
Electronic
Electronic
Electronic Whiteboard
Whiteboard
Whiteboard
Whiteboard Calibration
Calibration
Calibration
Calibration .)
2
)
Check the positioning
of
the projector and make sure that the lamp
of
the projector points at
the center
of
the interactive electronic whiteboard.
2
2
2
2
.
.
.
.
The
The
The
The interactive
interactive
interactive
interactive electronic
electronic
electronic
electronic whiteboard
whiteboard
whiteboard
whiteboard does
does
does
does not
not
not
not recognize
recognize
recognize
recognize input.
input.
input.
input.
1
)
Software files may be broken or installation may not be complete correctly. Uninstall the
software and re-install the drivers to solve the problem.
2
)
USB cable connection
is
failed. Check the USB cable connection.
3.
3.
3.
3. The
The
The
The writing
writing
writing
writing stroke
stroke
stroke
stroke is
is
is
is unable
unable
unable
unable to
to
to
to be
be
be
be displayed
displayed
displayed
displayed on
on
on
on screen.
screen.
screen.
screen.
1
)
Pen color may be the same as the background. Try to select different pen color from the
background.
2
)
The way
of
writing may be incorrect. The whiteboard just supports single touch writing,
therefore, writing tool (any opaque object such as finger, pointer) should be
in
vertical position
to the whiteboard surface.
To
solve the problem, just remove the other article away than
writing tool from the screen when writing.
4
4
4
4
.
.
.
.
The
The
The
The USB
USB
USB
USB cable
cable
cable
cable along
along
along
along with
with
with
with the
the
the
the whiteboard
whiteboard
whiteboard
whiteboard is
is
is
is not
not
not
not long
long
long
long enough.
enough.
enough.
enough.
If the distance between the computer host and the whiteboard
is
more than the length
of
the USB cable (5 meters), a USB extension cable that supports the whiteboard should be used.
Note that the connection sequence shall be that indicated
in
the following diagram, and that the
order shall not be reversed.
Connect to
USB port
of Host
Connect to
whiteboard
USB port
USB Extension
Cable (5 meters)