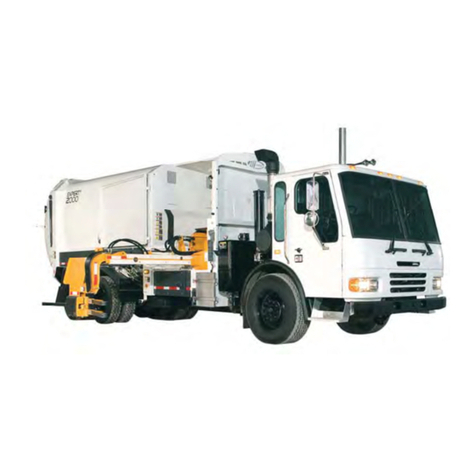
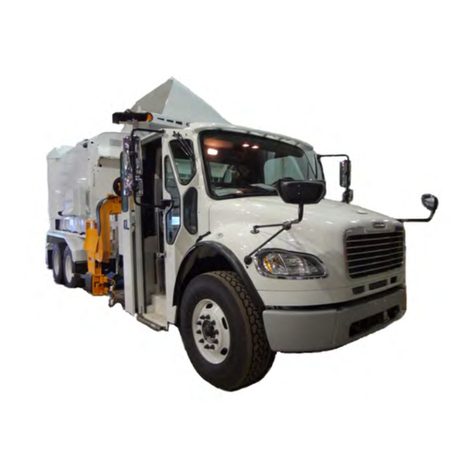
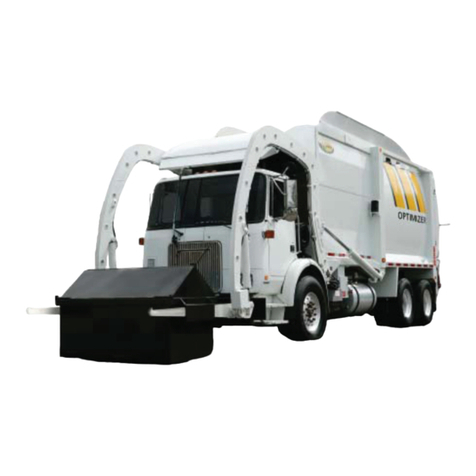
Labrie AUTOMIZER FULL EJECT User manual

AUTOMIZERTM FULL EJECT
MAINTENANCE MANUAL


AUTOMIZERTM FULL EJECT
MAINTENANCE MANUAL

Liability
Labrie Enviroquip Group assumes no liability for any incidental, consequential, or other liability that
might result from the use of the information contained in this document.
All risks and damages, incidental or otherwise, arising from the use or misuse of the information
contained herein are entirely the responsibility of the user.
Although careful precaution has been taken in the preparation of this document, Labrie Enviroquip
Group assumes no responsibility for errors or omissions.
September 2021

Liability ........................................................................................ ii
Table of Contents ........................................................................ iii
Introduction ................................................................................ 1
About this Manual ............................................................................................................................................................................ 1
Topics Not Included in This Manual .................................................................................................................................... 1
About the Illustrations in this Manual ................................................................................................................................ 1
Schematics ................................................................................................................................................................................... 2
Warranty Registration Form .......................................................................................................................................................... 2
Introducing the AUTOMIZER™ FULL EJECT ..................................................................................................................................... 2
Multiplexed System .................................................................................................................................................................. 3
Service and Maintenance on the AUTOMIZER™ FULL EJECT .................................................................................................... 3
Parts ................................................................................................................................................................................................ 4
Warning ......................................................................................................................................................................................... 4
AUTOMIZER™ FULL EJECT Basic Maintenance ........................................................................................................................ 4
Office Addresses and Phone Numbers ..................................................................................................................................... 6
In the U.S. ...................................................................................................................................................................................... 6
In Canada ...................................................................................................................................................................................... 6
Safety ........................................................................................... 7
Safety Decals ...................................................................................................................................................................................... 7
Conventions ....................................................................................................................................................................................... 8
Basic Safety Notions ........................................................................................................................................................................ 9
Responsibilities .................................................................................................................................................................................. 9
Employer’s Responsibilities ................................................................................................................................................... 9
Employee’s Responsibilities ................................................................................................................................................ 10
Things to Do .................................................................................................................................................................................... 10
Things to Avoid .............................................................................................................................................................................. 11
General Precautions ...................................................................................................................................................................... 11
Hydraulics .................................................................................................................................................................................. 14
Welding ...................................................................................................................................................................................... 14
Fire Protection ......................................................................................................................................................................... 14
Housekeeping .......................................................................................................................................................................... 15
Safety Features ............................................................................................................................................................................... 16
Global Motion Sensors (Optional) .................................................................................................................................... 16
Back Up Alarm ......................................................................................................................................................................... 18
Tailgate Safety Prop ............................................................................................................................................................... 18
Camera System (optional) ................................................................................................................................................... 22
Tailgate Holding Valve .......................................................................................................................................................... 23
Prior to Start Up .............................................................................................................................................................................. 24
Locking Out and Tagging Out the Vehicle ............................................................................................................................ 26
Shutting Down the Vehicle ........................................................................................................................................................ 27
General Maintenance ................................................................ 29
Cleanliness ....................................................................................................................................................................................... 29
Preventive Maintenance Chart ................................................................................................................................................. 30
PTO Preventive Maintenance .................................................................................................................................................... 31
Packer ................................................................................................................................................................................................. 32
Variations of the Packer Panel ........................................................................................................................................... 33
Preparing for Packer Inspection ........................................................................................................................................ 36
Table of Contents

iv Table of Contents
Inspecting the Packer ............................................................................................................................................................ 37
Removing the Packer ............................................................................................................................................................. 45
Replacing the Central Trolley ............................................................................................................................................. 49
Replacing the T-Track ............................................................................................................................................................ 50
Replacing Sliding Shoes ....................................................................................................................................................... 51
Reinstalling the Packer .......................................................................................................................................................... 55
Packer Telescopic Cylinder .......................................................................................................................................................... 58
Removing the Packer Telescopic Cylinder ..................................................................................................................... 58
Installing a New/Repaired Packer Telescopic Cylinder ............................................................................................. 61
Panel Scraper ................................................................................................................................................................................... 63
Replacing the Panel Scraper ............................................................................................................................................... 63
Packer Roller Assemblies ............................................................................................................................................................. 65
Replacing Packer Roller Assemblies ................................................................................................................................. 65
Replacing Rollers ..................................................................................................................................................................... 67
Tailgate ............................................................................................................................................................................................... 68
Proximity and Limit Switches .................................................................................................................................................... 69
Limit Switch Adjustment ...................................................................................................................................................... 70
Proximity Switch Adjustment ............................................................................................................................................. 70
Packer Limit/Proximity Switches ....................................................................................................................................... 71
Adjusting Packer Extend Limit/Proximity Switch ........................................................................................................ 73
Adjusting Packer Retract Limit Switch ............................................................................................................................ 76
Adjusting Tailgate Unlocked Proximity Switch ............................................................................................................ 78
Adjusting Tailgate Fully Open Proximity Switch ......................................................................................................... 79
Adjusting Hopper Door Proximity Switch ..................................................................................................................... 81
Adjusting Arm Stowed Limit Switches ............................................................................................................................ 82
Adjusting Arm Mid-Height Limit Switches (2) .............................................................................................................. 84
Adjusting Crusher Panel Up Limit Switch (optional) .................................................................................................. 85
Lubrication ................................................................................ 87
Recommended Lubricants ......................................................................................................................................................... 87
Grease ......................................................................................................................................................................................... 87
Hydraulic Oil ............................................................................................................................................................................. 88
Engine Oil ................................................................................................................................................................................... 89
Transmission Oil ...................................................................................................................................................................... 89
Testing Hydraulic Oil ..................................................................................................................................................................... 90
Hydraulic Oil Sample Preparation ..................................................................................................................................... 90
Taking Oil Samples ................................................................................................................................................................. 91
Lubrication Charts ......................................................................................................................................................................... 93
Greasing Crusher Panel (optional) ........................................................................................................................................... 95
Body Hinges ..................................................................................................................................................................................... 96
Greasing Body-Chassis Hinges ........................................................................................................................................... 96
Tailgate ............................................................................................................................................................................................... 96
Greasing Tailgate Hinges, Locking Mechanism and Cylinder Pins ....................................................................... 96
Packer ................................................................................................................................................................................................. 98
Cylinder Pins ............................................................................................................................................................................. 98
Follower Panel Rollers ........................................................................................................................................................... 99
T-Track ...................................................................................................................................................................................... 100
Hopper Door Hinges .................................................................................................................................................................. 101
Pump Drive Shaft “U” Joint & Spline ..................................................................................................................................... 102
Sump Box Hinges ........................................................................................................................................................................ 102
Hopper Side Walls/Floor ........................................................................................................................................................... 103
Hydraulic System ..................................................................... 105
General Maintenance ................................................................................................................................................................ 105
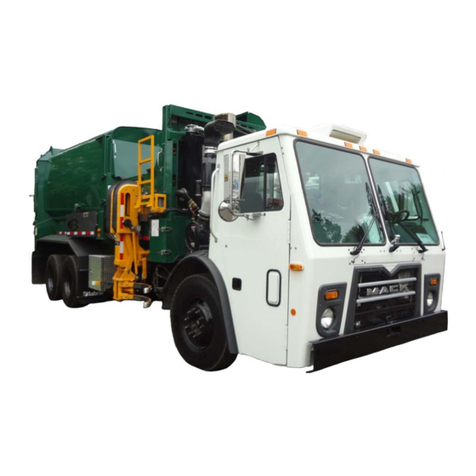
Table of Contents v
Inspecting Hydraulic Oil ..................................................................................................................................................... 107
Introducing the Dual Vane Pump .......................................................................................................................................... 108
Directional Control Valve ................................................................................................................................................... 109
Proportional Valve ................................................................................................................................................................ 110
Inspecting the Pump .................................................................................................................................................................. 110
Pump Replacement .................................................................................................................................................................... 111
Installing a Yoke-Locking Bolt .......................................................................................................................................... 125
Priming a New Pump .......................................................................................................................................................... 126
Hydraulic Tank .............................................................................................................................................................................. 127
Inspecting the Hydraulic Tank ......................................................................................................................................... 127
Emptying the Hydraulic Tank ........................................................................................................................................... 129
Cleaning the Strainer .......................................................................................................................................................... 129
Replacing Filter Elements .................................................................................................................................................. 132
Replacing Hydraulic Oil ...................................................................................................................................................... 133
Inspecting Hydraulic Cylinders ............................................................................................................................................... 134
Detecting Cylinder Internal Leaks .................................................................................................................................. 135
Hydraulic Cooler (optional) ...................................................................................................................................................... 137
Hydraulic Pressures ..................................................................................................................................................................... 138
Adjusting Vane Pump Relief Valves (if equipped) .................................................................................................... 138
Adjusting Pressure on the Directional Control Valve .............................................................................................. 140
Adjusting the Utility Section ............................................................................................................................................ 141
Adjusting Pressure on the Proportional Valve ........................................................................................................... 143
Adjusting Pressure on 96-Gallon Gripper .................................................................................................................... 144
Adjusting High Pressure on 300-Gallon Gripper ....................................................................................................... 145
Adjusting Low Pressure on 300-Gallon Gripper ........................................................................................................ 147
Pressure and Cycle Time Charts .............................................................................................................................................. 149
Main Hydraulic Schematics ...................................................................................................................................................... 151
Electric System ........................................................................ 157
Electrical Schematics .................................................................................................................................................................. 157
How the Electrical System Works ........................................................................................................................................... 157
Adjusting and Repairing Electric Components ................................................................................................................ 159
Fuses and Circuit Breakers ................................................................................................................................................. 159
Limit and Proximity Switches ........................................................................................................................................... 161
Multiplex System-Related Interventions ............................................................................................................................. 162
IFM Program Update Process ........................................................................................................................................... 162
J1939 Baud Rate .................................................................................................................................................................... 164
Checking Control Module (Node) Supply Voltage ................................................................................................... 165
Electrical Schematics .................................................................................................................................................................. 167
Cab ............................................................................................................................................................................................. 167
Cab Console & Control Wiring ......................................................................................................................................... 168
Control Box ............................................................................................................................................................................. 169
Chassis ...................................................................................................................................................................................... 170
Tailgate Lighting ................................................................................................................................................................... 171
Left Body Side Wiring .......................................................................................................................................................... 172
Right Body Side Wiring ....................................................................................................................................................... 173
Camera(s), Switchpack(s), Layout & Option(s) ........................................................................................................... 174
Pneumatic System ................................................................... 175
Air Tanks .......................................................................................................................................................................................... 175
Air Dryer .......................................................................................................................................................................................... 176
Troubleshooting ...................................................................... 177
Tools ................................................................................................................................................................................................. 177

vi Table of Contents
Troubleshooting Guide ............................................................................................................................................................. 179
Pump ............................................................................................................................................................................................... 183
Pump Cavitation ................................................................................................................................................................... 183
Bypassing a Dump Valve for Diagnostic Purposes .................................................................................................. 184
Tailgate-Locking Mechanism .................................................................................................................................................. 186
Tailgate Unlocking Spontaneously ............................................................................................................................... 188
Tailgate Lowering Spontaneously ................................................................................................................................. 189
“PUMP: Trans Not OK” ................................................................................................................................................................ 190
Troubleshooting Harnesses .................................................................................................................................................... 195
Multiplexing ............................................................................ 199
Labrie’s Multiplexed System ................................................................................................................................................... 199
Main Page ............................................................................................................................................................................... 200
Main Menu .............................................................................................................................................................................. 206
Warning Buzzer ..................................................................................................................................................................... 217
Plugging a Computer ......................................................................................................................................................... 218
Replacing the CAN Bus-Based Multiplex Joystick .................................................................................................... 218
Allison Transmission Parameters ........................................................................................................................................... 219
Programmed Parameters .................................................................................................................................................. 220
Cummins Engine Parameters ................................................................................................................................................. 221
Lifting Arm ............................................................................... 223
Daily Inspection ........................................................................................................................................................................... 223
Gripper Auto-Closing System ................................................................................................................................................. 226
Inspecting Auto-Closing System .................................................................................................................................... 227
Adjusting Auto-Closing System ...................................................................................................................................... 227
Auto-Packing ................................................................................................................................................................................ 229
Right-Hand™ Arm Chain Tension and Gripper Position ................................................................................................ 230
Bleeding Air Out of the Lifting Arm Hydraulic Circuit ................................................................................................... 232
Lifting Arm Holding Valves ...................................................................................................................................................... 234
Adjusting Gripper Holding Valve Pressure ................................................................................................................. 235
Adjusting In/Out Holding Valve Pressure ................................................................................................................... 236
Adjusting Up/Down Holding Valve Pressure ............................................................................................................. 238
Adjusting Arm Vane Pump Relief Valve ............................................................................................................................... 240
Adjusting Arm Speed ................................................................................................................................................................ 241
Keyless Locking Devices ........................................................................................................................................................... 242
Lubrication Charts ...................................................................................................................................................................... 245

1Introduction
About this Manual
This manual contains information regarding the
correct maintenance of your AUTOMIZER™ FULL
EJECT garbage truck. Maintenance personnel should
read and understand this information before doing
repairs and maintenance on the vehicle. For
information on how to safely and efficiently operate
the AUTOMIZER™ FULL EJECT, please refer to the
related Operator’s Manual that is provided with your
unit.
Topics Not Included in This Manual
Maintenance of the chassis
This is dealt with in the chassis manufacturer’s service
manual.
Cameras and backing-accident prevention systems
For these options, refer to the appropriate
manufacturer’s service manual.
Operating the AUTOMIZER™ FULL EJECT
For procedures related to the operation of the
AUTOMIZER™ FULL EJECT, please refer to the
AUTOMIZER™ FULL EJECT Operator’s Manual. (A copy
of this manual is provided with the truck.)
Parts and assemblies
For parts and assemblies that make up the
AUTOMIZER™ FULL EJECT, and for their respective part
number for ordering purposes, please refer to the
AUTOMIZER™ FULL EJECT Parts Manual.
About the Illustrations in this Manual
Because Labrie Enviroquip Group is constantly
updating its products, illustrations used in this manual
may differ from those of the actual product and
accessories, depending on the model or options that
come with your vehicle.

2Introduction
Schematics
For schematics related to body parts, refer to the AUTOMIZER™ FULL EJECT Parts Manual;
For electrical schematics, refer to the schematics provided with your AUTOMIZER™ FULL EJECT unit;
As for pneumatic and hydraulic schematics for your AUTOMIZER™ FULL EJECT unit, copies are
available from LabriePlus Service Department.
NOTE:A number of system schematics are included in this manual.
Warranty Registration Form
Do not forget to complete the owner registration form and to send it to Labrie Enviroquip Group.
Make sure to fill out the in-service date. This date will be used as the start date of the warranty period.
If the in-service date is not indicated, the warranty period will start 30 days after the delivery date.
Introducing the AUTOMIZER™ FULL EJECT
The AUTOMIZER™ FULL EJECT is a straight-frame, side-loading vehicle, manufactured to the highest
standards, and designed to collect residential and commercial refuse and recycling materials. It is the
ideal choice for those who need reliability and quick route times built into one solid package. Thanks
to its fully automated design and its large hopper area, the AUTOMIZER™ FULL EJECT helps to keep
overhead down allowing for more time spent picking up and less time dumping.
The AUTOMIZER™ FULL EJECT has been developed based on years of experience and a wise choice of
components. Everything has been foreseen to achieve excellent reliability while keeping construction
simple yet robust.
The AUTOMIZER™ FULL EJECT features a strong, light-weight body with a reliable loading arm called
the RIGHT-HAND™ arm. This arm can reach positions of up to 12 feet from the hopper and lift up to
1000 pounds fully extended. The RIGHT-HAND™ arm is easy to operate with an electric over
hydraulic joystick control, and the Zero-Grab low swing-out makes it easy to collect refuse in narrow
spaces.
AUTOMIZER™ FULL EJECT units are also equipped with a full eject packer panel to which a 3-stage
telescopic cylinder is connected.
Once the body of the AUTOMIZER™ FULL EJECT is full, all its content is unloaded at a waste
management landfill or other appropriate site (e.g. transfer station, incinerator, recycling station).
The AUTOMIZER™ FULL EJECT is not a tip-to-dump type of refuse truck. Instead, it uses a double-
acting hydraulic telescopic cylinder to horizontally eject the refuse load out of the rear opening.
The standard packer cycle time is 13.5 to 16.5 seconds at 1500 rpm, and the “Auto-Eject Mode” cycle
takes 40 seconds at 1500 rpm.
The hopper may also be equipped with a full-size crusher panel (optional). It also features a hinged
door on the left-hand side and 1 or 2 hinged doors on the right-hand side (2 doors if an automated
arm is installed).

Introduction 3
Multiplexed System
Labrie has equipped your AUTOMIZER™ FULL EJECT unit with a CAN bus-based multiplexed system,
which integrates a monitor, a control panel, a joystick, and a set of electronic controllers. This whole
system has been designed to help you operate your unit in an efficient and easy way. Labrie’s
multiplexed system is reliable and safe and it requires less wiring harnesses to operate. It can also
monitor various function status of the body and display warning and caution messages.
Through its monitor (see Figure 1-1), Labrie’s multiplexed system informs you of any malfunctions
that may occur during the operation of the truck. Various caution and warning messages can be
displayed on the monitor, depending on the seriousness of the situation. Yellow-highlighted
messages indicate that caution should be used while red-highlighted messages indicate a warning
situation that must be dealt with quickly.
Figure 1-1
Monitor
NOTE:Maintenance personnel as well as in-the-field technicians who encounter any problems with
the multiplexed system should refer to the Multiplex Diagnostic Manual (part# 153143_01) for
troubleshooting information and guidelines.
Service and Maintenance on the AUTOMIZER™ FULL
EJECT
Maintenance on the AUTOMIZER™ FULL EJECT is of paramount importance to ensure long-lasting
durability of all its moving parts as well as optimum performance in heavy work. Maintenance has to
be done on almost every system involved in the operation of the AUTOMIZER™ FULL EJECT, such as
the hydraulic, electrical and mechanical systems. Some parts are subjected to more wear and tear than
others. Therefore, these parts need regular maintenance and routine check-up to prevent signs of
deterioration as soon as possible.
NOTE:Any time you have a problem with a Labrie unit, you should contact your Labrie authorized
dealer first. They should be able to provide you with the proper help that you need, whether it
is for parts or technical service.

4Introduction
In this manual you will find the most common maintenance and inspection procedures required for
the AUTOMIZER™ FULL EJECT.
Parts
Labrie refuse vehicle parts are offered exclusively through LabriePlus and LabriePlus authorized
dealers. The quality and reliability of Labrie parts are second to none in the industry.
Warning
Your AUTOMIZER™ FULL EJECT unit MUST BE COMPLETELY LUBRICATED before its first use.
Refer to the lube charts near the hopper on the curbside to know where the lubrication points are
located on the vehicle and how often the parts should be lubricated.
Initial lubrication carried out by Labrie Enviroquip Group is sufficient for production and transport
purposes ONLY.
With your safety in mind, we would like to remind you that ONLY QUALIFIED MECHANICS
should service the hydraulic, electrical, and pneumatic systems on your side loader. In addition, they
should also be fully knowledgeable in the operation of this unit. Please read the Operator Manual
prior to attempting any maintenance work on your AUTOMIZER™ FULL EJECT unit.
AUTOMIZER™ FULL EJECT Basic Maintenance
AUTOMIZER™ FULL EJECT refuse bodies require routine maintenance to ensure product longevity as
well as dependability. Various components have specific needs. A detailed portion of these items is
listed below:
1) Lubrication
Your AUTOMIZER™ FULL EJECT unit MUST BE COMPLETELY LUBRICATED before its first use.
All moving parts require lubrication for continued operation, longevity and dependability.
Maintenance intervals should be adjusted according to the truck’s route or duty cycle. Proper
greasing ensures the maximum life from the moving parts as it flushes out water and contaminants
from the joint.
When greasing it is important to understand that providing the proper amount of grease is a delicate
balance between over greasing, which can result in seal damage as well as wasted lubricant. Only
pump enough grease until the air purges from the joint. Commonly, a “popping” sound can be heard
as the old grease begins to evacuate the seal. Equally important is to remove the excess grease from
the component you are maintaining. Leaving the excess grease will attract dirt and contaminants
which could work themselves into the joint causing potential future issues.
2) Body
The body contains grease fittings for every operating cylinder as well as all linkages.
Without proper lubrication and maintenance, these parts can become seized, galled, and/or break
resulting in equipment damage or injury.

Introduction 5
3) Hydraulic Fluid and Filter
Hydraulic fluid is the lifeblood of the AUTOMIZER™ FULL EJECT side loader. Regular maintenance of
the hydraulics will ensure long, trouble-free life.
As directed in all service training, the hydraulic filter needs to be replaced after the initial 50 hours
of new truck operation and then again every 6 months, or when the filter restriction gauge is in the
yellow. The hydraulic fluid needs to be replaced once a year along with the suction screen being
removed, inspected, cleaned and/or replaced.
4) Hardware
Hardware needs to be verified that it is present and tight. Loose or missing hardware can cause severe
damage and/or unsafe operational conditions.
5) Limit and Proximity Switches
Limit and proximity switches are used to limit travel of moving parts and/or to ensure conditions are
safe for operation.
If these switches are not adjusted properly, damage to the equipment may occur as well as poor or
dangerous functionality.
6) Leaks
Verify that there are not any leaking hydraulic cylinders, hoses, tubes, valves, or pumps. Leaks in the
hydraulic system are an indicator of possibly overheating hydraulics, damage to a seal, over-
pressurization, or general wear. To avoid costly and premature replacement of parts, ensure all leaks
are addressed properly and timely.
7) Cracks
Ensure that there are not any cracks forming along the hopper floor edge, body, packer and tailgate.
This is an indicator that something is worn, not adjusted properly or damaged.
8) Bushings/Bearings
Check for play in any bushing or bearing. This may require the use of a pry bar or lifting equipment.

6Introduction
Office Addresses and Phone Numbers
In the U.S.
Address: 1198 Shattuck Industrial Blvd.
LaFayette, GA 30728
Toll Free: 1-800-231-2771
Telephone: 1-706-591-8764
General Fax: 1-706-639-9275
Oshkosh General Fax: 1-706-591-8766
Parts and warranty: During business hours, 8:00 AM to 6:00 PM Eastern Standard Time
Technical Support Service: Available 24 hours
In Canada
Address: 455 1st Avenue
Levis, QC G6W 5M6
Toll Free: 1-877-452-2743
Customer Service Phone: 1-877-452-2743
Service Fax: 1-418-831-1673
Parts Fax: 1-418-831-7561
Parts and warranty: During business hours, 8:00 AM to 5:00 PM Eastern Standard Time
Technical Support Service: Available 24 hours
Website: www.labriegroup.com
E-mail: sales@labriegroup.com
IMPORTANT:For technical support and parts ordering, the serial number of your vehicle is required. Therefore,
Labrie Enviroquip Group recommends to keep record of the information found on the VIN plate,
which is located in the cab.

2Safety
Safety comes first and Labrie Enviroquip Group is
committed to your safety. Ultimately, safety is
everyone’s responsibility when operating or
maintaining the AUTOMIZER™ FULL EJECT side loader.
Make it your first priority! Be aware and apply the
safety practices and features detailed in this manual.
Maintenance personnel should not perform any
maintenance on the equipment if they are not well
acquainted with the operations of the equipment as
well as all safety precautions related to such operations.
Labrie Enviroquip Group will not accept any
responsibility for failures and/or injuries caused by
repairs done by the user and/or any persons other than
authorized Labrie Enviroquip Group representatives.
Safety Decals
Recognizing and understanding safety decals can
prevent damage and could prevent injury or even
death.
See the following recommendations regarding safety
decals:
These decals must be obeyed at all times.
These decals must be in place at all times. Report
any damaged or missing decals to the proper
authority at once.
Replacement decals can be ordered free of charge from
LabriePlus during the warranty period.
When ordering replacement decals, use the part
number as printed on the bottom of each decal.
Bilingual decals are available in English/Spanish or
English/French versions.
Safety decals fall into three main categories (see the
following illustration).

8Safety
Figure 2-1
Safety decal categories
Keep your decals clean and in good condition at all times. For a list of safety and informative decals
for your AUTOMIZER™ FULL EJECT unit, refer to the section on Safety and Informative Decals in the
related Operator’s Manual.
NOTE:Decals may vary from one unit to another depending on the options and features installed on
the unit.
Conventions
Throughout this manual “DANGER” “WARNING” and “CAUTION” notations accompanied by an
exclamation mark inside a triangle (an International Hazard Symbol) are used to alert the operator
and mechanics to special instructions concerning a particular operation or service that may be
hazardous if performed incorrectly or carelessly.
Danger! Indicates a hazardous situation which, if not avoided, will result in serious injury or death.
Warning! Indicates a hazardous situation which, if not avoided, could result in serious injury or
death.
Caution! Indicates a hazardous situation which, if not avoided, may result in minor or moderate
injury or property/product damage.

Safety 9
Strict compliance to these “safety alerts” combined with “common sense” operations are important
accident-prevention measures.
The word “NOTE” is also used throughout the manual. It precedes information that provides special
emphasis or clarification on a specific operation or procedure.
Basic Safety Notions
The following safety notions are related to the use of the AUTOMIZER™ FULL EJECT. It is important to
point out that the safe use of the vehicle remains the user’s responsibility. He must heed all safety
notions explained in this manual and on the decals on the vehicle.
Responsibilities
Safety is everybody’s responsibility. Both the employer and employees must play their part to ensure
safe working conditions in, on, and around the truck and to promote and enforce safe work practices
and procedures to prevent injuries and incidents as well as property/equipment damages.
Employer’s Responsibilities
It is the responsibility of the employer:
To ensure that the AUTOMIZER™ FULL EJECT is operated in accordance with all applicable
regulations, including all safety requirements and codes set by the Occupational Safety and Health
Administration (OSHA) and by the American National Standards Institute (ANSI).
To ensure that employees are qualified for operating or maintaining the vehicle and its
equipment, and that they all take safety measures before working in, on, and around them.
To properly maintain all mobile equipment to meet all state/provincial and federal safety
standards.
Danger! Always be aware of the vehicle’s surroundings to make sure that no pedestrians,
passersby, bystanders, or other people or vehicles are in any way exposed to any danger
caused by the use of the AUTOMIZER™ FULL EJECT.
Danger! Never get in the hopper area when the engine is running.
Only authorized personnel may do so following a lockout/tagout procedure (See Locking
Out and Tagging Out the Vehicle on page 26).
Warning! With your safety in mind, Labrie Enviroquip Group would like to remind you that ONLY
qualified personnel should service the hydraulic, electrical and pneumatic systems on
your refuse truck. They must also be knowledgeable about how to operate the truck and
installed equipment. Please read the Operator’s Manual prior to attempting any
maintenance or repair on your AUTOMIZER™ FULL EJECT vehicle.

10 Safety
To supply adequate safe vehicle/equipment instructions and training to employees before
allowing them to operate or maintain refuse vehicles or equipment.
To keep the vehicle maintained and properly adjusted to meet the manufacturer’s standards and
recommendations. For help or for more information, please contact the manufacturer or any of its
authorized representatives.
To keep records of all vehicle breakdowns and malfunctions, as well as any inspection and
maintenance.
To ensure that all failures or malfunctions that may be affecting the safe use of the vehicle are
repaired before the vehicle is put back into operation.
To meet the appropriate lighting requirements for night shift work (if permitted).
To regularly accompany the vehicle operator and take measures to ensure the smooth and safe
operation of the vehicle.
To make sure that the backup alarm works properly when the vehicle is in reverse.
To take necessary measures to repair any damage or malfunction reported by an employee.
To establish and ensure the application of a “lockout/tagout” procedure (see page 26) any time
inspection, repair or maintenance is performed on the vehicle, regardless of whether it takes place
on the road or in the garage.
Employee’s Responsibilities
It is the responsibility of the employee:
To enforce all safety measures to meet the requirements set by the employer.
To operate the AUTOMIZER™ FULL EJECT only after having received instructions and training.
To perform routine daily unit inspections.
To immediately report any damage or malfunction to the vehicle or equipment to the employer or
supervisor.
To make sure that nobody is near the vehicle before activating any of the controls, and to be
prepared to stop at any indication of possible danger.
IMPORTANT:Do not use damaged equipment.
Things to Do
Inspect the body and all systems at the start of each day.
Make sure that the area is clear of any people or possible obstructions.
IMPORTANT:Be extremely cautious in areas where small children may be present.
Wear safety glasses and footwear, gloves, and any other safety equipment when loading and
packing refuse.
Make sure that mirrors, windows, lights, and monitor equipment are clean and properly adjusted.
Check for explosive trash (e.g. televisions, paint cans, fluorescent light tubes, etc.).

Safety 11
Drive carefully when carrying an unevenly distributed load.
Inspect for overhead hazards (e.g. power lines) prior to using the arm.
Always use the tailgate safety prop before entering the area between the main body and the
tailgate.
Obey all warning and operation decals.
Things to Avoid
Do not operate any vehicle while under the influence of alcohol, narcotics or other intoxicants.
Do not talk on a cell phone or listen to loud music while driving.
Do not wear jewelry or loose clothing.
Do not leave the vehicle before it is brought to a complete stop and the work or parking brake is
engaged.
Do not enter the hopper or main body unless the engine is shut off, the key is removed and there is
an out-of-service tag on the steering wheel. Refer to “Locking Out and Tagging Out the Vehicle”
on page 26.
Do not back up the vehicle with the tailgate fully raised.
Do not drive with the tailgate fully open unless it is to unload refuse at the landfill.
Only qualified personnel should service the hydraulic, electrical, and pneumatic systems of this vehicle.
They should also be knowledgeable about the operation of the vehicle.
General Precautions
IMPORTANT:It is the employer’s responsibility to ensure that only qualified employees operate and maintain this
vehicle.
Read and make sure that you fully understand this manual and all safety decals before performing
maintenance on the vehicle. Maintenance personnel must also read and understand the Operator
Manual for this vehicle. In case of doubt, ask a supervisor for clarifications.
Before every work day, inspect the body, the packing system, and any system that might
compromise the public and/or the operator safety.
Warning! Prior to its first use, your AUTOMIZER™ FULL EJECT must be completely lubricated, as shown on
the lube chart located on the curbside of the truck, near the hopper.
Initial lubrication carried out by Labrie Enviroquip Group is sufficient for production and
transport purposes only!
Danger! Operator and maintenance personnel must adhere to the following precautions at all
times. Failure to do so may result in vehicle and/or property damage, personal injury, or
even death.

12 Safety
Verify that the accelerator pedal, the steering wheel, mirrors, brakes, and turn signals are in good
working order.
When driving the vehicle, keep both hands on the steering wheel at all times.
Stop the vehicle completely and put on the parking brake before leaving the driving position.
When the vehicle is parked, the parking brake must be applied.
Vehicle operators must have a clear view of lifting arm operations at all times. To prevent injury to
surrounding people, and damage to property and/or to the lifting arm itself, operators must be
able to stop arm movement at any time.
Before activating the lifting arm, operators shall make sure that people and obstructions are far
away from the vehicle.
AUTOMIZER™ FULL EJECT vehicles are primarily designed to be operated by only one person.
However, if Labrie Enviroquip Group customers elect to operate the vehicle with more than one
worker, additional safety items shall be installed to protect the co-worker from hazardous situations.
IMPORTANT:In such cases, Labrie Enviroquip Group must be informed of every and all units that will be operated
by more than one worker. Labrie Enviroquip Group will then determine and supply, at the
customer’s expense, the required safety items. For additional information, please contact LabriePlus
at 1-800-231-2771 in the U.S. or 1-877-831-8250 in Canada.
Do not operate this vehicle if there are any signs of damage or incomplete repairs.
Report any doubts that you might have and any safety service requirements regarding this vehicle
to a supervisor.
Never place head, body, fingers or any limbs into a scissors point or pinch point on the equipment.
Start the engine following the manufacturer’s recommended procedure.
When driving, wear your seat belt.
Never drive this vehicle with the tailgate unlocked.
Hopper door must be maintained and latched in place while operating equipment.
Ensure all co-workers are in view before operating or moving the unit or any of its controls.
Make sure the backup alarm is working properly.
When removing nylon locknuts, always replace them with new ones.
Before opening and closing the tailgate, make sure no one is behind the vehicle.
Before operating the vehicle the driver must be thoroughly familiar with the employer’s safety
program concerning traffic rules, warning devices and hand signals.
Be sure to know where to get assistance in the event of an emergency.
Know your machine. Know the location and function of all controls, gauges, instruments and
protective devices.
Maintenance personnel must read and understand this manual before doing any repair work. In
case of doubt, ask a supervisor for clarifications.
Do not get into the hopper compartment or try to repair anything behind the packer when it is
moving or when the hydraulic pump is still running. Personnel authorized to get into the hopper
must first lock out and tag out the vehicle, as required by the employer. For more information, see
Locking Out and Tagging Out the Vehicle on page 26.
Other manuals for AUTOMIZER FULL EJECT
1
Table of contents
Other Labrie Utility Vehicle manuals

Labrie
Labrie Pendpac WITTKE RETRO FL User manual

Labrie
Labrie expert 2000 User manual

Labrie
Labrie Top Select User manual

Labrie
Labrie Pendpac WITTKE RETRO FL User manual

Labrie
Labrie expert 2000 User manual

Labrie
Labrie AUTOMIZER HELPING-HAND User manual

Labrie
Labrie Top Select User manual

Labrie
Labrie AUTOMIZER FULL EJECT User manual

Labrie
Labrie OPTIMIZER 2007 User manual