manuals.online logo
Brands
  1. Home
  2. •
  3. Brands
  4. •
  5. Laird
  6. •
  7. Temperature Controllers
  8. •
  9. Laird 455-0009 User manual

Laird 455-0009 User manual

A
https://connectivity.lairdtech.com
1
© Copyright 2018 Laird. All Rights Reserved
Americas: +1-800-492-2320
Europe: +44-1628-858-940
Hong Kong: +852 2923 0610
Version 1.0
https://connectivity.lairdtech.com
2
© Copyright 2019 Laird. All Rights Reserved
Americas: +1-800-492-2320
Europe: +44-1628-858-940
Hong Kong: +852 2923 0610
Version
Date
Notes
Contributors
Approver
1.0
07 Jan 2019
Initial Release
Robert Gosewehr
Chris Hofmeister
https://connectivity.lairdtech.com
3
© Copyright 2019 Laird. All Rights Reserved
Americas: +1-800-492-2320
Europe: +44-1628-858-940
Hong Kong: +852 2923 0610
1Introduction..........................................................................................................................................................................4
2Part Numbers ......................................................................................................................................................................4
3Installation ...........................................................................................................................................................................5
3.1 Illustrations.................................................................................................................................................................6
3.1.1 Stainless Steel Temperature Probe with RJ45 Cable Assembly..........................................................................6
3.1.2 RJ45 Cable Gland................................................................................................................................................7
4Connection Status...............................................................................................................................................................8
5Data Visualization................................................................................................................................................................9
5.1 Sentrius Sensor Mobile App.......................................................................................................................................9
6Battery Consumption.........................................................................................................................................................11
7Sanitation and Cleanliness................................................................................................................................................11
https://connectivity.lairdtech.com
4
© Copyright 2019 Laird. All Rights Reserved
Americas: +1-800-492-2320
Europe: +44-1628-858-940
Hong Kong: +852 2923 0610
This User Guide explains how to properly install the Laird External Temperature Probe kit for the Sentrius Sensor series and
view sampled data using the Sentrius Sensor Mobile App.
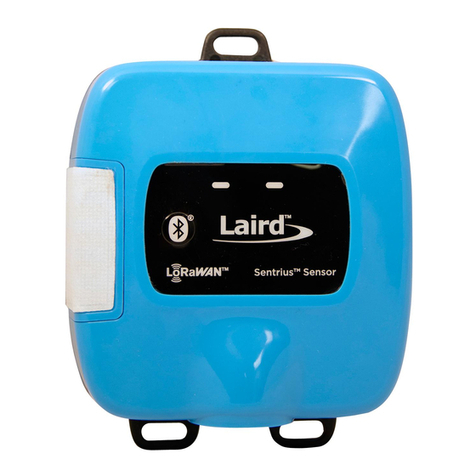
This variant of the Sentrius RS1xx series of LoRa / BLE Sensors enables use of an external cabled temperature probe, in place
of the integrated temperature sensor. The kit includes an IP67 rated cabled temperature probe that is 200mm in length and
6.35mm in diameter at the stainless-steel probe end. The external temperature probe utilizes a One Wire digital interface and
supports a general temperature range of -55° to +125°C (+/-0.9°C). The cabled probe connects into the main body of the Sentrius
Sensor via a CAT5 IP67 rated RJ45 connector.
Note: This guide only contains a brief walkthrough. Refer to the RS1xx Guide for further details on sensor functionality and
the mobile app capabilities. To access the RS1xx Guide, navigate to the RS1xx product page, click Documentation,
and select the Sentrius RS1xx User Guide.
Figure 1: Sentrius sensor with external temperature probe
Reference
Description
1
IP67 Rated, 1520 mm overall length, 200
mm Probe length, 6.35 mm diameter
stainless steel temperature probe CAT5
RJ45 connector
2
External port Sentrius Sensor
(915 MHz or 868 MHz)
The external temperature probe is available separately or included with an external Sentrius Sensor kit. Sentrius Sensors are
also available separately either for single or bulk packaging.
Table 1: Ordering Info
Part Number
Description
455-0009
Sentrius™ RS1xx External Sensor – 915 MHz external temperature probe including LoRa and BLE
455-0010
Sentrius™ RS1xx External Sensor –868 MHz external temperature probe including LoRa and BLE
455-0012
Sentrius™ RS1xx External Sensor – 915 MHz external temperature probe including LoRa and BLE (Bulk)
455-0013
Sentrius™ RS1xx External Sensor – 868 MHz external temperature probe including LoRa and BLE (Bulk)
455-0011
Stainless Steel External Temperature Probe Kit (Probe Only)
Probe length –200 mm Probe diameter –6.35 mm
https://connectivity.lairdtech.com
5
© Copyright 2019 Laird. All Rights Reserved
Americas: +1-800-492-2320
Europe: +44-1628-858-940
Hong Kong: +852 2923 0610
To install the external temperature sensor, refer to Figure 2 and follow these steps:
Unscrew the Ethernet cap (1) from the Sentrius
Sensor.
Connect the RJ45 connector from the cable
assembly into the external port of the Sentrius
Sensor.
Screw on (by hand) the top portion of the cable
gland –the screw nut (3) –until tight.
Visually check to ensure the lower portion of the
cable gland –the pressing screw (2) –is also
tight.
Figure 2: Installing the external temperature sensor
Note: Ensure that references (2) and (3) in Figure 2 are tight when installing the external temperature probe into the Sentrius
Sensor. If these areas are not sufficiently tightened, this could lead to a potential leak and cause damage to the sensor’s
external port connector or to the temperature probe cable assembly.
https://connectivity.lairdtech.com
6
© Copyright 2019 Laird. All Rights Reserved
Americas: +1-800-492-2320
Europe: +44-1628-858-940
Hong Kong: +852 2923 0610
Figure 3: Stainless steel temperature probe with RJ45 cable assembly
https://connectivity.lairdtech.com
7
© Copyright 2019 Laird. All Rights Reserved
Americas: +1-800-492-2320
Europe: +44-1628-858-940
Hong Kong: +852 2923 0610
(DIM in millimeters)
Figure 4: RJ45 cable gland
https://connectivity.lairdtech.com
8
© Copyright 2019 Laird. All Rights Reserved
Americas: +1-800-492-2320
Europe: +44-1628-858-940
Hong Kong: +852 2923 0610
When the external probe is connected properly to the sensor, the sensor will operate “normally” once powered up. Normal operation
of the sensor is indicated by the left LED will flashing either “orange” or “green” color to indicate the connection status to a network.
A connection problem is indicated by both LEDs on the front panel both being constantly on. This is a visual indicator to the user
that there is a communication issue between the sensor and the probe. The sensor will not function properly in this state.
To remedy this, follow these steps:
Retry the steps from the Installation section. Make sure the sensor has the latest firmware installed to ensure the sensor
has all the latest capabilities. The firmware can be updated using the mobile app. Reference the RS1xx guide for more
details RS1xx product page on this process.
The time it takes for the sensor to detect a probe depends on the sensor’s settings, in particular, the read period and
aggregate count. This means that the time to auto detect a probe can fluctuate between 30 seconds or likely much longer.
To speed up the auto detect process of the sensor, press and hold the Bluetooth button on the top of the sensor for
five seconds after reconnecting the external probe. This will restart the sensor, and on startup the Sentrius sensor will
check for the sensor.
If you continue to experience an issue, contact Laird Support. There could be damage to the Sentrius sensor or probe.
Figure 5: Front panel LEDs are lit
https://connectivity.lairdtech.com
9
© Copyright 2019 Laird. All Rights Reserved
Americas: +1-800-492-2320
Europe: +44-1628-858-940
Hong Kong: +852 2923 0610
The Sentrius mobile application allows a user to configure a device, troubleshoot a device, see real-time sensor data, and update
firmware. Search the appropriate app store (Google Play Store, Apple Store, or the Microsoft Store) for the Sentrius Sensor App
and install it on your device.
Note: This guide only contains a brief walkthrough. Refer to the RS1xx Guide for further details on sensor functionality and the
mobile app capabilities. To access the RS1xx Guide, navigate to the RS1xx product page, click Documentation, and select
the Sentrius RS1xx User Guide.
The Sentrius sensor mobile app displays real-time sensor data from the external temperature probe and sensor once a good cable
connection is established.
To view real-time sensor data, follow these steps:
Press and hold the BLE button on the front panel of the sensor to start BLE advertising on the device.
Select the corresponding DEV EUI on the connection screen of the mobile app. The DEV EUI of the sensor can be found
on the back label of the sensor.
Once connected to the mobile app, click the Temperature Reading icon under the Temperature/Humidity section to
see real-time sensor data from the temperature probe.
From this screen, the temperature probe can be validated by confirming the temperature measurements are accurate. Place
your hand on the probe to fluctuate the temperature.
Figure 6: Sentrius sensor mobile app displays
Update the sensor settings on the main screen to get a faster reading period if the temperature readings are taking too long
to update on the graph. The fastest read period a sensor can have is thirty seconds.
https://connectivity.lairdtech.com
10
© Copyright 2019 Laird. All Rights Reserved
Americas: +1-800-492-2320
Europe: +44-1628-858-940
Hong Kong: +852 2923 0610
https://connectivity.lairdtech.com
11
© Copyright 2019 Laird. All Rights Reserved
Americas: +1-800-492-2320
Europe: +44-1628-858-940
Hong Kong: +852 2923 0610
A RS186 was configured for a read period of 300 seconds with an aggregate of three.
A power analysis was performed for 32 minutes to ensure two LoRa transmit events were captured.
Figure 7: RS186 power consumption
The average current consumption was 72 uA over 32 minutes. The data rate that the RS186 transmitted at was SF7BW125.
Every external temperature probe is cleaned with an alcoholic wipe and placed in an individual bag before leaving the supplier. A
label is included with every bag warning the end-user to clean the probe before use. It is up to the end-user to ensure that every
temperature probe is cleaned and sanitary for consumer use before using the temperature probes. Laird will not be held liable for
any issues pertaining to the cleanliness of the probes.

This manual suits for next models

10

Other Laird Temperature Controllers manuals

Laird Sentrius RS1 Series User manual

Laird

Laird Sentrius RS1 Series User manual

Laird PR-59 User manual

Laird

Laird PR-59 User manual

Laird Sentrius RS1 Series User manual

Laird

Laird Sentrius RS1 Series User manual

Popular Temperature Controllers manuals by other brands

Titus TAO Installation & operation manual

Titus

Titus TAO Installation & operation manual

Future Design FDC-9090 user manual

Future Design

Future Design FDC-9090 user manual

Heat Controller B-VCH12FC-1 owner's manual

Heat Controller

Heat Controller B-VCH12FC-1 owner's manual

WIKA SC58 operating instructions

WIKA

WIKA SC58 operating instructions

Omron E5GN-QTD manual

Omron

Omron E5GN-QTD manual

Dometic Frigo DC Service manual

Dometic

Dometic Frigo DC Service manual

Pentair TEC24VCNTLR instruction manual

Pentair

Pentair TEC24VCNTLR instruction manual

Eurotherm 2116 user guide

Eurotherm

Eurotherm 2116 user guide

Sterling Sterltronic S-Series Service and instruction manual

Sterling

Sterling Sterltronic S-Series Service and instruction manual

RKC INSTRUMENT X-TIO-B instruction manual

RKC INSTRUMENT

RKC INSTRUMENT X-TIO-B instruction manual

FLIR Screen-EST Kiosk user manual

FLIR

FLIR Screen-EST Kiosk user manual

Honeywell C7089 installation instructions

Honeywell

Honeywell C7089 installation instructions

Heatmiser TM1-TS WiFi RF instruction manual

Heatmiser

Heatmiser TM1-TS WiFi RF instruction manual

dixell XT110C Installation and operating instructions

dixell

dixell XT110C Installation and operating instructions

netvox R720A user manual

netvox

netvox R720A user manual

Kobold TTL Series operating instructions

Kobold

Kobold TTL Series operating instructions

KIOUR TOUCH RSD3 quick start guide

KIOUR

KIOUR TOUCH RSD3 quick start guide

Lowrance EP-80R Temp Installation and configuration instructions

Lowrance

Lowrance EP-80R Temp Installation and configuration instructions

manuals.online logo
manuals.online logoBrands
  • About & Mission
  • Contact us
  • Privacy Policy
  • Terms and Conditions

Copyright 2025 Manuals.Online. All Rights Reserved.