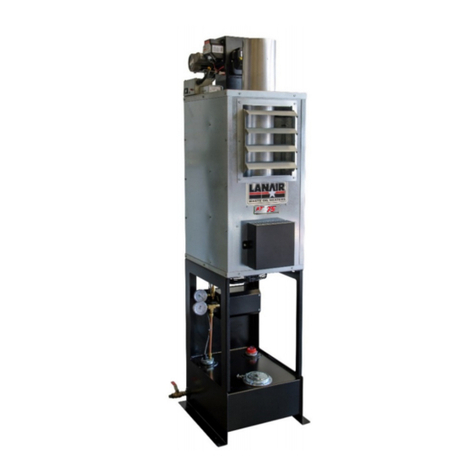
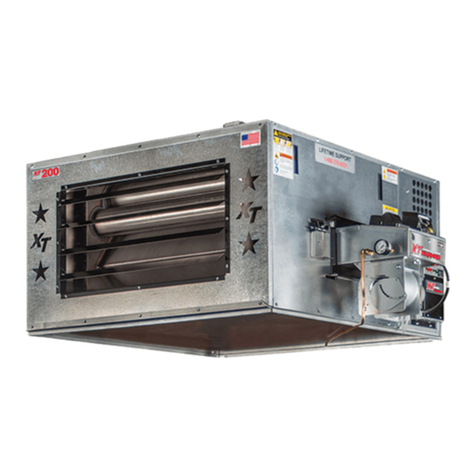
Lanair MX SERIES 250 User manual

MX SERIES 250
MX SERIES 300
WASTE OIL HEATER
Installation and Operating
Instructions
®
Lanair Products LLC
4109 Capital Circle
Janesville, Wisconsin 53546
1-888-370-6531
www.lanair.com

®
BEFORE YOU BEGIN INSTALLATION...
IMPORTANT
Read and understand this manual completely before beginning installation.
sThis heater is for commercial and industrial use only. This unit is not intended for residential
use.
sThis heater must be installed and/or inspected by a licensed heating contractor before
operation. Installer should be trained and thoroughly familiar with the installation and
operation of oil-fired heaters.
sInstallation of this unit must be made in accordance with state and local codes or authori-
ties having jurisdiction over environmental control, fuel, fire and electrical safety.
sN.F.P.A. (National Fire Protection Association Publications for Heater Installation)
NFPA No. 30 Flammable and Combustible Liquids Code
NFPA No. 31 Standard for the Installation of Oil Burning Equipment
NFPA No. 70 National Electric Code
NFPA No. 80 A&B Repair Garages and Parking Structures
NFPA No. 211 Standard for Chimneys, Fireplaces, Vents, and
Solid Fuel Burning Appliances
The above standards are available from the National Fire Protection Assn., Battery March
Park, Quincey, MA 02269
sRead and familiarize yourself with these instructions and associated photos, diagrams and
illustrations before beginning installation or operation.These instructions should be fol-
lowed closely, to achieve the best possible results.
If you have questions or concerns at any time during the installation, stop the installation
and contact a Lanair Service Representative.
sCheck to make sure you have all the required components needed for proper installation
and operation.
sCheck each component for visible damage. If you find a damaged component, contact a
Lanair Service Representative for a replacement. Do not install broken or damaged parts.
sThis heater is designed to provide economically and environmentally friendly disposal of
waste oil. Due to the nature of the fuel used, this heater should not be relied upon as the
sole source of heat.
sRead and understand the warranty. Fill out the enclosed warranty card and return within
10 days of purchase.
QUESTIONS?... Contact Customer Service at 1-888-370-6531 M-F 8:00 am- 4:15 pm CST
2

MX SERIES 250 WASTE OIL HEATER
MX SERIES 300 WASTE OIL HEATER
Installation and Operating Instructions
Table of Contents:
Rules For Safe Installation and Operation . . . . . . . . . . . . . . . . . . . . . . . . . . . . . . . . . . . page 2
Sec. 1 General Specifications and Hazards . . . . . . . . . . . . . . . . . . . . . . . . . . . . . . . . . . . . . . . . . . page 4
Sec. 2 Heater Installation . . . . . . . . . . . . . . . . . . . . . . . . . . . . . . . . . . . . . . . . . . . . . . . . . . . . . .. . . . . . . . page 10
Sec. 3 Chimney /Vent System . . . . . . . . . . . . . . . . . . . . . . . . . . . . . . . . . . . . . . . . . . . . . . . . . . . . .. . . page 12
Sec. 4 Draft . . . . . . . . . . . . . . . . . . . . . . . . . . . . . . . . . . . . . . . . . . . . . . . . . . . . . . . . . . . . . . . . . . . . . . . . . . . . . page 15
Sec. 5 Fuel Supply Tank /Piping Installation . . . . . . . . . . . . . . . . . . . . . . . . . . . . . . . . . . . . . . . . . page 15
Sec. 6 Fuel Supply Pump/Piping . . . . . . . . . . . . . . . . . . . . . . . . . . . . . . . . . . . . . . . . . . . . . . . . . . . .. page 17
Sec. 7 Compressed Air Installation . . . . . . . . . . . . . . . . . . . . . . . . . . . . . . . . . . . . . . . . . . . . . . . . . .. page 19
Sec. 8 Electrical Connections/Wiring Diagram . . . . . . . . . . . . . . . . . . . . . . . . . . . . . . . . . . . . . . page 20
Sec. 9 Controls . . . . . . . . . . . . . . . . . . . . . . . . . . . . . . . . . . . . . . . . . . . . . . . . . . . . . . . . . . . . . . . . . . . . . . . . . page 23
Sec.10 Priming Fuel Pump . . . . . . . . . . . . . . . . . . . . . . . . . . . . . . . . . . . . . . . . . . . . . . . . . . . . . . .. . . . . page 25
Sec.11 Burner Start-Up Procedure . . . . . . . . . . . . . . . . . . . . . . . . . . . . . . . . . . . . . . . . . . . . . . . . . . .. page 27
Sec.12 Flame Adjustment . . . . . . . . . . . . . . . . . . . . . . . . . . . . . . . . . . . . . . . . . . . . . . . . . . . . . . .. . . . . . page 29
Sec.13 Maintenance Schedule / Service Adjustments . . . . . . . . . . . . . . . . . . . . . . . . . . . . . . page 32
Sec.14 Troubleshooting . . . . . . . . . . . . . . . . . . . . . . . . . . . . . . . . . . . . . . . . . . . . . . . . . . . . . . . .. . . . . . . page 44
Sec.15 Warranty Certificate . . . . . . . . . . . . . . . . . . . . . . . . . . . . . . . . . . . . . . . . . . . . . . . . . . . . . . . . . . . . page 49
Sec.16 Burner Reference Diagram . . . . . . . . . . . . . . . . . . . . . . . . . . . . . . . . . . . . . . . . . . . . . . . . . . . . page 51
Visit our website at: www.lanair.com
3

Section 1 - General Specifications & Hazards
QUESTIONS?... Contact Customer Service at 1-888-370-6531 M-F 8:00 am- 4:15 pm CST
4
No. Description
1 Mounting Plate
2 Ignitor Transformer
3 Fuel Line Inlet
4 Fuel Pressure Gauge
5 Combustion Air Baffle
6 View Port
7 Oil Primary Safety Control
8 Waste Oil/Fuel Oil Switch
9 Quick Disconnect Receptacle
10 Air Supply Inlet
11 Combustion Blower Motor
Burner Assembly-
Performance Ratings
Voltage . . . . . . . . . . . . . . . . . . . . . . 115 vac
Cycles . . . . . . . . . . . . . . . . . . . . . . . . . . 60 hz
Total Operating Amperage . . . . . . . . 5.8
Weight . . . . . . . . . . . . . . . . . . . . . . . . .31 lbs
Oil Primary . . . . . . . . . . . . . . . . . . 0.2 amps
Pre-Heater Block . . . . . . . . . . . . .2.6 amps
Ignitor Transformer . . . . . . . . . . 0.3 amps
10
11
9
8
7
6
5
4
3
2
1
MX 250-300 Series Burner
NOTE: This burner intended for use
with MX Series Lanair Waste Oil-Fired
Heaters Only
8

Section 1 - General Specifications & Hazards
Visit our website at: www.lanair.com
5
1
3
2
22
2
4
8
5
6
7
9
No. Description
1 Adjustable Air Flow Louvers
2 Mounting Holes
3 Fan Limit Switch
4 8" Exhaust Flue
5 Flame View Port
6 Burner Assembly
7 Electrical Connections Cover
8 Secondary Air Filter/Regulator Location
9 Fan Assembly (Internal)

Section 1 - General Specifications & Hazards
QUESTIONS?... Contact Customer Service at 1-888-370-6531 M-F 8:00 am- 4:15 pm CST
6
MX-250/300 FRONT
DIMENSIONS:
MX-250 Height: 36” Width: 46” Depth: 48” Weight: 630 LBS
MX-300 Height: 36” Width: 46” Depth: 48” Weight: 630 LBS
FIRING CAPACITIES:
MX-250 Nozzle @ 1.79 gallons/hour, No. 2 fuel oil/used crankcase oil
MX-300 Nozzle @ 2.14 gallons/hour, No. 2 fuel oil/used crankcase oil

Section 1 - General Specifications & Hazards
Visit our website at: www.lanair.com
7
RIGHT SIDE
MX 250-300
LEFT SIDE
MX 250-300
TOP VIEW
MX 250-300
36"
36"
16”
25”
24"
48”
46”
13.5"
59.5"
6"
9.5"
5.5”
8” dia. flue

Section 1 - General Specifications & Hazards
8a
Pump Assembly-
Pump Assembly for use with By-pass Regulator
Performance Ratings
Voltage . . . . . . . . . . . . . . . . . . . . . . 115 vac
Cycles . . . . . . . . . . . . . . . . . . . . . . . . . . 60 hz
Weight . . . . . . . . . . . . . . . . . . . . . . . . . 24 lbs
Pump Motor . . . . . . . . . . . . . . . . . . 5 amps
QUESTIONS?... Contact Customer Service at 1-888-370-6531 M-F 8:00 am- 4:15 pm CST
No. Description
1 Pump Platform
2 Pump Motor
3 Pump Guard
4 Pump
5 Pressure Gauge port
6 Easy Flow Bleed Valve
7 1/4" NPT Inlet
8 1/8" NPT Outlet
9 Pump coupler
7
4
3
2
1
5
8
6
9

8b
Pump Assembly-
Performance Ratings
Voltage . . . . . . . . . . . . . . . . . . . . . . 115 vac
Cycles . . . . . . . . . . . . . . . . . . . . . . . . . . 60 hz
Weight . . . . . . . . . . . . . . . . . . . . . . . . . 16 lbs
Pump Motor . . . . . . . . . . . . . . . 0.59 amps
QUESTIONS?... Contact Customer Service at 1-888-370-6531 M-F 8:00 am- 4:15 pm CST
No. Description
1 Pump Platform
2 Pump Motor
3 Pump Guard
4 Pump
5 Pressure Gauge port
6 Easy Flow Bleed Valve
7 1/4" NPT Inlet
8 1/8" NPT Outlet
9 Pump coupler
10 Line to Burner
11 Line to Tank
7
4
3
1
10 11
5
8
6
9
2
Section 1 - General Specifications & Hazards
Optional Metering Pump Assembly

Section 1 - General Specifications & Hazards
Visit our website at: www.lanair.com
9
DIMENSIONS:
MX-250 Height: 36” Width: 46” Depth: 48” Weight: 630 LBS
MX-300 Height: 36” Width: 46” Depth: 48” Weight: 630 LBS
FIRING CAPACITIES:
MX-250 Nozzle @ 1.79 gallons/hour, No. 2 fuel oil/used crankcase oil
MX-300 Nozzle @ 2.14 gallons/hour, No. 2 fuel oil/used crankcase oil
MINIMUM CLEARANCE TO COMBUSTIBLES:
Top . . . . . . . . . . . . . . . . . . . . . . . . 6” Chimney Connector . . . . .18”
Sides . . . . . . . . . . . . . . . . . . . . . 18” Rear . . . . . . . . . . . . . . . . . . . . . 6”
Burner Side . . . . . . . . . . . . . . . 38”
Front . . . . . . . . . . . . . . . . . . . . . 60” Bottom . . . . . . . . . . . . . . . . 24”
THIS HEATER IS DESIGNED TO BURN THE FOLLOWING APPROVED FUELS:
Used 5W through 50W Crankcase Oils
No. 1 and No. 2 Fuel Oils
s4HE,ANAIR(EATERPROVIDESTHEOWNERWITHADEPENDABLEVERSATILEANDSIMPLEMEANSOF
BURNING.OAND.OFUELOILSAND7THROUGH7USEDCRANKCASEOILS-AINTAINED
CORRECTLYTHEHEATERWILLGIVEYOUYEARSOFSERVICE0LEASECAREFULLYREADTHISOWNERS
MANUAL)FINANYCASEYOUHAVEAPROBLEMWITHYOURHEATERORITSINSTALLATIONYOUSHOULD
CONTACTTHE,ANAIR#USTOMER3ERVICE$EPARTMENTAT
sThis heater is not designed for attachment or use with ductwork.
sDo not attempt to start the burner when excess oil, oil vapor, or fumes have
accumulated! Never press the red button on the oil primary control more than
twice! This could cause excess vapor, or fuel to ignite causing damage to the
heater and/or chimney.
sDo not store or use gasoline, or any other FLAMMABLE liquid and/or Vapors near this
heater.
sThis heater is not designed for use in hazardous atmospheres such as: 0aint Shops, Feed
Mills, installations WHEre explosiVe or FLAMMABLE conditions are present or could occur.
WARNING! Lanair heaters rely on natural draft. DoWN drafts (positiVe pressures)
in the heaters chimney WILL occur in BUILDINGS WHEre negatiVe pressures are created
By exhaust fans, (car exhaust, paint BOOTHs, etc). Do not try to use a poWer Vent to
oVercome a doWN draft (positiVe pressure). An adequate make-up air system is
required WHEN exhaust fans are used (consult your heating contractor).
!

Section 2 - Heater Install w/ Bypass Regulator
10a
Class “A”Chimney
Barometric Damper
2-3 ft. away from heater
Ceiling Hung
8 ft. min.
10 ft. max.
Secondary Air Regulator
Primary Air Regulator (not supplied)
Set to 30 lbs.
Chimney Connector
10 foot max. length
1/4”rise per foot of length
Chimney Cap
3 ft. taller than
any object within 10 ft.
10 ft.
min.
Fuel Line - 1/2” O.D.
Soft Copper
Room
Thermostat
Service
Disconnect
Main Power
120v - 60 hz 20 amp
Oil Bypass Regulator
Pump Assembly
Primary Strainer
1/2”Checkvalve
and Oil
Strainer
Supply Tank
16
17
19
20 23
14
24
13
12
13
18 25
11
10
9
2
5
1
15
21
22
8
8
11
3
4
6
7
1. Chimney Cap
2. Chimney Pipe (36”)
3. Storm Collar
4. Roof Flashing
5. Chimney Pipe (36")
6. Finishing Collar
7. Slip Connector (14")
8. Black Pipe (24")
9. Black Tee w/cap
10. Barometric Damper
11. Black Pipe (24")
12. Burner
13. Union
14.
15. Shut-off Valve
16. Shut-off Valve
17. Suction Line Strainer
18. Fuel Pump
19. Check Valve
20. Pick-up Tube Strainer
21. Thermostat
22. Service Disconnect
23. Tank Drain
24. Fill Pipe
25. Oil Bypass Pressure Reg.
★ Included with Heater
TYPICAL INSTALLATION:
HEATER/CHIMNEY PACKAGE
Through the roof installation
Figure 1
QUESTIONS?... Contact Customer Service at 1-888-370-6531 M-F 8:00 am- 4:15 pm CST
Tank Vent

Section 2 - Heater Install w/ Metering Pump
10b
Class “A”Chimney
Barometric Damper
2-3 ft. away from heater
Ceiling Hung
8 ft. min.
10 ft. max.
Secondary Air Regulator
Primary Air Regulator (not supplied)
Set to 30 lbs.
Chimney Connector
10 foot max. length
1/4”rise per foot of length
Chimney Cap
3 ft. taller than
any object within 10 ft.
10 ft.
min.
Fuel Line - 1/2” O.D.
Soft Copper
Room
Thermostat
Service
Disconnect
Main Power
120v - 60 hz 20 amp
Metering Pump
Primary Strainer
1/2”Checkvalve
and Oil
Strainer
Supply Tank
16
17
19
20 23
14
24
13
12
13
18
11
10
9
2
5
1
15
21
22
8
8
11
3
4
6
7
1. Chimney Cap
2. Chimney Pipe (36”)
3. Storm Collar
4. Roof Flashing
5. Chimney Pipe (36")
6. Finishing Collar
7. Slip Connector (14")
8. Black Pipe (24")
9. Black Tee w/cap
10. Barometric Damper
11. Black Pipe (24")
12. Burner
13. Union
14.
15. Shut-off Valve
16. Shut-off Valve
17. Suction Line Strainer
18. Fuel Pump
19. Check Valve
20. Pick-up Tube Strainer
21. Thermostat
22. Service Disconnect
23. Tank Drain
24. Fill Pipe
Tank Vent
★ Included with Heater
TYPICAL INSTALLATION:
HEATER/CHIMNEY PACKAGE
Through the roof installation
Figure 1
QUESTIONS?... Contact Customer Service at 1-888-370-6531 M-F 8:00 am- 4:15 pm CST

Section 2 - Heater Installation
Visit our website at: www.lanair.com
11
General Requirements
1. Do not install the heater on a combustible surface of any kind. For minimum clearance to
combustible material (see Page 9)
2. Install the heater in a location to utilize total heat throw.
3. Install the heater in a location to permit a correct outdoor chimney exit to eliminate
down drafts, and provide easy chimney installation and maintenance. Class A chimney
MUST be used when passing through any wall or ceiling. See Section 3 Chimney
Installation
4. Install the heater in a location to permit the fuel supply to be as close as possible.
5. Do not install the heater more than 10 feet above the top of the fuel supply tank.
6. Before suspending the heater check the supporting structure and reinforce if necessary
to support the weight of the heater/system.
7. Use 3/8” steel threaded rod to suspend the heater from a capable load carrying ceiling
structure when not using the Lanair Waste Oil Storage Tank.
8. The heater must be suspended level for proper operation. A heater that is not level could
cause a hazardous situation in which personal injury or property damage may result.
Adjustable Locking Louvers
The MX Series heaters feature spring
loaded locking louvers.To adjust:
sSlowly push the louver to the left
until the locking pin disengages.
NOTE: Do not allow the pivot pin
to come out of the hole.
sTilt the louver forward/backward
until desired position is obtained.
sRelease louver so locking seats
into the hole.
Pivot Pin.
NOTE: Do not
allow pin to
disengage while
adjusting

Section 3 - Chimney/Vent System
12
Class “A” Chimney
Barometric Damper
2-3 ft. away from heater
Ceiling Hung
8 ft. min.
10 ft. max.
Chimney Connector
10 foot max. length
1/4”rise per foot of length
Chimney Cap
3 ft. taller than
any object within 10 ft.
10 ft.
min.
Figure 2 - Typical Chimney Installation
NOTE: Class "A" components require a 2" clearance
from combustible materials. All other chimney compo-
nents require a minimum 18" clearance from com-
bustible materials
Failure to provide proper venting of the heater exhaust gases could
result in death, serious injury, and/or property damage. FOLLOW
CHIMNEY MANUFACTURERS INSTRUCTIONS.
!
General Requirements
1. Safe operation of any gravity vented heating appliance requires a proper air make-up
system to prevent the heater exhaust gases from being drawn into the building. These
gases could cause death, serious injury, and/or property damage. Exhaust fans, paint
booths may cause draft problems.
2. Never vent this heater into another heating appliances chimney. Never vent into “Class B”
chimney. Gas heaters use “Class B” chimney, it is rated for a much lower temperature than
is required for your waste oil furnace. This heater must have its own separate “Class A”
chimney.
3. Inspect and maintain the chimney on an annual basis.
QUESTIONS?... Contact Customer Service at 1-888-370-6531 M-F 8:00 am- 4:15 pm CST
(NOT TO SCALE)

Section 3 - Chimney/Vent System
Visit our website at: www.lanair.com
13
General Requirements (cont.)
4. Install a U.L. listed barometric damper in the chim-
ney. Do not reduce or enlarge the vent pipe.
5. Do not use more than one 90° elbow. Each 90°
NOTE: Do not install chimney in front of the heater (in air stream of fan)
elbow equals a 10’ run of chimney.The maximum
run for the chimney connector is 30’.
6. To prevent the drawing of exhaust gases into the
building, keep the barometric draft control at least
24” from the heater, exhaust fan etc..
7. Position the draft control as shown. Barometric
Damper gate pins must be horizontal (Parallel to
the floor) for proper operation.
8. Secure all connections in the chimney connector with 3 screws per joint.
9. The chimney connector clearance to any combustible material is 18”. The “Class A”
chimney clearance to any combustible is 2”. Follow the chimney manufacturer’s
instructions.
10. Do not install heat re-claimers, manual draft controls, or any other type of restrictive
control in the chimney.
11. Install clean out tee with a cap, at the transition of the chimney. FOLLOW CHIMNEY
MANUFACTURERS INSTRUCTIONS.
12. Use “Class A”insulated chimney pipe to vent exhaust gases through wall, ceilings, attics,
roofs, combustibles, etc. Class A chimney must be used for the entire run once passing
through a wall of ceiling.
13. Vent chimney at least 3 feet above the roof and at least 3 feet higher than any portion
of the building, roof, or obstruction within 10 feet of the chimney.
14. The chimney cap should be at least 3’ above the chimney exit through the roof.
15. Do not use a rotating chimney cap. Use a non-restrictive “Class A” cap made for the type
“Class A” chimney you are using. Follow chimney manufacturer’s instruction.
16. The chimney must be capable of producing a negative -.02 W.C. draft when cold and -
.06 W.C. draft when hot. Refer to Section 4 Draft Instructions. Refer to Section 3.10 for
typical Chimney Installation.
HORIZONTAL
VERTICAL
NOTE: Barometric Damper may
be mounted horizontally or
vertically. Angle gate pins
must be horizontal for proper
operation
Barometric Damper Position

Section 3 - Chimney/Vent System
QUESTIONS?... Contact Customer Service at 1-888-370-6531 M-F 8:00 am- 4:15 pm CST
14
17. If you are unable to attain the proper draft, check for exhaust fans in the building. To test
if there is a problem, open an overhead door and see if you now have the proper draft.
You may have to add one or more sections of “Class A” chimney to the roof to get the
proper draft.
18. The heater and chimney must be installed in accordance with all state and local
codes.The heater must be installed in accordance with the specifications listed in
this manual. The chimney must be installed per the chimney manufacturer’s
instruction. Use “Class A” chimney only.
Chimney Configurations Using Top Vent ( not to scale )
Left Exhaust
Through Roof
Right Exhaust
Through Wall
Right Exhaust
Through Roof
Left Exhaust
Install Cap
On Vent
Install Cap
On Vent
Install Cap
On Vent
Install Cap
On Vent

Section 4 - Draft
Visit our website at: www.lanair.com
15a
9570 By-Pass
Regulator
(included)
8398 Vacuum Guage (included)
9807 Primary Strainer
(included)
1/2” Copper Tube
(to Burner - not included)
8662 Check Valve
(included)
(included)
8748 Strainer Suction Line
PUMP
ASSEMBLY
(included)
PUMP
ASSEMBLY
(included)
1/2” Copper Tube
(to Burner - not included)
Bottom of strainer must be 6”
from the bottom of the tank
Tank Drain Plug
1/2” Pick-up Tube
(not included)
TOP VIEW
Figure 3
The Lanair heater should have a (negative) -.02 draft reading when cold, and a (negative) -.06
when hot. Check the heater when it is running after 45 minutes. If the reading is not what it
should be, adjust the barometric damper according to the instructions provided with the
damper.The draft reading should be taken with a manometer. Consult your heating contrac-
tor, or a manometer can be purchased from the Lanair Customer Service Department .
Section 5 - Fuel Supply Tank Install w/ Bypass Regulator
If using a Lanair supply tank follow instructions included with the tank.
!

Section 4 - Draft
Visit our website at: www.lanair.com
15b
8398 Vacuum Guage (included)
9807 Primary Strainer
(included)
8662 Check Valve
(included)
(included)
8748 Strainer Suction Line
METERING PUMP
ASSEMBLY
(included)
3/8” Copper Tube
(to Burner - not included)
3/8” Copper Tube
(to Burner - not included)
3/8” Copper Tube
(return to tank - not included)
Bottom of strainer must be 6”
from the bottom of the tank
Tank Drain Plug
1/2” Pick-up Tube
(not included)
TOP VIEW
Figure 3
The Lanair heater should have a (negative) -.02 draft reading when cold, and a (negative) -.06
when hot. Check the heater when it is running after 45 minutes. If the reading is not what it
should be, adjust the barometric damper according to the instructions provided with the
damper.The draft reading should be taken with a manometer. Consult your heating contrac-
tor, or a manometer can be purchased from the Lanair Customer Service Department .
Section 5 - Fuel Supply Tank Install w/ Optional Metering Pump
If using a Lanair supply tank follow instructions included with the tank.
!
3/8” Copper Tube
(return to tank - not included)
METERING PUMP
ASSEMBLY
(included)

Section 5 - Fuel Supply Tank Installation
16
General Requirements
1. The fuel supply tank and supply lines must be installed in accordance with the National
Fire Protection Association requirements, as well as State and Local ordinances.
2. Regulations require oil storage tanks located inside not too exceed 275 gallons individu-
ally, and are not to exceed a total capacity of 550 gallons in one building. Check State
and Local codes.
3. Locate the fuel supply tank inside the building as close to the heater as possible. It
should be no further than 25 feet from the heater to avoid oil flow problems.
4. The fuel supply tank must be mounted below the burner and the by-pass regulator (or
supply pump assembly when using the optional metering pump). Mounting the fuel
supply tank above the burner will create head pressure and over-fire the burner voiding
the warranty.
5. Pitch the fuel supply 2º with the drain valve at the lowest end to drain off water and
sludge. Sludge may have to manually be removed.
6. Some ordinances may require the fuel supply tank to be vented to outside
and above the roofline. Check State and Local codes. Keep the vent clear.
7. Install the fuel tank fill pipe at the end of the tank and above the drain.
8. Label the fuel tank for the recommended fuels.
9. Strain all fuel with a 50 X 50 mesh strainer before putting fuel into the tank.
10. When filling the fuel tank with a motorized pump, never leave unattended to prevent
over filling and/or spillage.
11. Keep cap on the fuel tank when not filling.
If using a Lanair supply tank follow instructions included with the tank.
!
For optimum performance, the waste oil pump manufacturer recom-
mends that multi-weight oils such as 5W-30W be maintained at 32˚ F
minimum and straight weight oils such as 40W and 50W be maintained
at 50˚ F minimum.
!
QUESTIONS?... Contact Customer Service at 1-888-370-6531 M-F 8:00 am- 4:15 pm CST

Section 6 - Fuel Supply Pump/Piping
Visit our website at: www.lanair.com
17
General Requirements
1. Mount the fuel supply pump in a horizontal position (shaft horizontal) near the fuel sup-
ply tank.
2. The oil pump has a maximum suction lift of 14 feet. Suction lift is the length of pipe run
from the bottom of the pick-up strainer to the fuel supply pump.
3. The fuel pump/motor are intended for indoor use only.
4. The fuel pump contains an internal strainer that periodically needs to be cleaned. This
internal strainer is mounted behind the pump cover. Before removing the pump cover
make sure you have a new gasket on hand. Contact the Lanair Customer Service
Department for the proper gasket for your model of pump, at 1-888-370-6531.
5. Install the suction supply line from the inlet side of the fuel pump into the fuel tank
opposite the drain.
6. Install a 1/2” inside diameter (.493) steel pipe, or 1/2” outside diameter copper through-
out the suction supply line and pick up tube. The use of smaller line, or rubber, plastic or
hydraulic line is unsafe and will void your warranty.
7. Use thread sealing compound on all pipe thread connections. Do Not Use Teflon Tape.
8. Install the suction line strainer in the suction line. Make sure the suction line strainer is 6”
off the bottom of the tank. The suction line strainer may be mounted horizontally or ver-
tically. Consider accessibility.
9. Install a 1/2” NPT pipe union between the suction line strainer and the pick up tube to
allow for service on the pick up tube.
10. Install the check valve (arrow facing towards the pump) on the bottom of the pick up
tube.
11. Install a vacuum gauge in the suction line.This gauge will indicate when service is need-
ed on the strainer, pump or connections.
12. When using a by-pass regulator install a 1/2” inside diameter (.493) steel pipe, or 1/2”
outside diameter copper from the fuel by-pass regulator (port marked “T”) to the fuel
supply tank. Do not allow this line to protrude into the tank more than 1”. The use of
smaller line, or rubber, plastic or hydraulic line is unsafe and will void your
warranty.
When using the optional Metering Pump install a 3/8” copper line from the tee on the
metering pump assembly to the fuel supply tank do not allow this line to protrude
below the level of the oil. The use of smaller line, or rubber, plastic or hydraulic line is
unsafe and will void your warranty.
13. Do not allow the fuel level in the tank to cover the return line.
Table of contents
Other Lanair Heater manuals
Popular Heater manuals by other brands

THE RADIATOR COMPANY
THE RADIATOR COMPANY Seta Groove Fitting instructions

Westinghouse
Westinghouse WSHPTCBN1901 instruction manual

Yoer
Yoer INFERNO OFR1025 manual

Dickinson
Dickinson Antarctic Diesel owner's manual

Adexa
Adexa CH-09FLCD instruction manual

KingShield
KingShield AC3000N installation instructions

SOLAC
SOLAC TROMSO Instructions for use

Atlantic
Atlantic Solius Ecodomo Series manual

PAMAPIC
PAMAPIC JHB-1500R User manual and warranty

Nibe
Nibe Heatrod Elements ThermTec HE A Series Fitting instructions

L.B. White
L.B. White I17 Owner's manual and installation instructions

Wilfa
Wilfa Lun Komfort POB-600 instruction manual