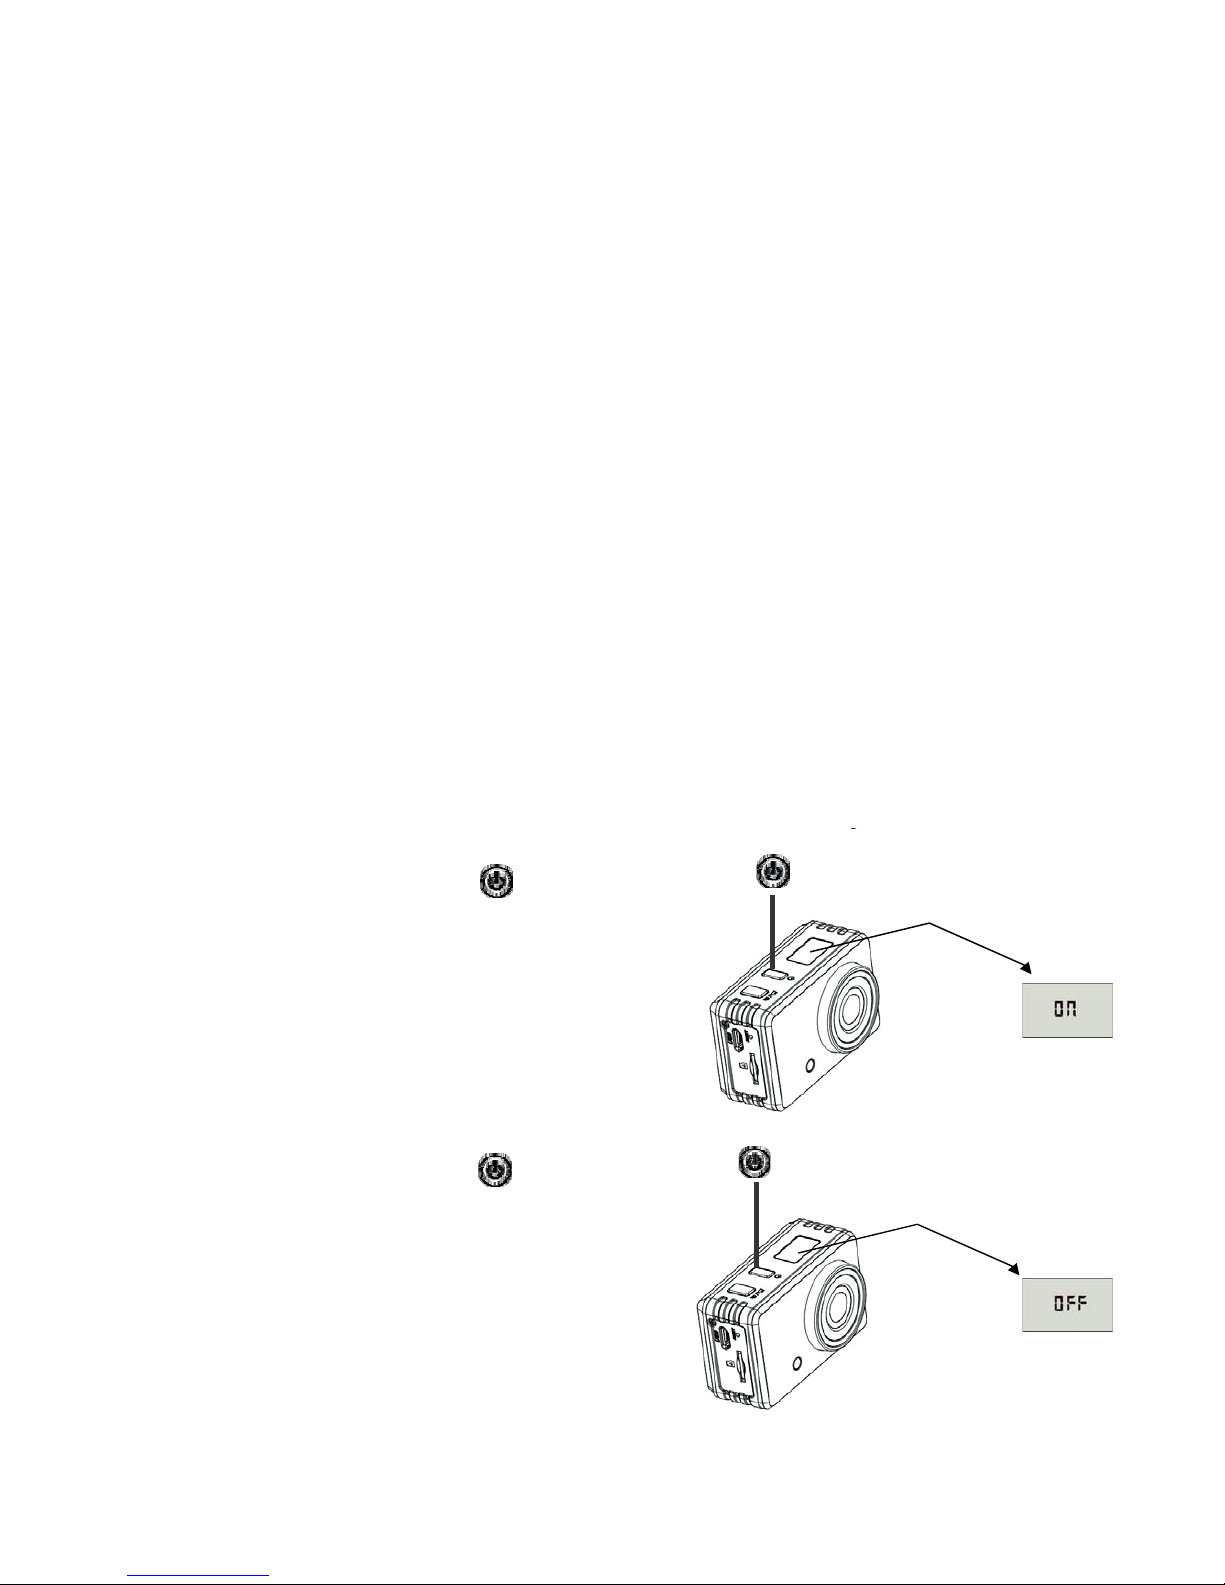
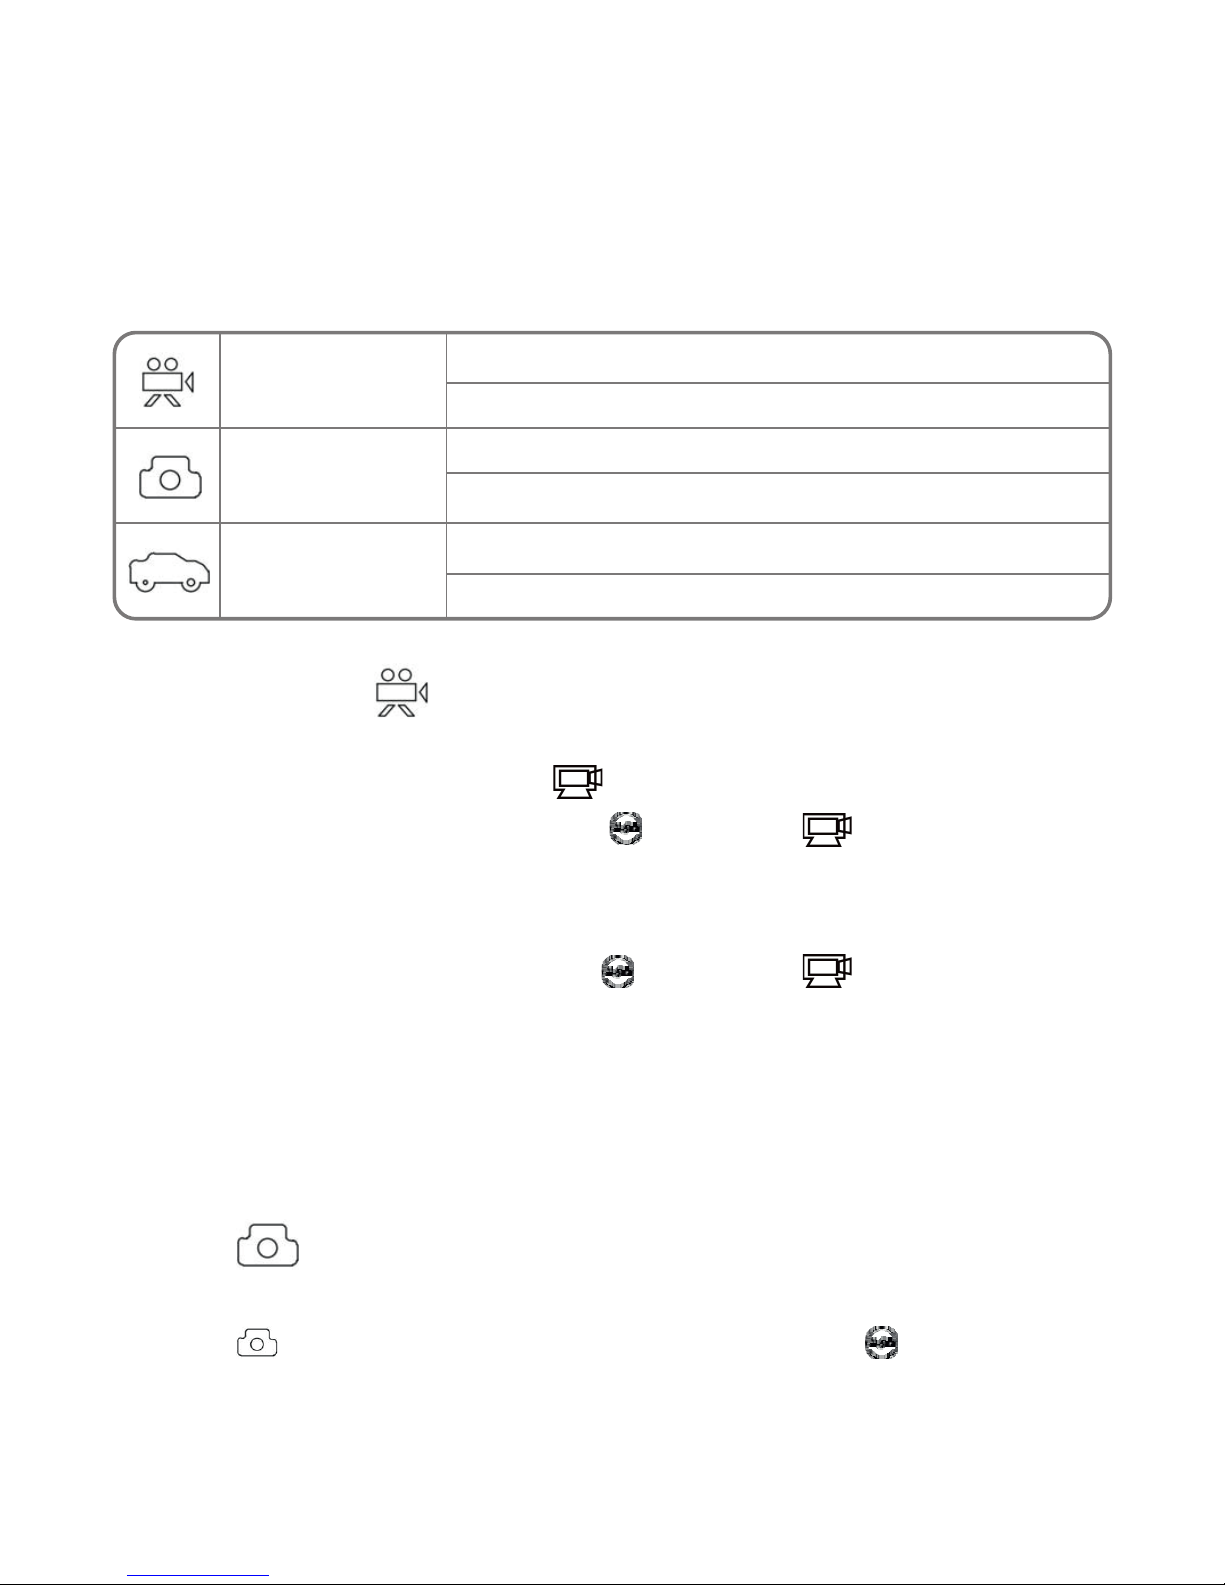
Lark FreeAction 200HD User manual

EN User manual 1
DE Benutzerhandbuch 1
CS Návod k obsluze 13
SK Návod na použitie 25
Instrukcja szybki start 37
PL
FreeAction
SPORTS CAMERA
200HD

Ďakujeme, že ste si kúpili FreeAction 200HD.
Pred prvým použitím si starostlivo prečítajte túto príručku, aby
ste dosiahli čo najlepšie výsledky a predĺžili životnosť výrobku.
Děkujeme Vám za nakup FreeAction 200HD.
Prosíme, před použitím přečtěte si pečlivě tento manual pro
dosahnuti co nejlepších výsledků a prodloužení životnosti
výrobku.
Vielen Dank für den Kauf FreeAction 200HD.
Vor dem Gebrauch lesen Sie bitte sorgfältig dieses Handbuch,
um die besten Ergebnisse zu erzielen und die Lebensdauer des
Produkts zu verlängern.
Thank you for buying our FreeAction 200HD.
Before start using this product, please read this manual
carefully to maximize its performance and extend
the life of the product.
Dziękujemy za zakup FreeAction 200HD.
Przed rozpoczęciem użytkowania prosimy o staranne
przeczytanie tego podręcznika, aby osiągnąć jak najlepsze
wyniki oraz wydłużyć czas użytkowania wyrobu.
1

Přeškrtnutý symbol odpadkového koše znamená, že na území Evropské unie je
třeba výrobek po skončení jeho životnosti odevzdat na zvláštním sběrném místě.
Tytovýrobky se nesmějí vyhazovatjakoběžný netříděnýkomunálníodpad.
Die durchgestrichene Mülltonne bedeutet, dass innerhalb der Europäischen
Union nach dem Gebrauch des Produktes muss in einem separaten verworfen
werden, die speziell von diesem Punkt aus entwickelt. Sie diese Produkte
entsorgenunsortierten Hausmüll.
Prečiarknutý symbol smetného koša označuje, že na území Európskej únie
je potrebné výrobok po skončení používania zlikvidovať na zvláštnom mieste
určenom špeciálne na tento účel. Tieto výrobky sa nesmú vyhadzovať spolu
snetriedenýmkomunálnymodpadom.
Przekreślony symbol pojemnika na śmieci oznacza, że na terenie Unii Europejskiej
po zakończeniu użytkowania produktu należy się go pozbyć w osobnym,
specjalnie od tego przeznaczonym punkcie. Nie należy wyrzucać tych produktów
razemz niesortowanymiodpadamikomunalnymi.
The symbol to the left means that according to European Union laws and
regulations yourproduct and/or its battery shall be disposed of separately from
household waste. When this product reaches its end of life, take it to a collection
point designated by local authorities. The separate collection and recycling
of your product and/or its battery at thetime of disposal will help conserve natural
resources and ensure that it is recycled in a manner that protects human health
andthe environment.
2

Before you begin
Safety and handling
Prevent your device and accessories from getting wet. Getting electrical
equipment wet not only causes serious damage, but it is also a threat to
the user (risk of electric shock).
Protect your device against shocks, falls and vibrations.
Protect the device from high and low temperatures.
Do not drop, bend, puncture, insert foreign objects, or place heavy objects
on your device.
Do not use unauthorized accessories, as the may damage the device and
void manufacturer's warranty.
Important safety instructions
Be sure to follow instructions bellow. Make sure that they are known to all
users of your device, including children.
Turn off the device in the plane for the whole ight or during take-off and
landing, according to the instructions given by the aircraft personnel.
Switch off the device near important electronic devices, which could be
disrupted by possible interference.
Do not attempt to disassemble, modify or repair the device. Always
entrust these tasks to authorized specialist.
Protect your device from strong magnetic elds. These elds can damage
magnetic storage media.
Do not use the device in very high temperatures or in areas at high risk of
re or explosion, such as petrol stations.
Supervise the use of the device by children, do not let them play with the
device unattended.
3
EN

Appearance and Buttons
1. Shutter button
2. LCD display
3. Power button
4. Lens
5. Indicator Light for charging (Red)
6. Microphone
7. Working Indicator Light (Blue)
8. Mode Switch
9. Micro USB port
10. Micro SD card slot
11. Reset button
4

LCD Display
Turn on the Sport DV, the LCD will display the following status and settings:
1. Camera mode
2. Video recording mode
3. vehicle-mounted mode
4. TF card icon (display when loaded)
5. Resolution icon:
In camera mode, stands for 3.1 Mega Pixels (2048×1536), and in videoHI
recording and vehicle-mounted mode, it stands for 720P.
In camera mode, stands for 1.3 Mega Pixels (1280x1024), and in videoLO
recording and vehicle-mounted mode, it stands for 640P.
6. Battery icon: current battery level of the camera.
7. Counter, displays up to 9999.
8. Timer, displays minutes and second.
NOTE:
The above icons may vary according to the status of the DV.
5

Working Mode Flow Chart
When you use the DV for the rst time,please:
Insert a micro SD or micro SDHC card, as shown in the following picture.
Vehicle-mounted mode Vehicle-mounted mode Camera mode
Video recording mode Video recording mode Camera mode
Mode
switch
Power
button
Power
button
Power
button
Mode
switch
Mode
switch
After turn on the DV, you can change the Power button/Mode switch to switch
the following modes in turn:
In video recording and vehicle-mounted mode , press the Shutter button
to start recording, Working Indicator Light ash .,and press it again to stop
In camera mode, press the Shutter button to take photo.
How insert microSD card?
High speed card at least Class 4 is recommended.
Turn off the DV before inserting or removing the card.
6

The DV uses built-in rechargeable lithium battery. When the DV is off,
connect it to the PC via USB cable to charge the battery. During charging,
indicator light for charging will light on, and the indicator off when charging
completes.
NOTE:
When the DV is on, connecting it to the PC will not charge. It will not charge
until the DV turn off.
Turn on/off
1. Turn on:
Press and hold the button for about
2 seconds, LCD displays“ON” .
NOTE:
The DV will turn off automatically
if it is idle for 5 minutes.
1. Turn off:
Press and hold the button for about
2 seconds, LCD displays“OFF”.
Charging the battery
7

Start to Use
1. Video recording
To record a video, please check whether the DV is under Video mode.
The icon is played on the screen .
Start recording: Press and release the button, the icon and [:]
displayed in LCD will ash. At the same time the blue indicator will ash
too, meaning the recording is in process.
Stop recording: Press and release the button, the icon and [:]
displayed in LCD will stop ashing. At the same time the blue indicator
will stop ashing either, meaning the recording is stopped.
When the TF card is full, or the battery runs out, the recording will stop
automatically, and the recorded video will be saved before the DV turns off.
2. Photo
To take a photo, please check whether the DV is under Camera mode.
The icon is played on the screen. Press and release the button, the blue
indicator will ash, meaning a photo is taken.(If you take photos more than
9999 copies, the LCD screen display only 9999).
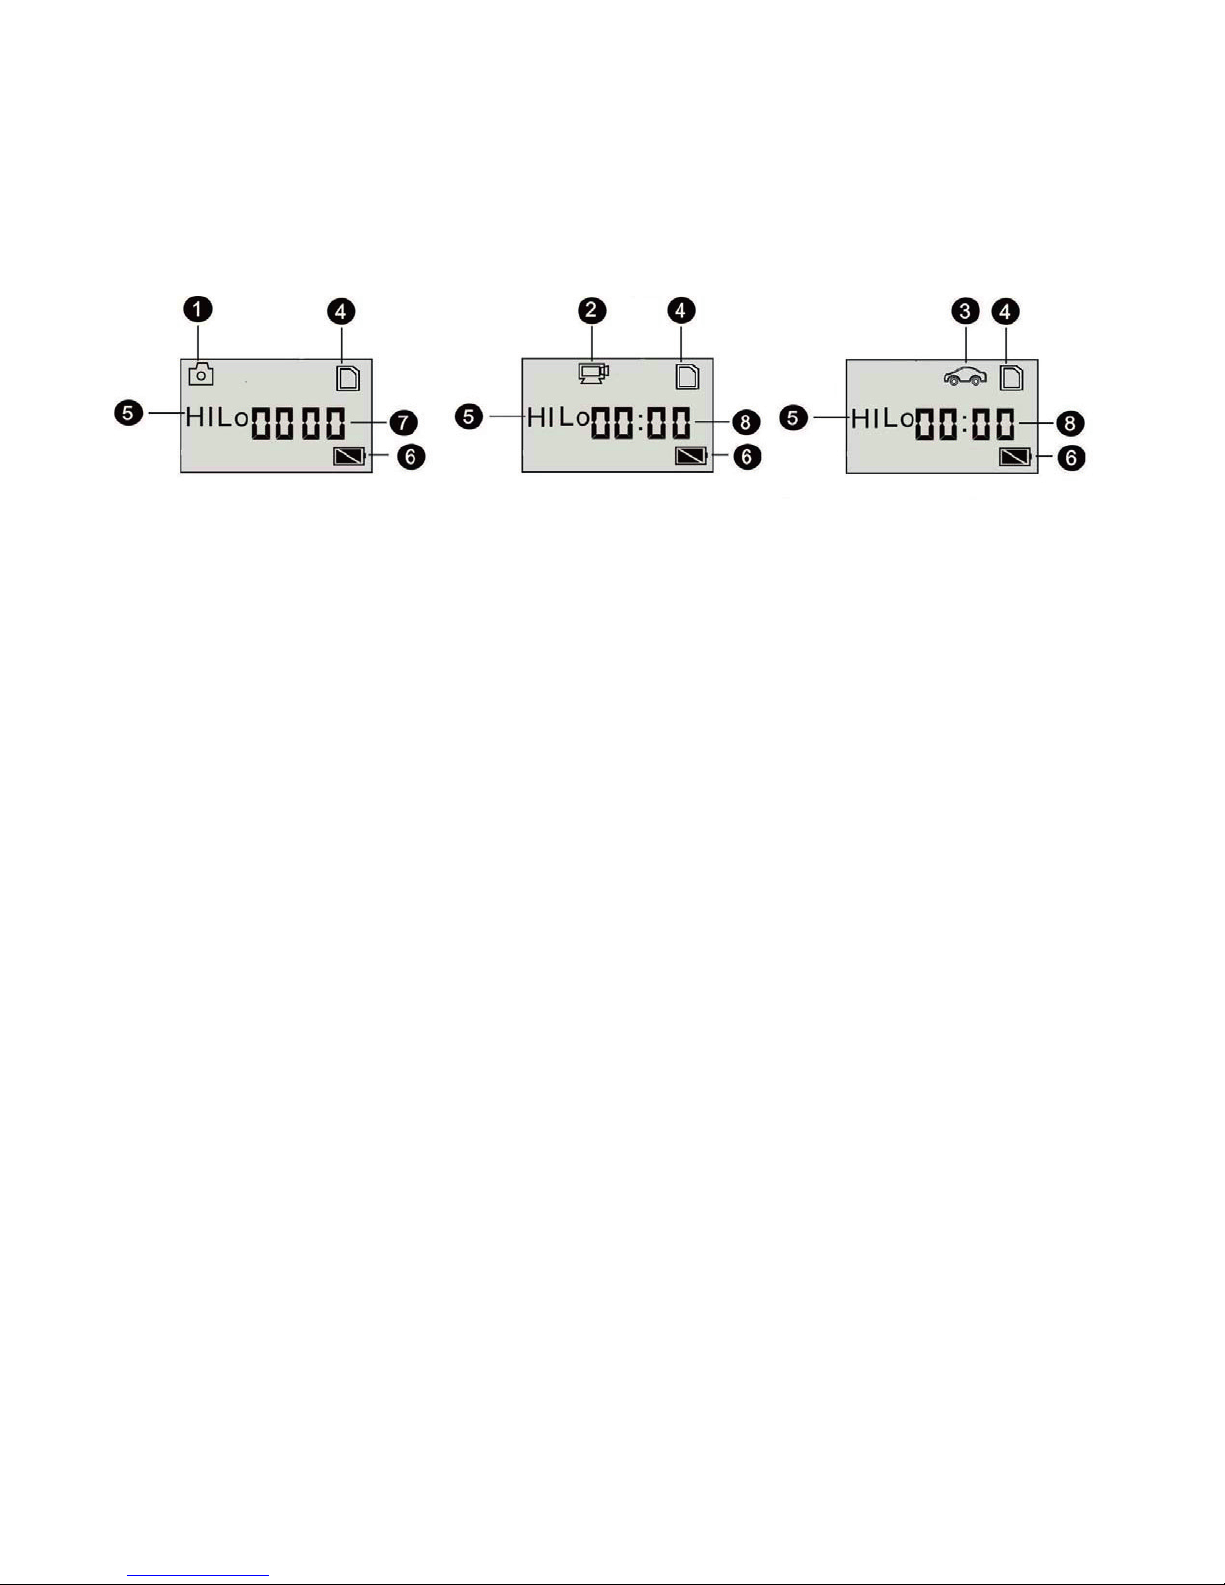
The DV provides different shooting modes. Conversion is available
via the mode switch after startup:
Vehicle-mounted
mode
Video recording
mode
Picture taking
mode
HI stands for 720P (1280x720,30 fps) video
Lo stands for 640P (640x480,60 fps) video
HI stands for 5M (2592 x 1944) resolution
Lo stands for 1M (1280x 960) resolution
HI stands for 720P (1280x720,30 fps) video
Lo stands for 640P (640x480,60 fps) video
8

3. Vehicle-mounted recording
To record a video, please check whether the DV is under Vehicle-mounted
mode. The icon is played on the screen.
Start recording: Press and release the button, the icon and [:]
displayed in LCD will ash. At the same time the blue indicator will ash
too, meaning the recording is in process.
Stop recording: Press and release the button, the icon and [:]
displayed in LCD will stop ashing. At the same time the blue indicator
will stop ashing either, meaning the recording is stopped.
Press the shutter button once under the preview state to begin recording, save
a segment for recording every 3 minutes, then start to record the next segment
of video. When the storage card is full, the earliest segment of video will
be deleted to release the corresponding space for continuous recording.
4. Connecting to PC
Turn on the DV and connect it to the USB port
of the PC via the attached USB cable.
The DV will enter U-disk mode and the LCD will
display [PCO] after connection:
Now you can view the photos or videos taken
by DV on PC.
In U-disk mode (PCO mode), press the Shutter
button to switch to web cam mode (PCC mode),
and the LCD will display [PCC].
Now you can start the web cam through application.
To return to U-disk mode (PCO mode), press
the button again.
NOTE:
Driver is not required for web cam mode (PCC mode) on Windows XP(SP3)
version or above.
9

10
DE
SICHERHEIT
Schutz und Pflege der Ausrüstung
Schützen Sie Ihr Gerät und Zubehör von Begleit Wasser und Feuchtigkeit.
Dämpfung der elektrischen Ausrüstung können die schweren verursachen
Schäden können auch eine Gefahr für den Benutzer (Risiko Stromschlag).
Schützen Sie das Gerät vor starken Erschütterungen, Stürzen, Vibrationen.
Schützen Sie das Gerät vor hohen und niedrigen Temperaturen.
Stürze vermeiden, das Gerät nicht werfen, Punktion das Gehäuse.
Das Gerät nicht verbiegen.
Verwenden Sie nicht das Zubehör unbekannter Herkunft kann zu
Beschädigungen Gerät ein und aus der Herstellergarantie.
Wichtige Sicherheitshinweise
Beachten Sie unbedingt die folgenden Regeln. Bezeichnen sie als ältere
Kinder, die die Vorrichtung verwenden kann.
In Krankenhäusern und anderen medizinischen Einrichtungen kann
untersagt werden Verwendung von elektronischen Geräten. Befolgen Sie
immer diese Verbote.
Schalten Sie Ihr Gerät im Flugzeug für die Dauer des Fluges oder bei Start
und Landung, wzależności von Anweisungen des Service-Ebene
ausgestellt.
Schalten Sie das Gerät in der Nähe wichtig für elektronische Geräte, die
den Betrieb stören könnten jegliche Einmischung.
Versuchen Sie nicht, zu zerlegen, zu modifizieren oder zu reparieren das
Gerät. Immer solche Aufgaben zu betrauen autorisierten Fach.
Schützen Sie das Gerät vor starken Magnetstrahlung. Ein solches Feld kann
magnetische Datenträger beschädigen.
Das Gerät an Orten verwenden, nicht mit extrem hohen Temperaturen
oder in besonders gefährdeten Gebieten von Brand oder Explosion, zum
Beispiel an Tankstellen.
Überwachen die Verwendung der Geräte von den Kindern, lassen Sie sich
nicht mit dem Gerät spielen.

Aussehen und Tasten
1. Auslöser
2. LCD-Display
3. Power-Taste
4. Linse
5. Ladekontrollleuchte (rot)
6. Mikrofon
7. Arbeitskontrolleuchte (blau)
8. Modusschalter
9. Mikro-USB-Anschluss
10. Mikro-SD-Kartenslot
11. Reset-Taste
11

LCD-Display
Schalten Sie die DV an; das LCD-Display wird folgende Status-Informationen
und Einstellungen zeigen:
1. Kamera-Modus
2. Videoaufnahme-Modus
3. Fahrzeugmodus
4. TF-Karte-Symbol (gezeigt wenn aufgeladen)
5. Auösung-Symbol
Im Kamera-Modus steht HI für 3,1 Megapixel (2048×1536), und in
Videoaufnahme- und Fahrzeugmodus steht es für 720P (1280x720,30fps);
Im Kamera-Modus steht LO für 1,3 Megapixel (1280x1024), und in
Videoaufnahme- und Fahrzeugmodus steht es für VGA (640x480,60fps);
6. Batterie-Symbol: aktueller Batterieladezustand der Kamera
7. Zähler, zeigt bis zu 9999.
8. Timer, zeigt Minuten und Sekunden.
ACHTUNG!
Die oben beschriebenen Symbole können nach dem Stand der DV variieren.
12

Arbeitsmodus Flow Chart
Wenn Sie die DV zum ersten Mal benutzen, bitte:
Legen Sie eine Mikro-SD oder Mikro SDHC-Karte ein, wie in der folgenden
Abbildung dargestellt.
Video-Vorschau-Modus Video-Vorschau-Modus Kamera-Modus
Modus-
Schalter
Power-
Taste
Power-
Taste
Power-
Taste
Modus-
Schalter
Modus-
Schalter
Nach dem Einschalten der DV, können Sie die Power-Taste / Modus-Schalter
drücken, um zwischen den folgenden Modi zu wechseln:
Im Videoaufnahme- und im Fahrzeugmodus drücken Sie den Auslöser, um die
Aufnahme zu starten; Arbeitskontrollleuchte blinken; und drücken Sie ihn
erneut, um zu stoppen.
Im Kamera-Modus, drücken Sie den Auslöser, um Fotos zu machen.
microSD-Karte
High-Speed-Karte, mindestens Klasse 4, empfohlen.
Schalten Sie die DV aus vor dem Einlegen oder Entfernen der Karte.
13

Die DV nutzt eingebaute wiederauadbare Lithium-Batterie.
Wenn die DV ausgeschaltet ist, schließen Sie sie an den PC über USB-Kabel
und die DV wird eingeschaltet. Bitte schalten Sie die DV aus, und die
Ladekontrollleuchte leuchtet auf. Während der Auadung leuchtet die
Ladekontrollleuchte auf, und wenn der Ladevorgang beendet wird, wird
die Ladekontrollleuchte ausgeschaltet.
ACHTUNG:
Wenn die DV eingeschaltet ist, wird das Auaden nicht nach dem Anschließen
an den PC starten. Das Auaden ndet erst nach dem Ausschalten der DV statt.
Ein-/Ausschalten
2. Ausschalten:
Drücken und 3 Sekunden halten ,
LCD-Display zeigt“OFF” .
1. Einschalten:
Drücken und 3 Sekunden halten ,
LCD-Display zeigt“ON”
ACHTUNG!
Die DV wird automatisch nach
5 Minuten ohne Tätigkeit ausgeschaltet.
Auaden der Batterie
14

Benutzung
1. Videoaufnahme-Modus
Um ein Video aufzunehmen, überprüfen Sie bitte, ob die DV im Video-Modus
ist. Das Symbol wird auf dem LCD-Display gezeigt.
Aufnahme starten: Die Taste drücken und loslassen, das Symbol
und [:] auf dem LCD-Display blinken. Zur gleichen Zeit blinkt die blaue
Kontrollleuchte auch, was bedeutet, die Aufnahme läuft.
Aufnahme stoppen: Die Taste drücken und loslassen, das Symbol
und [:] auf dem LCD-Display hören auf zu blinken. Zur gleichen Zeit hört die
blaue Kontrollleuchte auf zu blinken, was bedeutet, die Aufnahme wird
gestoppt.
Wenn die TF-Karte voll ist oder die Batterie leer ist, wird die Aufnahme
automatisch gestoppt, und das aufgenommene Video wird gespeichert vor
Ausschalten der DV.
2. Kamera-Modus
Um ein Foto zu machen, überprüfen Sie bitte, ob die DV im Kamera-Modus ist.
Das Symbol wird auf dem LCD-Display gezeigt.
Die Taste drücken und loslassen, die blaue Kontrollleuchte blinkt, was
bedeutet, ein Foto wird gemacht. (Wenn Sie mehr als 9999 Fotos machen,
zeigt das LCD-Display nur 9999).
Die DV bietet verschiedene Aufnahmemodi. Umstellen ist über die Modus-
Schalter nach Starten möglich:
Fahrzeug
-Modus
Videoaufnahme
-Modus
Fotos
-Modus
HI steht für 720P (1280x720, 30 fps) Video
LO steht für VGA (640x480, 60 fps) Video
HI steht für (2048×1536) Auösung
LO steht für (1280×1024) Auösung
HI steht für 720P (1280x720, 30 fps) Video
LO steht für VGA (640x480, 60 fps) Video
15

3. Fahrzeugmodus
Um ein Video aufzunehmen, überprüfen Sie bitte, ob die DV
im Fahrzeugmodus ist.
Das Symbol wird gezeigt.
Aufnahme starten: Die Taste drücken und loslassen, das Symbol
und [:] auf dem LCD-Display blinken. Zur gleichen Zeit blinkt die blaue
Kontrollleuchte auch, was bedeutet, die Aufnahme läuft.
Aufnahme stoppen: Die Taste drücken und loslassen, das Symbol
und [:] auf dem LCD-Display hören auf zu blinken. Zur gleichen Zeit hört die
blaue Kontrollleuchte auf zu blinken, was bedeutet, die Aufnahme wird
gestoppt.
Drücken Sie den Auslöser einmal im Vorschau um die Aufnahme zu starten,
speichern Sie ein Segment der Aufnahme alle 3 Minuten, dann starten Sie das
nächste Segment der Video aufzunehmen. Wenn die Speicherkarte voll ist, wird
der früheste Videosegment gelöscht, um den entsprechenden Raum für das
kontinuierliche Aufnehmen freizugeben.
4. Anschluss an PC
Schalten Sie die DV ein und schließen Sie sie an den
USB-Anschluss des PC über das USB-Kabel
(angeschlossen).
Die DV wird ins U-Disk-Modus eingehen und das
LCD-Display wird nach dem Anschluss folgendes [PCO]
Jetzt können Sie die Fotos oder Videos von der DV
auf dem PC anschauen.
In U-Disk-Modus (PCO-Modus), drücken Sie den
Auslöser um in den Web-Cam-Modus (PCC-Modus)
zu wechseln, und das LCD-Display wird [PCC]:
Jetzt können Sie die Web-Cam durch die App starten.
Um nach U-Disk-Modus (PCO-Modus) zurückzukehren, drücken Sie die Taste
wieder.
ACHTUNG!
Treiber ist nicht für die Web-Cam-Modus (PCC-Modus) auf Windows XP (SP3)
oder höher erforderlich.
16

17
CS
BEZPEČNOST
Ochrana a údržba zařízení
Chraňte zařízení a příslušenství před vodou a vlhkostí.
Při styku elektrického zařízení s vodou může dojít nejen k jeho
závažnému poškození, ale vzniká také riziko pro uživatele (riziko úrazu
elektrickým proudem).
Chraňte zařízení před silnými otřesy, pádem, vibracemi.
Chraňte zařízení před vysokými a nízkými teplotami.
Dávejte pozor, aby zařízení neupadlo, neházejte s ním, neprorážejte kryt.
Neohýbejte zařízení.
Nepoužívejte příslušenství neznámého původu, které může způsobit
poškození zařízení, na něž se nevztahuje záruka výrobce.
Důležité bezpečnostní pokyny
Seznamte s nimi také starší dětí, které mohou zařízení používat.
V nemocnicích a jiných zdravotnických zařízeních může platit zákaz
používání elektronických zařízení.
Vypínejte zařízení v letadle po celou dobu trvání letu nebo při startu
a přistání, v závislosti na pokynech obsluhy letadla.
Vypínejte zařízení v blízkosti důležitých elektronických zařízení, jejichž
provoz by mohl být rušen případnými interferencemi.
Nepokoušejte se rozšroubovávat, pozměňovat ani samostatně opravovat
zařízení. Tyto činnosti vždy svěřte autorizovanému servisu.
Chraňte zařízení před silným magnetickým zářením. Takovéto pole může
poškodit magnetické paměťové nosiče.
Nepoužívejte zařízení v místech s velmi vysokou teplotou nebo
v oblastech s vysokým rizikem požáru nebo výbuchu, apříklad
na benzínových stanicích.
Používají-li zařízení děti, mějte je pod dohledem a nenechte je hrát si
s zařízení o samotě.

Vzhled a tlačítka
1. Tlačítko spouště
2. Wyświetlacz LCD
3. Tlačítko napájení
4. Objektiv
5. Indikator (dioda) nabíjení (rudý)
6. Mikrofon
7. Indikator (dioda) práce Kamery DV (modrá)
8. Přepínač režimů
9. micro-USB konektor
10. Slot MicroSD karet
11. Tlačítko Reset
18

LCD obrazovka
Po zapnutí Dv kamery na displeji se zobrazí nasledující stav a možnosti
nastavení:
1. Režim fotoaparatu
2. Režim video nahravání
3. Režim auto rekordéru
4. Ikona microSD karty (jen, když je karta uvnítř)
5. Ikona rozlišení:
V režimu fotoaparatu ikona HI znamena rozlišení 3,1 megapixelů
(2048×1536), v režimu video nahravání a v režimu autorekordéru znamena
rozlišení 720p (1280x720, 30 snímků/s).
V režimu fotoaparatu ikona LO znamena rozlišení 1,3 megapixelů
(1280x1024), v režimu video nahravaní a v režimu autorekorderu znamena
rozlišení 720P (VGA (640x480, 60 snímků/s).
6. Ikona baterie: aktuální stav nabití baterie videokamery
7. Počítadlo, zobrazí hodnoty až do 9999.
8. Hodin, zobrazuje minuty a sekundy.
POZOR!
Tyto ikony se mohou lišit v závislosti na stavu váše DV kamery.
19
Table of contents
Languages: