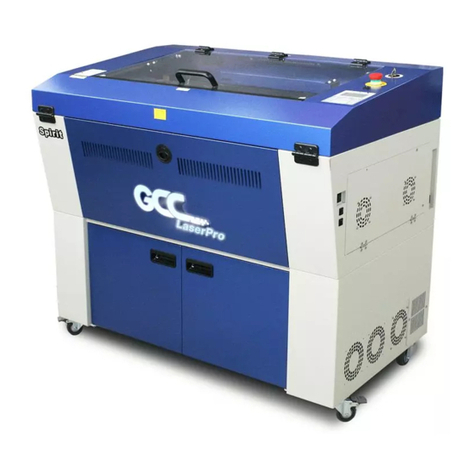
LaserPro Spirit User manual

1
Manual LaserPro Spirit

CONTENTS
1. OBJECTIVE p 2
2. INTRODUCTION AND MATERIALS p 2
3. PREPARING YOUR DRAWING p 3
4. WORKFLOW p 4
4.1. Preparation
4.2. Printing
4.3. On the lasercutter
4.4. Control
4.5. Cutting/ engraving
4.6. Taking out the material/clean up
5. TIPS p 7
* manual by Kurt Van Houtte, updated by Veerle De Ridder

3
1. OBJECTIVE
The objective of this workshop is to teach you how to use the laser cutter in a safe way
and without damaging the machine.
The objective is NOT to show you all functionalities of the machine, but rather to give
you a starting point from where you can start testing the possibilities on your own.
2. INTRODUCTION AND MATERIALS
Our laser cutter is a 25 Watt LaserPro Spirit.
This machine can cut and engrave at materials like paper, cardboard,
wood, acryl, textiles, rubber, and more with a laser.
The machine does not cut metal.
(A vector-hairline will be cut, wider lines and images will be engraved.)
- Mechanical Resolution: 0.02mm
- Driver Software: CorelDraw
- Accepted letypes :
AI(version 8), DXF, DWG(2004), SVG, EPS, JPG, PNG
- Maximal working surface: 640 x 460 mm
- Maximal thickness: mdf or triplex up to 4mm, plexi up to 8mm
WHAT NOT TO CUT!!!
The lab has a number of materials in stock, but you are also allowed to bring your own
materials. However, not all materials are allowed or possible for use in the laser cutter.
DO NOT USE:
* PVC, polyvinylchloride, the fumes are toxic and damage the lens.
* PC, polycarbonaat, this material burns
* THERMOSETS, all plastics that are not meltable,
like PU en bakelite
When in doubt, ask for advice from a lab supervisor.
To give you an idea: a new lens costs 400 euros. Treat the machine with care.

4
3. PREPARING YOUR DRAWING
On the laser, you can use up to 16 colors in one drawing.
Take into account that dierent types of software may use dierent line thicknesses.
Make sure that lines you want to cut are drawn in 100% RGB red.
Important:
- Anything you want to cut needs to be a vector,
and needs to be converted into a hairline.
- Use black to engrave. This can be a thicker line or an image.
- Use red for lines you want to cut.
- It’s best to engrave rst and cut after.
- For complicated designs that need to be precise, you can use several colors to cut.
It’s best to compose your design in such a way that it is lasered from the inside out,
since the material can shift a little when cut loose. This can cause small deviations.
The laser follows the order of the colors shown in CorelDraw when you set
your values for speed and power, working from the yop down.
By taking this into account, you can determine the order in which lines will be cut
and engraved.

5
4. WORKFLOW
4.1. Preparation
1. Place you le on the server:
- On the computer, go to Network places.
- Go to FabLab on 192.168.88.201
- Log in with Username pro and password pro
- In 001_USERS, make a folder with your name.
In this folder, you can save your les.
2. Open “new from template” in CorelDraw and choose the “Spirit laser” template.
This template has the same size as lasercutter, this way, you can easily posiyion your
designs. The point of origin is always in the top lefthand corner.
3. Import your le.
4. Change the line weight of those lines you want to cut to hairline.
It’s best to always change your colors to the colors in CorelDraw.
4.2. Printing
Givethe print command Crtl+P
1. Choose ‘Spirit’ as your printer.
2. Go to ‘Preferences’ for the print settings.
3. Under ‘Mode’, choose the ‘Manual Color Fill’ setting.
3. Go to ‘Pen’ for the cutting and engraving settings. Select per color what
action you want the laser to perform, with the right settings for the type
of material you are using.
- Check the ‘vector’ box to cut, or ‘raster’ to engrave
- Speed = your cutting speed. A lower speed means you cut deeper.
- Power = the power intensity with which the laser cuts, from 0 to 100%
- A higher value means more power.
4. Go to ’Advanced’ to set your starting position.
To make the laser start in the upper left corner, choose ‘Home’ as your
‘Position’ setting. To determine the laser’s starting point manually, choose ‘Relative’
as your ‘Position’ setting.
5. Click OK
6. Click ‘Print’. Your job is now added to the laser’s waiting list.

6
4.3. On the lasercutter
Before you start make sure the compressor and the suction are on!!!
If you don’t know how to do this, ask assistance from a lab supervisor.
1. Turn on the machine. (the switch is located on the right side of the machine)
2. Place your material in the upper left corner of the machine.
3. Press one of the arrows in the middle of the dashboard to unlock the
laser head. Manually move the laser head to a location above the material.
4. If you chose ‘Relative’ as a printing setting during your preparation,
manually move the laser head to your preferred starting point.
5. Attach the autofocus pen to the laser head and press ‘Autofocus’ on
the dashboard.
If autofocus function displays an error, you can focus manually with the
wooden guide. You do this by manually moving the bed up and down
with the arrow buttons above and under the autofocus button.
The distance needs to be about 29,5 mm. Be carefull! Never leave the wooden
guide under the laser head while moving the bed.
6. Press ‘Back’, so you see the name of your job on the screen again.
7. Remove the autofocus pen from the laser head.

7
4.4. Control
1. Leave the lid open and press START/STOP.
The laser will now do a test run without actually turning on the laser.
2. Check to see if the red pointer never goes beyond the edge of the material.
3. If you are satised with the test, you can stop it by pressing the red
START/STOP button again.
4.5. Cutting / engraving
1. Close the lid and push the red START/STOP button.
2. The machine will beep once it’s ready. Wait for 10 seconds before
opening the lid. This will allow for the suction to remove gasses.
ATTENTION! Always stay near the laser cutter! If something starts to burn,
lift the lid. This will stop the laser and the ame will go out.
4.6. Taking out the material / clean up
Take out the main sheet of material and your cut out designs.
Left over material gets sorted into recycling bins by material.
Depending on your design, there might be small pieces of material that get stuck in the
grill underneath. These need to be removed! To remove them, you van use the vacuum
cleaner or the small brush next to the laser.

8
5. TIPS
- Next to the laser cutter, you will nd a notebook with speed and power values for
dierent materials. If you are using a new material, always do a small test.
- Make a small test cut by drawing a small circle, selecting it, and choosing
‘print selection’.
- Make sure this test cut is not on a piece of your material that you plan to use
for your actual design.
This is a good way to test your speed and power settings on a material for which we
don’t have settings in our list yet. If you work out good values for a new material,
please add them to our list in the notebook next to the laser cutter.
- Makes sure your material lies at on the bed. If your material curves too much,
the focus will vary too much. This may cause the laser to not cut through the
material in certain areas of the material.

9
Table of contents
Other LaserPro Engraver manuals