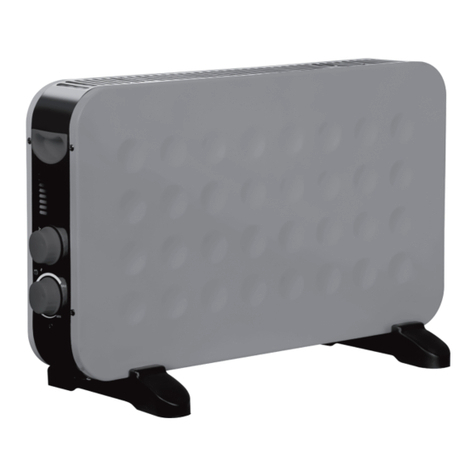
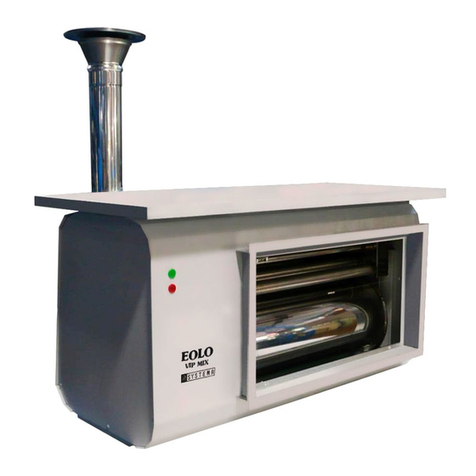
Laurens Cortinix User manual

Einbaueinleitung für Cortinix, Tetrix, Onyx, Rossix,…
Istruzioni di montaggio Cortinix, Tetrix, Onyx, Rossix,…
Inst. instructions for Cortinix, Tetrix, Onyx, Rossix,…
Montážní instrukce pro Cortinix, Tetrix, Onyx, Rossix,...
Fig.1
DE: Heizkörper werden normalerweise inklusive Halterung ausgeliefert. Die Befestigung erfolgt mit
Wandhacken auf die von oben der Heizkörper gehängt wird. Von unten wird der Heizkörper Abstandhalter
und Anschlüsse fixiert. Größere und schwerere Heizkörper werden bereits mit mehreren Halterungen von
der Produktion ausgeliefert. Die Teile der Halterung sind von Hinten am Heizkörper bereits vorinstalliert und
die Position von den Halterungen sollte nicht geändert werden.
ACHTUNG: Bitte verwenden Sie nur die mitgelieferten Halterungen nur in Kombination mit den passenden
Wandbefestigung (Schrauben/Dübel/etc.). Wenn Sie nicht alle mitgelieferten Halterungen (Wandhacken)
von Laurens gebrauchen, kann der Heizkörper wegen der schlecht aufgeteilten Traglast von der Wand unter
fallen und Personen / Tiere verletzten bzw. Gegenstände am Boden beschädigen.
IT: Il radiatore viene normalmente fornito con gli attacchi per il fissaggio a muro già correttamente
posizionati. Per la maggior parte dei radiatori sono sufficienti due ganci inferiori posizionati il più
esternamente possibile e uno o due attacchi a muro superiori, tuttavia per alcuni modelli di radiatore
potrebbero essere necessari degli attacchi supplementari. Essi saranno premontati sul radiatore,e non
dovranno essere rimossi.
ATTENZIONE: se si utilizza un numero inferiore di attacchi a muro rispetto a quello fornito dalla Laurens, il
radiatore potrebbe staccarsi dal muro, cadere al suolo creando danni ad oggetti/persone/animali.
EN: The radiator is normally supplied with upper hooks and lower connections already correctly positioned
for wall mounting. Most radiators are provided with two lower connections placed at the ends of the
radiator body and one or two upper hooks. Anyway radiators with larger overall dimensions require
additional connections and// hooks. They will be pre-assembled on the radiator and should not be removed.
WARNING! if you employ a lower number of connections and hooks than the ones supplied by LAURENS,
the radiator could come off the wall and falling to the ground causing damage to people / objects /
animals.
CS: Radiátory jsou běžnědodávány včetněnástěnných konzol, které se jižz výroby dodávají v počtu podle
hmotnosti a velikosti otopného tělesa. Zavěšení radiátoru je řešeno na vrchní nástěnné konzoly. Protikusy
nástěnných držákůjsou jižz výroby přichystány na zadní stranětělesa a neměly by být přesouvány. Spodní
část radiátoru je fixována vymezovacími držáky a v připojovacích bodech.
UPOZORNĚNÍ: Prosím dbejte na to, že spojovací materiál je zapotřebí stanovit dle typu zdiva. Jsou-li
součástí dodávky šrouby do zdi, hmoždinky a další spojovací materiál, je tento určen do plného zdiva
(beton, plná cihla). Ostatní typy zdiva (SDK, dřevo, duté zdivo, aj.) je nutné použít kotvící materiál dle
stavební dokumentace.
Fig.2
DE: Messen Sie den Abstand „X“ zwischen den oberen Hacken aus.
IT: Misurare, l’interasse „X“ che intercorre fra gli attacchi a muro superiori.

EN: Measure the distance "X" between centers of the 2 upper hooks.
CS: změřte rozteč„X“ mezi vrchními protikusy konzol
Fig.3
DE: Befestigen Sie die Hacken an die Wand mit dem ausgemessenen Abstand „X“ und richten Sie die an der
Wand so aus, dass die Hacken waagerecht sind und in die Richtung Heizkörperrücken zeigen. Verwenden
Sie zu der Wandstruktur passendes Befestigungsmaterial aus.
Das Befestigungsmaterial soll immer nach der Wandstruktur gewählt werden. Das mitgelieferte
Befestigungsmaterial von LAURENS ist nur für Vollziegel- bzw. Betonwände geeignet.
ACHTUNG: Die Auswahl von richtigen Befestigungsmaterialien ist sehr wichtig. soll immer nach der
Wandstruktur gewählt werden. Bei falscher Auswahl kann der Heizkörper wegen der schlecht aufgeteilten
Traglast von der Wand unter fallen und Personen / Tiere verletzten bzw. Gegenstände am Boden
beschädigen
IT: Fissare e livellare gli attacchi superiori al muro osservando la distanza “X” utilizzando tasselli ad
espansione idonei al tipo di muro sul quale si desidera porre il radiatore.
I tasselli ad espansione forniti dalla LAURENS, sono adatti per muri con mattoni pieni a struttura densa
oppure per muri con mattoni forati con struttura compatta.
ATTENZIONE: la scelta del corretto tassello ad espansione è molto importante. L’utilizzo di un tassello ad
espansione non idoneo potrebbe non garantire un corretto fissaggio del radiatore e creare danni a
persone,animali od oggetti.
EN: Fasten and even the hooks to the wall respecting the distance "X" by using screw anchors suitable to
the type of wall on which you want to place the radiator.
The anchors provided by LAURENS are suitable for walls made by solid bricks with a dense structure, or for
walls made with bricks with compact structure.
WARNING: Choosing the correct screw anchors is very important. The use of not suitable screw anchors
may not ensure a correct mounting of the radiator and may cause damage to people/animals or objects.
CS:Uchyťte konzoly na zeďdle změřené rozteče „X“ tak, aby závěsy směrovaly ven směrem k zadní straně
otopného tělesa a vyrovnejte do vodorovné polohy na zdi. Dle typu zdi použijte odpovídající kotvící
materiál. Je-li součástí dodávky kotvící materiál je tento zpravidla dodáván pouze pro uchycení radiátoru do
plných zdí (beton, cihla).
Fig.4

DE: Bitte vergewissern Sie sich dass die Halterung in gleicher Ebene mit der Oberkante von Heizkörper
ausgerichtet ist.
IT: Per facilitare il posizionamento del radiatore, si tenga presente che Il filo superiore dell’attacco a muro
superiore corrisponde al filo superiore del radiatore.
EN: To facilitate placement of the radiator, keep in mind that the upper edge of the hooks corresponds to
the upper edge of the radiator.
CS: Ujistěte se, že kotvící prvky na zdi lícují s vrchní hranou otopného tělesa.
Fig. 5
DE: Vorinstallieren Sie die unteren Anschlüsse für das Ventil. Hängen Sie den Heizkörper auf die oberen
Wandhacken auf. Sie können den Wandabstand durch zwei verschiedene Hackenschlitze bestimmen.
Hängen Sie den Heizkörper auf. Schlitz in die Pos. 1 bestimmt den Wandabstand von 10-15mm und auf Pos. 2
von 20-25mm. Versichern Sie sich nochmals dass die Wandhacken fest geschraubt sind und waagerecht gut
ausgerichtet sind.
ACHTUNG: Falls die Wandhacken nicht gut und waagerecht ausgerichtet sind wird der Heizkörper optisch
nicht gut ausgerichtet sein und es wird nicht möglich sein die untere Halterung zu fixieren.
IT: Premontare, sul radiatore gli attacchi inferiori utilizzando la vite e la ranella in dotazione. Appendere il
radiatore agli attacchi superiori, alla distanza a muro desiderata 1=10/15mm da parete 2=20/25mm da
parete, ed assicurarsi che il radiatore sia ben appeso verificando che le due staffe siano sullo stesso piano.
ATTENZIONE: se le due staffe non sono sullo stesso piano significa che il radiatore non è ben appeso per
cui non si dovrà procedere al fissaggio del radiatore fintantoché esso non sarà ben appeso e le staffe
saranno allineate.
EN: Pre-mount on the radiator the lower connections using the screws and washers supplied. Hang the
radiator to the upper hooks at the distance to the wall desired 1 = 10/15mm from the wall 2 = 20/25mm
from wall, and make sure that the radiator is well hung and the two hooks are on the same level.
CAUTION: If the two hooks are not on the same level it means that the radiator is not well hung so you will
not have to proceed to fixing of the radiator as long as it will not be well hung and hooks are aligned.
CS: Připravte si na radiátoru spodní vývody pro napojení ventilu, ujistěte se že jsou vrchní konzoly pevně
dotaženy a přišroubováni ke zdi a zavěste radiátor na háky. Dle požadované vzdálenosti od stěny můžete
volit pro zavěšení do zářezu 1 (10-15mm od stěny) a nebo do zářezu 2 (20-25mm od stěny).
UPOZORNĚNÍ: Pokud držáky nebudou vyrovnány nebo řádnědotaženy nebude možné řádnědotáhnout
spodní fixační šrouby k ventilu a zdi a radiátor nebude vypadat opticky dobře.
Fig.6
DE: Zeichen Sie die Positionen der Anschlüsse und unteren Halterungen an die Wand ein. Nehmen Sie den
Heizkörper von der Wand weg um die Bohrungen und Vorrichtung der Anschlüsse zu machen.
IT: Tracciare il posizionamento delle staffe inferiori.Togliere il radiatore dal muro, togliere gli attacchi
inferiori, e tracciare il punto di perforazione, posizionando l’attacco inferiore sulla tracciatura eseguita.
EN: Plot the position of the lower connections. Remove the radiator from the wall, remove lower
connections and plot the point of drilling, placing the lower connections on the tracing performed.
CS: Rozkreslete si pozice držáku podle přiložených konzol na zeď, vyvrtejte do zdi díry pro držáky a popř.
pro přípravu rozvodů.

Fig.7
DE: Fixieren Sie die Unteren Anschlüsse mit dem richtigen Befestigungsmaterial und versichern Sie sich,
dass die unteren Halterungen die Fixierungsfläche nach unten ausgerichtet haben. Die Abstände sollten
gleich wie in der Fig. 2 sein.
ACHTUNG: Versichern Sie sich immer nach dem Aufhängen des Heizkörpers, dass alle Halterungen einander
gut eingerastet sind und alle Schrauben gut und fest gezogen sind. Wenn nicht kann der Heizkörper wegen
der schlecht aufgeteilten Traglast oder schlechter Aufhängung von der Wand unter fallen und Personen /
Tiere verletzten bzw. Gegenstände am Boden beschädigen
IT: Fissarle gli attacchi inferiori tramite idonea tassellatura. Rimontare il radiatore a muro , assicurarsi
nuovamente che sia ben agganciato assicurandosi che i piani descritti in fig.2 siano allineati.
ATTENZIONE: se i piani non sono allineati significa che il radiatore non è ben agganciato, non proseguire
fintantoché esso non è posizionato correttamente. Un radiatore non correttamente agganciato potrebbe
cadere al suolo recando danni a persone,animali,oggetti.
EN: Fasten lower connections using suitable screws. Replace the radiator to the wall, make sure that it is
securely hung again and that the upper hooks in Figure 2 are aligned.
CAUTION: If the plans are not aligned means that the radiator is not securely hung, do not continue as long
as it is not positioned properly. If the radiator is not correctly hung, it may fall to the ground, damaging
people, animals and objects.
CS: Utáhněte spodní držáky ke zdi se správným spojovacím materiálem a ujistěte se, že jsou držáky řádně
vyrovnány. Roztečmá být stejná jako ve Fig. 2.
Přesvědčte se, že kotvící prvky radiátoru zapadly řádnědo konzolí na zeďa že jsou všechny šrouby řádněa
pevnědotaženy. Pokud ne zvyšuje se riziko, že díky nerovnoměrnému rozložení nosné síly nebo špatnému
zapadnutí úchytu může radiátor spadnout ze stěny a způsobit poranění osobám nebo zvířatům nebo může
dojít k poškození věcí nebo stavebních prvkůumístěných v okolí radiátoru.
Fig.8

DE: In diesem Schritt schließen Sie die Anschluss an das Heizsystem an bzw. in die Steckdose (für
elektrische Variante). Bei Kombi-Betrieben (Wasser + Elektrisch) soll zuerst das Heizsystem in Betrieb
genommen werden und erst danach, wenn der Heizkörper mit Heizungswasser gefüllt ist kann die
elektrische Heizpatrone in Betrieb genommen werden.
ACHTUNG:
!Kinder unter 8 Jahre dürfen sich im Bereich vom Heizkörper nicht befinden. Das gilt auch wenn der
Heizkörper im ausgeschalteten Zustand ist.
!Einige Teile des Heizkörpers können während des Betriebes ziemlich heiß werden. Es herrscht
Verbrennungsgefahr. Bitte verhalten Sie sich im Bereich von dem Heizkörper vorsichtig und denken
Sie an das eventuelle Risiko der Verbrennung.
!Einige Teile und Kanten des Heizkörpers können scharf sein. Denken Sie bitte an das Risiko der
möglichen Verletzung beim Putzen oder Fassen.
IT: A questo punto, per gli articoli ad acqua fare i collegamenti idraulici (seguendo le istruzioni dello schema
idraulico), invece per gli articoli elettrici collegare la scuko alla presa elettrica.
A questo punto terminare il fissaggio del radiatore, bloccando lo stesso con le viti e le ranelle fornite.
ATTENZIONE
!I bambini sotto gli 8 anni devono essere mantenuti lontani dall’apparecchio anche a spina disinserita.
!Alcune parti di questo prodotto possono diventare molto calde e causare ustioni. Si deve fare
particolare attenzione in presenza di bambini al di sotto degli 8 anni di età, persone disabili, animali e
cose.
EN: At this point, for items to water make the hydraulic connection (following the instructions of the
hydraulic diagram), instead to connect the electrical items Scuko the electrical outlet.
At this point terminate the fixing of the radiator, blocking the same with the screws and washers provided.
CAUTION
!The children under 8 years old must be kept away from the appliance even unplugged
!Some parts of this product can become very hot and cause burns. Particular attention has to be
given where children and people are present.
!Some parts and edges of the radiator can be sharp. Please take attention to the risk of injury by
cleaning or touching the radiator.
CS: V posledním kroku napojte radiátor na otopnýsystém nebo do zásuvky (je-li na elektrickýprovoz). Při
kombinovaném provozu musíte do radiátoru nejprve napustit vodu a ažpoté je možné zapojit elektrickou
tyč. Radiátor před prvním použitím řádněodvzdušněte povolením šroubu na odvzdušnění. Odvzdušňovací
šrouby se nacházejí na vrchní hraněradiátoru a je nutné odvzdušnit každou sekci zvlášť povolením a
utažením odvzdušňovacího šroubu.
Upozornění:
!Děti do 8 let se nesmí zdržovat v prostoru radiátoru i kdyžje vypnutý
!Některé části radiátoru mohou být velice horké a můžou způsobit popálení. Proto se chovejte
v prostoru kolem radiátoru obezřetněa dbejte na to, že může hrozit riziko popálení jak vám tak
osobám nebo dětem v okolí radiátoru.
!Některé hrany radiátoru mohou být ostré. Proto dbejte při instalaci i používání, údržběi čistění
radiátoru na to, že hrozí riziko pořezání
Mehr fragen? Altre domande? More questions? Více dotazů?
T. + 32 11 555 776 | benelux@laurensint.com
T. +49 221 250 89 832 | de@laurensint.com
This manual suits for next models
3
Table of contents
Other Laurens Heater manuals
Popular Heater manuals by other brands
Galletti
Galletti FLAT Technical manual
Coopers of Stortford
Coopers of Stortford Altitude 500 Instructions for use
Protemp
Protemp PT-16-TTC User's manual & operating instructions

Desa
Desa H18NA OWNER'S OPERATION AND INSTALLATION MANUAL
EINHELL
EINHELL NWW 1800 operating instructions

Allmand
Allmand SH-750 Operator's manual
