Lava V333 / Premium Line
Copyright www.lava-vacuum-packing.com
www.lava-europe.com 5
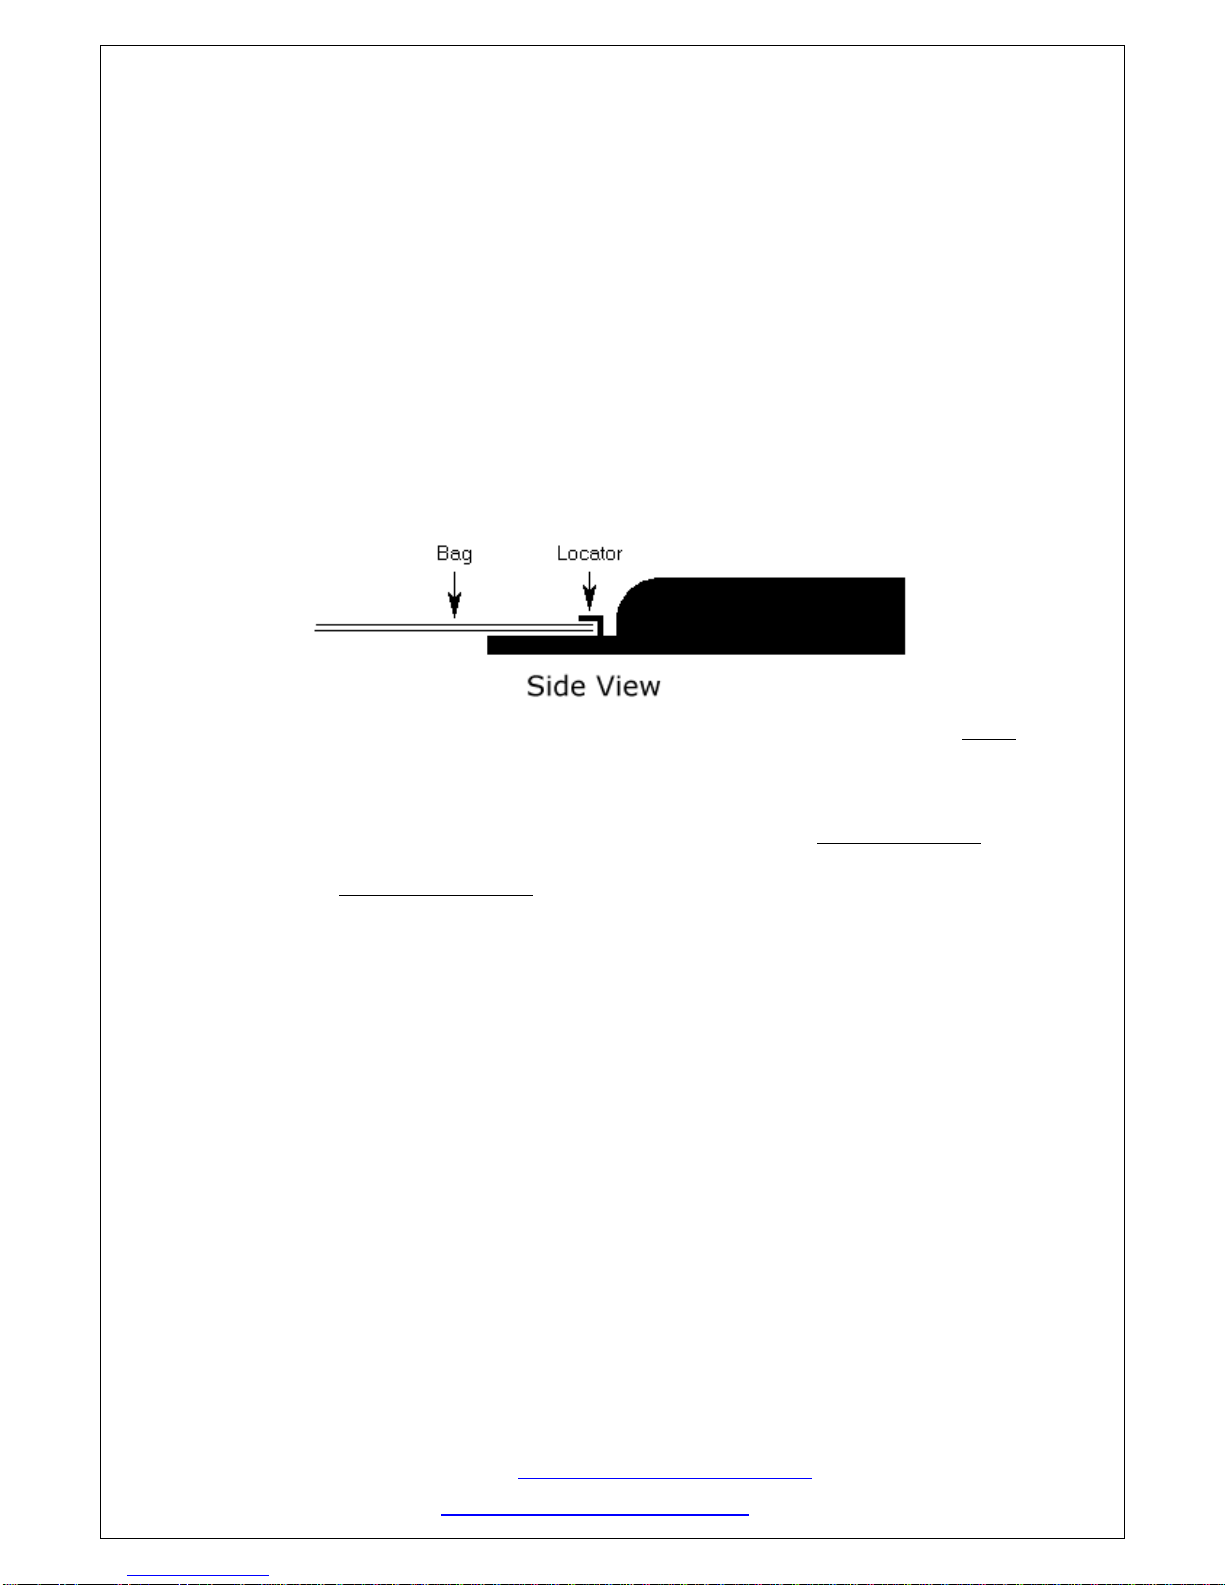
front of the machine and place the top of the bag into the bag locator (F). It is vital that the
top of the bag is correctly located with the full width of the bag inside the bag locator.
Failure to locate the bag properly is the most common cause of problems with Lava
machines.
5. Close the lid and you will hear the pump start up. You must then press down firmly on the
corners of the lid. Failure to press down hard enough at this stage is the second most
common cause of problems with Lava machines.
6. When the desired pressure is reached by adjusting the regulator valve, firmly depress and
hold switch (P). The red sealing indicator light (M) will come on. When the light goes out
you can release the switch. The bag is now sealed.
7. You can now raise the lid and remove the sealed bag. Before packing other items, check that
the seals look OK – see Checking the Seal.
Checking the Seal
The V333 seals bags with a triple seal, these should be clear lines running uninterrupted the full
width of the bag. If the bag is melted through then you will need to turn the rotary switch (L) down
a little. If the seal is interrupted then you will need to turn it up. Once this has been correctly set for
the type of bag you are using, you should not need to alter it again. It is also very important not to
contaminate the area of the bag to be sealed with grease or liquids, this can also create a bad seal.
Please note that if you are packing at a very low pressure then you may need to press down very
hard on the lid of the machine during the sealing process.
Vacuum Packing in Containers
Acrylic containers are ideal for packing things like soup, fresh salad or soft fruit like raspberries or
strawberries. They are also great for curing and speed marinating meat.
1. Place the machine on a flat level work surface. Plug-in the machine and switch it on using
switch (C, T). The switch should light-up red. If not then check both the power supply and
fuse.
2. Lift the lid and place the end of the container attachment tube over the vacuum pump inlet
(H) which can be found on the left of the bag locator strip.
3. Place the food item into the acrylic container and close the lid firmly.
4. Set the vacuum pump control switch (R) to ‘I’.
5. The pump will start up and begin sucking air through the container attachment.
6. Place the container attachment over the valve on the top of the container and press it down
firmly. When the desired vacuum is reached ( Max 0.3 bar ) then switch the vacuum pump
control switch (R) to ‘0’. It is very important not to over vacuum the container. Once the
ORANGE nipple, located on the lid, has inverted stop the vacuum process. To much
negative pressure can cause the container to crack or even implode.
Note; that you will be unable to remove the lid from the container until you have released the
pressure using the release valve on the top.