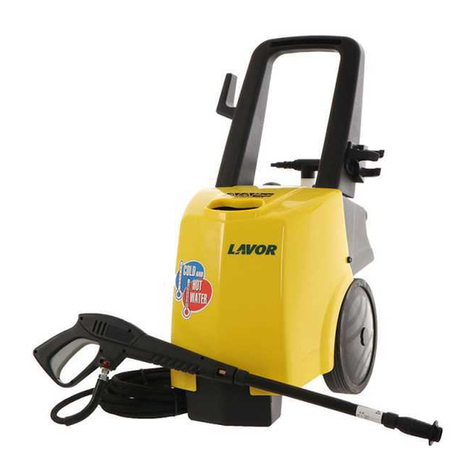
Lavor SUPERWASH 160 User manual

GB
1
Index
Introduction
Intended usepage 2
Equipment page 2
Technical specifications page 2
Safety
Safety guidelines pag. 3
Additional safety information pag. 3
Before using for the first time
Assembling the appliance pag. 4
Usage
Connecting to the water mains page 5
Installing the gun page 6
Automatic Stop System page 6
Gun with pressure-gauge page 6
Gun safety catch page 6
At the end of a job page 7
Maintenance Cleaning pag. 7
Disposal pag. 8
Troubleshooting pag. 8
Additional information
Guarantee terms page 11
Certificate of compliance page 11

GB
2
Introduction
Introduction
Please read this instruction manual
thoroughly, referring to it whenever
necessary before starting a job. This is
because, as with all appliances, the high-
pressure cleaner must be used correctly in
order to ensure optimum performance.
First of all, open both fold-out pages
containing the illustrations, and study then
carefully until you are familiarised with how
the machine works. These pages fold out
in front of and behind the cover of the
instruction manual.
Intended use
The high-pressure cleaner is ideal for all
outdoor cleaning requirements. It may be
used to clean dirty surfaces such as house
walls, verandas and roads.
A range of optional gun-mounted accessories
is available for foam and rotary brush
washing applications.
The appliance may also be used to clean
walls, swimming pools, garden furniture and
tools, and to wash vehicles.
Always observe all applicable local legislation
concerning cleaning products.
The machine must never be used for any
purposes other than those specified or
modified, as this may be extremely
dangerous. The manufacturer cannot be
held responsible for damages or injury
resulting from inappropriate use or
modifications.
Do not direct the nozzle toward mechanical
parts containing lubricant grease, as the
grease will dissolve and spread over the
surrounding ground.
Vehicle tyres/tyre valves may only be cleaned
from a minimum distance of 30 cm, otherwise
the vehicle tyre/tyre valve could be damaged
by the high-pressure jet. The first indication
of this is a discoloration of the tyre. Damaged
vehicle tyres/tyre valves can be deadly
dangerous.
Standard equipment
Turbo nozzle
Rotary brush
Nozzle with pressure regulator
Gun with pressure gauge
Hose reel stand
Crank handle
Hose reel
Wheel axle
Hook for power lead
Wheel lock plug
Wheel
Handle
Nozzle cleaning pin
Accessory holder
(a) Nozzle holder
(b) Nozzle stand
Rotary regulator
Tank cap
Concentrated car washing detergent
Quick release water inlet connector
Technical specifications
Year of manufacture 2005
Rated voltage 230V 50 Hz
Power rating 2550 W
Max. delivery max. 8.83 l/min
(530 l/h)
Operating pressure 135 bar
(+/-10%)
(13,5 MPa)
Minimum intake pressure 1 bar
(0,1 MPa)
Maximum intake pressure 10 bar
(1 MPa)
Jet recoil on spray gun 20N
Minimum intake rate 12 l/min
Max. intake water
temperature 40°C
Storage temperature away from frost
Not below 0°C
Weight 21.35 Kg
Acoustic pressure LWA 95db (A)
LPA 76db (A)
˜
S
U
R
T
High pressure washer
SUPERWASH 160
1
2
3
4
5
6
7
8
9
10
11
12
13
14
15

GB
3
Safety
Protection rating IPX5
Vibration transmitted
to operator 0.56 m/s2
Technical specifications plate
Ensure that the specifications listed on the
plate match those of the mains water and
power supplies you will be connecting the
machine to.
• Only use clean water.
Caution: Failure to comply with the
above will cause severe damage to the
machine and voids the guarantee.
Safety
Specific safety guidelines for the
appliance
How to prevent fatal electric shock hazards:
•Do not use the appliance if the power lead
or plug is damaged. Have damaged leads
repaired by a customer service centre (e.g.
if the appliance does not work correctly or
if it is damaged). For the contact details
of your nearest authorised customer care
centre, please refer to the chapter
“Guarantee” or to the attached guarantee
documents.
•Do not leave the appliance out in the rain
and never use in damp or wet conditions.
Ensure that the high-pressure cleaner
power lead is never wet or damp while the
appliance is in use.
•Never spray water towards the mains plug
and socket.
•Do not cover the appliance or its air vents,
as this will cause the machine to overheat.
•Never pull on the cable to unplug the
appliance from the mains. Always grip the
plug itself and pull it out of the socket to
disconnect.
How to prevent injury
•Never leave the appliance unattended
•Caution! Keep children well away from
the power lead and the appliance. Children
are often not aware of the hazards that
household appliances may present.
•This appliance is intended for outdoor use
only.
•Never use the appliance if the power lead
or any major components are damaged
(e.g. safety systems, high-pressure gun
hose, etc).
•Never try to repair a damaged hose
yourself.Always replace a damaged hose
with a new one.
•For reasons of safety, irrespectively of the
type of job you are about to carry out,
always use both hands to assemble the
nozzle and the gun .
•When you have finished a job, always
disconnect the appliance from the mains
water and electricity.
•CAUTION: This appliance has been
designed to be used with the detergent
supplied or specified by the manufacturer
(a neutral, biodegradable anionic surfactant
based shampoo type detergent). The use
of any other detergent or chemical product
may render the appliance unsafe.
•CAUTION:
High-pressure water jets may
be dangerous. Never direct the water jet
towards persons, animals, powered
electrical appliances or the high-pressure
cleaner itself.
•CAUTION: Only use hoses, accessories
and connectors approved by the
manufacturer. To prevent injury, it is vital
that all components are kept in good
condition.
•CAUTION: the high pressure hose,
accessories and connectors are all
important for the safety of the appliance.
Use only manufacturer approved high
pressure hoses, accessories and
connectors.
•CAUTION: do not operate the machine if
there are persons within its working range
not wearing appropriate protective
garments.
•This appliance is equipped with the following
safety features: spray gun with safety catch,
43

GB
4
Safety Before using for the first time
an electrical overload cutout system (CL.
I) and pump bypass valve or stop system.
•CAUTION: The spray gun is
equipped with a safety catch.
When the appliance is not in use,
always engage the safety catch
to prevent the machine from being started
unintentionally.
•Never direct the jet towards yourself or
any other person to clean clothing or
footwear.
•Never allow children or persons without
the necessary skills to operate the
machine.
•CAUTION: Do not leave the appliance in
standby mode for more than 5 minutes.
•CAUTION:Always switch off the appliance
completely (main switch OFF) whenever
leaving it unattended.
•CAUTION: This machine uses high-
pressure fluids. Always grip the gun
firmly to counteract the recoil. Only use
the high-pressure nozzle supplied with the
machine.
Additional safety information
Water supply
•See chapter “Technical specifications”.
• Only use clean water.
Caution: Failure to observe the above
conditions will cause serious mechanical
damage to the pump and will void the
guarantee.
High-pressure hose
Caution: The high-pressure hose
has been specially designed to resist
high pressures. Treat with particular care
to prevent damaging it.
•Avoid tangling.
•Do not bend the hose or subject it to high
stress or strain
•Never start the high-pressure cleaner
without first completely unwinding the high-
pressure hose .
•Before unwinding or winding the hose,
switch the machine off and release the
pressure in the hose itself (pull spray
gun trigger 2-3 times).
Caution:
Inappropriate use may cause
damage or untimely breakage and voids
the guarantee.
Electrical power supply
•Warning: Before connecting the appliance,
ensure that the specifications listed on the
identification plate match those of the mains
electric supply and that the socket is
protected by a differential magneto-thermal
circuit breaker with a trip threshold less
than 0.03A - 30ms.
•If the mains power lead or plug is damaged,
have it repaired or replaced by a customer
service centre.
•
Do not use the appliance at temperatures
lower than 0°C.
Caution: Non-approved extension leads
may be dangerous and must never be
used.
•If an extension lead is used, both the plug
and the socket must be waterproof and the
cable cross section must be as specified
in the following table.
Before using for the first time
Warning:
•Before assembly, ensure that all
appliances and accessories listed in the
chapter “Equipment” are present
•Each unit is test run after manufacture,
therefore you may find some residual water
in the water intake.
230 - 240V
1,5 mm2max 20 m
2,5 mm2max 30 m
18
26
26
4
4

GB
5
Before using for the first time Usage
Assemble the appliance
1. Photo sequence D:
• Fit the wheel onto the axle
•Fit the other wheel, ensuring that the pin
fits into the recess in the axle.
•Push the plugs into the wheel centres
until they fit into place (as shown in the
cross-section drawing)
• Fit the tank .
2. Photo sequence E:
Note: Turn the appliance around to face
the rear of the unit for the following sequence
of instructions.
•Securely mount the nozzle holder (a)
(with the Phillips screw and washer) onto
the bottom right hand side of the unit,
fitting it onto the relative lug
•Securely attach the accessory holder
(with the rounded side facing down) at
the rear of the unit
•Fix the accessory support to the cable
winder on the left and to the nozzle
holder on the right (b).
3. Photo sequence F:
• Nozzle cleaning pin fixture
•Securely attach the hose reel support
to the rear of the unit, using 2 Phillips
screws. Ensure that the side with the round
and rectangular openings is installed on
the left hand side
•Completely unwind the hose from the hose
winder before assembling the 2 parts.
•Take the 2 sections of the hose reel
•Fit the 2 sections together and feed the
hose out through the aperture
•Now secure the 2 sections with 4 Phillips
screws
•The high-pressure hose end will be
attached to the gun.
4. Photo sequence G:
•Turn the drum , keeping the hose
connector on the left hand side
•Fit the previously assembled drum
onto the bracket at the rear of the unit.
Press on the drum to secure it into its
mountings on the bracket.
•Fit the hose connector underneath and
screw securely onto the outlet connector
•Fit the crank handle to the right hand
side of the drum with a Phillips screw
•Rewind the hose with the handle, without
tightening excessively.
•Connect the short high-pressure hose
connector to the spray gun quick release
connector. Lift the ring on the spray gun
mount
, insert the end of the hose
and release the ring. Check that it
has engaged correctly.
•Secure the handle to the rear of the
unit with 3 Phillips screws.
Usage
Caution: For safety reasons, always use
both hands to assemble the nozzle and
spray gun before starting a job.
Connection to the water mains
Main ON / OFF switch
High-pressure water outlet (OUTLET)
Plug/wall socket
Water tap
Water supply hose
Water inlet (INLET)
Water filter
Mounting
Snap-on hose connector
Detergent tank
High-pressure hose
Spray gun safety catch
Spray gun trigger
•Check that the main switch is “OFF”;
•The water inlet hose must be fitted to
the snap-on hose connector
Caution: use a hose with a minimum
pressure resistance of 15 bar / 200 psi,
and an internal diameter of at least 13
14
10
15
5
12
14
15
13
4
3
26
16
T
9
26
7
7
7
16
17
18
19
20
21
22
23
24
20
25
26
27
28
4
24
11 86

GB
6
Usage
mm (1/2").
Caution: Inlet water temperature must
never exceed 40°C;
•Ensure that the high-pressure hose
and the hose connector are securely
connected as described in chapter
“Appliance assembly” (photos F and G);
•Screw the mounting tightly by hand
onto the inlet connector.
•Fit the quick-release hose connector
onto the garden hose (not supplied).
•
Fit the hose connector into the mounting
.
• Open the tap ;
•Fit the nozzle onto the spray gun. Twist
the nozzle clockwise to secure on the gun;
•Attach the power plug to the socket ;
•Switch the machine on by turning the main
switch to “ON”.
•If the unit motor starts up even without
operating the spray gun , this is probably
due to air bubbles in the system.
•Press the spray gun lever to purge any
air and residual pressure in the hosing;
•Fill the detergent tank with manufacturer-
approved products, suitable for the type of
job in hand;
•Caution: Ensure that the spray gun is
open every time that the unit is turned on
(main switch “ON”).
•Avoid opening and closing the gun
repeatedly over a short period.
Spray gun accessories
Caution: Never use the spray gun
without an accessory!
Rotary brush
The brush is particularly suitable for
cleaning small surfaces, such as car wheels,
plastic garden furniture, etc.
The rotary spray gun head automatically
aspirates and mixes the detergent.
Nozzle with pressure regulator
You may adjust the operating pressure by
turning the knob at the end of the nozzle
(see also photo C)
“-” To reduce operating pressure:
Turn the knob towards “-” for light dirt
and cleaning delicate surfaces (e.g. car)
“+”Increase operating pressure:
Turn the knob towards “+” for stubborn
dirt (e.g. house facings).
Turbo nozzle
The turbo nozzle is particularly suitable
for cleaning very dirty surfaces.
Caution: As this nozzle is not fitted with
a pressure regulator, do not use it to clean
delicate surfaces (e.g. cars).
Automatic Stop System
This appliance is equipped with an AS
system. This system immediately starts the
unit whenever the gun trigger is operated
and switches it off when the trigger is
released.
•Even though the unit is equipped with this
system, never leave it unattended.
•If the machine is left unused for more than
5 minutes, turn the main switch to “OFF”.
Spray gun with pressure gauge
The spray gun is equipped with an
integrated pressure gauge. This makes it easy
to check the pressure while you are working.
Spray gun trigger safety catch
The spray gun is equipped with a manually
engaged trigger mechanism lock system .
This is used to lock the trigger and to prevent
accidental activation.
To engage catch
Press the lock button on the right hand
side of the gun . Check that the trigger
mechanism is blocked.
25
18
16
19
3 R
1 2 3
4
2
2
28
4
26
23
23
24
24
16 16
28
4
4
27
1
1
27
4
28
3

GB
7
Usage Maintenance Cleaning
To disengage the catch
Press the lock button on the left hand
side of the gun .The trigger is released.
Detergent pick-up
1)Fill the detergent tank (see photo B, pos.
24).
Caution: This appliance has been
designed to be used with a neutral,
biodegradable anionic surfactant based
shampoo. The use of any other detergent
or chemical product may render the
appliance unsafe.
2) Caution: Before enabling detergent
pick-up, ensure that the regulator knob
is turned towards “-” (low pressure).
•Suck detergent by pulling the spray gun
trigger
•Note: A few seconds may be required
before pick-up starts.
3) Adjust the pressure with the regulator
knob (see chapter “Nozzle with pressure
regulator”).
At the end of a job
1)Switch the unit off by turning the main
switch to OFF
2)Disconnect the unit from the water supply
3)Disconnect the power plug .
4)Purge any residual pressure by pulling
the spray gun trigger repeatedly
5)Clean the waterinlet filter (seeparagraph
“Cleaning the water filters” in chapter
“Maintenance and Cleaning”)
6)Store the high-pressure cleaner in a dry
safe place (temp.>0°C), out of the reach
of children.
Maintenance Cleaning
•Before starting any maintenance work on
the high-pressure cleaner, purge the
pressure and disconnect the unit from the
mains electricity and water.
•Ensure that the air intake vents are always
clean so that air can circulate freely inside
the unit.
•To ensure safe operation, only use original
replacement parts supplied or approved
by the manufacturer.
•When starting the unit for the first time, a
little water may leak from the pump; this
may last a few hours. If you are unable to
adjust the settings and stop this leak,
contact an authorised customer support
centre (see chapter “Guarantee terms”).
•The electric motor is equipped with an
overload cutout system (CL. I). In the event
of malfunction, the unit is stopped. Wait
5-10 minutes before restarting the
appliance. If the trouble persists, refer to
chapter “Troubleshooting” for help. If you
are still unable to resolve the problem,
contact an authorised customer support
centre.
Cleaning the appliance water filter:
•To ensure that the pump works correctly,
it is very important that you regularly check
and clean the water filter.
1)Unscrew the water inlet connector .
2)Pull the filter out of its mounting with
an appropriately sized pair of pliers
3)Clean the filter thoroughly under running
water.
4)Refit the filter in its mounting and screw
the connector back on.
Cleaning the nozzle orifice:
•Aclogged nozzle may impair function and
must therefore always be kept clean.
1)Turn the unit off and remove the nozzle
16
18
27
428
28
22
23
22

GB
8
Maintenance Cleaning Disposal Troubleshooting
from the gun.
2)Clean the nozzle orifice with the nozzle
cleaning pin provided.
3)Rinse the nozzle under running water.
Disposal
•Disposal must be carried out in accordance
with applicable environmental legislation.
•The appliance and its accessories must
be disposed of in accordance with the
materials used in their construction.
•Disposal must be carried out in accordance
with applicable local legislation. Contact
your municipality for the nearest refuse
dumping site.
•As owner of an electrical or electronic
product, you are not allowed by law
(according to EU-Directive 2002/96/EC of
27 January 2003 on waste electrical and
electronic equipment and the particular
national laws of the EU-Member States
transforming this Directive) to dispose of
this product or its electrical/electronic
accessories as unsorted domestic waste.
You shall use the designated gratis
possibilities for return instead
Troubleshooting
Fault
Cause
Repair
The pump does not
start when the switch
is pressed.
•The plug is not properly
connected to the
socket.
• Faulty electric plug.
• The mains voltage is
insufficient.
• The gauge of the
electrical power lead is
too small.
•The pump has cut out.
•Connect the plug to the
power socket correctly.
•Have the electrical
socket checked.
•Check that the system
is suitable.
•See paragraph “Safety
notes / electrical
connection”.
•Turn the switch to ON
while keeping the gun
lever pressed; if the
problem persists
contact an authorised
service centre.
Fault
Cause
Repair
The machine starts, but
no water comes out.
• Pump, hoses or
accessories frozen.
• No water supply.
•Unitwaterfilter clogged.
• Nozzle or spray gun
orifice clogged.
• Allow the pump and
hoses to thaw.
•Connect the machine to
thewater supplysystem
and turn on the tap.
3
13
3

GB
9
Troubleshooting
Repair •Remove and clean the
filter (see paragraph
“MAINTENANCE /
CLEANING”).
•Remove the lance from
the gun and clean the
nozzle with the pin
provided.
Fault
Cause
Repair
The pump runs but
there is no pressure.
• Insufficient water.
• Suction filter fouled.
•Nozzle regulator valve
in lowest pressure
setting.
• Lance nozzle worn.
• Suction or delivery
valves fouled or worn.
•Check that the delivery
rate is at least 12 l/min.
•Remove and clean the
filter.
• Increase pressure by
turning the pressure
regulator on the
nozzle.
• Contact your
authorised customer
service centre.
Fault
Cause
Uneven working
pressure.
•Lance nozzle fouled or
dirty.
• Air in intake water.
• Suction filter fouled.
• Suction or delivery
valves fouled or worn.
• Gaskets worn.
• Pressure regulator
valve gaskets worn.
Repair •Remove the lance from
the gun and clean the
nozzle with the pin
provided.
• Supply the machine
with water correctly.
•Remove and clean the
filter (see paragraph
“MAINTENANCE /
CLEANING”)
• Contact your
authorised customer
service centre.
Fault
Cause
Repair
The motor stops
suddenly.
• The appliance has
been automatically
stopped by the
overload cutout
system.
• Unsuitable electrical
extension lead.
• Let the motor cool for
a few minutes. Contact
your authorised
customer service
centre if the problem
persists.
• See chapter “Safety
guidelines / electrical
power supply”.
Fault
Cause
Abnormal noise.
• Suction filter fouled.
• Intake water
temperature too high.
• Suction or delivery
valves fouled or worn.
• Bearings worn.

GB
10
Troubleshooting
Repair •Remove and clean the
filter (see paragraph
“MAINTENANCE /
CLEANING”).
• Use water at a
temperature lower than
40°C.
• Contact your
authorised customer
service centre.
Fault
Cause
Repair
Water contaminated
with oil.
• O-ring seals worn.
• Contact your
authorised customer
service centre.
Fault
Cause
Repair
The machine restarts
with the gun released.
•Water leak from hose-
gun connection
(except models with
hose and gun supplied
ready-connected).
• Air in intake water.
•Water leak from the
gun.
•Water leak from the
pump.
•Tighten the connection
ahead of the quick
release connector
using 2 suitable
spanners.
• Connect the machine
to a suitable water
supply.
• Contact your
authorised customer
service centre.
Fault
Cause
Repair
The machine does not
suck in detergent.
•Tank empty.
•Nozzle regulator knob
turned to “+”.
• The transparent pick-
up tube inside the
appliance is damaged
or disconnected.
• The drain hole of the
tank is plugged.
• Fill the tank.
•Turn the regulator
knob to the low-
pressure setting.
• Contact your
authorised customer
service centre.
Table of contents
Other Lavor Pressure Washer manuals
Lavor
Lavor SQUALO 140 User manual
Lavor
Lavor Tormenta User manual

Lavor
Lavor Mystic-R User manual

Lavor
Lavor STM Series User manual

Lavor
Lavor THERMIC 22 H Instruction manual

Lavor
Lavor INDEPENDENT 2800 User manual

Lavor
Lavor MCHPV User manual
Lavor
Lavor INDEPENDENT 2800 User manual
Lavor
Lavor EPIC User manual
Lavor
Lavor STM User manual

Lavor
Lavor SPACE User manual

Lavor
Lavor LVR COSMOS User manual

Lavor
Lavor INDEPENDENT 2000 User manual

Lavor
Lavor STM 160 WPS User manual

Lavor
Lavor Giant 20 PRO User manual

Lavor
Lavor Vulcano User manual
Lavor
Lavor LVR User manual

Lavor
Lavor Alaska User manual

Lavor
Lavor Giant 20 PRO User manual
Lavor
Lavor Advanced Warm up User manual

